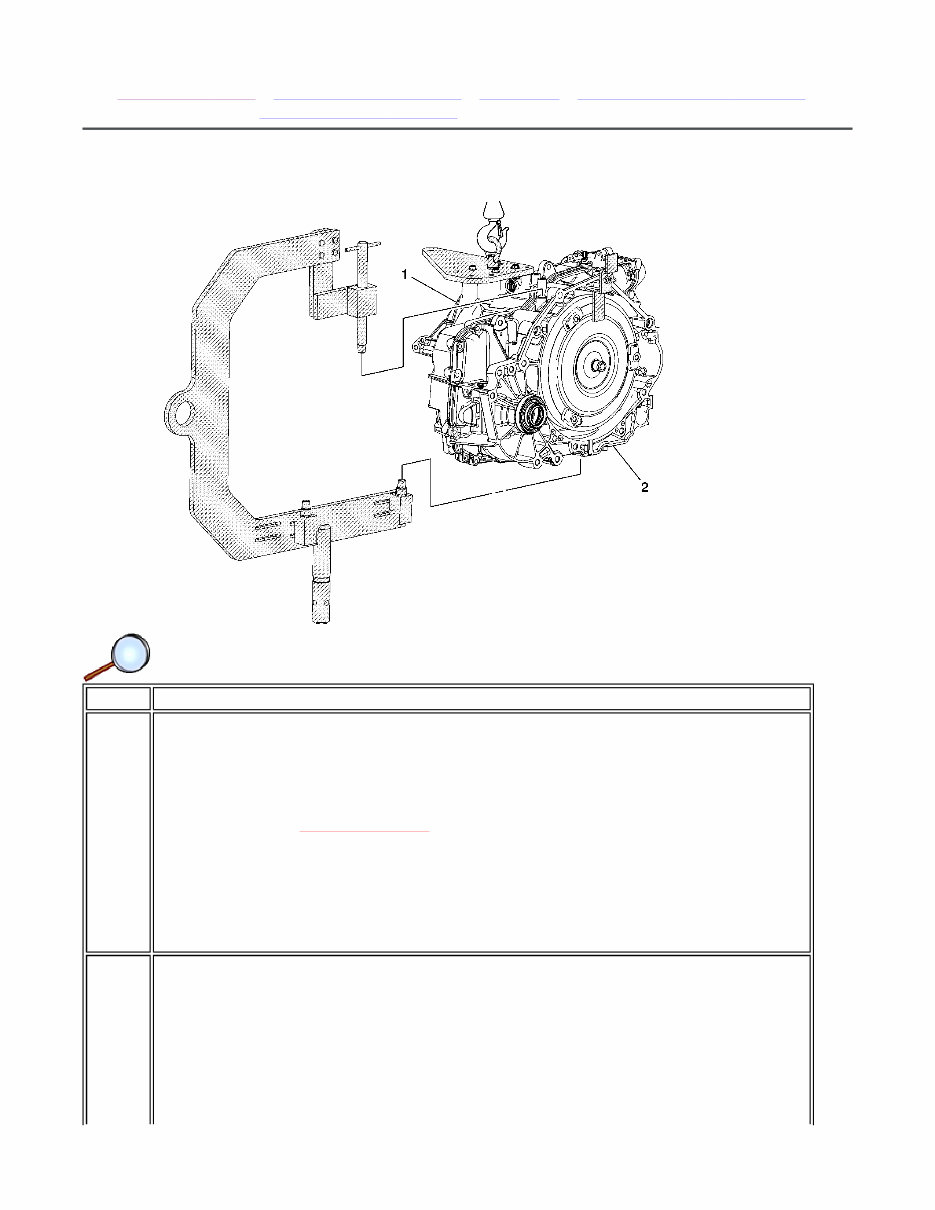
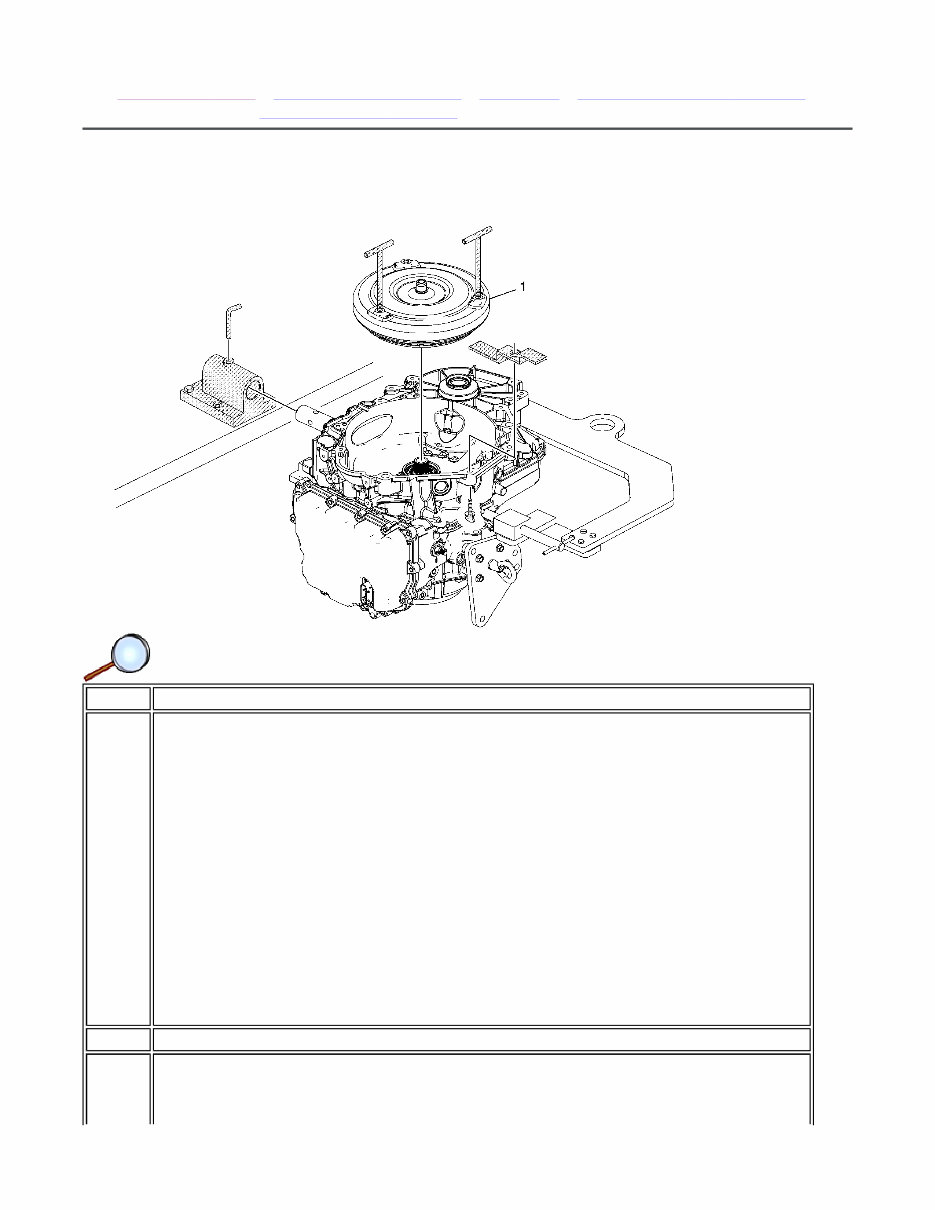
3 tightening the lift assist handles can cause damage to the torque converter. Tip Failure to raise the torque converter straight up could damage the torque converter clutch lip seal inside the torque converter clutch assembly. Special Tools J-46409 Torque Converter Lifting Handles Page 2 of 2 Document ID: 2084529 6/3/2010 http://localhost:9001/si/showDoc.do?docSyskey=2084529&pubCellSyskey=164620&pubO...
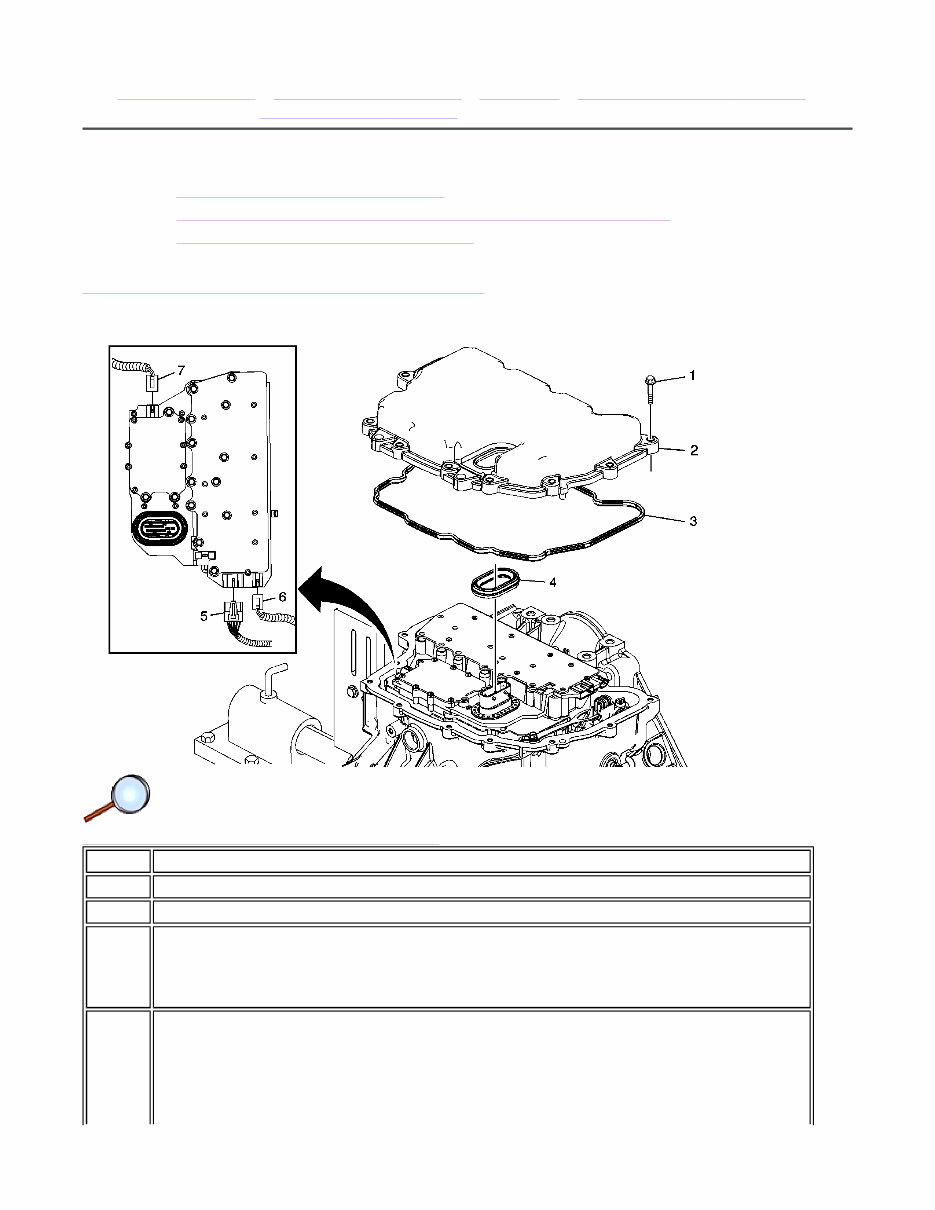
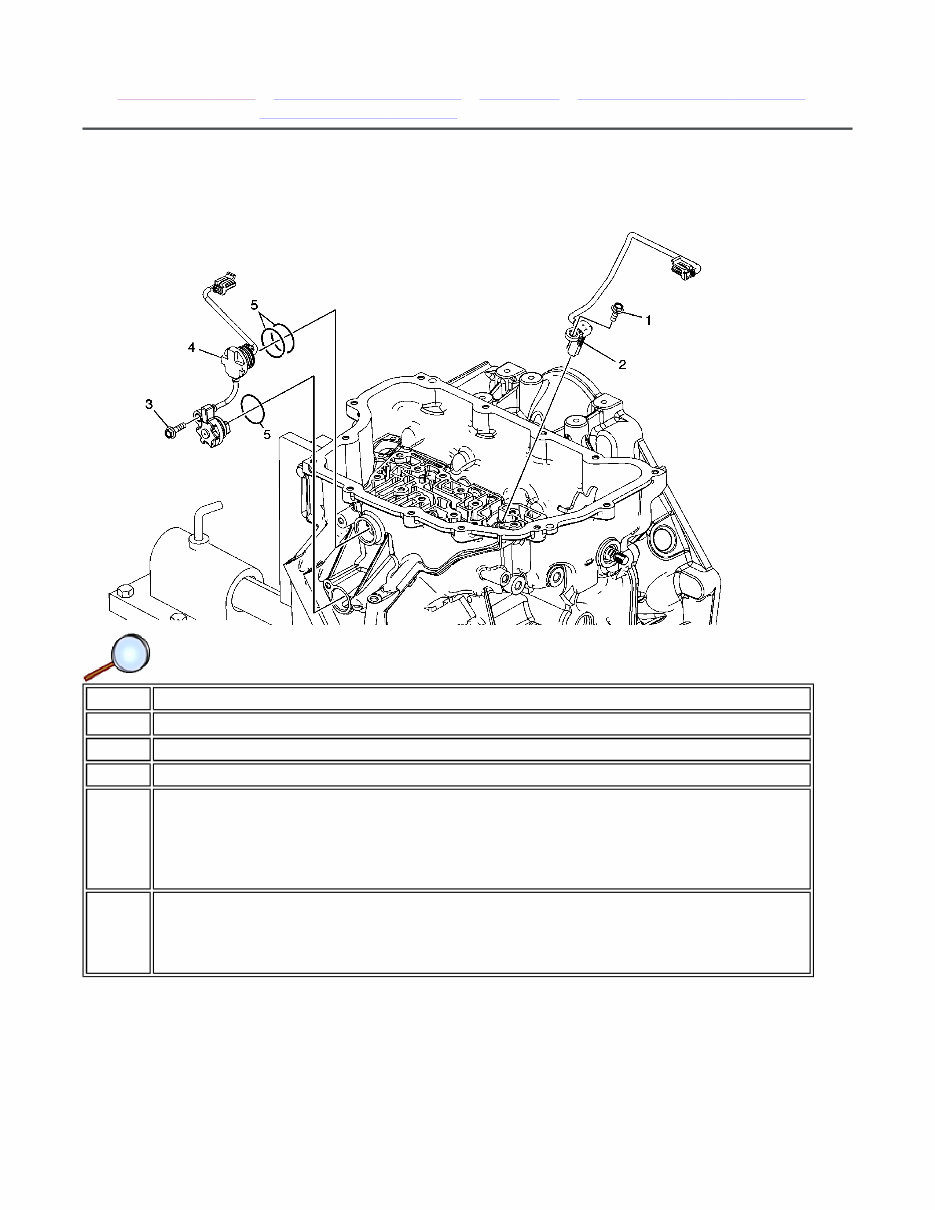
Control Solenoid (With Body and TCM) Valve Assembly Removal Tip Discard the seal. It is not reusable. 5 Shift Position Switch Connector 6 Output Speed Sensor Connector 7 Input Speed Sensor Connector Control Solenoid (With Body and TCM) Valve Assembly Removal Callout Component Name 1 Control Valve Body M5 x 40.5 (Qty: 3) 2 Control Valve Body Bolt M6 x 30 (Qty: 12) 3 Control Solenoid (with Body and TCM) Valve Assembly 4 Control Solenoid Valve Assembly Filter Plate Caution: Use care when removing or installing the filter plate assembly. A broken or missing retaining tab may not adequately secure the filter plate to the control solenoid valve assembly, resulting in possible damage or contamination. Tip • Discard the filter plate. It is not reusable. • Inspect the pressure switch seals for damage or contamination. Replace the Page 2 of 3 Document ID: 2084530 6/3/2010 http://localhost:9001/si/showDoc.do?docSyskey=2084530&pubCellSyskey=164621&pubO...
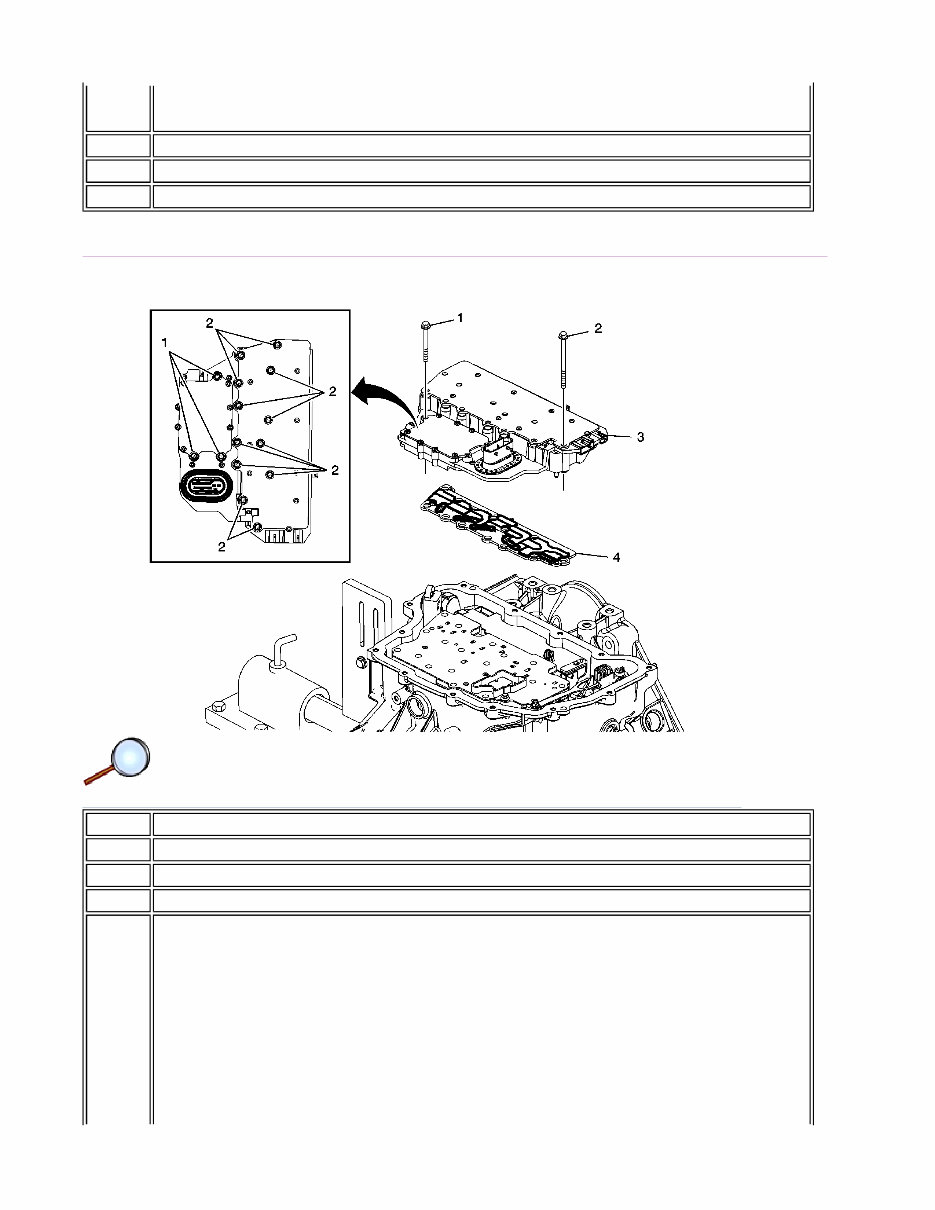
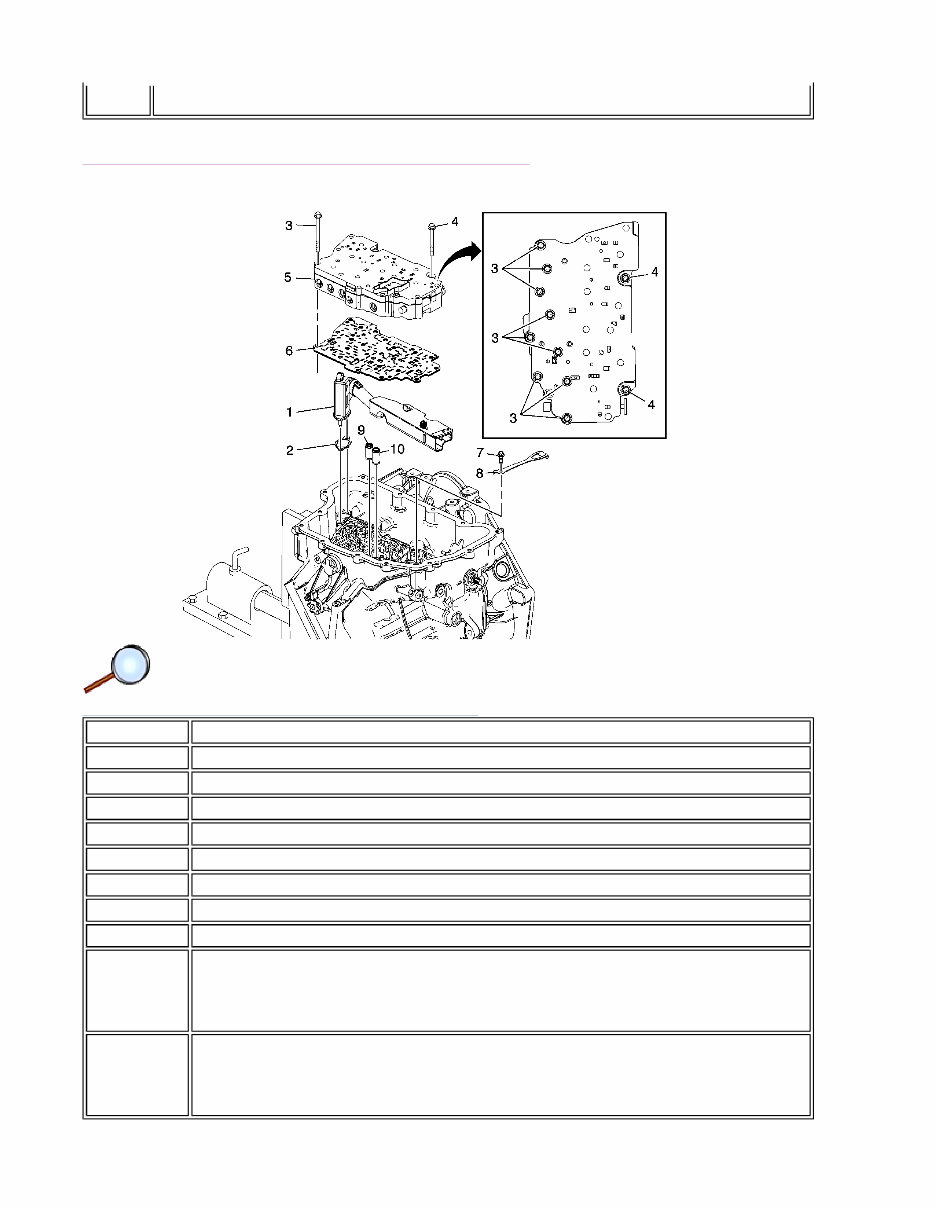
Control Valve Body Assembly Removal control solenoid valve assembly as necessary. Control Valve Body Assembly Removal Callout Component Name 1 Fluid Level Control Valve 2 Fluid Level Control Valve Gasket 3 Control Valve Body Bolt M6 x 60 (Qty: 9) 4 Control Valve Body Bolt M6 x 53 (Qty: 2) 5 Control Valve Body Assembly 6 Control Valve Body Spacer Plate Assembly 7 Manual Shaft Detent Spring Bolt M6 x 16 (Qty: 1) 8 Manual Shaft Detent Lever Spring Assembly 9 1-2-3-4 Clutch Fluid Passage Seal Tip Discard the seal. It is not reusable. 10 Low/Reverse Clutch Fluid Passage Seal Tip Discard the seal. It is not reusable. Page 3 of 3 Document ID: 2084530 6/3/2010 http://localhost:9001/si/showDoc.do?docSyskey=2084530&pubCellSyskey=164621&pubO...
The 2012 Chevrolet Malibu Service & Repair Manual is a comprehensive guide that provides detailed instructions and information for servicing and repairing the Chevrolet Malibu. It includes step-by-step instructions, diagrams, illustrations, and specifications for various maintenance and repair tasks.
This manual is designed for the 2012 Chevrolet Malibu and is compatible with all trim levels and engine options available for this model year, including the LS, LT, or LTZ trim, and the 2.4L or 3.6L engine.
Key features of the 2012 Chevrolet Malibu Service & Repair Manual:
Comprehensive instructions: Detailed procedures and step-by-step instructions for maintenance and repair tasks.
Diagrams and illustrations: Visual aids to help understand procedures and components.
Specifications: Detailed specifications for parts, components, and systems.
Troubleshooting guides: Help in identifying and resolving common issues and problems.
Maintenance schedules: Recommended intervals and procedures to keep your Malibu running smoothly.
Compatibility: Works with all 2012 Chevrolet Malibu trim levels and engine options.
Whether you are a professional mechanic or a DIY enthusiast, the 2012 Chevrolet Malibu Service & Repair Manual is an essential tool for maintaining and repairing your vehicle. It provides a user-friendly interface and comprehensive content to keep your Malibu in top condition.