Congratulations on your purchase of a Chevrolet Malibu. Please read this information about your vehicle’s features and your Owner Manual to ensure an outstanding ownership experience. Note that your vehicle may not include all the features described in this booklet. Keep this booklet with your Owner Manual for easy reference. REMOTE KEYLESS ENTRY FEATURES Remote Keyless Entry . . . . . . . . .2 Remote Vehicle Start . . . . . . . . . .2 PERSONAL FIT FEATURES Manual Seat Adjustments . . . . . .3 Power Seat Adjustments . . . . . . .4 Lumbar Adjustment . . . . . . . . . . . .4 Shoulder Belt Height Adjustment . . . . . . . . . . . . . . . . . . .4 Steering Wheel Adjustment . . . .4 ENTERTAINMENT FEATURES Audio System Features . . . . . . . .5 Multiple-Disc CD Player . . . . . . . .7 Audio Steering Wheel Controls . .7 XM ® Radio . . . . . . . . . . . . . . . . . . .8 Bluetooth ® System . . . . . . . . . . . . .8 INSTRUMENT PANEL FEATURES Driver Information Center . . . . . .8 Instrument Panel . . . . . . . . . . . . .10 Instrument Panel Cluster . . . . . .11 CONVENIENCE FEATURES Climate Controls . . . . . . . . . . . . .12 Heated Seats . . . . . . . . . . . . . . . .13 Automatic Headlamp System . .13 Interior Lamps . . . . . . . . . . . . . . .14 Auto-Dimming Rearview Mirror . . . . . . . . . . . . . . . . . . . . . .14 Speed-Sensitive Windshield Wipers . . . . . . . . . . .14 Cruise Control . . . . . . . . . . . . . . .15 Express Power Windows . . . . . .15 Universal Home Remote . . . . . .15 Center Console Features . . . . . .16 115-Volt Outlet . . . . . . . . . . . . . . .16 OnStar ® . . . . . . . . . . . . . . . . . . . . .16 Split-Folding Rear Seats . . . . . .17 PERFORMANCE & MAINTENANCE FEATURES TAPshift . . . . . . . . . . . . . . . . . . . . .17 Traction Control System . . . . . . .18 StabiliTrak ® – Stability Control System . . . . . . . . . . . . . . . . . . . . . .18 Tire Pressure Monitor . . . . . . . .19 Reset the Oil Life System . . . . . .19 OWNER INFORMATION Roadside Assistance . . . . . . . . .20 My GMLink . . . . . . . . . . . . . . . . . .20
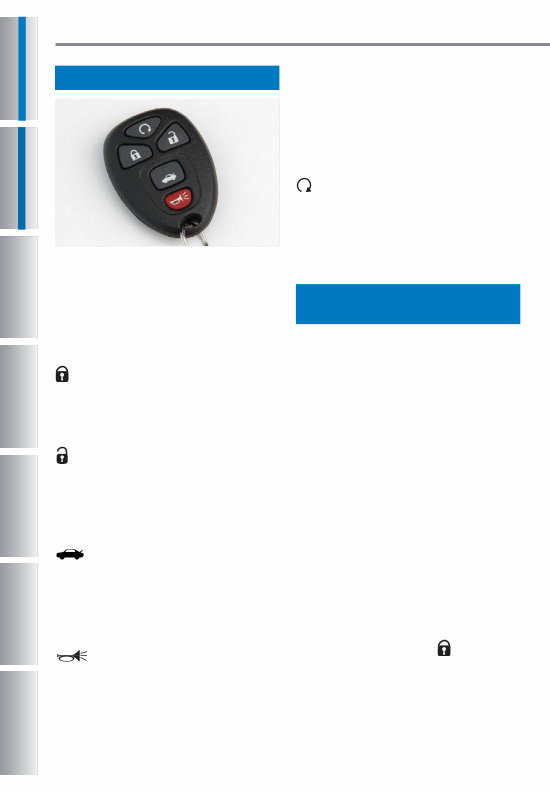
2 REMOTE KEYLESS ENTRY FEATURES Remote Vehicle Start (if equipped) The Remote Keyless Entry (RKE) transmitter allows you to lock and unlock your vehicle and perform other functions while up to approximately 65 feet away from the vehicle (196 feet if equipped with Remote Vehicle Start). RKE functions include: (Lock): Press this button to lock all the doors. RKE feedback (light flash and/or horn chirp) can be programmed using the Driver Information Center (DIC). (Unlock): Press this button to unlock the driver’s door. Press it again within five seconds to unlock all remaining doors. RKE feedback (light flash and/or horn chirp) can be programmed using the DIC. (Trunk Release): Press and hold this button for approximately one sec- ond to unlatch the trunk. The trunk also may be opened by pressing the Trunk Release button on the driver’s door. (Vehicle Locator/Panic Alarm): Press and release this button to locate your vehicle. The turn signal lamps will flash and the horn will sound three times. Press and hold the button for approxi- mately three seconds to activate the panic alarm. The headlamps and parking lamps will flash and the horn will sound for 30 seconds. Press the button again or turn the ignition to On to cancel the alarm. (Remote Vehicle Start) (if equipped): This feature can be used to start the engine from outside the vehicle. (See Remote Vehicle Start.) See Section 2 of your Owner Manual. Remote Keyless Entry This feature allows you to start the engine from outside the vehicle by using the Remote Keyless Entry (RKE) transmitter. The remote start capability must be turned on using the Driver Information Center. During a remote start, the manual climate control system will operate at its last setting before the vehicle was turned off. With automatic climate control (if equipped), the system will default to a heating or cooling mode, and may activate the rear defogger, based on outside temperature. Starting the Vehicle 1. Aim the RKE transmitter at the vehicle. (Transmitter range is within approximately 196 feet of the vehicle.) 2. Press and release the (Lock) button on the transmitter.
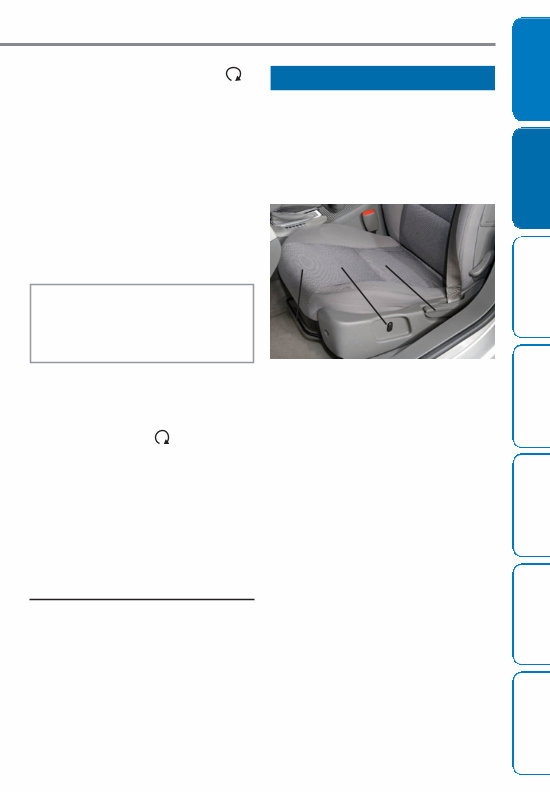
Seat Adjustment • To adjust the position of the front seat, lift the bar (A) located under the front of the seat and move the seat fore or aft; then release the bar. Seat Height Adjustment • To raise or lower the driver’s seat, press the height adjustment button (B) located on the outboard side of the driver’s seat cushion. Seatback Adjustment • To adjust the position of the front seatback, lift the recline lever (C) located on the outboard side of the seat and recline or raise the seat- back; then release the lever. See Section 1 of your Owner Manual. 3 PERSONAL FIT FEATURES Owner Information Performance & Maintenance Features Convenience Features Instrument Panel Features Entertainment Features Personal Fit Features Remote Keyless Entry Features 3. Immediately press and hold the (Remote Start) button for about four seconds. When the vehicle starts, the parking lamps will light and remain on while the engine is running. The engine will continue running for 10 minutes. 4. Repeat these steps for a 10-minute time extension. Only two consecu- tive remote starts are allowed. When you enter the vehicle after a remote start, the ignition must be turned to the On position before driving. Canceling a Remote Start To turn off the engine instead of driving after a remote start: • Press and hold the (Remote Start) button until the parking lamps turn off. • Press and release the Hazard Warning Flashers button. Press it again to turn off the flashers. • Turn the key in the ignition switch to the On position and then off. See Section 2 of your Owner Manual. Note: The Remote Vehicle Start feature will not operate if the key is in the ignition, the hood is open, or the Check Engine light is illuminated on the instrument panel cluster. Manual Seat Adjustments B A C
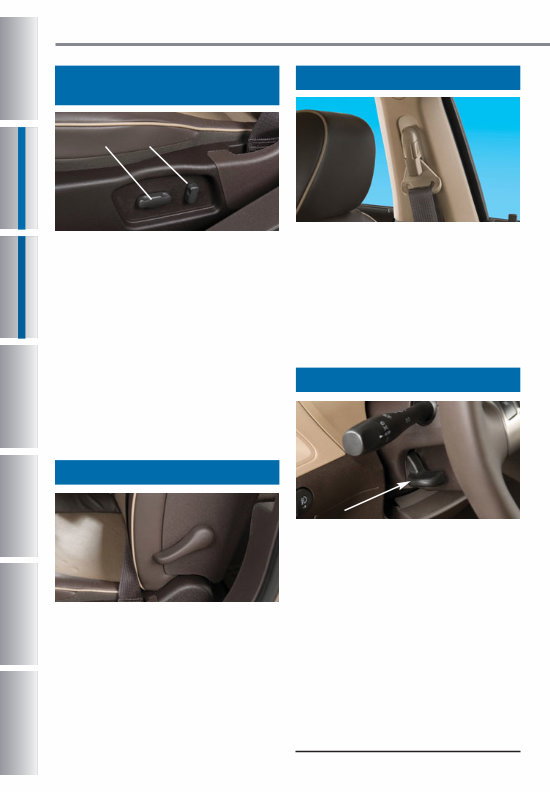
4 PERSONAL FIT FEATURES Lumbar Adjustment The lumbar adjustment lever is located on the outboard side of the seatback. • To increase the lumbar support, ratchet the lever down repeatedly. To decrease the support, ratchet the lever up repeatedly. See Section 1 of your Owner Manual. Shoulder Belt Height Adjustment • Push the two release buttons to move the front seat shoulder belt height adjuster up or down. Once in a comfortable position, try to move the height adjuster to make sure it is locked in place. See Section 1 of your Owner Manual. Steering Wheel Adjustment Adjust the driver’s seat to a comfort- able position before adjusting the steering wheel. To tilt and telescope the position of the steering wheel: 1. Push down the lever on the left side of the steering column. 2. Adjust the wheel to a comfortable position by moving it up or down as well as in or out. 3. Pull up the lever to lock the wheel in place. See Section 3 of your Owner Manual. Power Seat Adjustments (if equipped) A B The power seat controls are located on the outboard side of the seat cushion. Seat Adjustment • Use the horizontal control (A) to move the seat fore or aft as well as to raise or lower the front or rear of the seat cushion. Seatback Adjustment • Use the vertical control (B) to recline or raise the seatback. See Section 1 of your Owner Manual.
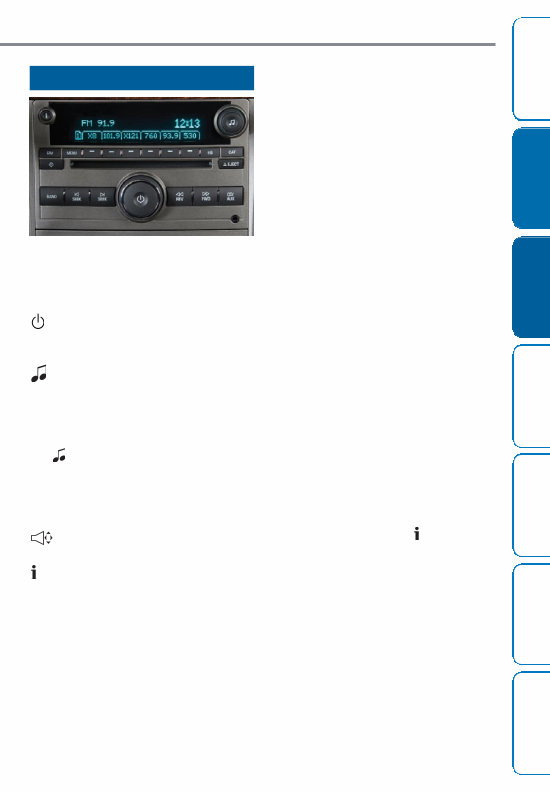
5 ENTERTAINMENT FEATURES Owner Information Performance & Maintenance Features Convenience Features Instrument Panel Features Entertainment Features Personal Fit Features Remote Keyless Entry Features Audio System Features While most of the features on your radio will look familiar, some of the following may be new: (Power/Volume): Press this knob to turn the system on or off. Turn the knob to adjust the volume. (Tune): Turn this knob to select radio stations or, when a CD is playing, to select a track or MP3 file (if equipped). Tone and Speaker Control: Press the (Tune) knob to adjust the tone control (bass/treble) or speaker control (balance/fade) setting. Turn the knob or press the SEEK, FWD or REV button to adjust the selected setting. (Balance/Fade): Press this button to adjust the speaker control settings. (Information): Press this button to switch the radio display between station frequency and time. It will also display additional information related to the current FM-RDS or XM station, or MP3 song (if equipped). FAV (Favorite): Press this button to go through up to six pages of any combi- nation (AM, FM, or XM, if equipped) of preset favorite radio stations. On each page, up to six stations are available by using the six pushbuttons below the radio display. BAND: Press this button to switch to FM, AM, or XM (if equipped). When playing a CD or portable audio player, press this button to play the radio. CD/AUX: Press this button to play a CD instead of the radio. Press again and the system will automatically search for a portable audio player connected to the auxiliary input jack. EQ (Equalization): Press this button to select preset equalization settings. CAT (Category) (if equipped): Press this button to find XM stations within a desired category. Auxiliary Input Jack: A portable audio player (such as an iPod ® or other MP3 player) can be connected to the auxiliary input jack located on the radio. Press the CD/AUX button to play audio from the portable player over the vehicle speakers. To optimize speaker volume, fully increase the volume level of the portable player. Radio Data System (if equipped) When you tune to a Radio Data System (RDS) station, the station name or call letters will appear on the display. Additional text information may be available by pressing the (Information) button. RDS features are available for use only on FM stations that broadcast RDS information. RDS relies on receiving specific information from these stations and will work only when the informa- tion is available. Playing MP3 Files (if equipped) The audio system may have MP3 file playback capability. When playing a CD-R containing MP3 audio files, an MP3 label will be displayed. Mid-level radio shown
You're Reading a Preview
What's Included?
Lifetime Access
Fast Download Speeds
Offline Viewing
Access Contents & Bookmarks
Full Search Facility
Print one or all pages of your manual
$24.99
2009 CHEVY / CHEVROLET Malibu HYBRID Owners Manual
The 2009 CHEVY / CHEVROLET Malibu HYBRID Owners Manual is an essential guide for owners of the Chevy Malibu Hybrid model. This comprehensive manual provides detailed information and instructions on how to operate, maintain, and troubleshoot your hybrid vehicle.
With the 2009 CHEVY / CHEVROLET Malibu HYBRID Owners Manual, you'll have access to a wealth of knowledge that will help you maximize the performance and efficiency of your vehicle. From understanding the hybrid system and its components to learning about proper maintenance procedures, this manual covers it all.
Here are some of the topics covered in the manual:
Introduction to the Chevy Malibu Hybrid
Hybrid system operation and features
Driving tips for optimal fuel efficiency
Routine maintenance and service schedules
Troubleshooting common issues and error codes
Safety tips and precautions
Whether you're a new owner or have been driving the 2009 CHEVY / CHEVROLET Malibu HYBRID for a while, this manual is a valuable resource that will help you understand and maintain your vehicle. Get the most out of your hybrid experience with the 2009 CHEVY / CHEVROLET Malibu HYBRID Owners Manual.
Reviews
Q&A
Recently Viewed
5,521,897Happy Clients
2,594,462eManuals
1,120,453Trusted Sellers
15Years in Business
Price:
Actual Price:
2009 CHEVY / CHEVROLET Malibu HYBRID Owners Manual