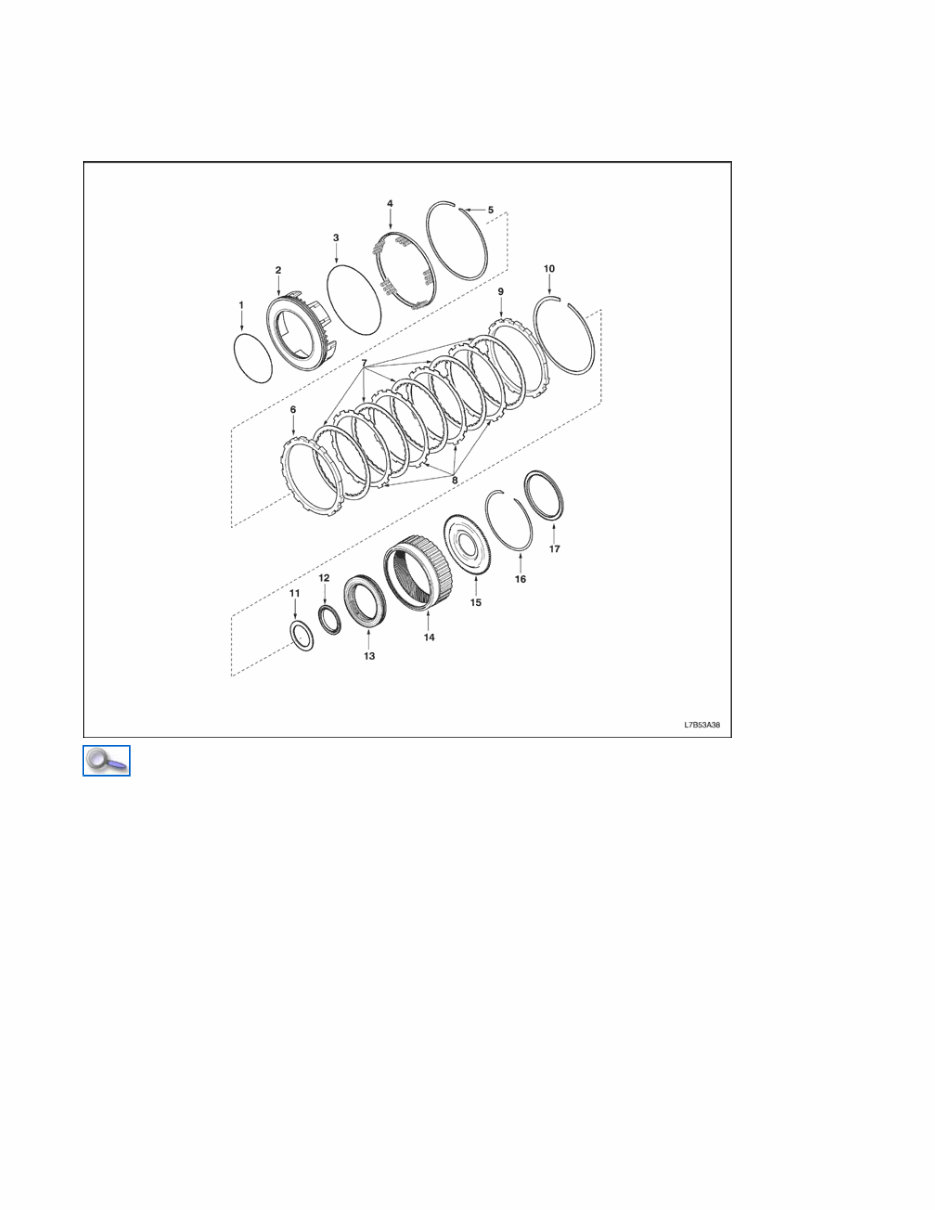
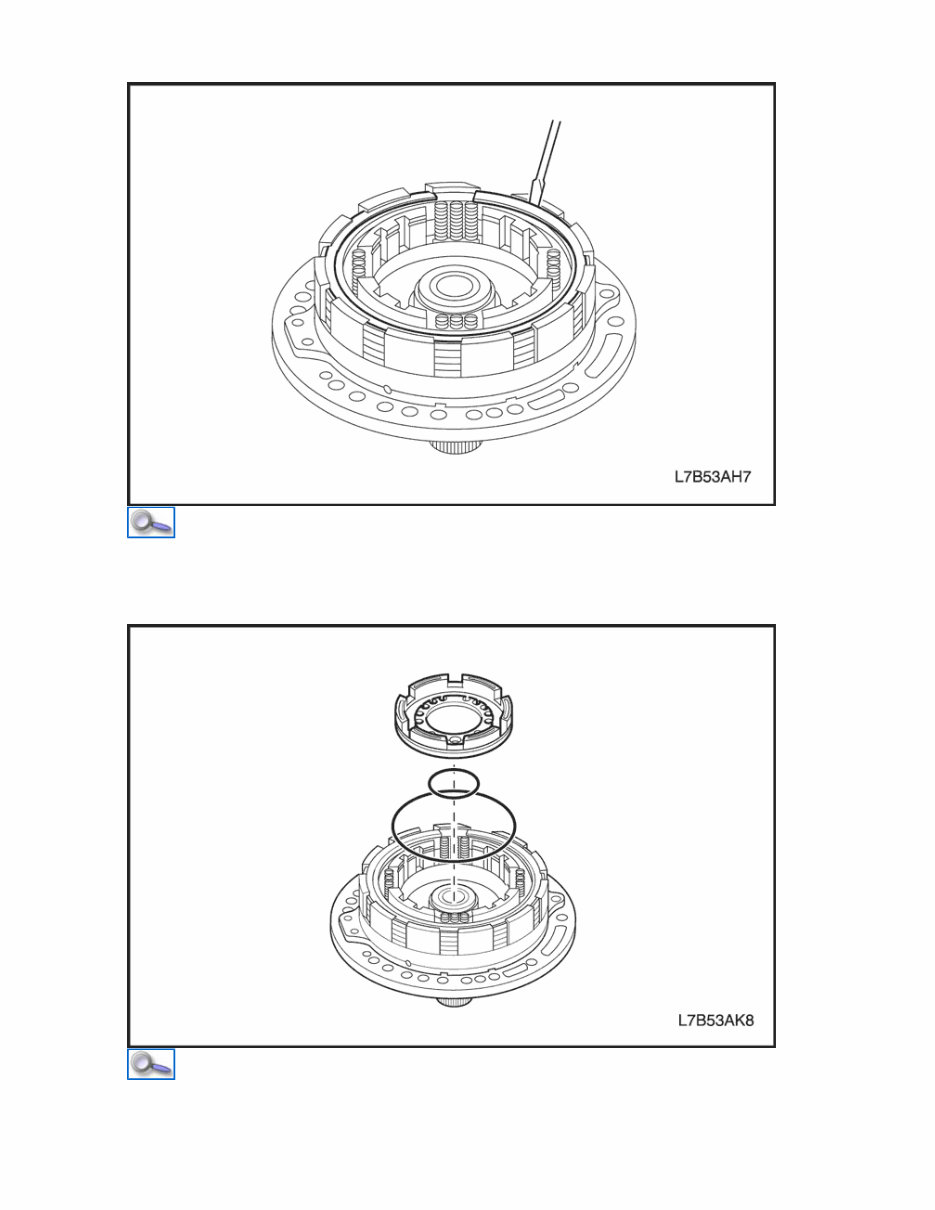
1st and Reverse Brake (B3) and One Way Clutch No.2 (F2) Illustration 1. O-ring 2. 1st and Reverse Brake (B3) Piston 3. O-ring 4. 1st and Reverse Brake (B3) Return Spring 5. Snap Ring 6. 1st and Reverse Brake (B3) Flange 7. 1st and Reverse Brake (B3) Disc 8. 1st and Reverse Brake (B3) Plate 9. 1st and Reverse Brake (B3) Flange 10. Snap Ring 11. Thrust Bearing Race 12. Thrust Bearing 13. One Way Clutch No.2 (F2) Assembly Page 1 of 2 8/9/2016 http://localhost:9080/tis2web/?target=AN00TJFM&target.method=getPage
14. Front Planetary Ring Gear 15. Front Planetary Ring Gear Flange 16. Snap Ring 17. Thrust Bearing Page 2 of 2 8/9/2016 http://localhost:9080/tis2web/?target=AN00TJFM&target.method=getPage
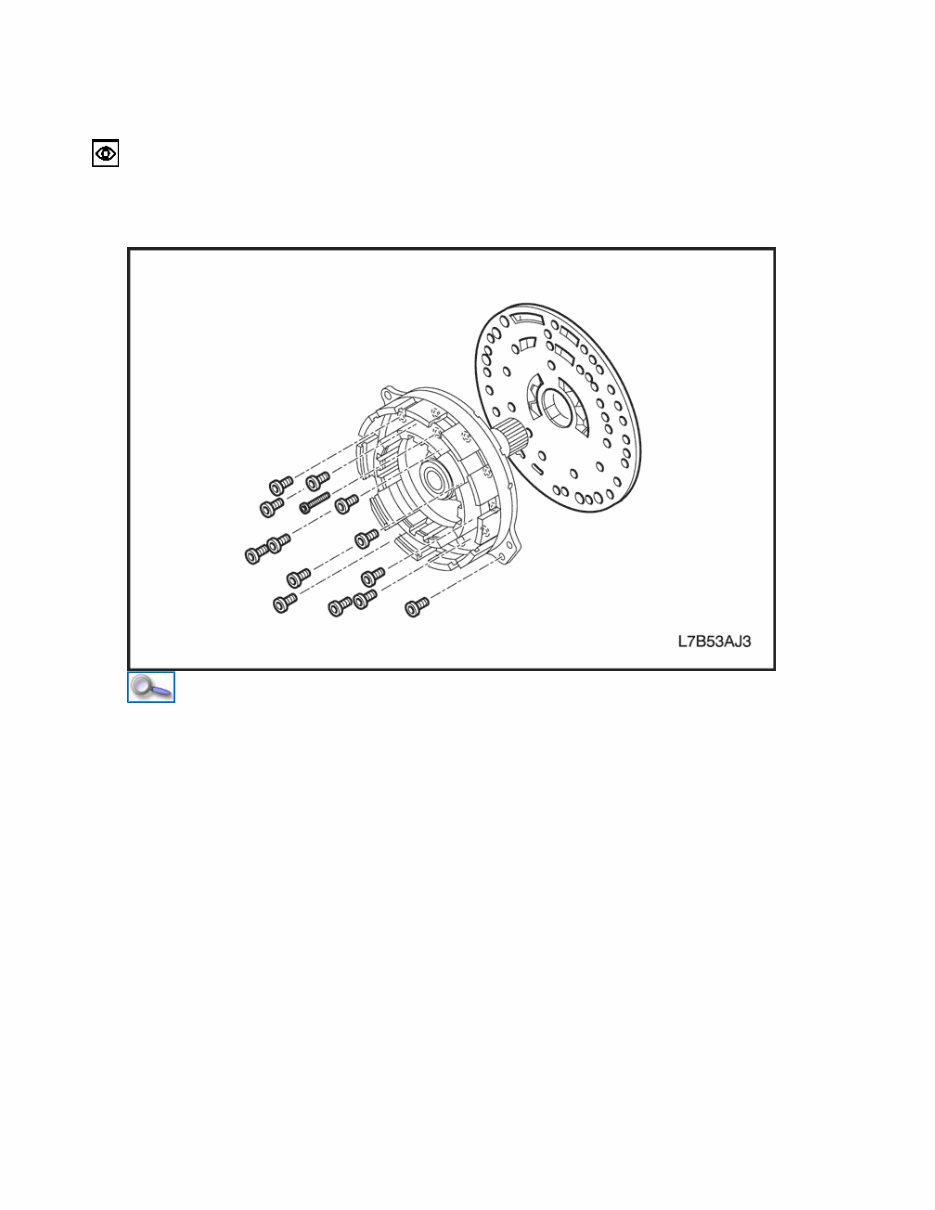
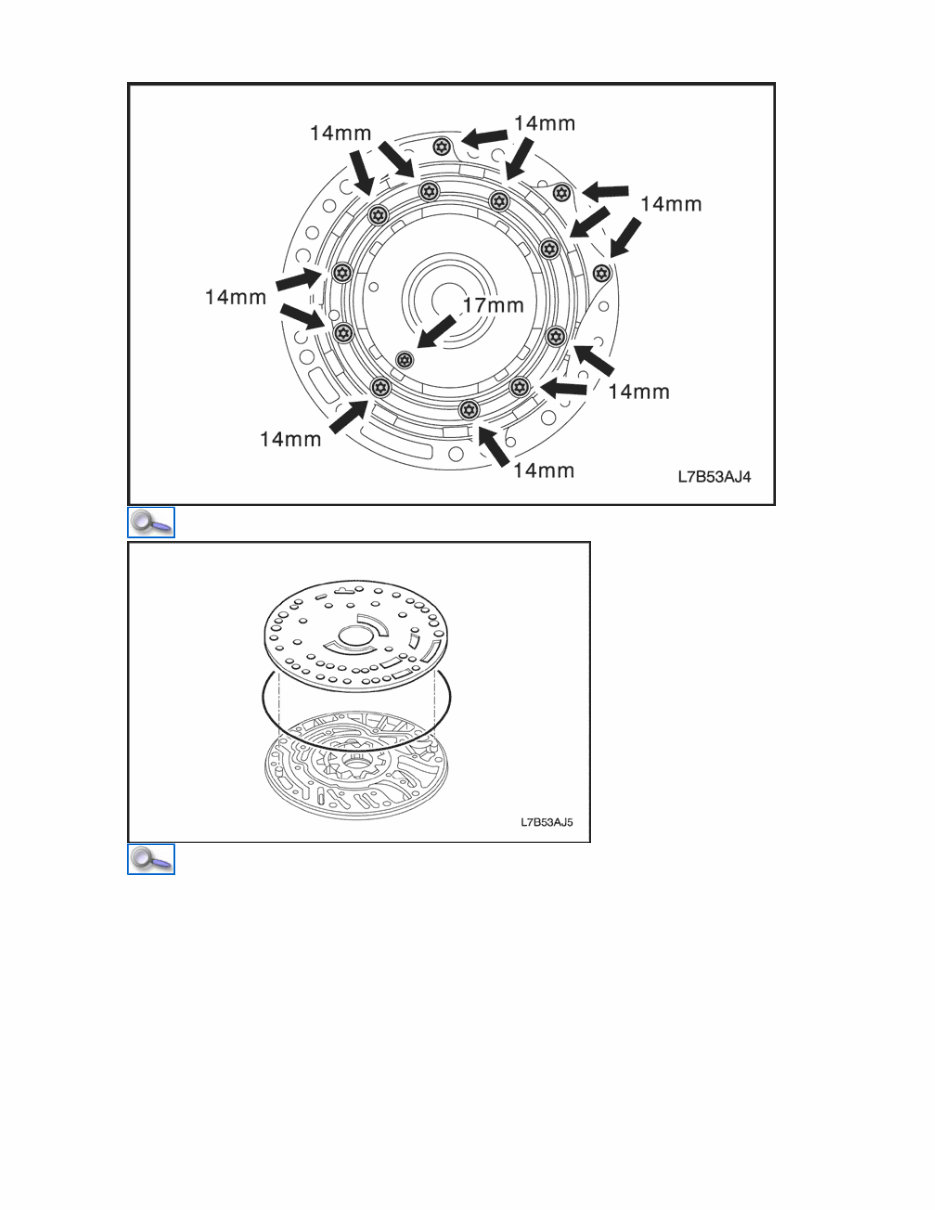
2 nd Coast Brake (B1) and 2 nd Brake (B2) Inspection Inspect 1. Inspect the flange, disc and plate. Check that the sliding surface of disc and plate is not worn or burnt. If the disc or plate is worn or burnt, replace it. Important : When replacing clutch discs, soak the new discs for at least 2 hours in ATF. 2. Remove the oil pump cover. Remove the 14 torx bolts. Important : Be careful not to drop the oil pump body and oil pump cover. Remove the oil pump cover. Page 1 of 3 8/8/2016 http://localhost:9080/tis2web/?target=AMKZKD7&target.method=getPage
3. Remove the oil pump plate. Remove the oil pump plate. · Remove the O-ring from the pump body. Page 2 of 3 8/8/2016 http://localhost:9080/tis2web/?target=AMKZKD7&target.method=getPage
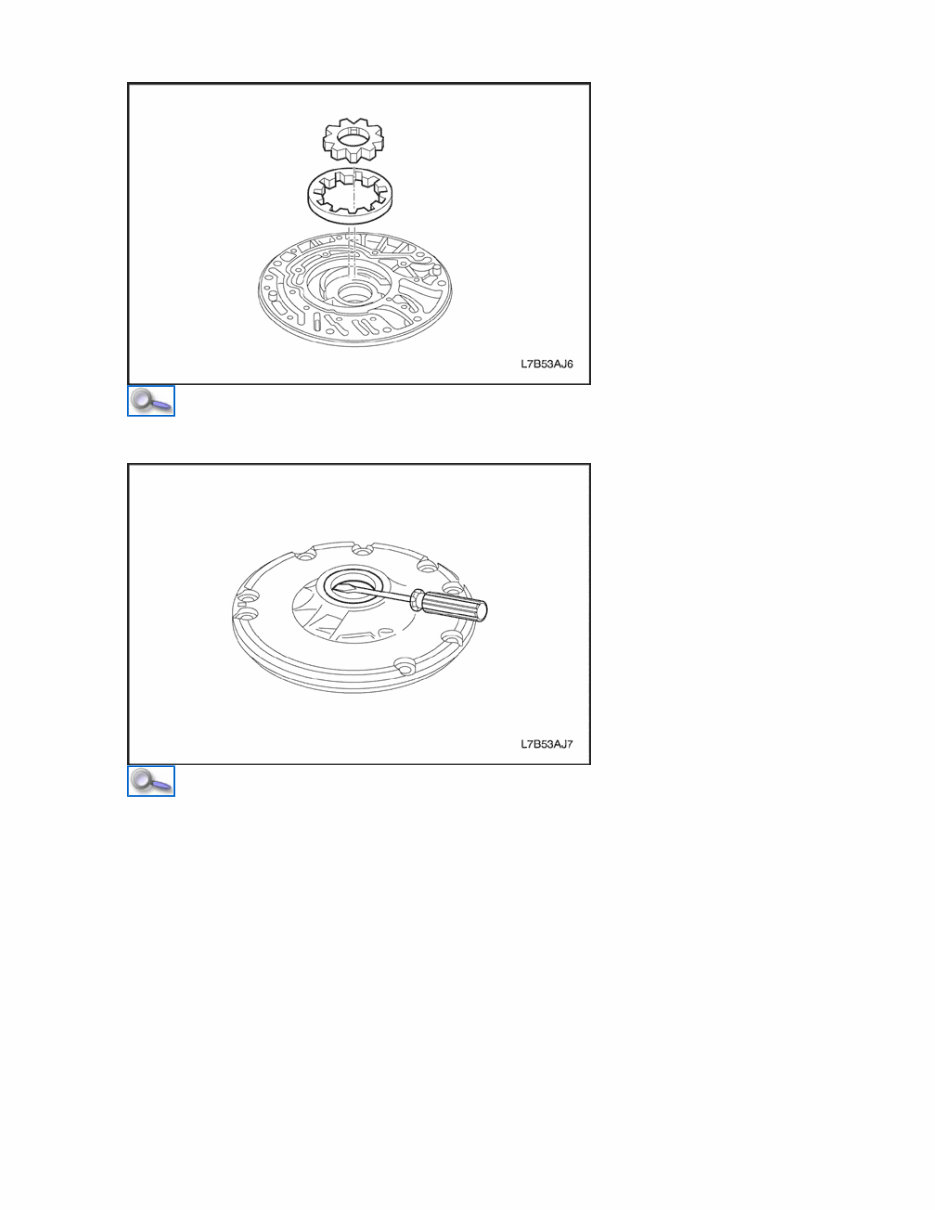
4. Remove the oil pump drive gear and oil pump driven gear. 5. Remove the oil seal. · Remove the oil seal with a screwdriver. Important : Be careful not to damage the oil pump body bushing. Page 3 of 3 8/8/2016 http://localhost:9080/tis2web/?target=AMKZKD7&target.method=getPage
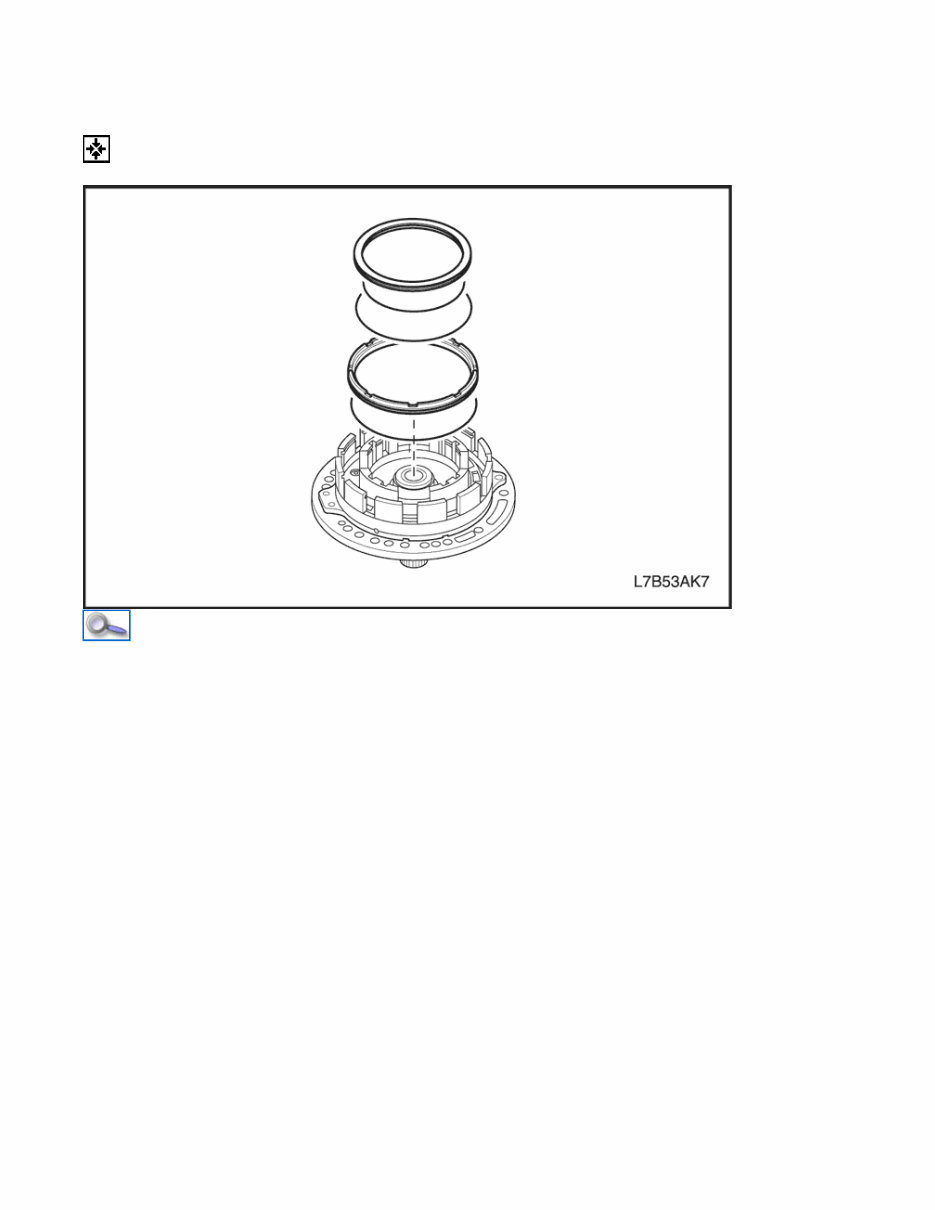
2nd Coast Brake (B1) and 2nd Brake (B2) Assembly Assemble Tools Required J 23327 Clutch Spring Compressor J 28585 Snap Ring Remover J 41236 Coast Clutch Spring Compressor J 45164 Spring Compressor Bridge 1. Install the 2nd brake (B2) piston. Coat the new O-rings with ATF and install them on the piston. Coat the inner surfaces of oil pump cover with ATF. Press the piston into the oil pump cover. Page 1 of 9 8/8/2016 http://localhost:9080/tis2web/?target=AMKZKD7&target.method=getPage
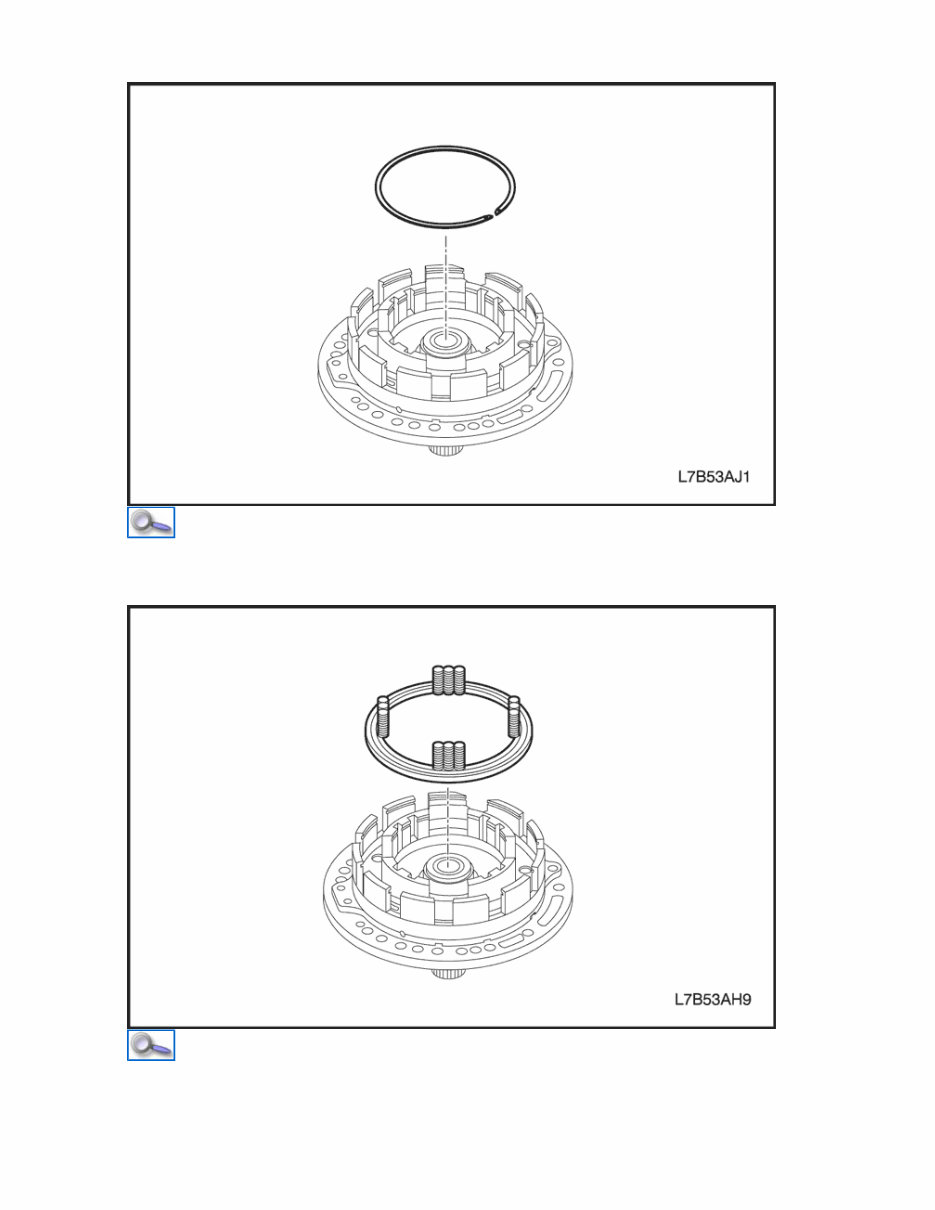
Install the snap ring. Important: Be careful not to damage the oil pump cover. 2. Install the 2nd brake (B2) return spring. Page 2 of 9 8/8/2016 http://localhost:9080/tis2web/?target=AMKZKD7&target.method=getPage
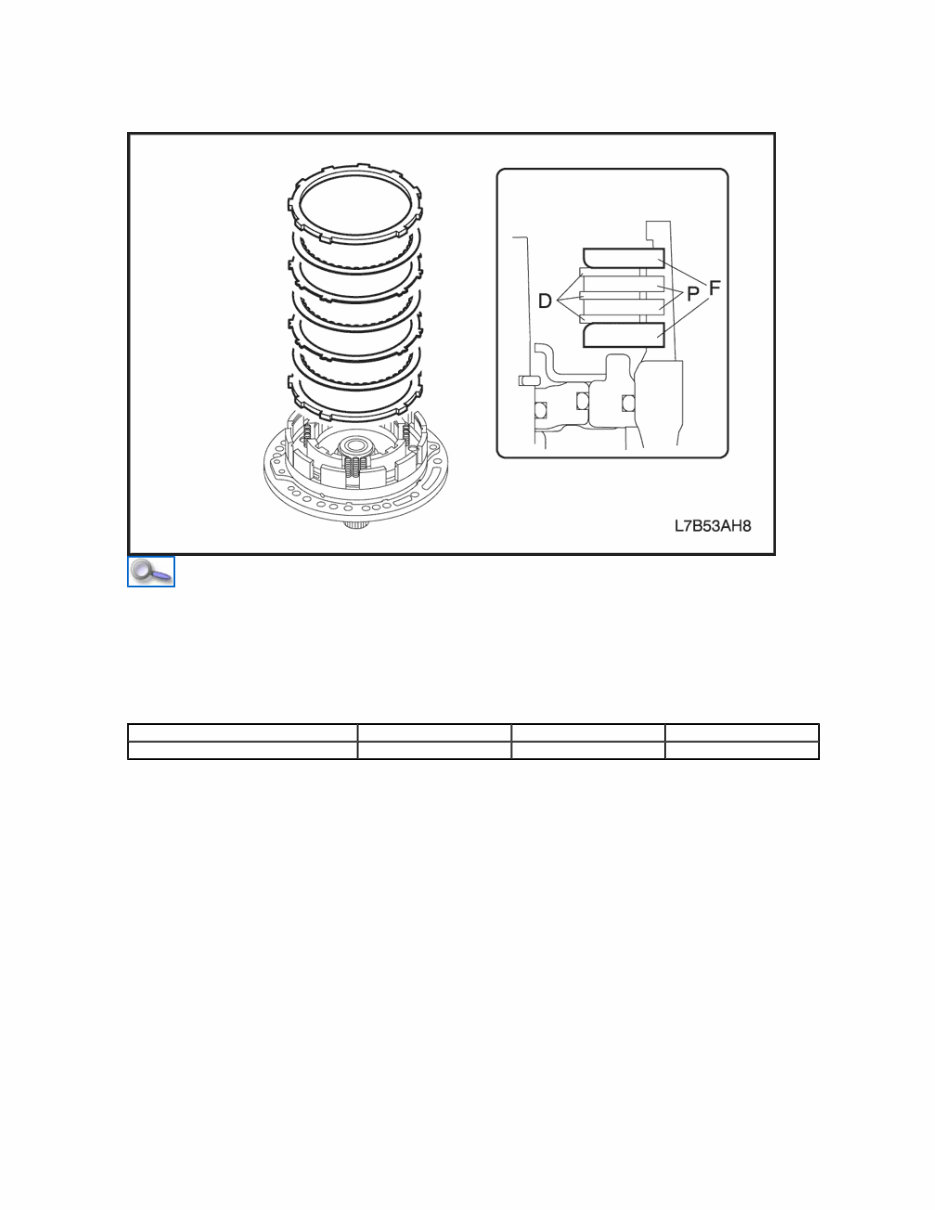
Place the return spring on the piston with the spring side up. 3. Install plate, disc and flange of 2nd brake (B2). Install the flange, disc and plate as shown in the figure. Important : Be sure of number and order of plates and discs. Order : F-D-P-D-P-D-F (Z24XE) P-D-P-D-P-D-P-D-F (Z32SE or Z20DMH, Z20DM) () : For Z32SE or Z20DMH, Z20DM Clutch/Brake Flange (F) Plate (P) Disc (D) 2nd brake (B2) 2 (1) 2 (4) 3 (4) Page 3 of 9 8/8/2016 http://localhost:9080/tis2web/?target=AMKZKD7&target.method=getPage
Using a screwdriver, install the snap ring. Check that the end gap of snap ring is not aligned with one of the cutouts. 4. Install the 2nd coast brake (B1) piston. Page 4 of 9 8/8/2016 http://localhost:9080/tis2web/?target=AMKZKD7&target.method=getPage
You're Reading a Preview
What's Included?
Lifetime Access
Fast Download Speeds
Online & Offline Access
Access PDF Contents & Bookmarks
Full Search Facility
Print one or all pages of your manual
$41.99
2008-2010 Chevrolet Captiva Sport Service & Repair Manual
Thank you for considering this comprehensive Workshop Service Repair Manual for the Chevrolet Capitva Sport Chevy Captiva Sport 2008-2010.
This manual is an invaluable resource for both professional mechanics and DIY enthusiasts, covering every service and repair procedure with easy-to-follow step-by-step instructions and detailed illustrations.
By utilizing this manual, you can significantly reduce repair costs by performing maintenance and repairs on your own. The manual is yours to keep forever, allowing you to print specific pages or chapters, or conveniently access it on your tablet or smartphone.
All models, engines, trim levels, and transmission types are included in this high-quality Service Repair Workshop Manual, encompassing all repair procedures from A to Z.
Compatible with all PC and MAC computers, tablets, and mobile phones, this downloadable manual requires only Adobe Reader, which is typically pre-installed or can be easily obtained for free.
Upon payment confirmation via Visa, MasterCard, or PayPal, the manual will be instantly delivered to the email address provided during checkout, ensuring prompt access to the essential repair information.
Rest assured, customer satisfaction is guaranteed with this comprehensive Workshop Service Repair Manual.
Reviews
Q&A
Recently Viewed
5,521,897Happy Clients
2,594,462eManuals
1,120,453Trusted Sellers
15Years in Business
Price:
Actual Price:
2008-2010 Chevrolet Captiva Sport Service & Repair Manual




 Lifetime Access


