Safety Warnings and Symbols A circle with a slash through it is a safety symbol which means “Do Not,” “Do not do this” or “Do not let this happen.” A box with the word CAUTION is used to tell about things that could hurt you or others if you were to ignore the warning. { CAUTION: These mean there is something that could hurt you or other people. Cautions tell what the hazard is and what to do to avoid or reduce the hazard. Read these cautions. A notice tells about something that can damage the vehicle. Notice: These mean there is something that could damage your vehicle. Many times, this damage would not be covered by the vehicle’s warranty, and it could be costly. The notice tells what to do to help avoid the damage. There are also warning labels on the vehicle which use the same words, CAUTION or Notice. iv
Vehicle Symbols The vehicle has components and labels that use symbols instead of text. Symbols are shown along with the text describing the operation or information relating to a specific component, control, message, gage, or indicator. M : This symbol is shown when you need to see your owner manual for additional instructions or information. * : This symbol is shown when you need to see a service manual for additional instructions or information. Vehicle Symbol Chart Here are some additional symbols that may be found on the vehicle and what they mean. For more information on the symbol, refer to the index. 0 : Adjustable Pedals 9 : Airbag Readiness Light # : Air Conditioning ! : Antilock Brake System (ABS) g : Audio Steering Wheel Controls or OnStar ® $ : Brake System Warning Light " : Charging System I : Cruise Control B : Engine Coolant Temperature O : Exterior Lamps # : Fog Lamps . : Fuel Gage + : Fuses i : Headlamp High/Low-Beam Changer j : LATCH System Child Restraints * : Malfunction Indicator Lamp : : Oil Pressure v
g : Outside Power Foldaway Mirrors } : Power / : Remote Vehicle Start > : Safety Belt Reminders 7 : Tire Pressure Monitor _ : Tow/Haul Mode F : Traction Control M : Windshield Washer Fluid vi
Head Restraints ...............................................1-2 Front Seats ......................................................1-3 Power Seats ..................................................1-3 Power Lumbar ...............................................1-4 Heated Seats .................................................1-5 Heated and Cooled Seats ................................1-6 Memory Features ...........................................1-7 Power Reclining Seatbacks ..............................1-8 Rear Seats .....................................................1-10 Rear Seat Operation .....................................1-10 Safety Belts ...................................................1-12 Safety Belts: They Are for Everyone ................1-12 How to Wear Safety Belts Properly .................1-17 Lap-Shoulder Belt .........................................1-26 Safety Belt Use During Pregnancy ..................1-31 Safety Belt Extender .....................................1-31 Child Restraints .............................................1-32 Older Children ..............................................1-32 Infants and Young Children ............................1-34 Child Restraint Systems .................................1-38 Where to Put the Restraint .............................1-40 Lower Anchors and Tethers for Children (LATCH) ......................................1-41 Securing a Child Restraint in a Rear Seat Position ............................................1-47 Securing a Child Restraint in the Right Front Seat Position ............................................1-50 Airbag System ...............................................1-53 Where Are the Airbags? ................................1-56 When Should an Airbag Inflate? .....................1-58 What Makes an Airbag Inflate? .......................1-59 How Does an Airbag Restrain? .......................1-59 What Will You See After an Airbag Inflates? .....1-60 Passenger Sensing System ............................1-61 Servicing Your Airbag-Equipped Vehicle ...........1-67 Adding Equipment to Your Airbag-Equipped Vehicle ....................................................1-67 Restraint System Check ..................................1-69 Checking the Restraint Systems ......................1-69 Replacing Restraint System Parts After a Crash ...................................................1-70 Section 1 Seats and Restraint System 1-1
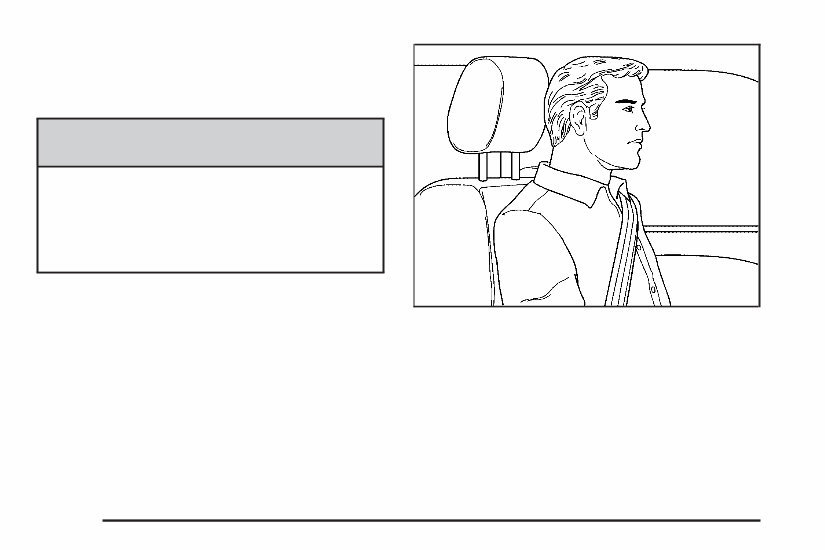
Head Restraints The front seats have adjustable head restraints in the outboard seating positions. { CAUTION: With head restraints that are not installed and adjusted properly, there is a greater chance that occupants will suffer a neck/spinal injury in a crash. Do not drive until the head restraints for all occupants are installed and adjusted properly. Adjust the head restraint so that the top of the restraint is at the same height as the top of the occupant’s head. This position reduces the chance of a neck injury in a crash. 1-2
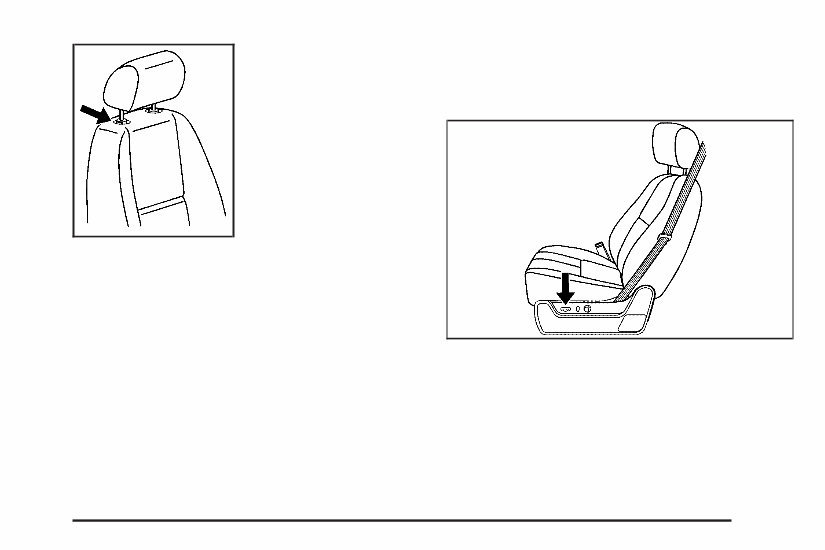
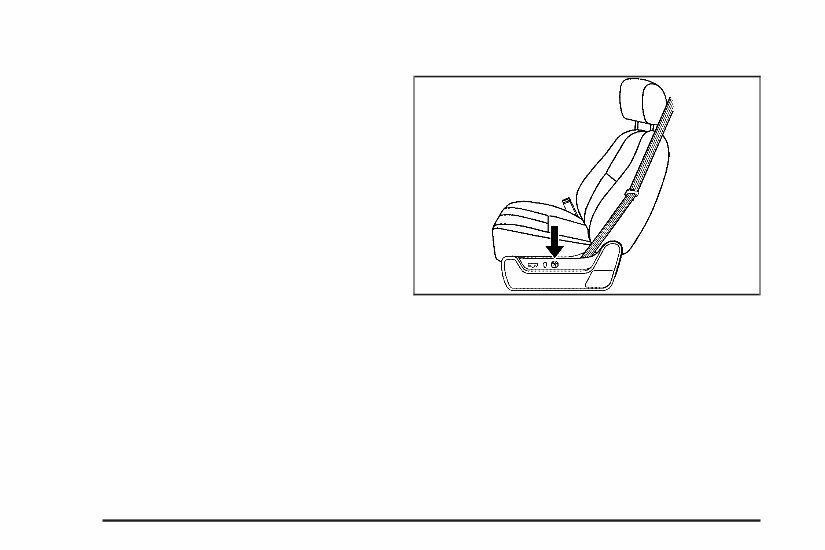
Pull the head restraint up to raise it. To lower the head restraint, press the button, located on the top of the seatback, and push the restraint down. Push down on the head restraint after the button is released to make sure that it is locked in place. The head restraints are not designed to be removed. The rear seat has head rests that can be adjusted up and down. Front Seats Power Seats The power seat controls are located on the outboard side of the front seats. • Move the seat forward or rearward by sliding the control forward or rearward. • Raise or lower the front part of the seat cushion by moving the front of the control up or down. Driver Seat with Power Seat Control, Power Recline, and Power Lumbar shown 1-3
• Raise or lower the rear part of the seat cushion by moving the rear of the control up or down. • Raise or lower the entire seat by moving the entire control up or down. The power reclining seatback control is located behind the power seat control on the outboard side of the seats. See Power Reclining Seatbacks on page 1-8. Your vehicle has a memory function which allows seat settings to be saved and recalled. See Memory Features on page 1-7. Power Lumbar If the seats have power lumbar, the controls used to operate this feature are located on the outboard side of the seats. • To increase lumbar support, press and hold the front of the control. • To decrease lumbar support, press and hold the rear of the control. • To raise the height of the lumbar support, press and hold the top of the control. • To lower the height of the lumbar support, press and hold the bottom of the control. 1-4
The Cadillac 2009 Escalade EXT Owners Operators Owner Manual is an essential guide for all owners of the Cadillac 2009 Escalade EXT model. This comprehensive manual provides users with all the necessary information and instructions to operate and maintain their vehicle.
With clear and concise explanations, the manual covers a wide range of topics, including:
Introduction to the Cadillac 2009 Escalade EXT
Vehicle controls and operation
Maintenance and care
Driving tips and safety precautions
Technical specifications and troubleshooting
Whether you're a new owner or have been driving the Cadillac 2009 Escalade EXT for years, this manual will serve as an invaluable resource. It is designed to ensure that you get the most out of your vehicle and keep it in optimal condition.
Don't risk operating your Cadillac 2009 Escalade EXT without proper knowledge and guidance. Order your copy of the Cadillac 2009 Escalade EXT Owners Operators Owner Manual today and have all the information you need at your fingertips.








 Lifetime Access




