14. Lower the vehicle. 15. Remove the scan tool. 16. Install the tire and wheel assemblies. Refer to Tire and Wheel Removal and Installation . 17. Inspect the brake fluid level. Refer to Master Cylinder Reservoir Filling . 18. Road test the vehicle while inspecting that the pedal remains high and firm. Page 2 of 2 Document ID: 2132671 10/1/2010 http://localhost:9001/si/showDoc.do?docSyskey=2132671&pubCellSyskey=1238&pubObj...
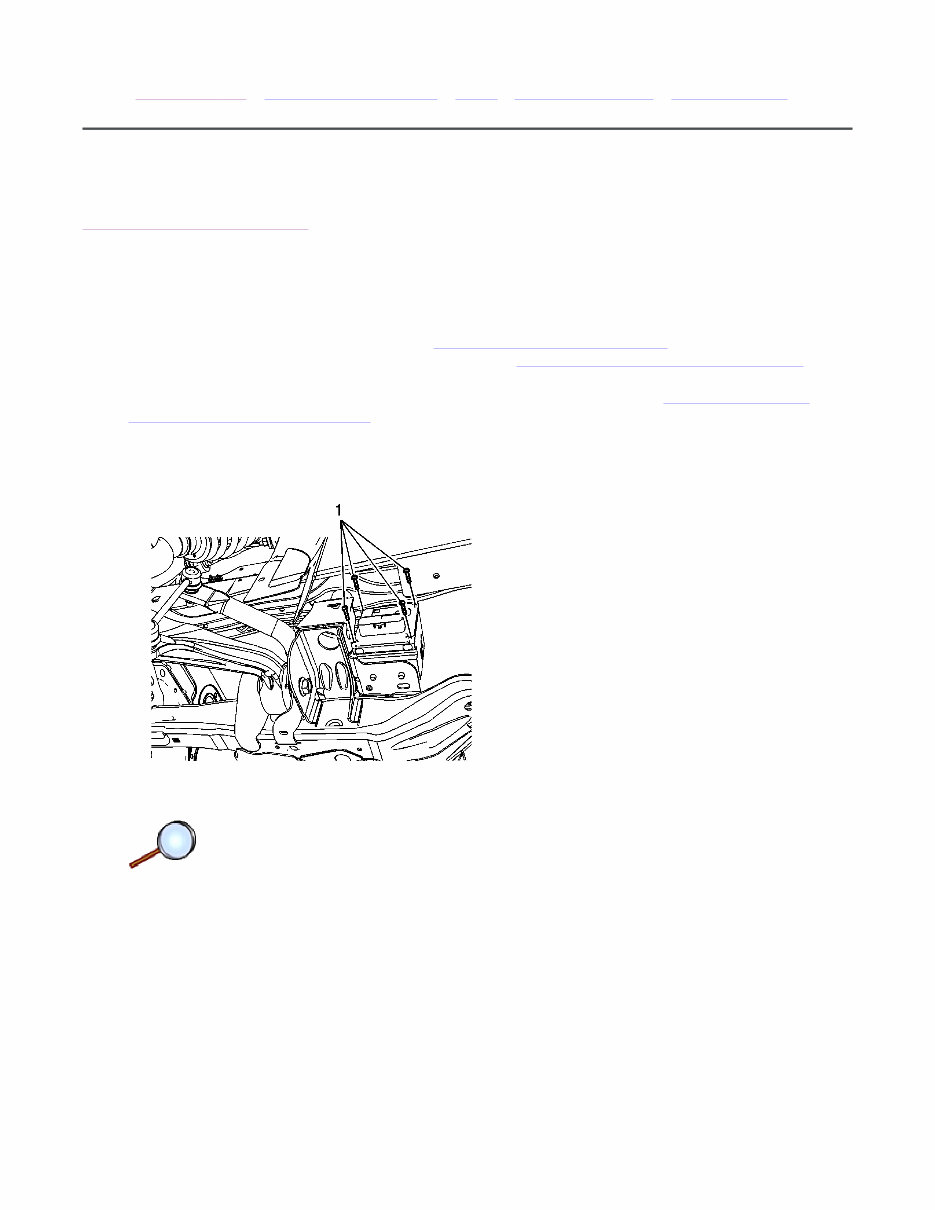
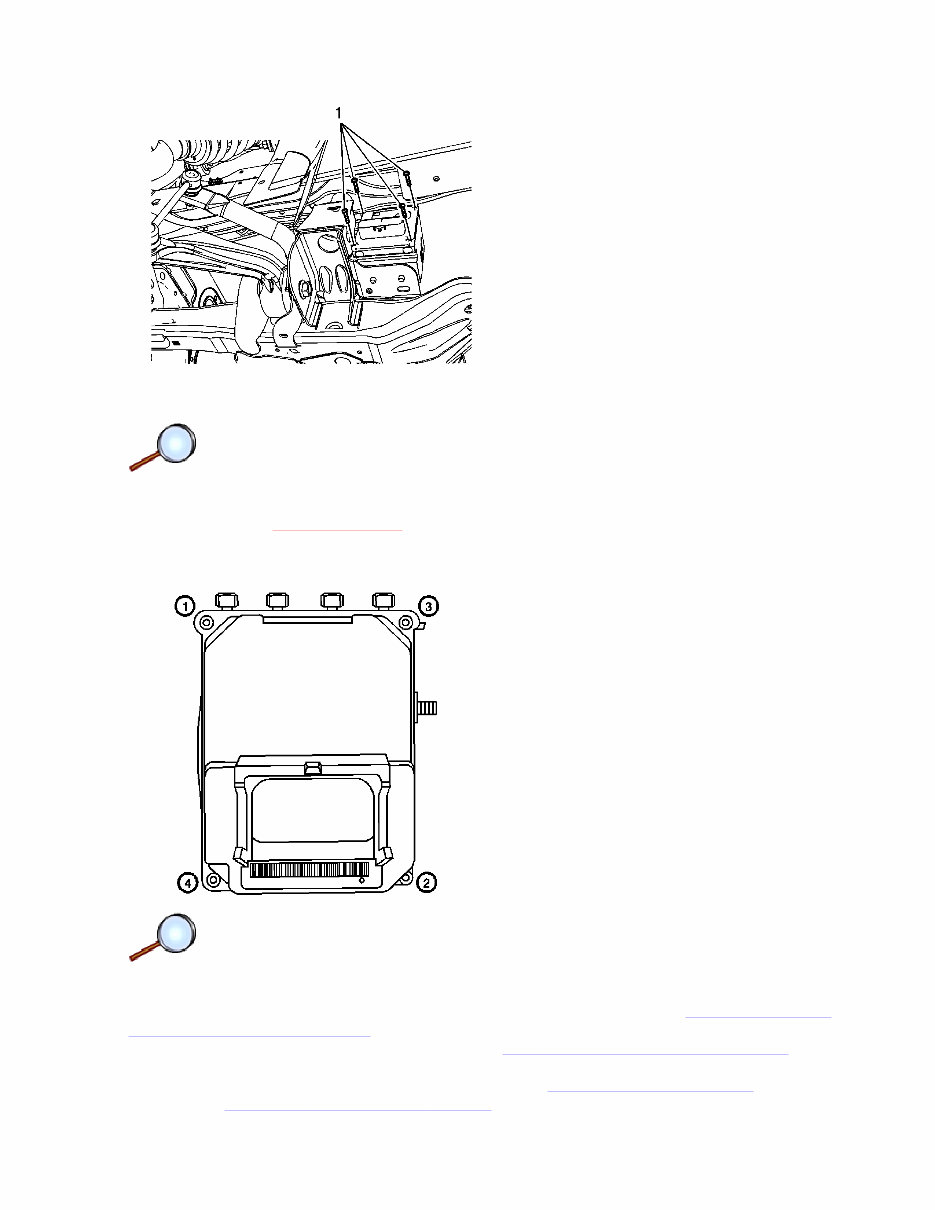
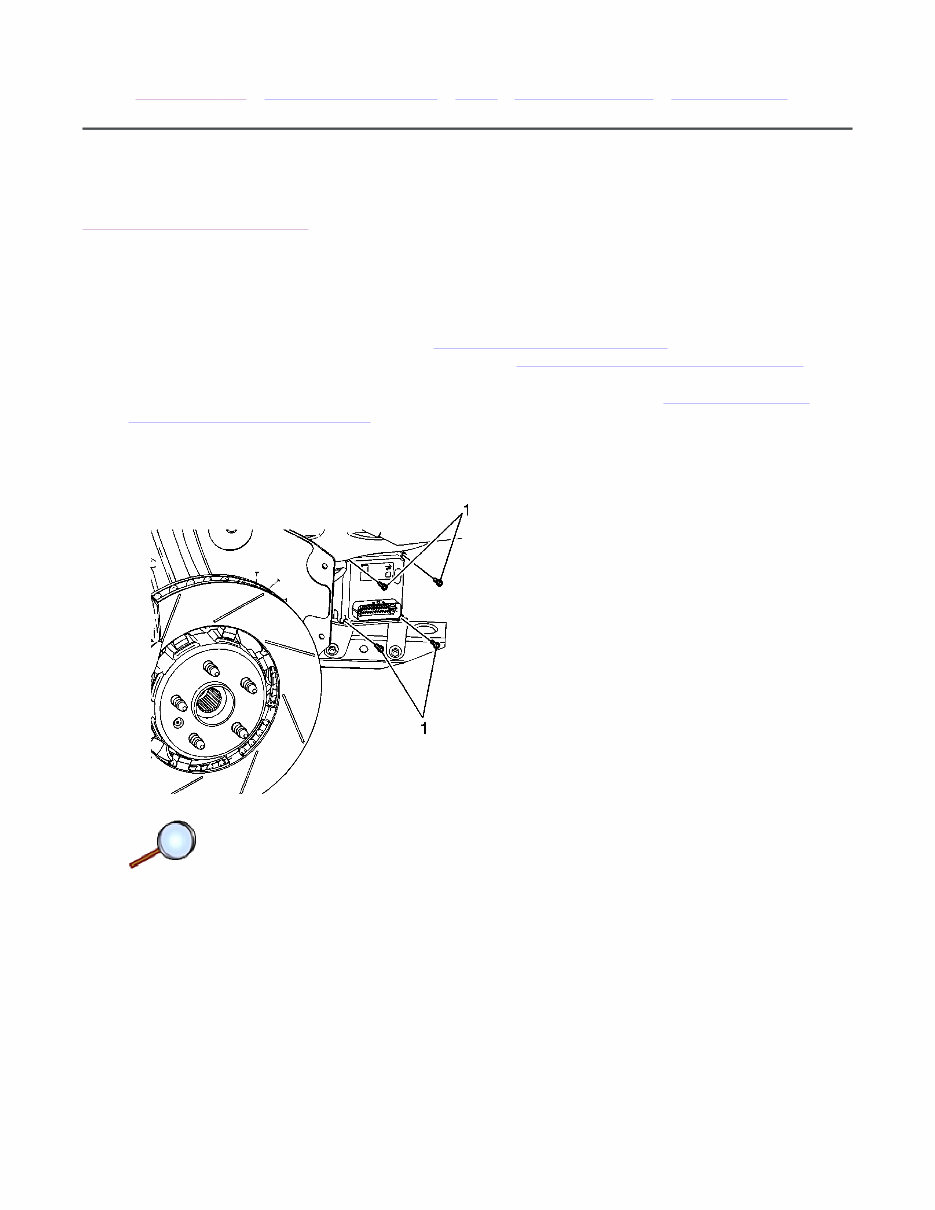
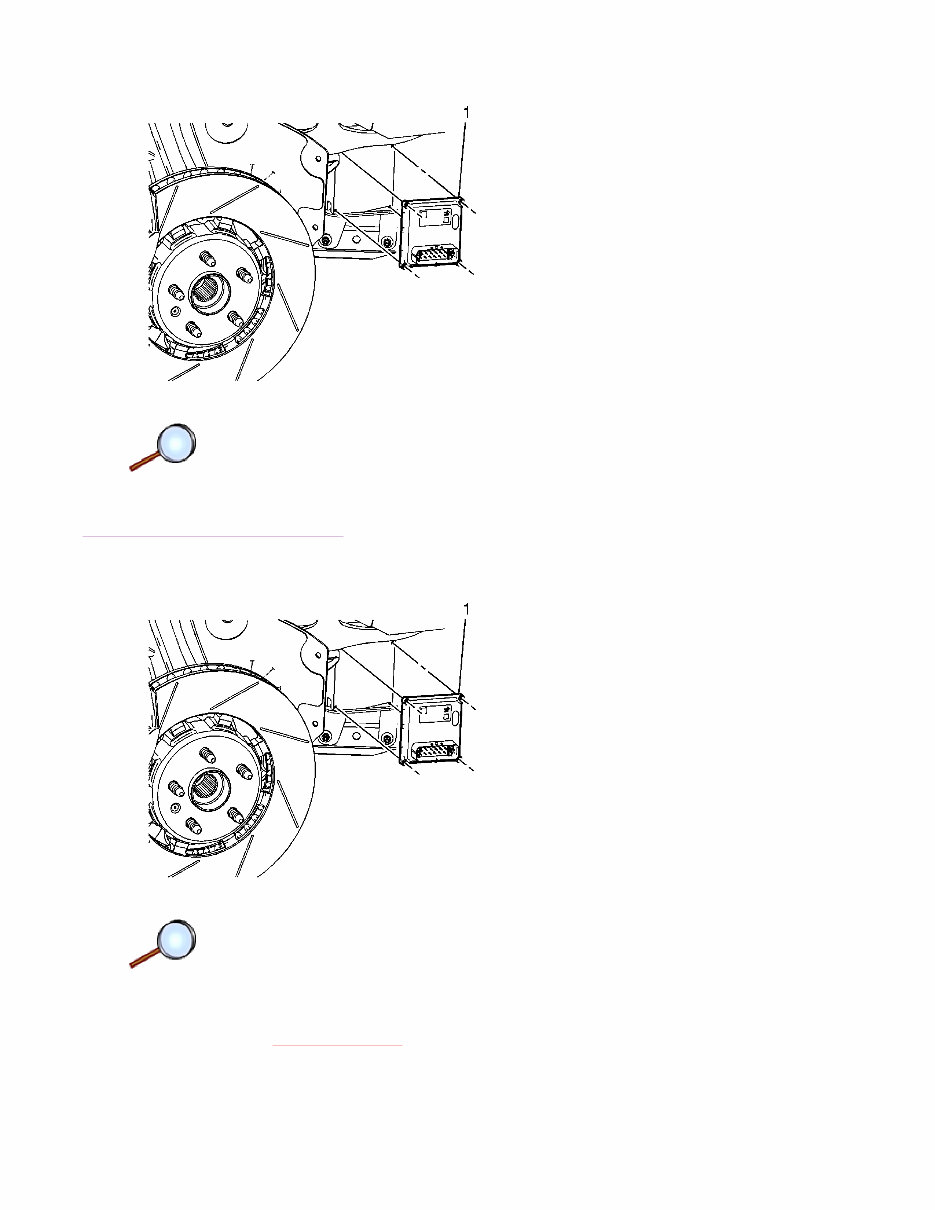
8. Separate the EBCM (1) from the brake pressure modulator valve (BPMV). Installation Procedure 1. Clean the sealing surfaces of the BPMV and the EBCM. 2. Install the EBCM (1) to the BPMV. Page 2 of 3 Document ID: 2152855 10/1/2010 http://localhost:9001/si/showDoc.do?docSyskey=2152855&pubCellSyskey=183713&pub...
3. Install the EBCM screws (1). Caution: Refer to Fastener Caution in the Preface section. 4. Tighten the EBCM screws in the sequence shown (1-4) to 5 N·m (44 lb in). 5. Connect the EBCM electrical connector. 6. Position the washer solvent container and install the fasteners. Refer to Windshield Washer Solvent Container Replacement . 7. Install the right front wheelhouse liner. Refer to Front Wheelhouse Liner Replacement . 8. Lower the vehicle. 9. If installing a new EBCM, program the EBCM. Refer to Control Module References . 10. Perform the Diagnostic System Check - Vehicle . Page 3 of 3 Document ID: 2152855 10/1/2010 http://localhost:9001/si/showDoc.do?docSyskey=2152855&pubCellSyskey=183713&pub...
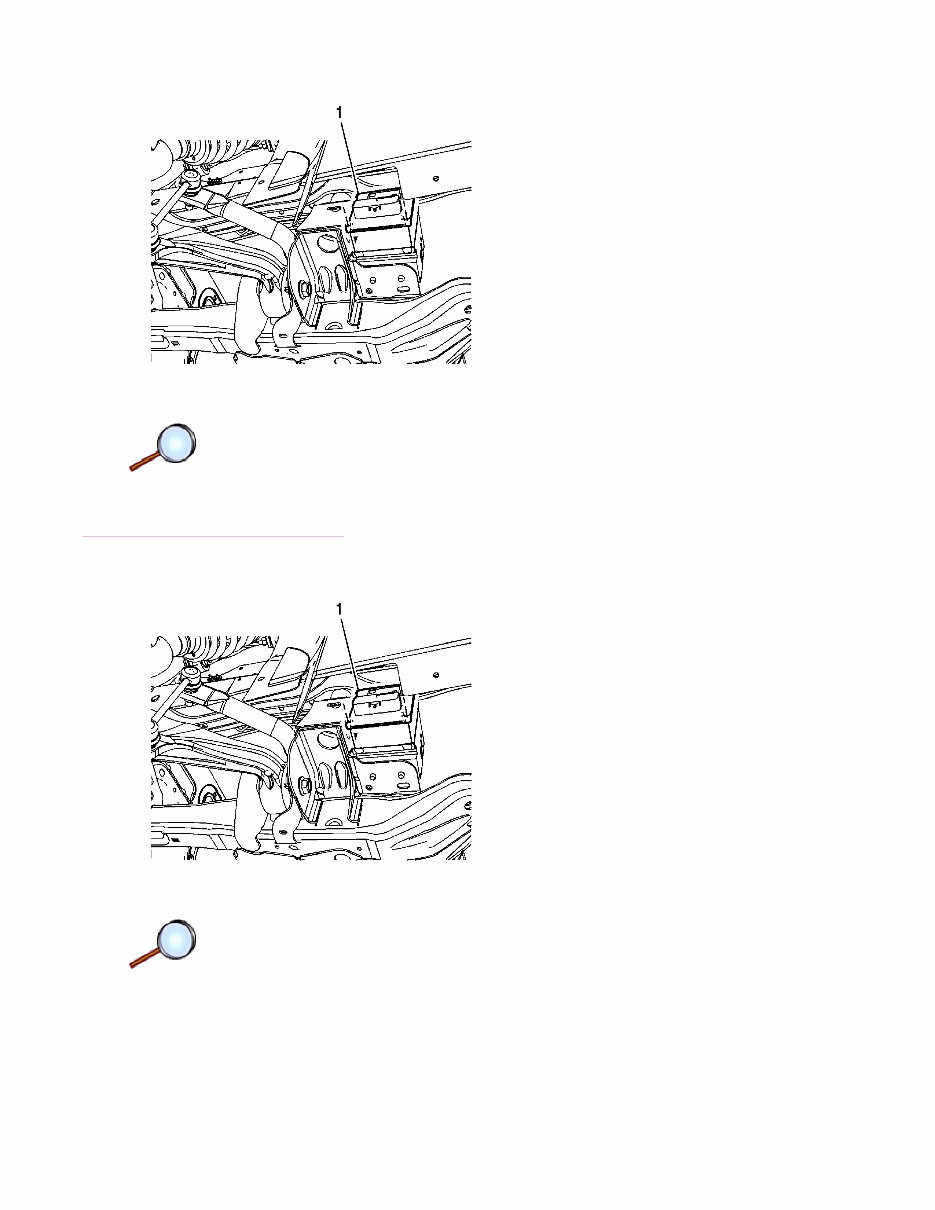
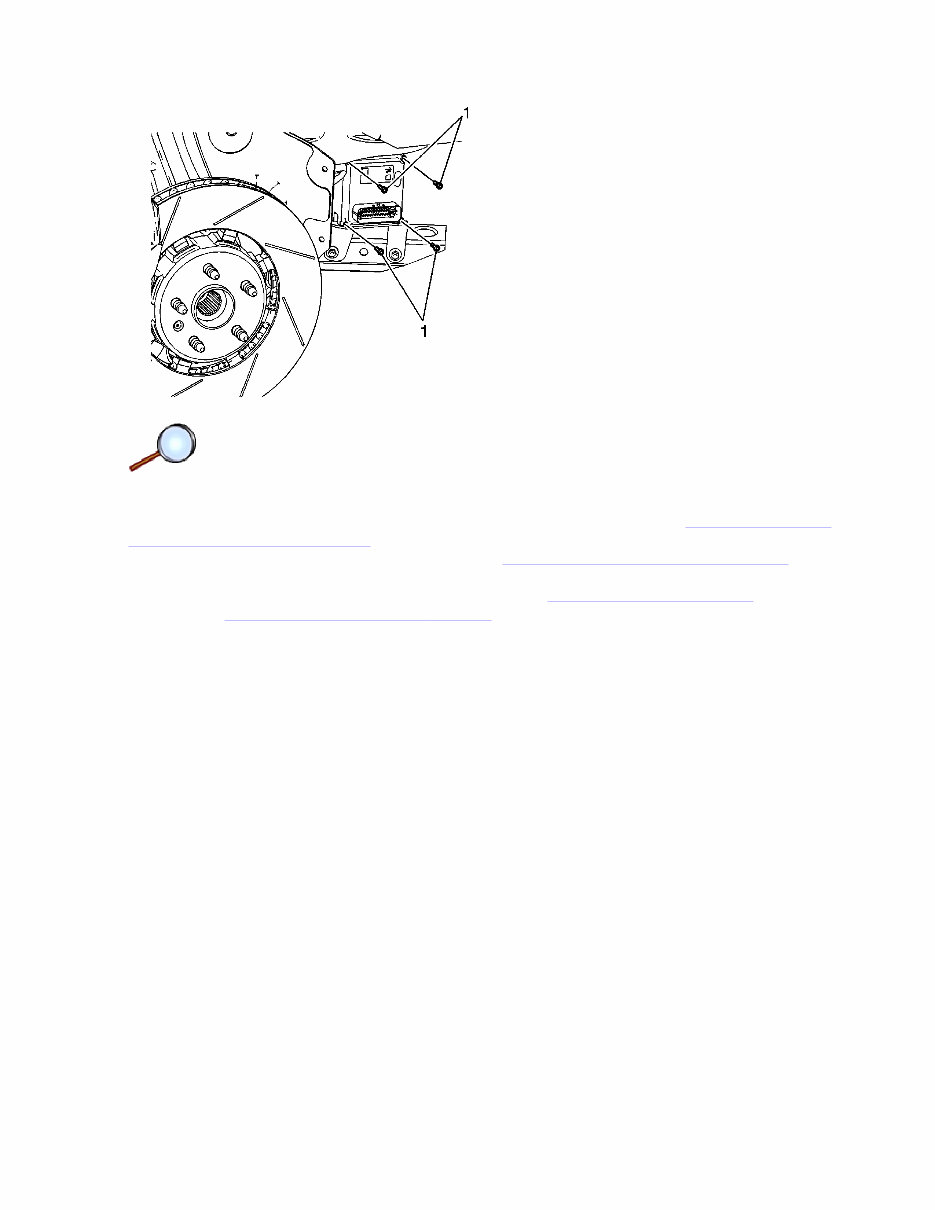
8. Separate the EBCM (1) from the brake pressure modulator valve (BPMV). Installation Procedure 1. Clean the sealing surfaces of the BPMV and the EBCM. 2. Install the EBCM (1) to the BPMV. Caution: Refer to Fastener Caution in the Preface section. Page 2 of 3 Document ID: 2170980 10/1/2010 http://localhost:9001/si/showDoc.do?docSyskey=2170980&pubCellSyskey=183713&pub...
3. Install the EBCM screws (1) and tighten in a cross pattern to 5 N·m (44 lb in). 4. Connect the EBCM electrical connector. 5. Position the washer solvent container and install the fasteners. Refer to Windshield Washer Solvent Container Replacement . 6. Install the right front wheelhouse liner. Refer to Front Wheelhouse Liner Replacement . 7. Lower the vehicle. 8. If installing a new EBCM, program the EBCM. Refer to Control Module References . 9. Perform the Diagnostic System Check - Vehicle . Page 3 of 3 Document ID: 2170980 10/1/2010 http://localhost:9001/si/showDoc.do?docSyskey=2170980&pubCellSyskey=183713&pub...
If you are in need of a repair manual for your 2009 Cadillac CTS, look no further. This comprehensive manual is designed to assist both professional mechanics and DIY enthusiasts in performing a wide range of repairs and maintenance tasks.
In the past, obtaining service information required purchasing traditional paper manuals at a higher cost. However, this digital format offers a more affordable and convenient alternative, allowing easy access to essential details for fixing brakes, engines, suspension, steering, drivetrain, electrical systems, heating, air conditioning, and more.
Whether you are addressing brake issues, replacing suspension components, or conducting standard maintenance, this repair manual provides all the necessary guidance. By utilizing this manual, you can save a significant amount of money on repair costs, as it covers a multitude of repair and maintenance procedures for your Cadillac CTS.
This manual is available in a convenient digital format, compatible with Windows, Mac computers, smartphones, and tablets, making it easily accessible for all your repair needs.