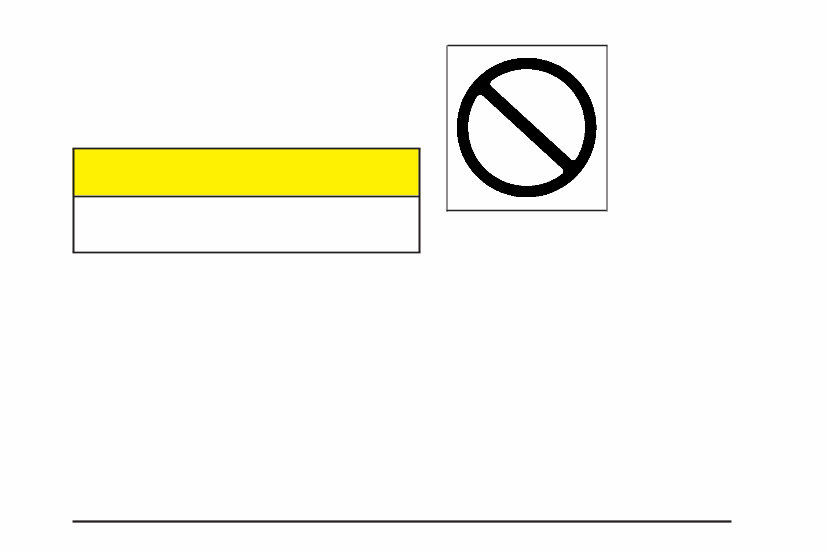
Safety Warnings and Symbols You will find a number of safety cautions in this book. We use a box and the word CAUTION to tell you about things that could hurt you if you were to ignore the warning. {CAUTION: These mean there is something that could hurt you or other people. In the caution area, we tell you what the hazard is. Then we tell you what to do to help avoid or reduce the hazard. Please read these cautions. If you don’t, you or others could be hurt. You will also find a circle with a slash through it in this book. This safety symbol means “Don’t,” “Don’t do this” or “Don’t let this happen.” iii
Vehicle Damage Warnings Also, in this book you will find these notices: Notice: These mean there is something that could damage your vehicle. A notice will tell you about something that can damage your vehicle. Many times, this damage would not be covered by your warranty, and it could be costly. But the notice will tell you what to do to help avoid the damage. When you read other manuals, you might see CAUTION and NOTICE warnings in different colors or in different words. You’ll also see warning labels on your vehicle. They use the same words, CAUTION or NOTICE. Vehicle Symbols Your vehicle has components and labels that use symbols instead of text. Symbols, used on your vehicle, are shown along with the text describing the operation or information relating to a specific component, control, message, gage or indicator. If you need help figuring out a specific name of a component, gage or indicator, reference the following topics: • Seats and Restraint Systems in Section 1 • Features and Controls in Section 2 • Instrument Panel Overview in Section 3 • Climate Controls in Section 3 • Warning Lights, Gages and Indicators in Section 3 • Audio System(s) in Section 3 • Engine Compartment Overview in Section 5 iv
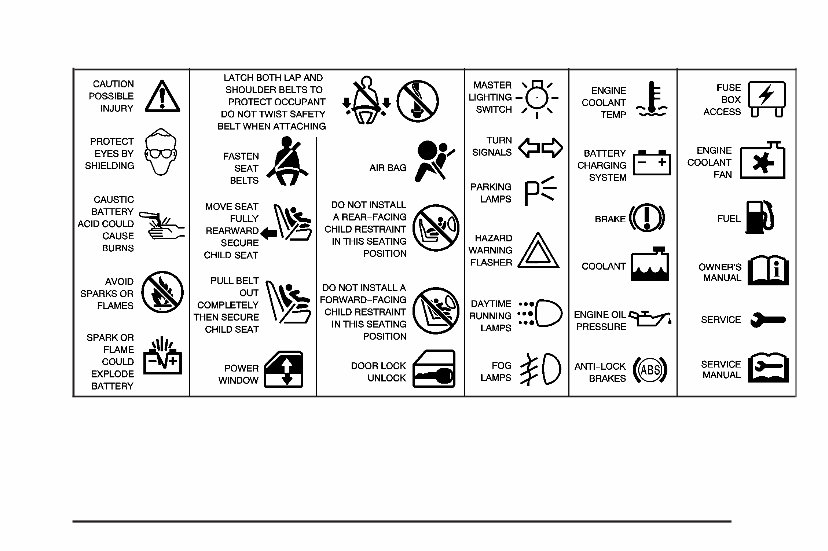
These are some examples of symbols you may find on your vehicle: v
✍ NOTES vi
Front Seats ......................................................1-2 Power Seats ..................................................1-2 Power Lumbar ...............................................1-2 Heated Seats .................................................1-3 Power Reclining Seatbacks ..............................1-4 Head Restraints .............................................1-5 Rear Seats .......................................................1-5 Rear Seat Operation .......................................1-5 Safety Belts .....................................................1-7 Safety Belts: They Are for Everyone .................1-7 Questions and Answers About Safety Belts ......1-12 How to Wear Safety Belts Properly .................1-13 Driver Position ..............................................1-13 Safety Belt Use During Pregnancy ..................1-19 Right Front Passenger Position .......................1-20 Rear Seat Passengers ..................................1-20 Rear Safety Belt Comfort Guides for Children and Small Adults ......................1-23 Safety Belt Extender .....................................1-25 Child Restraints .............................................1-26 Older Children ..............................................1-26 Infants and Young Children ............................1-28 Child Restraint Systems .................................1-32 Where to Put the Restraint .............................1-35 Top Strap ....................................................1-36 Top Strap Anchor Location .............................1-37 Lower Anchorages and Top Tethers for Children (LATCH System) ...........................1-38 Securing a Child Restraint Designed for the LATCH System ....................................1-40 Securing a Child Restraint in a Rear Outside Seat Position ................................1-40 Securing a Child Restraint in the Center Seat Position ............................................1-42 Securing a Child Restraint in the Right Front Seat Position ....................................1-43 Air Bag Systems ............................................1-45 Where Are the Air Bags? ...............................1-49 When Should an Air Bag Inflate? ....................1-51 What Makes an Air Bag Inflate? .....................1-52 How Does an Air Bag Restrain? .....................1-52 What Will You See After an Air Bag Inflates? ...................................................1-53 Servicing Your Air Bag-Equipped Vehicle .........1-55 Restraint System Check ..................................1-55 Checking Your Restraint Systems ...................1-55 Replacing Restraint System Parts After a Crash ............................................1-56 Section 1 Seats and Restraint Systems 1-1
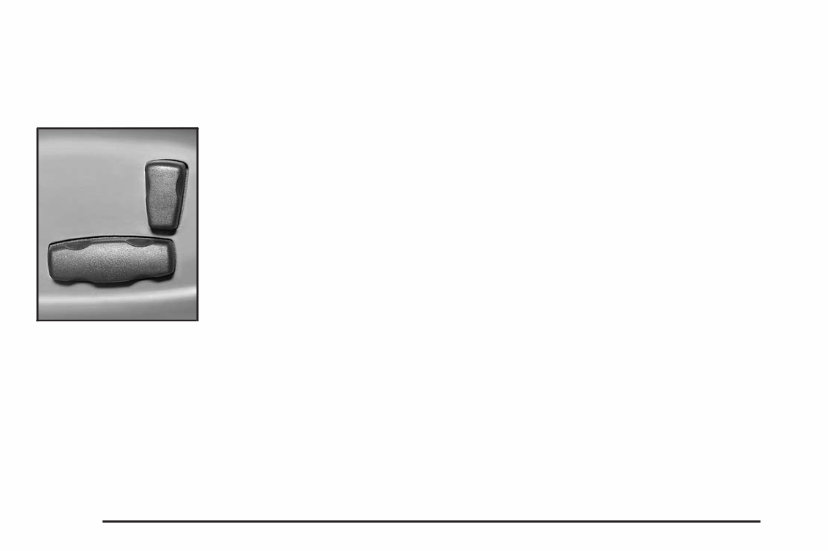
Front Seats Power Seats The power seat controls are located on the outboard side of the front seat cushions. The horizontal control adjusts the seat cushion and the vertical control adjusts the seatback. • Move the front of the horizontal seat control up or down to adjust the front portion of the cushion. • Move the rear of the seat control up or down to adjust the rear portion of the cushion. • Lift up or push down on the center of the seat control to move the entire seat up or down. • To move the seat forward or rearward, slide the seat control forward or rearward. • To recline the seatback, press the vertical control rearward. To raise the seatback, press the vertical control forward. Power Lumbar The seatback lumbar support can be adjusted by moving a control located on the outboard side of the seat cushions. To increase or decrease support, hold the control forward or rearward. Keep in mind that as your seating position changes, as it may during long trips, so should the position of your lumbar support. Adjust the seat as needed. 1-2
Heated Seats Your vehicle may have heated front seats. The buttons used to control this feature are located on the front door armrests. The engine must be running for the heated seat feature to work. To heat the entire seat, press the horizontal button with the heated seat symbol. Press the button repeatedly to cycle through the temperature settings of high, medium, low and off. The indicator lights will glow to designate the level of heat selected: three for high, two for medium and one for low. The low setting warms the seatback and cushion until the seat temperature is near body temperature. The medium and high settings heat the seatback and seat cushion to a slightly higher temperature. You will be able to feel heat in about two minutes. To heat only the seatback, press the button with the words BACK ONLY. An indicator light on the switch will glow to designate that only the seatback is being heated. Additional presses will cycle through the heat levels for the seatback only. Press the horizontal button again to heat the whole seat. The feature will shut off automatically when the ignition is turned off. 1-3
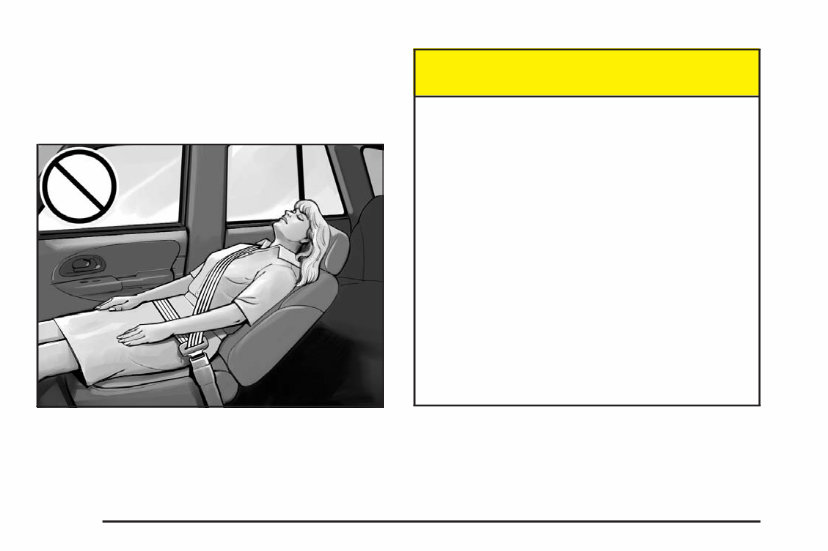
Power Reclining Seatbacks Your vehicle may have this feature. The vertical power seat control described earlier allows the seatback to recline. See Power Seats on page 1-2 for more information. But don’t have a seatback reclined if your vehicle is moving. {CAUTION: Sitting in a reclined position when your vehicle is in motion can be dangerous. Even if you buckle up, your safety belts can’t do their job when you’re reclined like this. The shoulder belt can’t do its job. In a crash, you could go into it, receiving neck or other injuries. The lap belt can’t do its job either. In a crash the belt could go up over your abdomen. The belt forces would be there, not at your pelvic bones. This could cause serious internal injuries. For proper protection when the vehicle is in motion, have the seatback upright. Then sit well back in the seat and wear your safety belt properly. 1-4
If you are in need of a repair manual for your 2005 Buick Rainier, look no further. Our accessible repair manual software provides comprehensive coverage for the Buick Rainier, making it perfect for both professional mechanics and DIY enthusiasts.
Gone are the days of purchasing traditional service manuals in book format at a higher cost. Our repair manual software offers the same valuable information in a more affordable and convenient digital format.
Whether you require guidance for brake repairs, suspension component replacements, engine troubleshooting, or standard maintenance procedures, this repair manual software for the Buick Rainier has you covered.
With this software, you will have access to a wealth of service information, including but not limited to brakes, engine, suspension, steering, drivetrain, electrical systems, heating, and air conditioning. It equips you with the knowledge to address any automotive issue.
By utilizing this 2005 Buick Rainier repair manual software, you can save a substantial amount of money on vehicle maintenance. Avoid the high costs charged by mechanics and take matters into your own hands with the help of this user-friendly manual.
Our software is compatible with Windows, Mac computers, smartphones, and tablets, ensuring ease of access and usability across various devices.
Recently Viewed
5,521,897Happy Clients
2,594,462eManuals
1,120,453Trusted Sellers
15Years in Business
Price:
Actual Price:
2005 Buick Rainier Service & Repair Manual Software