BRAKE CYLINDER REBUILDING for the Isetta or BMW 600 Bill Rogers www.isettadoc.com Anyone who has ever purchased an Isetta or BMW 600 has at one time or another faced the fact that years of sitting round take their toll on the brake cylinders. All of my cars at one time or another developed leaks at the wheel cylinders. In the late 60’s and early 70’s when I first started driving and working on these cars you could hone them and hopefully stop the leak. Eventually, this no longer worked as the rust pits got deeper and the cylinders had to be replaced. Back then replacing the wheel cylinders or even the master cylinder was not that big of a deal. Cylinders were still available and at a relatively low price. Today, wheel cylinders will cost nearly $120.00 each with the master cylinder going for around $220.00. Fortunately, in recent years some shops have started providing a service of relining your cylinders with either stainless steel or, more commonly, brass. While master cylinders do take some special tooling to make sure the boring of the cylinder is true, wheel cylinders can be done in your shop with a simple drill press. This procedure will show you how. First a word of caution! Remember you are working on your brake system and mistakes can have disastrous results. If you are not sure or comfortable about this procedure, either purchase new cylinders or send your cylinders to a shop that does this everyday. Also, after installing any brake part on your car, new or rebuilt, you should check the system frequently to see if any leaks have developed. The user of this paper is cautioned that they are ultimately responsible for their own safety while performing any repair or rebuilding procedure. Always follow safety procedures and instructions provided with tools and solvents. Refer to the manufacture’s MSDS sheets for information concerning proper treatment for exposures and other hazards. Things you will need: 1. Drill press 2. Drill press vice 3. Drills • 17/32” drill for rear cylinders • ¾” drill for front cylinders • Number 28 drill for hydraulic fitting • Number 40 drill for bleeder screw fitting 4. Brass tubing from McMaster Carr • Rear cylinders use 8859K34 - 17/32” OD sold in (3) 1’ lengths • Front cylinders use 8950K711 - ¾” OD sold in 6’ lengths 5. Kroil oil (and lots of patience) 6. Acetylene torch 7. Propane or Map torch 8. Loctite 609 9. Loctite cleaner spray 10. Hydraulic press or large vice If the cylinder has either frozen pistons or a broken bleeder screw this must be taken care of first. Most people have the greatest trouble resolving these issues. I am a firm believer in Kroil oil. This stuff works, but you must allow it time to soak into the parts. Hold you cylinder with the hydraulic supply hole up and fill the cylinder with Kroil oil. Let it soak overnight. The next day, refill the cylinder with fresh Kroil oil and take a propane or map torch and heat the outside of the cylinder. Don’t apply too much heat; just enough to expand the joints between the pistons and cylinder. WARNING - The Kroil oil may Brake Cyl rebuild revised 4-18-07.doc Page 1 of 4
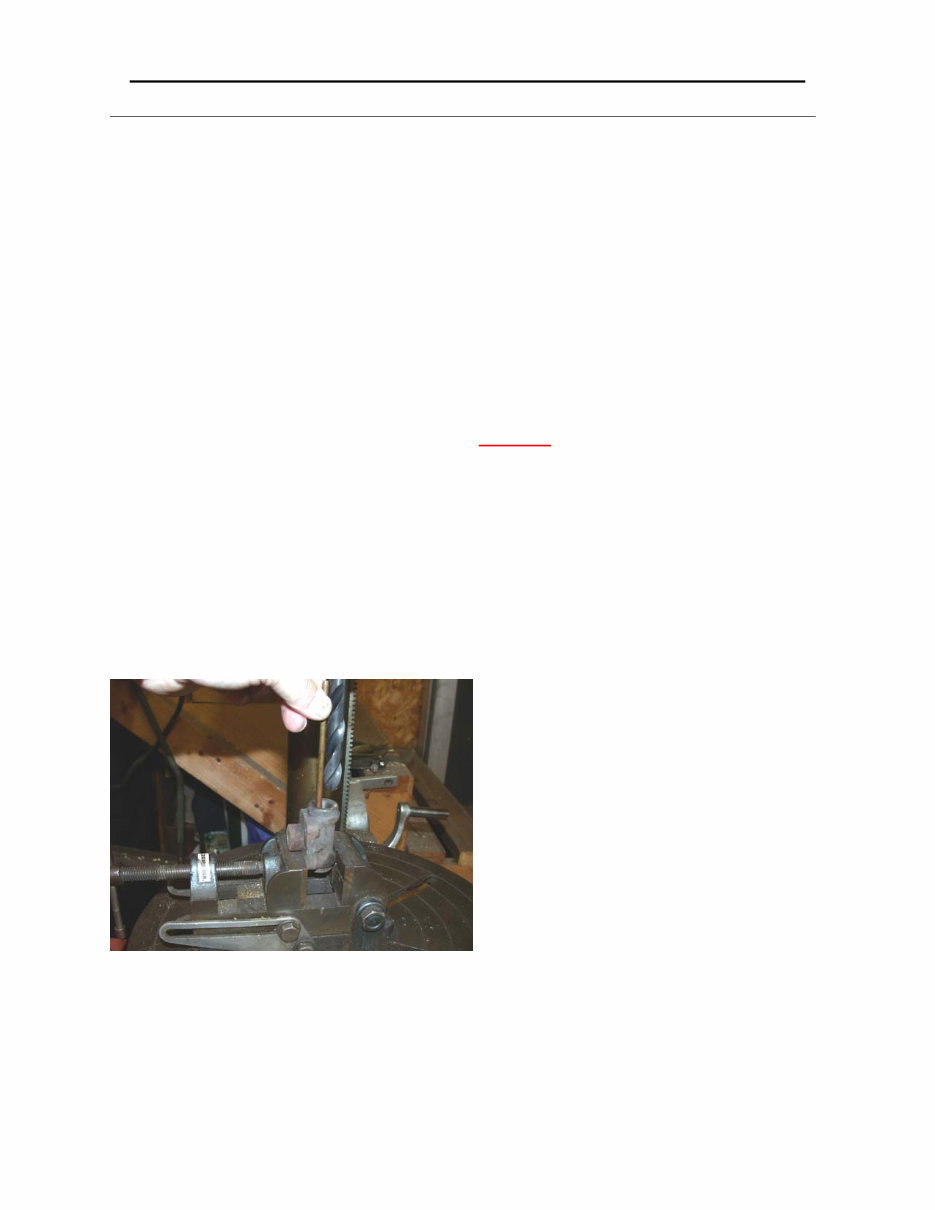
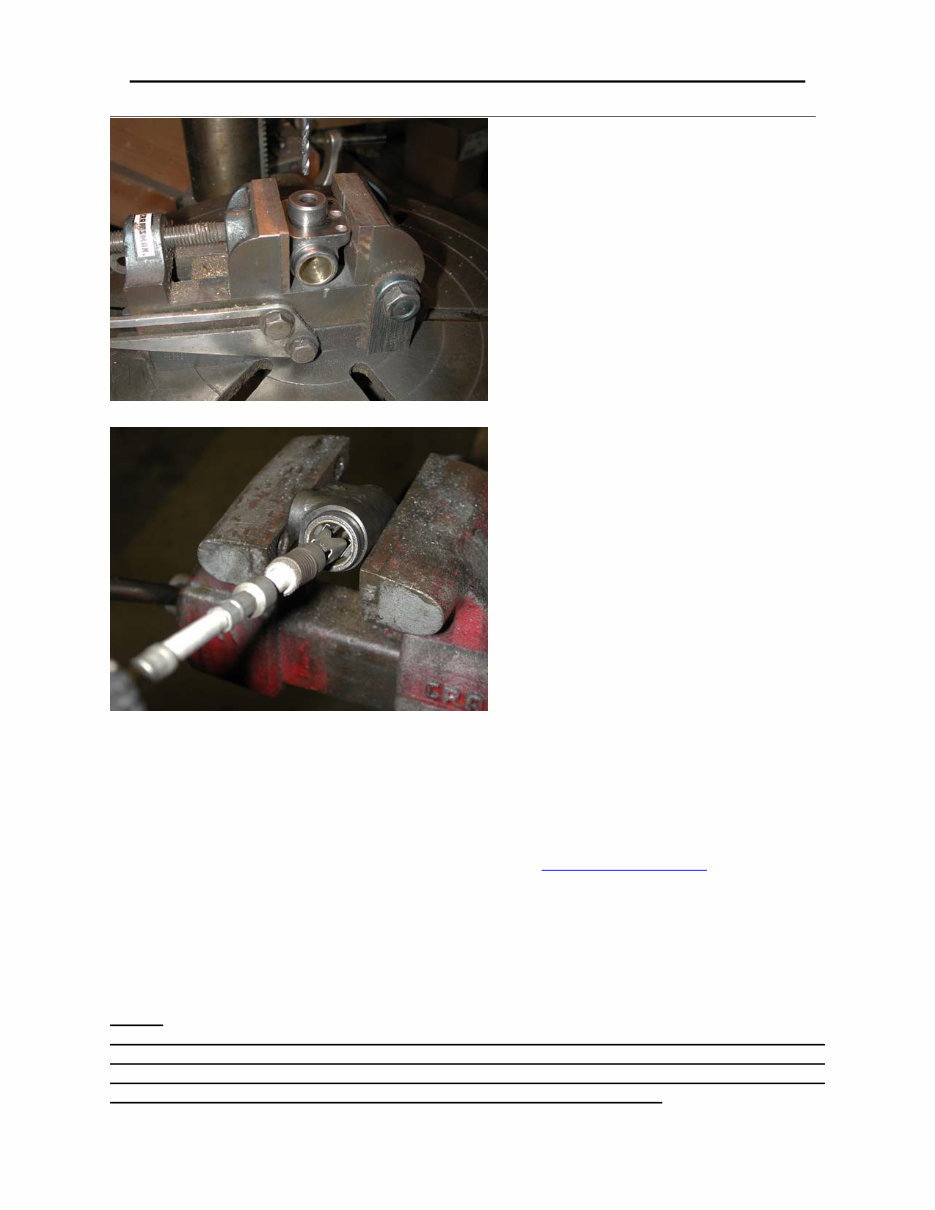
BRAKE CYLINDER REBUILDING for the Isetta or BMW 600 Bill Rogers www.isettadoc.com catch on fire, so have the unit outside on a metal table. Now let the whole thing sit until it cools and add more Kroil oil. Allow it to sit another day. Now apply some heat with the propane torch again. Again, don’t try and get them too hot, just hot enough that you can get expansion of the parts. At this point I normally take a soft brass hammer and gently tap the pistons and try and drive them through the cylinder (that’s a lot easier than trying to pull them out with pliers). A little twisting motion on the tips of the pistons just prior to this also helps. Be careful, if the pistons will not twist, don’t force them. Try tapping the 2 pistons back and forth, always applying more Kroil oil. If after tapping and attempted twisting the pistons will still not budge, you can use a hydraulic press (or large vice) to remove the pistons. I set the cylinders up in the drill press vice so that the cylinder is firmly supported and the lower piston is able to come through the bottom. Using a 10mm deep socket over the tip of the top piston, press both pistons through the cylinder. With this method I have always been successful in getting the pistons out without damage. Now that the pistons are out, you can get tough on the broken bleeder screw. For this you will need an aceleyene torch. Neither Propane nor Map will do! Heat the body of the cylinder around the screw to a dull red. While keeping the body hot, heat the screw cherry red ! Set the torch aside and using an easy- out remove the screw. If it doesn’t come, soak another day with Kroil oil. Then repeat the process. It should come out with little difficulty. Ok, I’m making an assumption here that you were successful. If you were not – then just call me an idiot, throw away this paper and go purchase some new cylinders! (or send yours to someone else and let them cuss over them) First make sure that the bed of your drill press is square with the drill. This can be done with any square. It is very important that you have everything square. If you fail in the setup, you will ruin your cylinders. After the bed has been trued, place either the front or rear cylinder in the drill press vice so that it can be made true with the drill. Use some type of straight edge and make sure the cylinder is true with the drill. Check the squareness in both the “X” and “Y” axis. After you are certain all is true bolt the vice down to the drill press (if possible). This last part is not completely necessary, but it does afford you some safety in the event the drill catches in the cylinder. Carefully drill out the cylinder with a 17/32" drill bit (or ¾” for front). Drill slowly and don't get in a hurry. Brake Cyl rebuild revised 4-18-07.doc Page 2 of 4
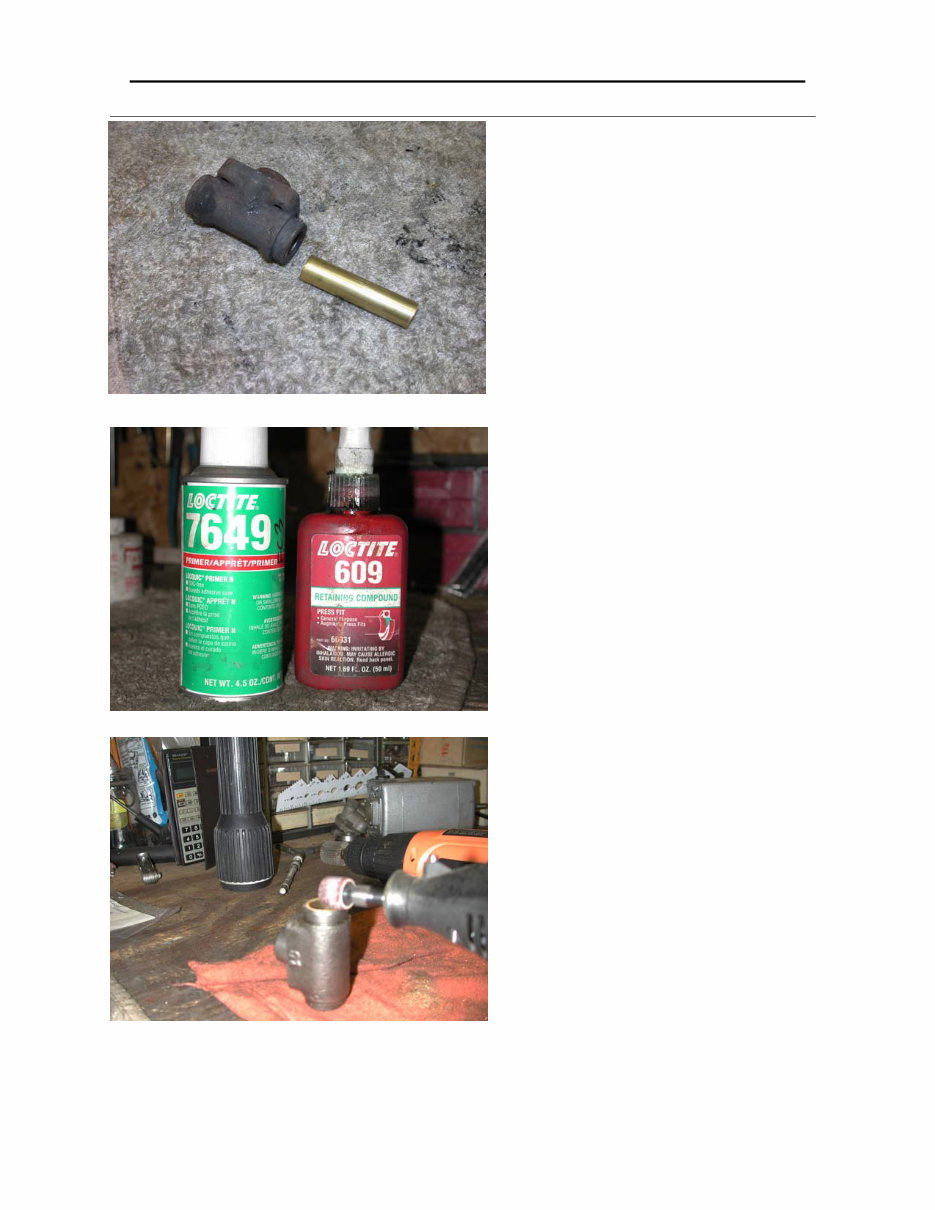
BRAKE CYLINDER REBUILDING for the Isetta or BMW 600 Bill Rogers www.isettadoc.com Brake Cyl rebuild revised 4-18-07.doc Page 3 of 4 Once the cylinder has been drilled, cut a length of brass tubing slightly longer than the length of the cylinder. I used a dermal tool for this to prevent any deformation of the tubing. Using Loctite cleaner–primer, prime both the inside of the cylinder and the exterior of the brass tube. Allow the primer to dry as instructed on the container. Liberally coat the inside of the cylinder and the exterior of the tubing with Loctite 609 compound. The entire inside of the cylinder should be coated. Once both pieces are coated, slide the sleeve into the cylinder with a quick rotary motion. Allow to set overnight. After the cylinders have set for at least 24 hours, dress off any excess brass with a dermal tool.
BRAKE CYLINDER REBUILDING for the Isetta or BMW 600 Bill Rogers www.isettadoc.com Brake Cyl rebuild revised 4-18-07.doc Page 4 of 4 Using a number 28 drill, drill the hole for the hydraulic supply fitting. Using a number 38 drill, drill the hole for the bleeder screw. On the larger front cylinders, use a cylinder hone to clean up any burrs on the cylinder wall from the drills. Also make certain you clean the edges where use used the dermal tool to dress down the ends of the brass tubing. On the smaller rear cylinders, roll up some 200 grit emery cloth and smooth out any burrs. Clean up the pistons and install new rubbers. Either install your old bleeder screw or a new one. The last step is the most critical. You need to test your cylinder. If you do not have a test stand, then install the cylinder on the car and after proper bleeding, pump the brakes very hard. Check for leaks. It is also recommended that after a week or so, you revisit that cylinder and recheck for any signs of leaks. Keep a close eye on the hydraulic level in the master cylinder. Any signs of leakage should be checked out. If you are not ready to tackle this job yourself, contact me at roge1033@bellsouth.net and I will reline your cylinders for $50.00. This assumes the cylinders are rebuildable. Stuck pistons that are not damaged, or broken off bleeder screws are not an issue unless you have damaged the bleeder screw threads trying to remove them. Cylinders will be returned with ready for new rubbers and pistons. I have recently developed the process for relining master brake cylinders. This service is available with completely new internals for $140. NOTE: I HAVE REVISED MY PROCESS CONSIDERABLEY SINCE THIS WAS ORIGINALLY WRITTEN IN 2004. I NOW USE SOME SPECILIZED TOOLS TO PROVIDE A TRUER BORE IN THE CYLINDERS. I ALSO POWDER COAT ALL CYLINDERS PRIOR TO SHIPPMENT AND ALL CYLINDERS ARE SHIPPED WITH NEW BLEEDER VALVES.
Thank you for considering this comprehensive Workshop Service Repair Manual for the BMW Isetta from 1957 to 1961.
This manual is an invaluable resource for both professional mechanics and DIY enthusiasts, covering every service and repair procedure necessary.
With easy-to-follow step-by-step instructions and detailed illustrations, this manual enables you to save money by performing repairs yourself. You have the flexibility to print specific pages, chapters, or the entire manual, and it can also be saved to your tablet or smartphone for easy access.
All models, engines, trim, and transmission types are included in this manual, providing coverage for a wide range of variations.
From basic maintenance to complex repairs, this high-quality manual encompasses all repair procedures from A to Z, ensuring that every aspect of servicing and repairs is thoroughly explained.
Compatible with all PC and MAC computers, tablets, and mobile phones, this manual requires only Adobe Reader, which is commonly pre-installed. If not available, it can be easily downloaded for free.
Upon payment confirmation through Visa, MasterCard, or PayPal, the manual will be instantly emailed to the address provided during checkout, ensuring prompt access.
Customer satisfaction is guaranteed, providing assurance of the manual's quality and usefulness.


 Lifetime Access




