Maintenance Maintenance Procedures - A8 & S8 01 - MAINTENANCE ENGINE OVERVIEW Gasoline engines * 95 RON Super unleaded gasoline is permissible, however with decreased power output. *91 RON standard unleaded gasoline is permissible, however with decreased power output. NOTE: Some engines listed below are for European models and are not applicable to the North American market. Engine code BFL BVJ BFM ASN BPK BBJ BSM BHT Emissions category EU IV EU IV EU IV EU IV EU IV EU IV EU IV EU IV No. of cylinders 8 8 8 6 6 6 10 12 Valves per cylinder 5 4 5 5 4 5 4 4 Displacement L 3.7 4,2 4,2 3,0 3,2 3.0 5.2 6.0 Output kW at RPM 206 / 6000 257/6800 246 / 6500 162 / 6300 191 / 6000 162/6300 331/7000 331/6200 Torque Nm at RPM 360 / 3750 440/3500 400 / 3500 300 / 3200 330 / 3400 300/3200 540/3000- 4000 595/3500 Bore mm 84.5 84.5 84.5 82.5 84.5 82.5 84.5 84.0 Stroke mm 82.4 92.8 93.0 93.0 92.8 93.0 92.8 90.2 Compression ratio 11.0 12.5 11.0 10.5 12.5 10.5 12.5 10.75 Engine code BFL BVJ BFM ASN BPK BBJ BSM BHT Fuel injection/Ignition Motronic ME 7.1.1 Motronic MED 9.1.1 FSI Motronic ME 7.1.1 Motronic ME 7.1.1 Motronic FSI Motronic ME 7.1.1 Motronic MED 9.1.1 FSI Motronic ME 7.1.1 RON min. 98 * See footnote 98 * See footnote 98 * See footnote 98 * See footnote 95 * See footnote 98 * See footnote 98 * See footnote 98 * See footnote Camshaft adjustment X X X X X X X X On Board Diagnostic X X X X X X X X Secondary air injection X X X X - X X X Turbocharger - - - - - - - - 2006 Audi A8 Quattro Maintenance Maintenance Procedures - A8 & S8 2006 Audi A8 Quattro Maintenance Maintenance Procedures - A8 & S8 FIXYOURCAR 2:15:08 AM Page 1 FIXYOURCAR 2:15:14 AM Page 1
Diesel engines DELIVERY INSPECTION Delivery inspection For additional information regarding inspection service, refer to ServiceNet, Maintenance Schedules for appropriate model year or Perfect Delivery Inspection (PDI) forms located in ServiceNet. OIL CHANGE SERVICE Oil change service For information regarding oil change service, refer to ServiceNet; Maintenance Schedules for appropriate model year. Also for oil type and usage, refer to ServiceNet; Additional information; Fluid Capacity Charts for appropriate Model and Year INSPECTION SERVICE Inspection service Engine code ASB BNG ASE BVN Emissions category EU IV EU IV EU - III EU IV Number of cylinders/valves per cylinder 6/4 6/4 8 / 4 8 / 4 Displacement L 3.0 3.0 4.0 4.2 Output kW at RPM 171/4000 155/3400 202/3750 240/ 3750 Torque Nm at RPM 450/ 15003250 450/ 15003250 650/1800-2500 650/1800-2500 Bore mm 83.0 83.0 81 83.0 Stroke mm 91.4 91.4 95.5 95.5 Compression ratio 17 17 19.5 16.4 Engine code ASB BNG ASE BVN Fuel injection Common - Rail Common - Rail Common - Rail Common - Rail CN min. 51 51 51 51 On Board Diagnostic X X X X Catalytic converter Oxidation catalyst Oxidation catalyst Oxidation catalyst Oxidation catalyst Exhaust gas recirculation X X X X Turbocharger X X X X Charge air cooler X X X X 2006 Audi A8 Quattro Maintenance Maintenance Procedures - A8 & S8 FIXYOURCAR 2:15:08 AM Page 2
For information regarding inspection service, refer to ServiceNet, Maintenance Schedules for appropriate model year CONTACT CORROSION Contact corrosion Contact corrosion can occur if improper fastening elements (bolts, nuts, washers, etc.) are used. For this reason, only fastening elements with a special surface coating are installed. These elements can be recognized by their green color. In addition, rubber, plastic parts and adhesive are made of non-conductive material. If there are doubts as to whether parts can be reused, install new parts. DESCRIPTION OF WORK All switches, all electrical components, all displays and other operating elements: Checking function Check following: Lighting, headlamps, fog lights, turn signals, hazard warning flashers, taillights, rear fog lights, backup lights, brake lights, parking lights Interior and reading lights (automatic shutoff on interior lights), illuminated storage compartment, illuminated ashtray, luggage compartment lighting, illuminated ignition Warning buzzer for lights and/or radio left on All switches in console MMI function (radio, navigation, etc.) Driver Information System (DIS) Instrument unit with all displays, meters and lights Two-tone horn Windshield/headlamp wipers, headlamp cleaning system Cigarette lighter Electrical exterior mirrors (heated, adjustable, foldable) Electric windows WARNING: Only using original Audi A8 parts! Accessories must be approved by Audi AG! Damage due to contact corrosion is not covered by warranty! 2006 Audi A8 Quattro Maintenance Maintenance Procedures - A8 & S8 FIXYOURCAR 2:15:08 AM Page 3
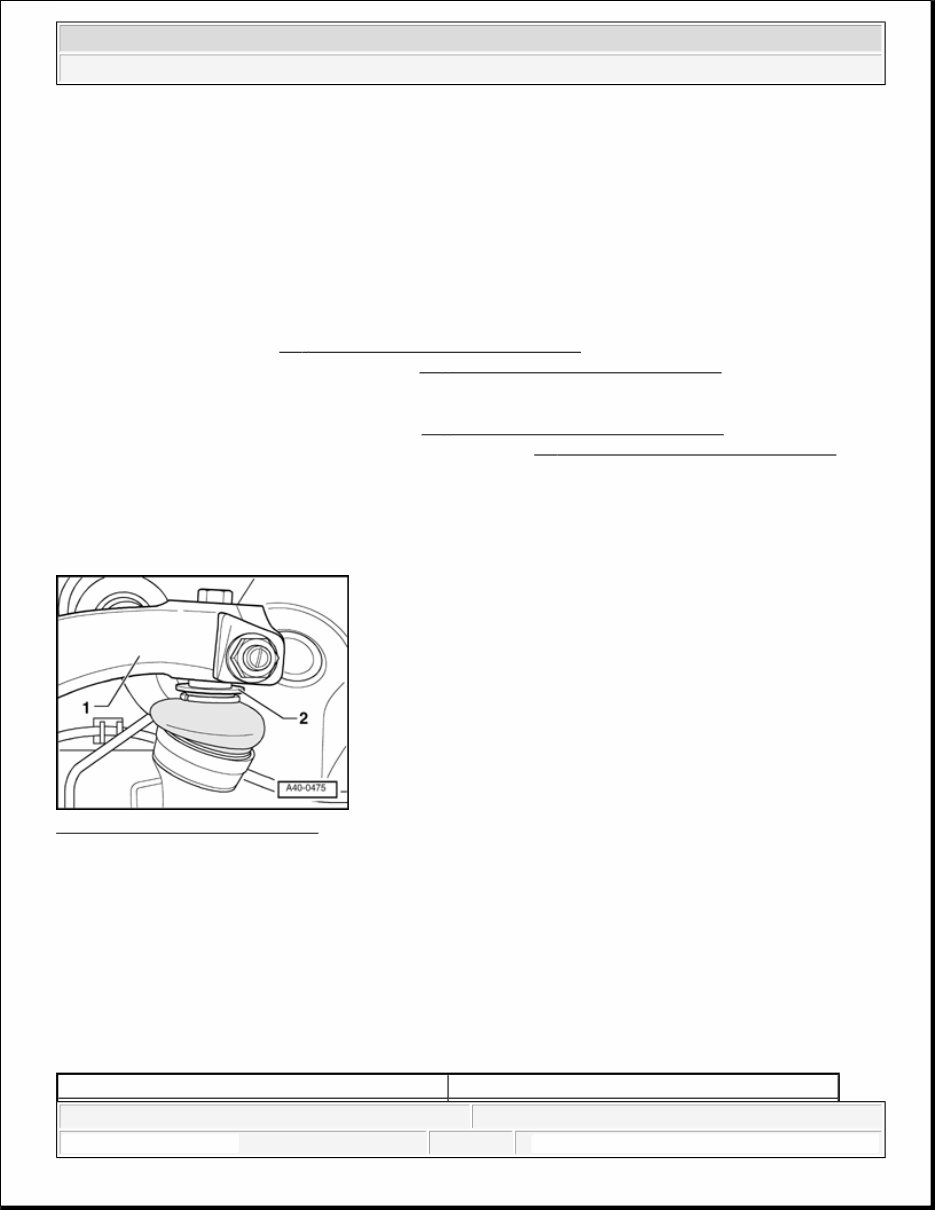
Electric tilt/slide sunroof Sun shade Central locking, remote control operation, comfort closing Electrical seat, headrest, steering wheel and seatbelt height adjustment Heated seats and rear seat bench, heated steering wheel Final drive (automatic transmission): Check oil level, add oil if necessary Automatic Transmission --> - 39 - FINAL DRIVE, DIFFERENTIAL , 6 SPD. AUTOMATIC TRANSMISSION 09E ALL WHEEL DRIVE or 39 - FINAL DRIVE, DIFFERENTIAL , 6 SPD. AUTOMATIC TRANSMISSION 09L ALL WHEEL DRIVE Continuously Variable Transmission (CVT) --> - 39 - FINAL DRIVE, DIFFERENTIAL , 6 SPD. AUTOMATIC TRANSMISSION 09E ALL WHEEL DRIVE or 39 - FINAL DRIVE, DIFFERENTIAL , 6 SPD. AUTOMATIC TRANSMISSION 09L ALL WHEEL DRIVE Wheel bolts: Tighten to correct torque setting Center cap Fig. 1: Identifying Removal Hook Courtesy of VOLKSWAGEN UNITED STATES, INC. The removal hook - A - for removing the center cap is located in the vehicles tool kit. Wheel bolts The adapter to loosen/tighten the anti-theft wheel bolts is located with the vehicle tool kit. NOTE: Be sure to tighten wheel bolts in diagonal sequence to the following specified torque: Tightening torque Nm 2006 Audi A8 Quattro Maintenance Maintenance Procedures - A8 & S8 FIXYOURCAR 2:15:08 AM Page 4
Place adapter with vehicle tool kit after completing work. Correct wheel installation When installing wheels, you must observe the following points to ensure wheels fit securely: Always tighten wheel bolts to the specified torque so the wheel bolt seats in rim are not deformed. When installing a wheel, do not tighten first wheel bolt immediately (for example, with an impact wrench). This would prevent other bolts from centering rim properly when they are screwed in. Rim could then become loose, even if tightened to specified torque. Before installing wheels, check for rust/corrosion in wheel bolt seats and contact surfaces between rims and hubs, removing if necessary. Otherwise, the wheel bolts can lose tension after installation and the rim can come loose. Battery manager: Deactivate transport mode Transport mode is for maintaining a vehicles startability (battery charge). Transport mode limits discharging of battery. If transport mode is activated, many functions are not available or have limited function, for example, CD changer is deactivated, radio is deactivated, etc. Deactivate transport mode using guided fault finding or guided functions. Follow these steps in sequential order. Fig. 2: Connecting Data Link Connector (DLC) Wheel bolts 120 WARNING: If the above points are not observed, wheels can come loose and the wheel bolt seats in rim can be deformed. The deformity could be so small that you can't see it. But even small deformities in the wheel bolt seats can prevent the wheel from fitting securely, so that it becomes looser and looser. 2006 Audi A8 Quattro Maintenance Maintenance Procedures - A8 & S8 FIXYOURCAR 2:15:08 AM Page 5
Courtesy of VOLKSWAGEN UNITED STATES, INC. Connect VAS 5051/5052 Guided Fault Finding or Guided Functions Go to - function/component selection Service work Energy manager, activate/deactivate transport mode Now follow guided program Battery: check electrolyte level Battery with magic eye Switch ignition off and remove ignition key. Fig. 3: Right Luggage Compartment Side Trim Courtesy of VOLKSWAGEN UNITED STATES, INC. Remove right luggage compartment side trim cover - arrows -. 2006 Audi A8 Quattro Maintenance Maintenance Procedures - A8 & S8 FIXYOURCAR 2:15:08 AM Page 6
Fig. 4: Removing Cover Above Battery Courtesy of VOLKSWAGEN UNITED STATES, INC. Remove cover - 1 - over battery. Fig. 5: Locating Magic Eye Courtesy of VOLKSWAGEN UNITED STATES, INC. NOTE: Ignore item - 2 -. 2006 Audi A8 Quattro Maintenance Maintenance Procedures - A8 & S8 FIXYOURCAR 2:15:08 AM Page 7
The magic eye - arrow - gives information about electrolyte level and battery charge. Three color displays are possible: Before performing visual check, carefully and lightly knock magic eye with handle of a screwdriver. This removes air bubbles. Read "magic eye" color display. Battery sealing plugs On batteries with visible min and max markings, electrolyte level only needs to be checked visually. Electrolyte level must be between min. and max. markings. On batteries where the outer min. and max. markings are difficult to see or the visibility of the electrolyte level cannot be guaranteed due to the opaque battery housing, the sealing plugs must be removed. Then it is possible to check electrolyte level by a visual inspection of the battery interior. The electrolyte level must meet the inner electrolyte level marking (plastic bar). This corresponds to the outer max. mark. Color display Battery level Green Battery is sufficiently charged Black No charge or charge too low Colorless or yellow Electrolyte has reached critical level, battery must be replaced! --> 27 - BATTERY, STARTER, GENERATOR, CRUISE CONTROL NOTE: If the battery was recharged, that is, if it was charged while driving, air bubbles can form under the magic eye. These cause an incorrect magic eye color display. If batteries are equipped with plugs for production reasons, these are covered with plastic film. NOTE: If electrolyte level is too low, battery loses capacity (loses performance) because the cell plates dry out. If the cell plates are not covered by electrolyte, the plates and plate bridges start to corrode causing the function of the battery to diminish. After a while the battery does no longer function. The battery becomes useless. WARNING: If the electrolyte level is below them in. marking, the battery must be replaced! --> 27 - BATTERY, STARTER, GENERATOR, CRUISE CONTROL 2006 Audi A8 Quattro Maintenance Maintenance Procedures - A8 & S8 FIXYOURCAR 2:15:08 AM Page 8
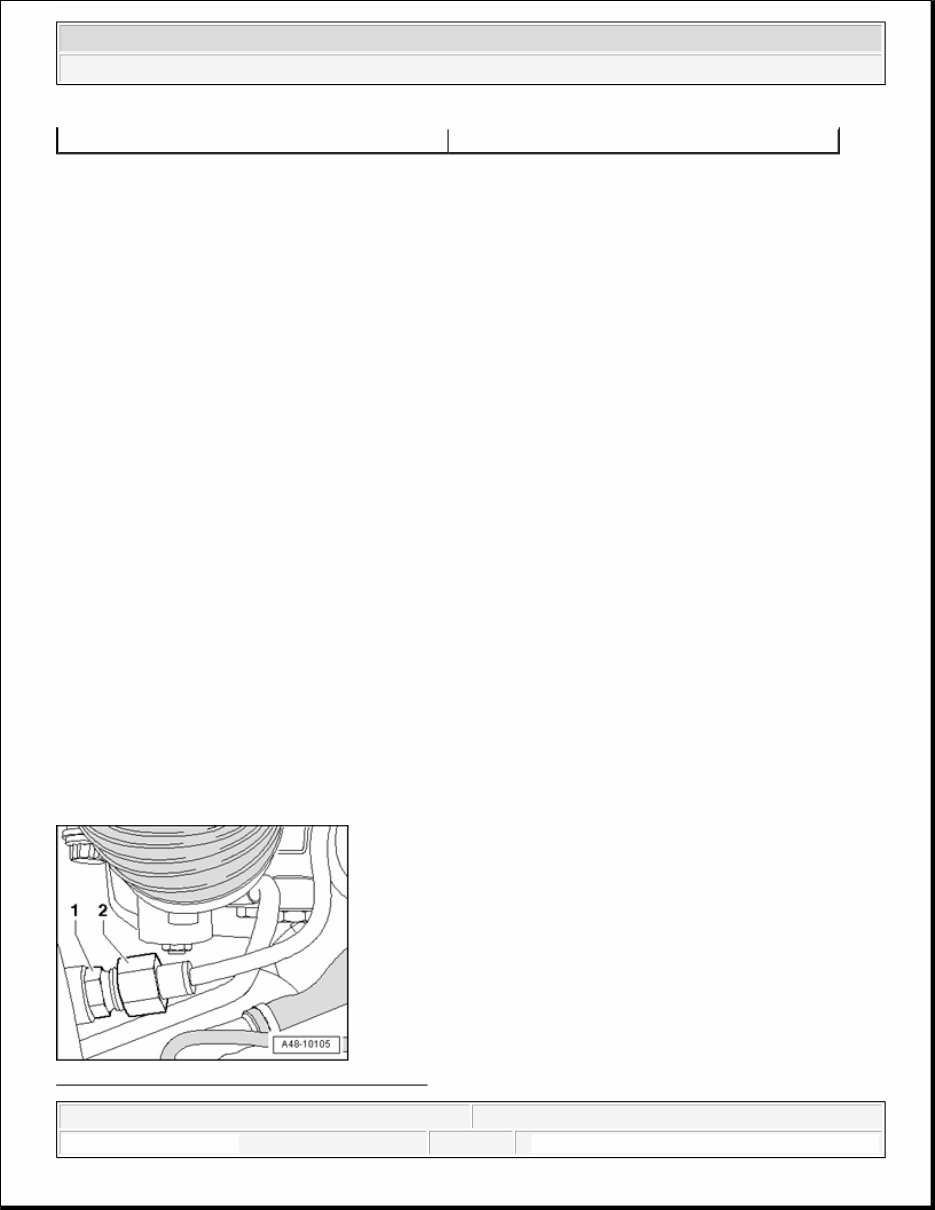
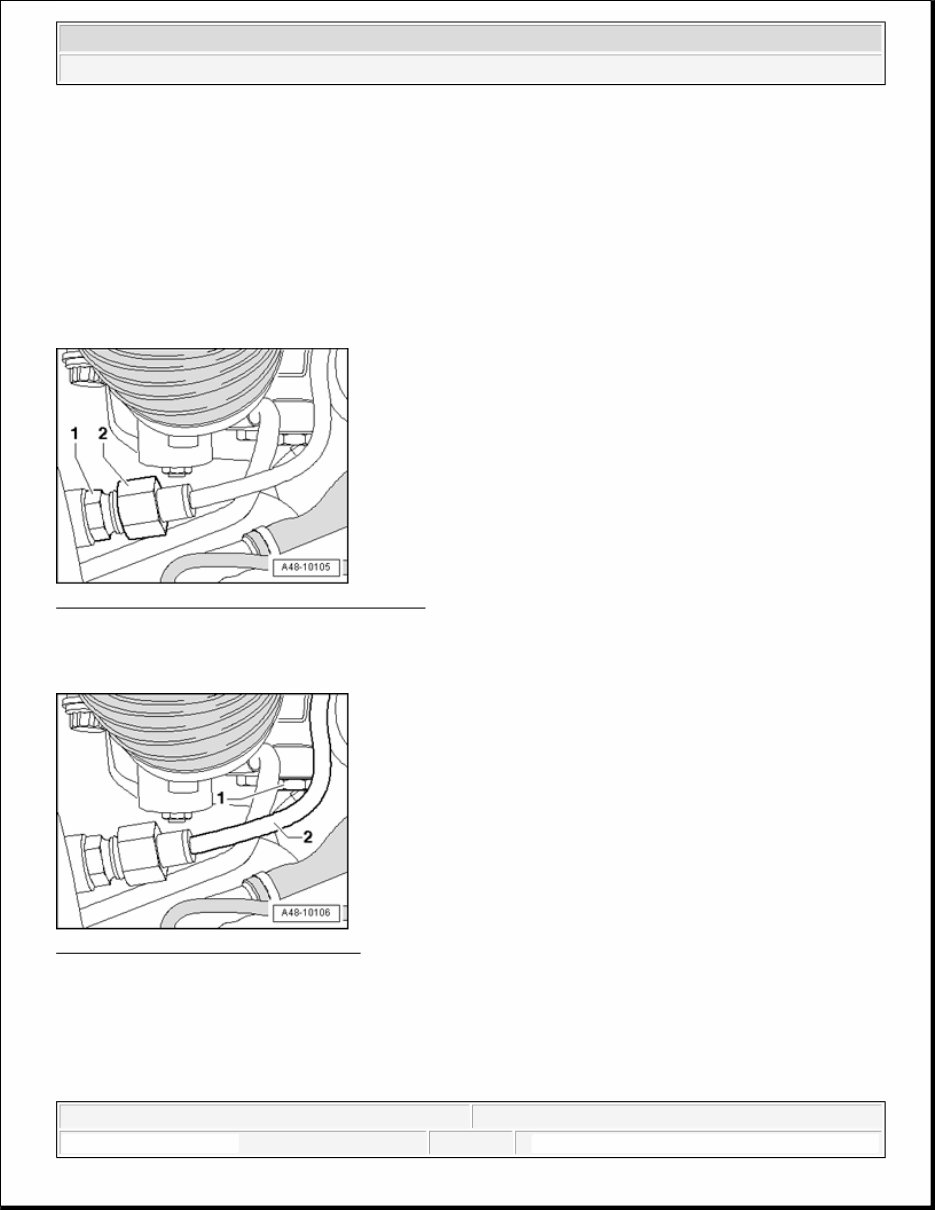
Battery, disconnecting and connecting Vehicle Diagnostic, Testing and Information System VAS 5051; Guided Fault Finding; Adaptation; Telephone/Telematics Switch ignition off and remove ignition key. Fig. 6: Right Luggage Compartment Side Trim Courtesy of VOLKSWAGEN UNITED STATES, INC. Remove right luggage compartment side trim cover - arrows -. Fig. 7: Removing Cover Above Battery Courtesy of VOLKSWAGEN UNITED STATES, INC. Remove covers - 1 - and - 2 - over battery. WARNING: Activate Telematics control module Service Mode before disconnecting battery. 2006 Audi A8 Quattro Maintenance Maintenance Procedures - A8 & S8 FIXYOURCAR 2:15:08 AM Page 9
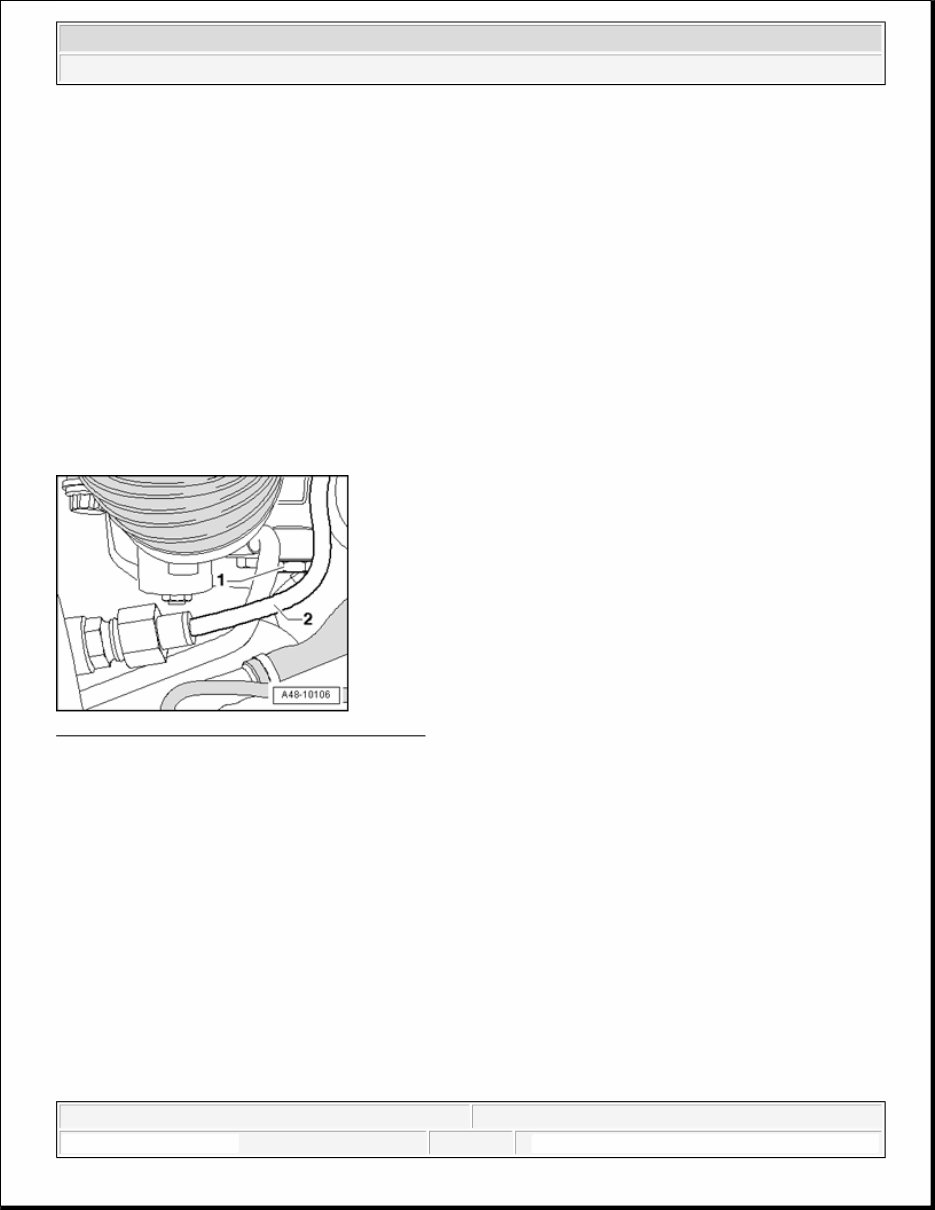
Fig. 8: Ground Wire And Positive Wire Courtesy of VOLKSWAGEN UNITED STATES, INC. Clamp ground wire - 2 - and positive wire - 4 - to battery. Connect battery First connect positive wire pole shoe - 4 - by hand to battery positive pole "+" and tighten nut. Connect ground wire pole shoe - 2 - by hand to battery negative pole "-" and tighten nut. If the battery is reconnected, the following measures must be performed: Deactivate Telematics control module service mode --> 91 - COMMUNICATION Activate electric window regulator 1-touch up/down feature Owners Manual. Turn ignition key in ignition lock left as far as stop one time 2006 Audi A8 Quattro Maintenance Maintenance Procedures - A8 & S8 FIXYOURCAR 2:15:08 AM Page 10
Get your hands on the 2006 Audi A8 Service and Repair Manual, your go-to resource for fixing vehicle issues. Whether you're a professional mechanic or a DIY enthusiast, these manuals provide comprehensive instructions and procedures to help you tackle car repairs with confidence.
With detailed technical data, diagrams, and a complete list of car parts, these manuals are designed to assist you in maintaining, servicing, diagnosing, and repairing your vehicle. The step-by-step guides, accompanied by illustrations and drawings, make it easy for even novice car mechanics to follow along.
These manuals cover a wide range of sections including maintenance, engine, control system, mechanical, fuel service specifications, emission control, and much more. They are available in both .PDF and .OVA file formats, compatible with Windows Vista32 and 64, XP, ME, 98, NT, 2000, and Mac operating systems.
By having a reliable repair manual at your disposal, you not only save money but also get to enjoy the satisfaction of completing do-it-yourself projects. Additionally, you can find a complete list of accessories to further enhance your engine's performance.
These factory repair manuals provide complete instructions, wiring schematics, and diagrams to facilitate the servicing and repair of your vehicle. They are printable, allowing you to easily access the information you need without flipping through multiple pages.
Compatible with all versions of Windows and Mac, these manuals are a valuable resource for anyone looking to gain in-depth knowledge about their vehicle and perform repairs with ease. Say goodbye to relying solely on your mechanic and embrace the rewarding experience of maintaining and repairing your car on your own terms.