Maintenance Maintenance Procedures - A8 & S8 01 - MAINTENANCE ENGINE OVERVIEW Gasoline engines * 95 RON Super unleaded gasoline is permissible, however with decreased power output. *91 RON standard unleaded gasoline is permissible, however with decreased power output. NOTE: Some engines listed below are for European models and are not applicable to the North American market. Engine code BFL BVJ BFM ASN BPK BBJ BSM BHT Emissions category EU IV EU IV EU IV EU IV EU IV EU IV EU IV EU IV No. of cylinders 8 8 8 6 6 6 10 12 Valves per cylinder 5 4 5 5 4 5 4 4 Displacement L 3.7 4,2 4,2 3,0 3,2 3.0 5.2 6.0 Output kW at RPM 206 / 6000 257/6800 246 / 6500 162 / 6300 191 / 6000 162/6300 331/7000 331/6200 Torque Nm at RPM 360 / 3750 440/3500 400 / 3500 300 / 3200 330 / 3400 300/3200 540/3000- 4000 595/3500 Bore mm 84.5 84.5 84.5 82.5 84.5 82.5 84.5 84.0 Stroke mm 82.4 92.8 93.0 93.0 92.8 93.0 92.8 90.2 Compression ratio 11.0 12.5 11.0 10.5 12.5 10.5 12.5 10.75 Engine code BFL BVJ BFM ASN BPK BBJ BSM BHT Fuel injection/Ignition Motronic ME 7.1.1 Motronic MED 9.1.1 FSI Motronic ME 7.1.1 Motronic ME 7.1.1 Motronic FSI Motronic ME 7.1.1 Motronic MED 9.1.1 FSI Motronic ME 7.1.1 RON min. 98 * See footnote 98 * See footnote 98 * See footnote 98 * See footnote 95 * See footnote 98 * See footnote 98 * See footnote 98 * See footnote Camshaft adjustment X X X X X X X X On Board Diagnostic X X X X X X X X Secondary air injection X X X X - X X X Turbocharger - - - - - - - - 2006 Audi A8 Quattro Maintenance Maintenance Procedures - A8 & S8 2006 Audi A8 Quattro Maintenance Maintenance Procedures - A8 & S8 FIXYOURCAR 2:15:08 AM Page 1 FIXYOURCAR 2:15:14 AM Page 1
Diesel engines DELIVERY INSPECTION Delivery inspection For additional information regarding inspection service, refer to ServiceNet, Maintenance Schedules for appropriate model year or Perfect Delivery Inspection (PDI) forms located in ServiceNet. OIL CHANGE SERVICE Oil change service For information regarding oil change service, refer to ServiceNet; Maintenance Schedules for appropriate model year. Also for oil type and usage, refer to ServiceNet; Additional information; Fluid Capacity Charts for appropriate Model and Year INSPECTION SERVICE Inspection service Engine code ASB BNG ASE BVN Emissions category EU IV EU IV EU - III EU IV Number of cylinders/valves per cylinder 6/4 6/4 8 / 4 8 / 4 Displacement L 3.0 3.0 4.0 4.2 Output kW at RPM 171/4000 155/3400 202/3750 240/ 3750 Torque Nm at RPM 450/ 15003250 450/ 15003250 650/1800-2500 650/1800-2500 Bore mm 83.0 83.0 81 83.0 Stroke mm 91.4 91.4 95.5 95.5 Compression ratio 17 17 19.5 16.4 Engine code ASB BNG ASE BVN Fuel injection Common - Rail Common - Rail Common - Rail Common - Rail CN min. 51 51 51 51 On Board Diagnostic X X X X Catalytic converter Oxidation catalyst Oxidation catalyst Oxidation catalyst Oxidation catalyst Exhaust gas recirculation X X X X Turbocharger X X X X Charge air cooler X X X X 2006 Audi A8 Quattro Maintenance Maintenance Procedures - A8 & S8 FIXYOURCAR 2:15:08 AM Page 2
For information regarding inspection service, refer to ServiceNet, Maintenance Schedules for appropriate model year CONTACT CORROSION Contact corrosion Contact corrosion can occur if improper fastening elements (bolts, nuts, washers, etc.) are used. For this reason, only fastening elements with a special surface coating are installed. These elements can be recognized by their green color. In addition, rubber, plastic parts and adhesive are made of non-conductive material. If there are doubts as to whether parts can be reused, install new parts. DESCRIPTION OF WORK All switches, all electrical components, all displays and other operating elements: Checking function Check following: Lighting, headlamps, fog lights, turn signals, hazard warning flashers, taillights, rear fog lights, backup lights, brake lights, parking lights Interior and reading lights (automatic shutoff on interior lights), illuminated storage compartment, illuminated ashtray, luggage compartment lighting, illuminated ignition Warning buzzer for lights and/or radio left on All switches in console MMI function (radio, navigation, etc.) Driver Information System (DIS) Instrument unit with all displays, meters and lights Two-tone horn Windshield/headlamp wipers, headlamp cleaning system Cigarette lighter Electrical exterior mirrors (heated, adjustable, foldable) Electric windows WARNING: Only using original Audi A8 parts! Accessories must be approved by Audi AG! Damage due to contact corrosion is not covered by warranty! 2006 Audi A8 Quattro Maintenance Maintenance Procedures - A8 & S8 FIXYOURCAR 2:15:08 AM Page 3
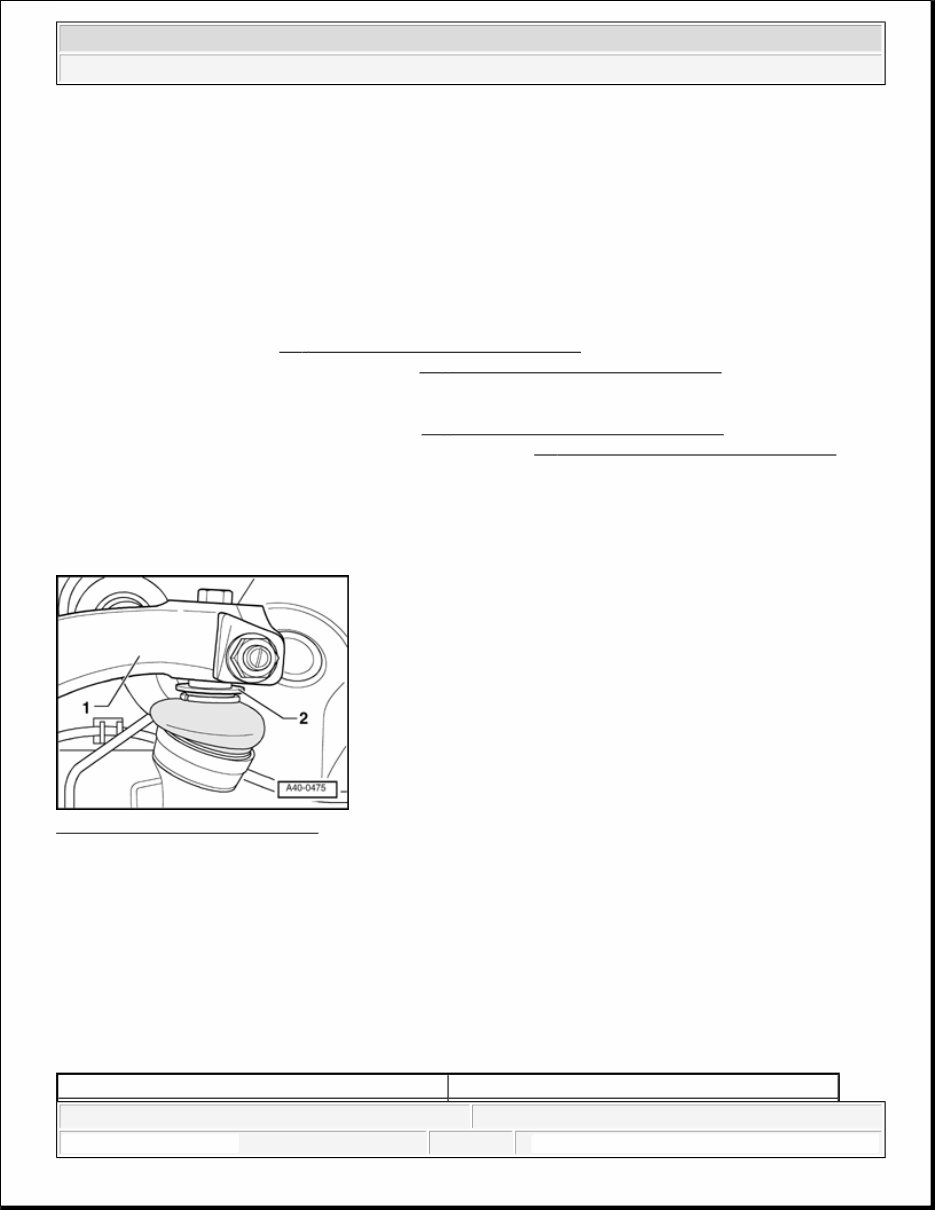
Electric tilt/slide sunroof Sun shade Central locking, remote control operation, comfort closing Electrical seat, headrest, steering wheel and seatbelt height adjustment Heated seats and rear seat bench, heated steering wheel Final drive (automatic transmission): Check oil level, add oil if necessary Automatic Transmission --> - 39 - FINAL DRIVE, DIFFERENTIAL , 6 SPD. AUTOMATIC TRANSMISSION 09E ALL WHEEL DRIVE or 39 - FINAL DRIVE, DIFFERENTIAL , 6 SPD. AUTOMATIC TRANSMISSION 09L ALL WHEEL DRIVE Continuously Variable Transmission (CVT) --> - 39 - FINAL DRIVE, DIFFERENTIAL , 6 SPD. AUTOMATIC TRANSMISSION 09E ALL WHEEL DRIVE or 39 - FINAL DRIVE, DIFFERENTIAL , 6 SPD. AUTOMATIC TRANSMISSION 09L ALL WHEEL DRIVE Wheel bolts: Tighten to correct torque setting Center cap Fig. 1: Identifying Removal Hook Courtesy of VOLKSWAGEN UNITED STATES, INC. The removal hook - A - for removing the center cap is located in the vehicles tool kit. Wheel bolts The adapter to loosen/tighten the anti-theft wheel bolts is located with the vehicle tool kit. NOTE: Be sure to tighten wheel bolts in diagonal sequence to the following specified torque: Tightening torque Nm 2006 Audi A8 Quattro Maintenance Maintenance Procedures - A8 & S8 FIXYOURCAR 2:15:08 AM Page 4
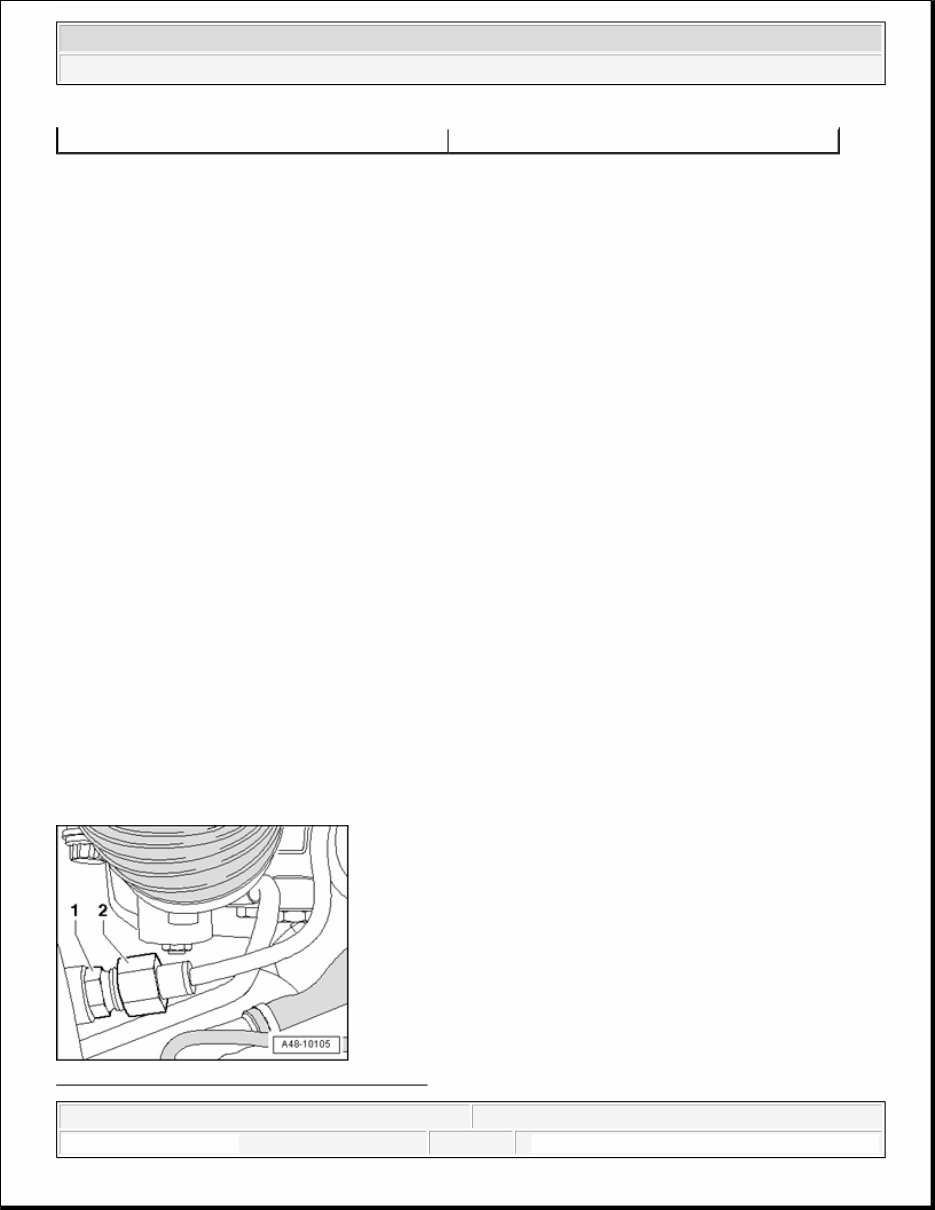
Place adapter with vehicle tool kit after completing work. Correct wheel installation When installing wheels, you must observe the following points to ensure wheels fit securely: Always tighten wheel bolts to the specified torque so the wheel bolt seats in rim are not deformed. When installing a wheel, do not tighten first wheel bolt immediately (for example, with an impact wrench). This would prevent other bolts from centering rim properly when they are screwed in. Rim could then become loose, even if tightened to specified torque. Before installing wheels, check for rust/corrosion in wheel bolt seats and contact surfaces between rims and hubs, removing if necessary. Otherwise, the wheel bolts can lose tension after installation and the rim can come loose. Battery manager: Deactivate transport mode Transport mode is for maintaining a vehicles startability (battery charge). Transport mode limits discharging of battery. If transport mode is activated, many functions are not available or have limited function, for example, CD changer is deactivated, radio is deactivated, etc. Deactivate transport mode using guided fault finding or guided functions. Follow these steps in sequential order. Fig. 2: Connecting Data Link Connector (DLC) Wheel bolts 120 WARNING: If the above points are not observed, wheels can come loose and the wheel bolt seats in rim can be deformed. The deformity could be so small that you can't see it. But even small deformities in the wheel bolt seats can prevent the wheel from fitting securely, so that it becomes looser and looser. 2006 Audi A8 Quattro Maintenance Maintenance Procedures - A8 & S8 FIXYOURCAR 2:15:08 AM Page 5
You're Reading a Preview
What's Included?
Lifetime Access
Fast Download Speeds
Offline Viewing
Access Contents & Bookmarks
Full Search Facility
Print one or all pages of your manual
$52.99
2004 Audi A8 (D3) Download Service & Repair Manual
This 2004 Audi A8 (D3) Service & Repair Manual is a comprehensive resource used by Audi technicians and is suitable for both professional mechanics and DIY enthusiasts. It covers your specific model and its variants, providing troubleshooting and replacement procedures, step-by-step instructions, clear images, and exploded-view illustrations.
Regular maintenance is essential for the durability of your vehicle. This manual equips you with the manufacturer's recommended troubleshooting charts and replacement procedures, enabling you to address issues and replace worn-out parts effectively.
Whether you're a professional mechanic or a weekend DIY’er, this repair manual is the one-stop solution for maintaining and repairing Audi vehicles. It includes everything you need to rebuild the engine, replace components, and utilize wiring diagrams, torque specs, and exploded-view illustrations.
With the manufacturer's troubleshooting charts, you can quickly identify the cause of any issue based on specific symptoms, making it user-friendly even for beginners. This manual empowers you to save on repairs and maintenance, making it a valuable investment.
Printable: Yes
Compatibility: Pretty much any electronic device, incl. PC & Mac computers, Android and Apple smartphones & tablet, etc.
Requirements: Adobe Reader (free)
Reviews
Q&A
Recently Viewed
5,521,897Happy Clients
2,594,462eManuals
1,120,453Trusted Sellers
15Years in Business
Price:
Actual Price:
2004 Audi A8 (D3) Download Service & Repair Manual

 Download Service & Repair Manual")