New Holland Ford 345D 445D 545D Operators Owners Maintenance Manual Tractor Loader
What's Included?
Lifetime Access
Fast Download Speeds
Online & Offline Access
Access PDF Contents & Bookmarks
Full Search Facility
Print one or all pages of your manual
NEW HOLLAND CONSTRUCTION 345D 445D 545D OPERATORS'S MANUAL
DEAR CUSTOMER– PLEASE READ CAREFULLY The warranty coverage that is extended to your Ford Tractor is explained in the Warranty and Limitation of Liability, ... Ford Tractor and Equipment form. Your dealer will provide you with a copy of the warranty and retain a copy which you have signed. After you read the warranty, ask your dealer to explain any points that you may not understand. Do not moddy or alter or permit anyone else to modify or alter this tiactor or any of its components or any tractor function without first consulting your Dealer. If you have any questions regarding tractor modifications contact Ford New Holland, Inc., at any one of the addresses shown overleaf. Your safety and the safety of those around you depends upon the care and good judgment you use while operating this equipment. Read the safety precautions carefully. For a complete list of the pre-de)ivery service checks performed by your dealer, refer to PRE-DELIVERY SERVICE on the upper portion of the following two pages. The first copy is your record of the service performed and the second copy, which is to be removed from the manual, is your dealer’s record. MAKE SURE THAT YOU AND THE DEALER SIGN BOTH COPIES. Afier you have operated the tractor for St) hours take your tractor and this manual to yoursellingdealer. He will perform the factoryrecommended 50 hourservice. YOUwillbe responsible forthecostof lubricants, filtersand otheritemsreplacedaspartofnormalmaintenance. Priortotakingthetractor toyoursellingdealerforservice,itis recommended thatyoucontactthemto determine any othercharges for which you maybe responsible. PARTS AND SERVICE CATALOGS AVAILABI.E! Ford New Holland is pleased to announce to owners of Ford tractors and equipment the availability of numerous parts and service catalogs. To obtain these catalogs merely fill out the order form available from your local authorized Ford New Holland ... Dealer. Your order will be processed promptly.
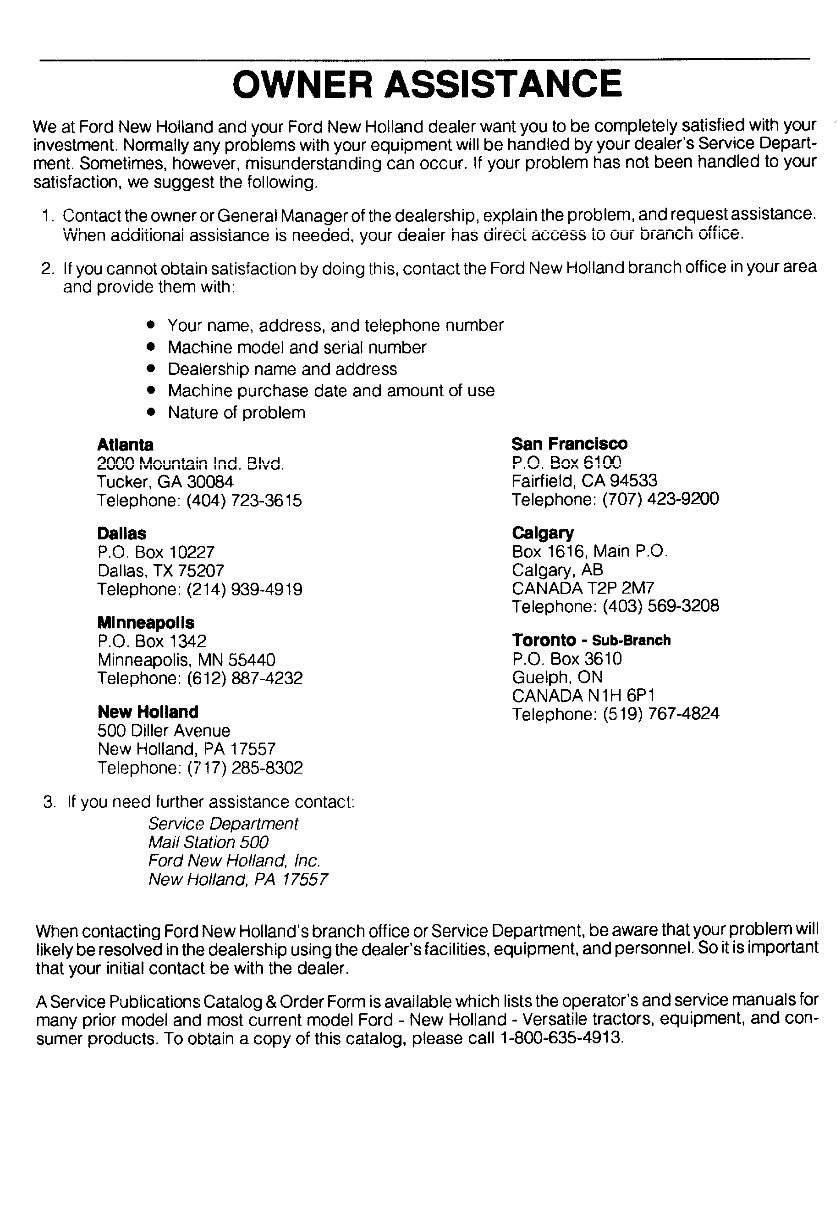
OWNER ASSISTANCE We at Ford New Holland and your Ford New Holland dealer want you to be completely satisfied with your ‘ investment, Normally any problems with your equipment will be handled by your dealer’s Service Depart- ment. Sometimes, however, misunderstanding can occur, If your problem has not been handled to your satisfaction, we suggest the following. 1. Contact the owner or General Manager of the dealership, explain the problem, and request assistance. When additional assistance is needed, your dealer has direct access to our branch office. 2, If you cannot obtain satisfaction by doing this, contact the Ford New Holland branch office in your area and provide them with: ● ● ● ● ● Atlanta Your name, address, and telephone number Machine model and serial number Dealership name and address Machine purchase date and amount of use Nature of problem San Francisco 2000 Mountain Ind, Blvd. Tucker, GA 30084 Telephone: (404) 723-3615 Dalias P,O. i30x 10227 Dallas, TX 75207 Telephone: (214) 939-4919 Minneapoiia P.C).Box 1342 Minneapolis, MN 55440 Telephone: (612) 887-4232 New Hoiiand 500 Diner Avenue New Holland, PA 17557 Telephone: (717) 285-8302 PO, BOX 6100 Fairfield, CA 94533 Telephone: (707) 423-9200 Caigary Box 1616, Main PO. Calgary, AB CANADA T2P 2M7 Telephone: (403) 569-3208 Toronto - Sub-Branch P.O. 60X 3610 Guelph, ON CANADA N 1H 6PI Telephone: (519) 767-4824 3. If you need further assistance contact: Servict? Department Mai/ Siation 500 Ford New Holland, Inc. New Holland, PA 17557 When contacting Ford New Holland’s branch office or Service Department, be aware that your problem will likely be resoived in the dealership using the deaier’s facilities, equipment, and personnel. So it is important that your initiai contact be with the deaier. A Service Publications Catalog&Order Form is available which lists the operator’s and service manuals for many prior model and most current model Ford - New Hoiland - Versatile tractors, equipment, and con- sumer products. To obtain a copy of this catalog, please tail 1-800-635-4913.
.. PRE-DELIVERY SERVICE - CHECK AND ADJUST AS REQUIRED INOPERATIVE SERVICE CHECKS: 23. Front axle support and spindle nuts ● Bucket level indicator for proper 1 Tire pressure . .... . fortlghtness ,, rl adjustment ..(1 I 2 Aircleaner andhose connactions.. . J 24. Unit properly we!ghted .... ... .. . .. ... ..,. (1 ● Return -to-d igswttch for 3 Radmtor coolant level I 25. Loader pivot pin torque .... . . r] proper adjustment . ... ..,,.,.,. [ I 4 All belt tensions ,. I 26. Hydraulic lift Draft Control 8. Hydraulic System: 5 Banetyc leankness, vent openings, mainspring adjustment .....[ 1 . Lift control levers for Draft and.. ‘1 electrolyte level, and specific gravity 27 Check seat mounting and Posmon Control operation not Iess than 1 240 I adpJstment ‘1 ● Flow control operation. I 6 Check allelecntcal cables and wtre 28. Cabdoor and lock operation sAuxtllary Service control operatmn routmgs are away from sharp edges, and seal condition. i~ or remote control valve. 1 mowng parts and exhaust heat. ‘1 29. Cabmterior upholstery, trim 7 Englneoll level ,, 1 andmouldlng s,.. ..,, ,,.. 1 pERF~RMANCESERVICECHECKS: 8 Hydraullc system 011 level (Loader) , 30. Cabw(ndow operation?, window props 9 Transmisslonotl level ; and latches, seal condition ..... 1 1. Engmeoperatlon includmgthroflle 31 Cabsun visor operation. ‘1 10 Rear axle 011 level,. ,,, I 32, cab filter ,“~tallatlon, and governol operation .... . ....1 11 Power steering resetvolroll level ..,, I i] 2 Transrn6sion control Ieveroperatmn, A ... ,. 12 Brake pedal free travel equalization 3 Transmission stall speec ... ... 1 4. Steerlf>g control, ..... ., “1 and pedal lock. I 13 Front wheel toe. tn I OPERATIVE SERVICE CHECKS: 5 Differential Iock engagement and 14 Lubt!cate hydraukcp umpdrweshaft I Alloperative checks aretobe performed with disengagement ........ ...1.1 15 Front and rear wheel disc-to-hub nuts 6 Brake action ..,.,,,, .,,., ,., ..,,.,,., ,..11 the tractor at normal operating temperature forltghtness ., 7, Allopllonal equipment and II 1 Lights, instruments ancl 4-way flasher 16 Fuel levd ....IJ for proper operation. . ,...1.1 accessories. ,.1 1 17 Sheet metal and paint condition ,. , I 2 Fkldandotl leaks ..,. ..,,,.,. .[1 SAFEW ITEMS CHECKS: 18 Lubricate loader andchasslsmvms ,,. ~I 3. Wlndshteld washer bottte.. :I 19 Drain diesel fuel f!herancj water 4 Engmemaxlmum no-loadspee dandidle sed!ment separator 1 speed adjustments anclfuel shut-off “1 20 Remove palnl from flmshedsutfaces (Ie 5. Thronle linkage adjustment ‘1 Ioadercylmder rods and valve spools) IJ 6. PT,O, engagement anddisengagement[ 1 21 Fret. taxieddferentialo illevel (front 7. Loadec wheel drive only).. .,, .,, [1 ● Control Iever for proper operation. .[ 1 22 Front axle hubodlevel ;front wheel””’” ● Hydrauhc connectiot>s for leaks drwe only) .,, .,,.. .! and hews for proper positro n,.,.,..,,, .l-) INSPECTION PERFORMED WARRANTY EXPLAINED) TRACTOR MODEL NO ,,.,.,,. LOADER SERIAL NO. 1 ROPSnstalled.. ... . . ..... . ...............11 2. Seat belt Installed ............ . ....... ....... ,, .,,, I 3. PT. O.mastershleld installed .,...,,,,, .. ....’l 4 SMV emblem installed.,..,,..,,.. [1 5 Safety decals installed .......... ......11 6 Safety stafiswltch operation,,. [7 7 Park brake operation .,, .,,.,, ,.. . .,., ,,.,..,11 8 Operator’s Manual ... .. [3 TRACTOR SERIAL NO owner’s signature date dealer’s s!gnature date I I ‘– ------------------------------x ---------- x 50-HOUR SERVICE - CHECK AND ADJUST AS REQUIRED INOPERATIVE SERVICE CHECKS: 17 Check front and rear wheel nuts 6, P.TO. engagement and disengagement [1 for tightness ,,.,...,,, ,,.,, ......1 7 Loadel for proper operation and 1 Tire pressure 1 18. Adjust valve clearances J :? Air cleaner, pre cleaner and periorrnance. ,. [1 19. Lubrication fmngs and pivots J hose connections. 8 H ydrau Iic kft for proper operation I 3. Dram diesel fuel filter and ““”””’ ““ ““ I 20. Loader pwot pln torque I and performance .,,. [“1 21 Chanae front axle differential oil I watet separator and bleed system II (front_wheel drive only) .,. L. 4 Radiator coolant level II 22. Change front axle hub 011 5 All belt terwons. I (front wheel drive only) ......... [3 I 6, Clutch pedal freeplay 23. Clean, Inspect and grease front wheel 1 (wh~?re applicable) I bearings (two wheel dtwe)... I ? Check all electrical cables and w)re 24. Clean cab alr filters. I I routlngs are away from sharp I edges, mcv!ng parts and exhaust heat. 8 Orain and refill engine 011 I opwmmm SERVICE CHECKS: I 9 Renew engine 011falter, ,,. I All operative checks are to be performed with \ 10. Rerww hydraulic 011 f!lters.. I the tractor at normal operating temperature. ! 11 Renew transrms.won oil flker., I 1. Ltahts and instruments for PERFORMANCE SERVICE CHECKS: 1 Engine operation includlng throttle and gcwernor operation ..... [3 2 Transrmssion, includlng control lever. [1 3 Steering control.. .,. [I 4 Differential lock engagement and disengagement ... [1 5 Brake ,actlon [7 6 All opt!onal equipment anti accessories ... :3 ! 12. Brake pedal free travel equaltzat]on pr;per operation ,.,,..,, I and pedal lock I 2. Flutd and 011 leaks .,.,.., .,,.. ., ,.,,., ,“1 SAFETV ITEMS CHECKS, ~ 13, Hydraukr system oil level ‘,:, :: “.“: ~ 3. Windshield washer bottle. I‘ 1 ROPS bolt torque ..,... ,.., 1 1 14 Tram mlss!on oIl level 4. Engine maximum no-load speed and Idle . 2 Seat belt condhion and bolt torque... I 15 Power steering resewolr 011 level, I 1G Rear axIe 011 Ikwei speed adjustments and fuel shut-off [1 3 Safety start swttch.. [1 5. Throttle knkage adjustment I 4 PT.O master shield installac,,,, .,,,,.,,.,11 I INSPECTION PERFORMED wARRAN~”EXPLAINED TRA(;TOR MODEL NO .. TRACTOR SERIAL NO LOADER SERIAL NO ..., ,.,, .:: I ~-;at”re — date dealer’s signature date – I I
PRE-DELIVERY SERVICE - CHECK AND ADJUST AS REQUIRED - INOPERATIVE SERVICE CHECKS: 1. Tire pressure . .. .............. .. .......[1 2. Alrcleaner andhoseconnectmns 17 3 Radiator coolant level.. .. . .. [-l 4. All belt tensions ...... ... [.1 5 Batter ycleanliness,vent openings, electrolyte level, and specific grawty not Iess than 1 .240 ...... [“l 6. Check allelectrlcal cables and wire routmgs are away from sharp edges, movmg parts and exhaust heat .rl 7 Engmeotl level .[ I 8 Hydrauhc system od level (Loader) ..... [J 9 Transmlsslon od level... .[3 10, Rewaxleoll level ., .,... ,,.., [I 11 Power steerlngresewolrod level. :I 12 Brake pedal free lravel equallzatton ancl pedd lock. I 13, Front wheel toe-in .,.... ., I 14 Lubricate hydraulic pump drive shaft. :I 15, Front and rear wheel d(sc-to- hub nuts foroghtness I 16. Fuel level. I 23. Front axle support andsp!ndle nuts for tightness ............... . ....E. 24 Unit properly weighted .... . .[-l 25 Loader pivot pin torque. .1 I 26 Hydraulic lift Draft Control mainsprmg adjustment ........ ....=1 27 Check seat mounting and adjustment ...... I 28. Cabdoor andlockaperatlon and seal condition ....=1 29 Cab Inter(or upholstery, tr!m and moldings. . 30. Cabwindow operation, w;ndow props I and latches, seal condition. i- 31. Cab sun wsoroperation [-1 32. Cab fdtermstallatlon ...! OPERATIVE SERVICE CHECKS: All operatwe checks are to ba performed wdh the tractor at normal operating temperature 1, Lights, instruments and4-way flasher fwmOt) er Operation.. ,,,1 17 Sheet metal and paint condit!on I 2. Fluldand o;l leaks.,,.. ,...,.. [ 18. Lubricate loader and chassjs pivots. I 3 W(ndshleld washer bottle... F 19 Dram diesel fuel falter and watel 4 Englnemax[mum no-toad speed and Idle sediment separator J speed adjustments and fuel shut-off. .[– 20 Remove paint from flnlshed surfaces (le. 5. Throttle llnkagead)ustment, .,,.. ..,.. .,1, I. Ioadercylmder rods and valve spools) I 6. PTO engagement anddtsengagement ’21. Front axle djfferentlal 011 level (front 7 Loader wheel drtve only). .,, 1 ● Control lever for proper operation ... r 22. Front axle h(jboll level (front wheel ● Hydraulic connections for leaks drlveordy) ‘1 and hoses for proper posmon ,1. ● Bucket level indicator for proper .@ustment..., ... .... ,,..,.,.., U.,U ● Return-to-dig switch for proper adjustment.. .,,.,, .,.. L”! 8. Hydraulic System: ● Lift control Ievers for Oraft and.,,., ,..,.. L; Position COntrOl OperatiOn ● Flow control operation.. .[ 1 .Au:<dlary Serwce control operation or remote control valve ..,.... .. ..[”1 PERFORMANCE SERVICE CHECKS: 1. Englneoperation including throttle and governor operation,,.., ,,..,.. ,,.,, ,.., .[) 2 Transmlssmn control Ieveroperatlon ., [1 3 Transmission stall speed .,. .,,..1 4 Steering control,., . ..... .,,.. LI 5 Differetmall ockengagementand disengagement. . ., .[ 6 Brake action .,, .’ 7 Alloptlonal equipment and accessories ... ,.,,. ,,., ..,,. [.1 SAFETY ITEMS CHECKS: 1 ROPSmstalled,,.. ,.,,. fi 2 Seat bait Installed ,...., ..... I 3 P.TO master shleldmstalled ,. ..,,,, ..,,. l 4. SMV emblem installed ., .,,., ..,,.’ 5 Safetfdecals installed .,,., ,.,, 6. Safety start switch operation,,. , .,. ;“ 7 Park brake operation. ,,,.. ..,.,, ,.,,., ! 8 Oper;nor’s Manual ..... .,. . INSPECTION PERFORMED WARRANIYEXPLAINEO TRACTOR MODEL NO, TRACTOR SERIALNO ., LOADER SERIAL NO. ,;, : ,, owner’s slgniwre date (dealer’s signature date 50-HOUR SERVICE - CHECK AND ADJUST AS REQUIRED INOPERATIVE SERVICE CHECKS: 17. Check front and rear wheel nuts 6. P.T.O engagement andd(sengagementl for tightness..,.. ..,,., ,, ,.: 7 Loader forproper operanonand 1. Tire pressure ,. ‘“ 18. AdJust valve clearances ,,,.,. L 2. Air cleaner, pre cleaner and performance. .. . .. .....fl 19. Lubrcation fhtingsa ndp[vots..,,.. .,,. .!- 8. Hydrouli cliftfo rproperoperat[on hose connections .,. ,. -; 20. Loader pivot pin torque, ,.., ,,,..,,., ,,, .I– and performance. T 3. Dram diesel fuel falter and 21. Change front axle dMerentialoil water separator and bleed system n (front wheel drive only) ,,.,,.,. ,,., ,7 4. Radiator coolant level,. ., .[1 22, Chanae front axle huboll PERFORMANCE SERVICE CHECKS: 5. All belt tensions. , ,,,. ., .~ 6 Clutch pedal freeplay (where applicable) ,. I 7 Check all electrical cables and wire routings are away from sharp edges, mowng parts and exhaust heat,. d 8 Oralnand refill engmeoll I 9 Renewengmeo ilfilter ., .,, .,, .I 10 Renew hydraulic oll filters.. ., ‘1 11 Rer!ewtransmissmn od filter ..,. 1 12 8rakepedal free travel equahzatmn and oadal lock 1 (front_wheel drive only) ..,., ,,.,,.. ,.,,.,.. F, 23. Clean, Inspect andgrcase front wheel bearings (two wheel drwe),., ..,,.. 24 Clean caklalrftlters. ,,. ,,., ,_ OPERATIVE SERVICE CHECKS: All operative checks are to be performed with the tractor at normal operating temperature 1. Lights and [nstruments for proper operation .,, .,.,, I. 2. Fluldand oil leaks,,.,, ,.,,,,,.,,.,.., [- 1, Engirle operation mcludmgthrotfle and governor operation .,,..,.,,.,,., ..,,. LJ 2 Transm[sslon, inckJdingcDntrOl lever ..,,.: I 3 Steering control, .,,.... ., ,..,,., ..,.., ,..,~. ~ 4 Different[al lock engagernemta”d disengagement ..,., ,..,,. [.1 5. Braheact[ on .. ....... .r”l 6. All opoonal equipment and accessories .,,. ] SAFEN ITEMS CHECKS: 13 Hydraull,: system oll level,,, ,,. -1 3. Windshield washer bottle . .. .. .,,... ,- 1. ROPS bolt torque. .,,,,, ,..,.. ... ZI 14 Transmlssmn 011 level,,. .,;1 4 Eng[nemaximum no-load speed and idle 2. Seat belt conddlon and boktorque.., ,.., J 15 Power steering resewoiroll level ,~; speed adjustments and fuel shut-off. I 3. Safety stan switch .,,., ,..[1 16 Rear axlt? oil level ., I 5 Throttlelmk ageadjustment. 4. PTO master sh[eld Installed ! INSPECTION PERFORMED -WARRANIYEXPLAINEO TRACTOR MOOEL NO. .TRACTOR SERIAL NO. LOADER SERIAL NO —— owner’s signature date dealer’s signature date
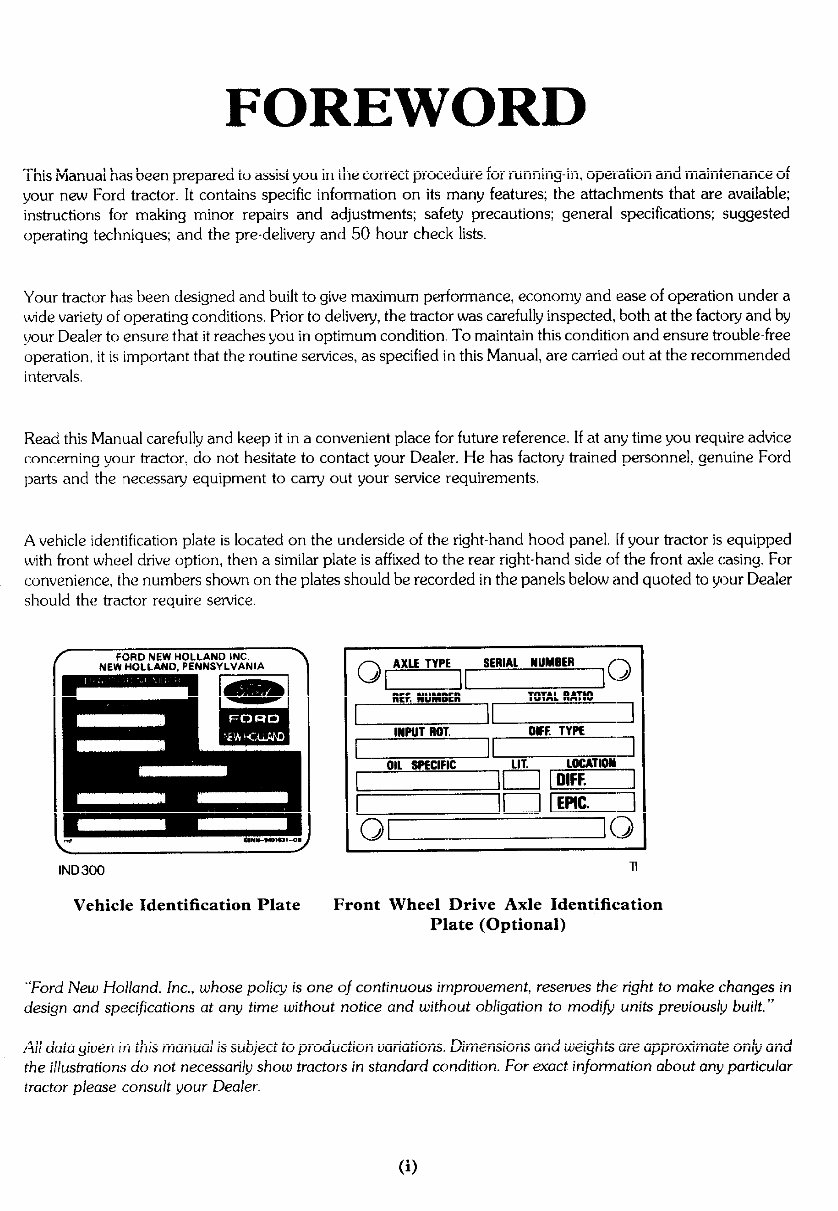
FOREWORD This Manual has been prepared to assist you in the correct procedure for running-in, operation and maintenance of your new Ford tractor. It contains specific information on its many features; the attachments that are availablq instructions for making minor repairs and adjustments; safety precautions; general specifications; suggested operating techniques; and the pre-delivery and 50 hour check lists. Your tractor has been designed and built to give maximum performance, economy and ease of operation under a wide variety of operating conditions. Prior to delivery, the tractor was carefully inspected, both at the factoy and by your Dealer to ensure that it reaches you in optimum condition. To maintain this condition and ensure trouble-free operation, it is important that the routine services, as specified in this Manual, are carried out at the recommended intervals. Read this Manual carefully and keep it in a convenient place for future reference. If at any time you require advice concerning your tractor, do not hesitate to contact your Dealer. He has factory trained personnel, genuine Ford parts and the necessary equipment to carry out your service requirements. A vehicle identification plate is located on the underside of the right-hand hood panel. [f your tractor is equipped with front wheel drive option, then a similar plate is affiied to the rear right-hand side of the front axle casing. For . convenience. the numbers shown on the plates should be recorded in the panels below and quoted to your Dealer should the tractor require semice T FORD NEW HOLLANO INC. \ NEW HOLLANO, PENNSYLVANIA . d,nl-nOm-09 IND300 Vehicle Identification Plate n Front Wheel Drive Axle Identification Plate (Optional) “Ford New Holland, Inc., whose policy is one of continuous improvement, reserues the right to make changes in design and specifications at any time without notice and without obligation to modijj units preciously built.” All data giuen In this manual is subject to production variations. Dimensions and weights are approximate only and the illustrations do not necessarily show tractors in standard condition. For exact information about any particular tractor please consult your Dealer. (i)
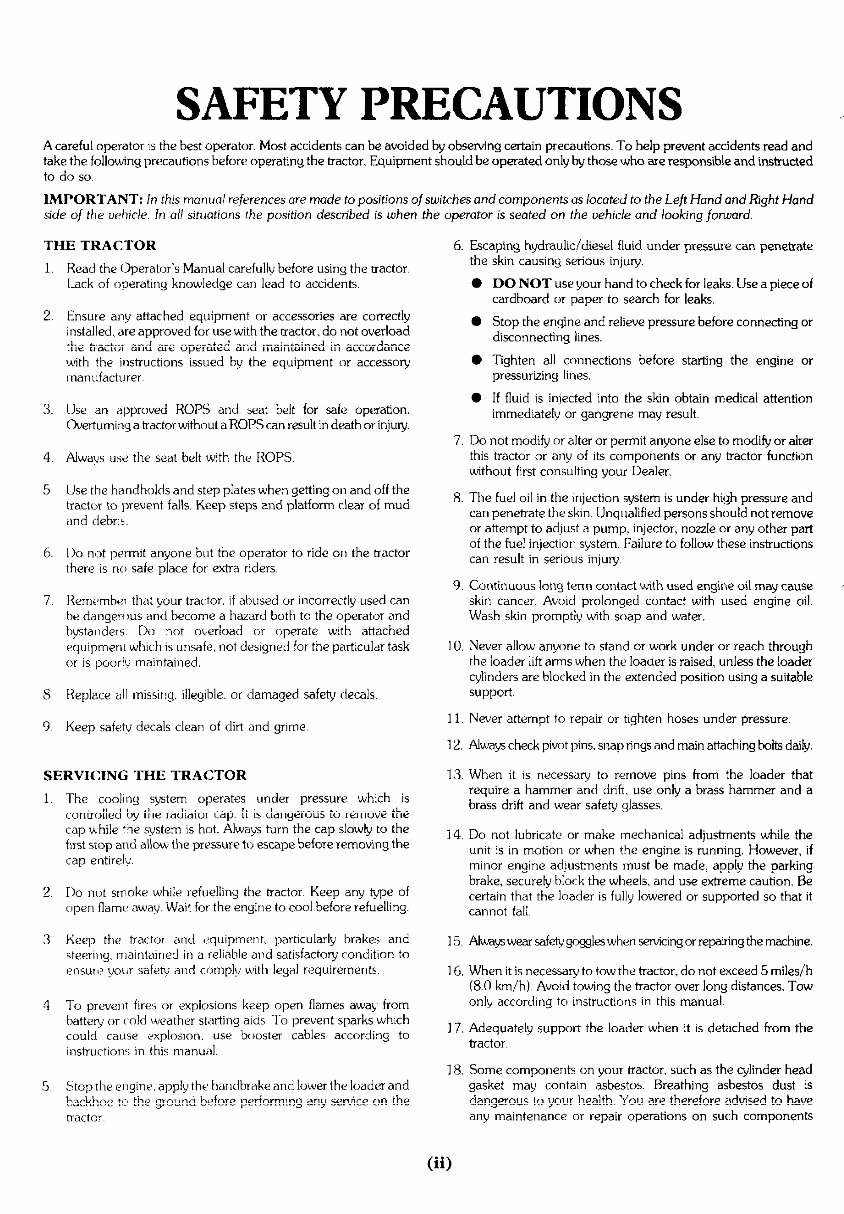
SAFETY PRECAUTIONS ,,”.. A careful operator ISthe best operator. Most accidents can be avoided by obserwing certain precautions. To help prevent accidents read and take the following precautions before operating the tractor. Equipment should be operated only by those who are responsible and instructed to do SO IMPORTANT: /n this mcmud re~erences are made to positions ofsuitches and components as located to the Left Hand and Right Hand side of the uehde [n all situations the position described is cuhen the operator is seated on the uehic/e and looking forward. THE TRACTOR 1 2 3. 4 5 6 7 8 9 Read the (>perator’s Manual carefully before using the uactor Lackofo peratmgk nowledgecan lead to accidents. Ensure any attached equipment m-accessories are ccmectly installed. preapproved forusew-ith thetractor, do not overload the tractor and are operated and maintained in accordance with the instructions issued by the equipment or accessoy Imanufacturer Use m apprcwed ROPS and seat belt for safe operation. Gvertumirxg a tractor without a ROPS can result in death or injuy. Alwavs us,? the seat belt with the ROPS. Use the handholds and step plates when getting on and off the tmctm to prevent falls, Keep steps and platform clear of mud ,md debr,s IX) not permit anyone but the operator to ride on the tractor there IS no safe place for extra riders Remember that your tractor. ifabuse dorincocrectl yusedcan be danger{ MS anti become a hazard both tc the operator and bysta!]ders IA not ouerlcmd or operate with attached equipment which ISunsafe, not des]gned for the particular task or is poorlv maintained. Replace all m]ssing. ]Ileglble. or damaged safety decals Keep safet; decals clean of dirt and grime SERVICINGTHETRA[:TOR The cooling system operates under pressure wh]ch is controlled by the radiato[ cap It IS dangerous to remove the cap wbile the system IS h(ot. Always turn the cap slowly to the froststop and allow the pressure to escape before remoting the cap enttrely Do not smoke while refueling the tractor Keep any type of open flame away Wait for the engine to cool before refueling Keep the tractor and equipment. parttculady brakes and steerlr)g. rnajntamed in a reliable and satjsfactoy conddlon to ensur,> ycxlr safety and comply with legal requirements 1’o prevent fmi or explosmns keep open flames awa} fcom battey or, old weather skwting aids To prevent sparks which could cause explosmn. use b,mster cables according to lnstmrction~ in this manual Stoptlw et)g}ne, apply th< handbrake and Iowerthe kmderand backhne to th< ground b<,fore performmg any sewice on the tractor 6. Escaping hydraukc/dtesel fluid under pressu!e can penetrate 7 8 9 the skin causing serious injury. DO NOT use youI hand to check for leaks Use a piece of cardboard or paper to search for leaks Stop the engine and relieve pressure before connecting or disconnecting lines. Tighten all connections before starting the engine or pressurizing lines. [f fluid is in]ected into the skin obtain medical attention immediately or gangrene may result, Do not modify or alter or permit anyone else to modify or alter this tractor or any of Its components or any tractor function wthout first consulting yom Dealer. The fuel oil in the Injection system is under hi!gh pressure and can penetrate the skin Unqualified persons shnuld not remove or attempt to ad~ust a pump. injector, nozzle or any other pm-t of the fuel injectioc system, Failure to follow these instructions can result in serious injuy Continuous lonq temn contact with used enqine oil ma~ cause skm cancer Av;>icl prolonged contact wit~ used en~ne c]il. Wash skin promptly with snap and water. 10 Never allow anyone to stand or work under or reach through the loader lit arms when the loader is raised, unless the loader ylinders are blocked in the extended position using a suitable support 11 Never attempt to repair or ttghten hoses under pressure. 12, Always check pivot pins, snap rings and main attaching bolts dai~. 13. When it is necessay to remove pins from the loader that require a hammer and cfrift, use only a brass hammer and a brass drift and wear safety glasses, 14. Do not lubricate or make mechanical adjustments while the und is in motion or when the engine is running. However, if minor engine adjustments must be made, apply the parking brake, securely block the wheels, and use extreme caution. Be certain that tbe loader is fully lowered or supported so that it cannot fall 15 Always wear safety g~les when sewicing or repaicing the machine. 16, When it is necessa~ to tow tbe tractor, do not exceed 5 miles/h (80 km/h) Auo]d towing the tractor over long distances. Tow only according to mstmct)c)ns in this manual. 17. Adequately support the loader when it IS detached from the tractor 18, Some components on your tractor, such as the cylinder head gasket may contain asbestos. Breathing asbestos dust is dangerous to your health You are therefore adwsed to have any maintenance m repair operations on such components (ii)
SAFETY PRECAUTIONS SERVICINGTHETRACTOR(Continued) tamed out by your Dealer. If, however. setice operations are to be umietiaken on parts that contain asbestos, the essenhal precautions hsted below must be obsewed Worh out of doors or in a well ventilated area. Dust found on the tractor Or produced during work cm the tractor sh[ )uld be removed by extraction not by blowing. Dust waste snould be dampened. placed in a sealed container ,ancl marked to ensure safe disposal. If any cutting. dnlkng, etc, E attempted on materials contmnlng asbestos, the item should be dampened and only ban, i tools m low speed power tnols used. 19 Tr,ictor wheel, are vey heavv Hamile with care and ensure, whm stored that they cannot topple and cause injuy OPERATING THE UNIT 1 Postion the transmission in neutral and apply the parking brake before starthg the tractor 2 DO not start the engine or operate controls while standing besde the tractor Always sit n the tractor seat when starting the eng]ne or operating the controls ,{ Do not bypass the safety start switch Consult your Dealer if your safety start contiok malfunction [Jse booster cables only irj the recommended manner. [mpmper use can result in a tmctor runaway, see SectIon A page 6 for instructions 4 Avo{d accidental contact with the gearsh)ft leveIs or paver reversing lever whk the engine E runmng Unexpected tractor movement can result from such contact. !i Do not ged off the tractor whale it is in motion b Never attach ctmms, ropes or cables tc the loader or ROPS for pullklg purpcrs~s 7 Pull only tom the swmg]ng drawbar or the lower link drawbar ]n the down position. Use only a drawbar pin that locks in place. Pulling from the tractor rear .wle or any point above the axle may cause the tractor to upset 8 If the front end of the tractor tends to rtse when heay implements ar{?attached to the threepoint hitch, install front end or front wheel weights. Do not operate the tractor with a light front end !) AIUJaYS set the hydraulic selector lever m pos]tion control when attaching equipment and when transpotiing equipment. Be sure hydraulic couplers are properly mounted and WIIIdm connect safely m case of accidental detachment of implement. 10 Never leave th(, tractor u.nthout first lowering hydraulic equip- ment and loader buckets to the ground 11 Stop the wrgirw, apply the parking brake and put the gearshlft Ievwrs and/or power revers:ng lever into neutral before dmnounting, OPERATINGTHE UNIT (Continued) 12 13 14 15 16 Do not engage the parking brake while the tractor is in motion. Never leave the tractor when it E parked on an recline. Always park the tractor on level grouncl whew possible. If the tractor E to be parked on an mckne, always lower the buckets so that the t uttfng lips contact the ground apply the parking brake, and +ecurely block the wheels. AJways keep a lookout for bystanders. Always check overhead clearance, particularly when trans- porting the tractor If the engine or power steering ceases operating. stop the tractor immediately 17 I)0 not run the engine m a closed building without adequate ventdation, as exhaust fumes can suffocate you. 18, Afways cany out the recommended checks before commenc- mg work each day. 19. [)0 not enter the platform from the rear. 20. Always check the Iwat!on of gas and electilcal lines before you start to dig 21 Watch out for overhead and underground high-voltage elec- trical lines when operating the loader. 22. Never operate any contiols when standing on the ground 23. Always tmvel slowly over uneven ground 24. Always use the recommended amount of counterwelghting to ensure good stability 25. I)0 not transpoti anyone m th? loader bucket. 26. Always carry the loader bucket low for maximum fstability and visibili~, whether the bucket is loaded or empty 27. Be careful when handling round ob]ects such as oil drums, pipes or poles: Liting too high or rolling back too far could result in these ob]ects rolling reanvard down the loader arms onto the operator. OPERATING THE P.T.O. 1. When operating P.T O drwen equipment. shut ofi the engine and wait until the P T O stops before getting off the tractor and (f]sconnecting the equipment. 2 I )0 not wear loose clothing when operating the power take-off or when near rotating equipment 3 When operating statlonay P.1 O driven equipment, always apply the tractor parking brake and block the rear wheels front and back. 4.70 avoid ]npiry do not clean. ad]ust. unclog or sewice P T O. driven equipment cuhen the tractor engine IS running. 5. Make sure the P T.O guard E in position at afl times and always replace the P T O cap when the P TO. is not in use. (iii)
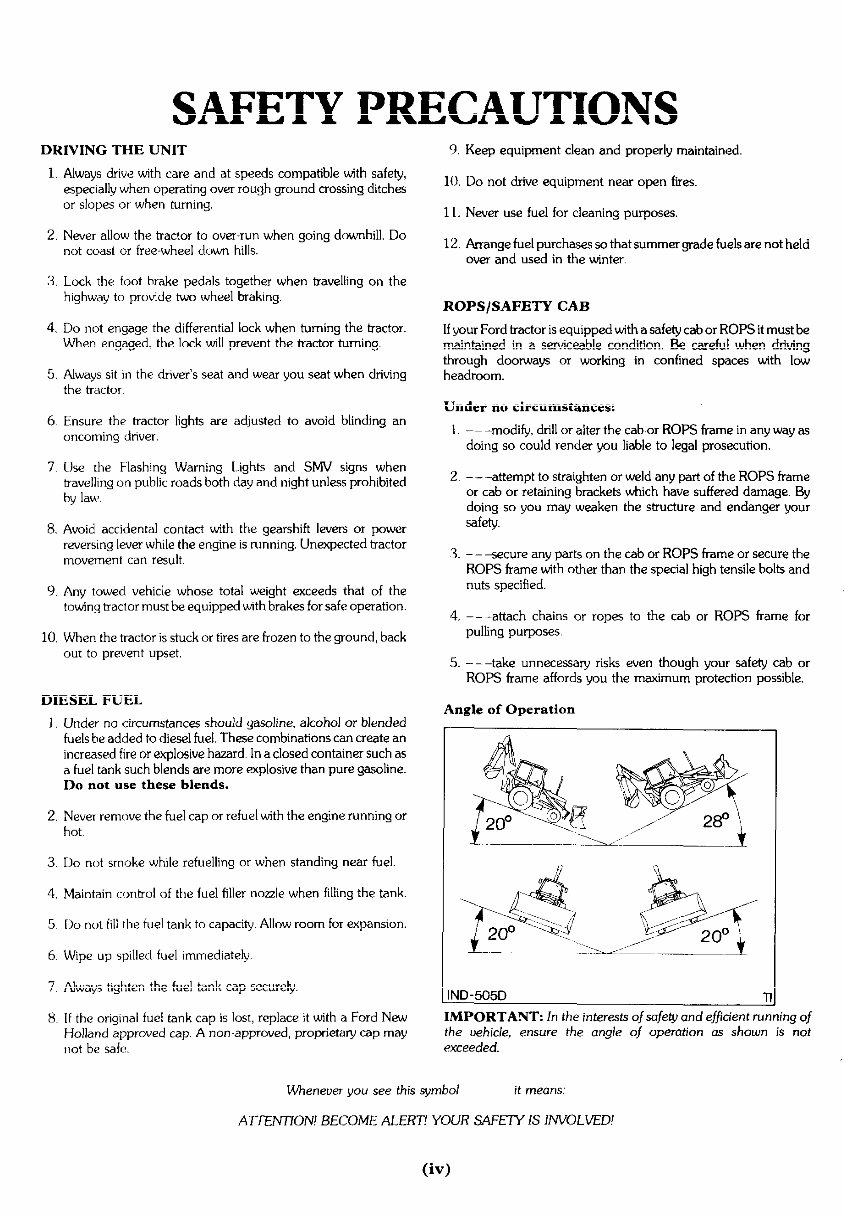
SAFETY PRECAUTIONS , DRIVINGTHE UNIT 1 Always drive with care and at speeds compatible tith safety, especially when operating over rough ground crossing ditches or slopes or when turning. 2, Never allow the tractor to ova-run when going dcnvnhill. Do not coast or free-wheel dcwn hills. 3 Lock the fuot brake pedals together when traveling on the highway to provide two wheel braking 4. Do not engage the differential lock when turning the tractor. When engaged. the lock will prevent the tractor turning. 5. Always sit in the drwer’s seat and wear you seat when driting the tractor 6 Ensure the tractor lights ae ad]usted to avoid blinding an oncoming drwer. 7 Use the Flashing Warning Lights and SMV signs when travellmg un public roads both day and night unless prohibited by law. 8. Avoid accidental contact with the gearshift levers or ~wer reversing lever while the engine is running. Unexpected tractor movement can result 9. Any towed vehicle whose total weight exceeds that of the towing tcactor must be equipped with brakes for safe operation. 10, When the tractor is stuck or tires are frozen to the ground, back out to prevent upset. DIESELFUEL 1 2 3 4 5 6 7 8 Under no circurnstanc= should gasoline, akohol or blended fuels be added to diesel fuel. These combinations can create an increased fire orexplosive hazard Inaclosed container suchas a fuel tank such blends are more explosive than pure gasoline. Do not use these blends. Never rem[we the fuel cap or refuel with the engine running or hot DO not smoke whale refueling or when standing near fuel. Maintain control of the fuel filler nozzle when filling the tank. Dormtfill tbefuel tankto capacity AIIowroom for expansion. W]pe up spilkxi fuel immediately Always tighten the fuel tank cap securely. If the original fuel tank cap is lost, replace it with a Ford New Holland approved cap Anon-approved, proprietay cap may not be safc~. 9. Keep equipment clean andpropedy maintahed, lo. Do not drive equipment near open fires. 11. Never use fuel forcleaning purpwe.s. 12. f%ange fuel purchases so that summer grade fuels are not held over and used in the winter ROPS/SAFETY CAB If your Ford lractor is equipped with a safety cab or ROPS it must be mainkined in a serviceable condition. Be careful when driving through doorways or workin!j in confined spaces with low headroom. Under no circumstances: 1. –––modify, drill or alter the cab or ROPS frame in any way as doing so could render you liable to legal prosecution. 2, -–-attempt to straighten or weld any part of the ROPS frame or cab or retaining brackets which have suffered damage. By doing so you may weaken the structure and endanger your safety. 3. ---secure any parts on the cab or ROPS frame or secure the ROPS frame with other than the special high tensile bolts and nuts specified. 4 ––-attach chains or ropes to the cab or ROPS frame fnr pulling purposes 5. ––-take unnecessary risks even though your safety cab or ROPS frame affords you the maximum protection possible. Angle of Operation IMPORTANT fn the interests oj safety and ejficient running of the vehicle, ensure the angle of operation as shown is not exceeded. Wheneuer you see this symbol it means AITENTIOiV! BECOME ALERT! YOUR SAFETY IS INVOLVED! (iv)
This is the Owners Operators Maintenance Manual for model 345D 445D 545D tractor loaders. It covers all the information you need to own, operate, and maintain this equipment.
There are 10 complete sections; each section is indexed for fast & easy referencing. Each section covers a different area of the machine:
Safety Precautions
ROPS
Universal Symbols
Section A Controls Instruments and Operation
Section B Loader Controls and Operation
Section C Hydraulic Lift and PTO Controls and Operation
Section D Lubrication and Maintenance
Section E Specifications, Safety decals, Index
Easy to read exploded views to make safe operation, easy component identification, careful disassembly, accurate adjustments, and correct routine maintenance repairs. All sections are neatly organized in Adobe Acrobat, the entire document is scalable to several times normal size. Tons of illustrations, specifications, lots of pictures, step-by-step maintenance and operation instructions, information etc.
This is exactly like the paper manual made for this equipment; the only difference is this one is not paper, and doesn't need to be shipped. You get it right away! Zoom it, print it, save it, close it. Print a few pages at a time, as you need; no need to lug that bulky binder around anymore!
Once you buy the manual, you will immediately get a link in your email, then just go view it, print it, and save it for use later on. Viewed in popular Adobe format, which most computers have already. To the latest FREE Adobe viewer go to www(dot)adobe(dot)com
About New Holland
New Holland started with one corn mill in the state of Pennsylvania, first built in 1895. The company then expanded into farm implements and later found success with automatic hay balers. New Holland was acquired by Ford Tractor Operations in 1985, and the Ford New Holland name began to appear on tractors. In 1990 Ford sold a majority interest in its farm machinery operations to a foreign company called FIAT, with the agreement that the Ford name be dropped in ten years.
Tractors began to be released under two names: New Holland in traditional Ford tractor markets, and FIAT in their traditional markets. In 1999, Case IH and FIAT New Holland merged to form CNH Global (Case New Holland) which continues to build tractors under the New Holland brand.
New Holland produces both Agricultural farm equipment, and Heavy construction equipment like backhoe, skid steer loader, excavator, mini excavator, and wheel loader. Some examples of the tractor loader backhoe include 550, 555, 555A, 555B, 555C, 555D, 555E, 655, 655A, 655B, 655C, 655D, 655E, 675, 675A, 675B, 675C, 675D, 675E, 755, 755A, 755B, 755C, 755D, 755E, LB75, LB75.B, LB90, LB90.B, LB110, LB110.B, LB115, LB115.B just to name a few.
Some examples of the skid steer loader include L35, L170, L180, L185, L190, L225, L250, L255, L325, L425, L445, L451, L452, L454, L455, L465, L553, L554, L555, L565, L779, L781, L783, L784, L785, L865, LS120, LS125, LS140, LS150, LS160, LS170, LS180, LS190, LS465, LX485, LX565, LX665, LX865, LX885, LX985, just to name a few.
Recently Viewed
5,521,897Happy Clients
2,594,462eManuals
1,120,453Trusted Sellers
15Years in Business
Price:
Actual Price:
New Holland Ford 345D 445D 545D Operators Owners Maintenance Manual Tractor Loader