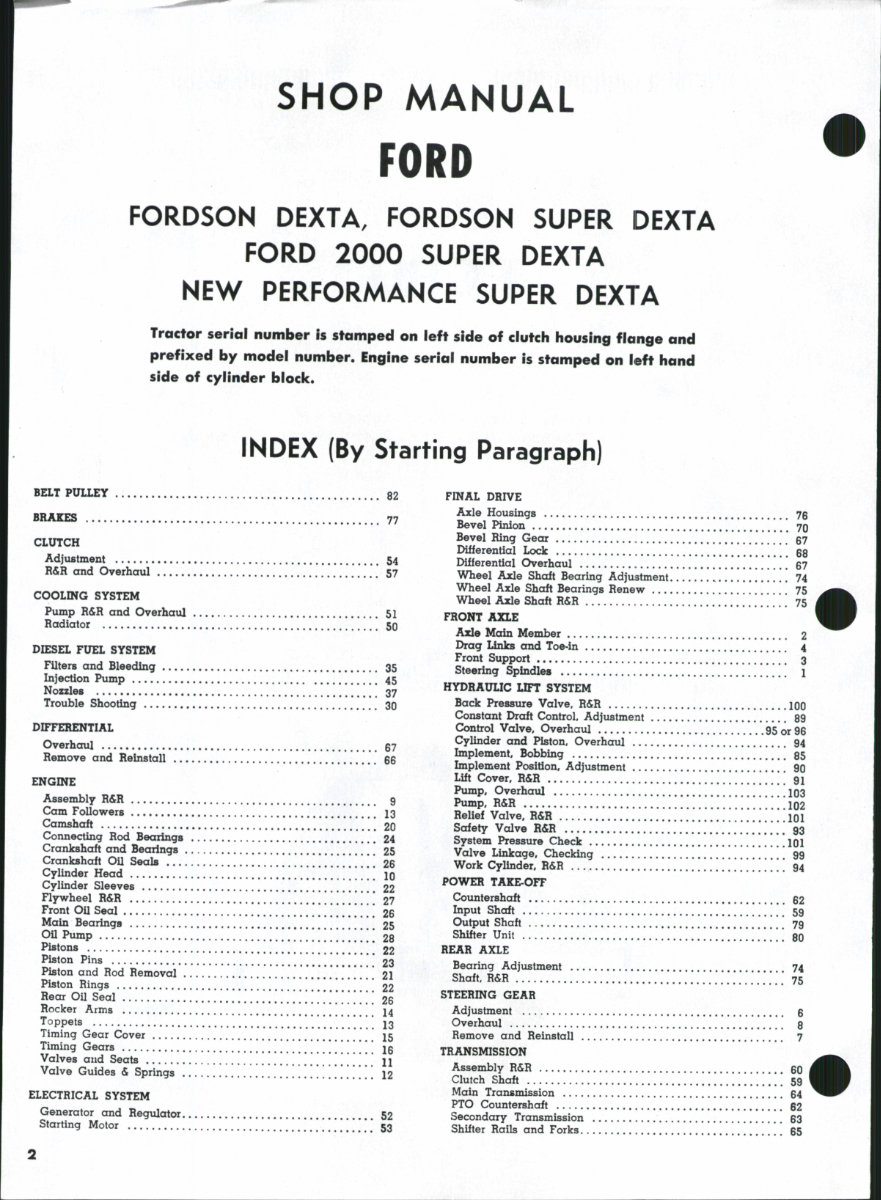
SHOP MANUAL FORD FORDSON DEXTA, FORDSON SUPER DEXTA FORD 2 0 0 0 SUPER DEXTA NEW PERFORMANCE SUPER DEXTA Tractor serial number is stamped on ieft side of ciutch iiousing fiange and prefixed by modei number. Engine seriai number is stamped on ieft hand side of eyiinder block. INDEX (By Starting Paragraph) BELT PULLEY 82 BRAKES 77 CLUTCH Adjustment 54 R&R and Overhaul 57 COOLING SYSTEM Pump R&R and Overhaul 51 Radiator ] 5Q DIESEL FUEL SYSTEM Filters and Bleeding 35 Injection Pump 45 Nozzles ] ^ / 37 Trouble Shooting [[[[ 30 DIFFERENTIAL Overhaul $7 Remove and Reinstall 66 ENGINE >. ; Assembly R&R 9 Cam Followers ][ I3 Camshaft \[\ 20 Connecting Rod Bearings .*'..! 24 Crankshaft and Bearings [[[ 25 Crankshaft Oil Seals !!!!!!!! 26 Cylinder Head !.!.!!!!!! 10 Cylinder Sleeves .*,. 22 Flywheel R&R ...//.,.[./.., 27 Front Oil Seal !.!!!!.!!.!! 26 Main Bearings !,..!.!!!!!!!!! 25 Oil Pump ....,.//,./.]..,,[..[] 28 Pistons !.!!!!!!!!!!!!!! 22 Piston Pins !...!..!.!!!!!.!.!. 23 Piston and Hod Removal .* ........ !...! 21 Piston Rings , 22 Rear OU Seal ' ......... !.!.,.!.*!!!!..!,'.' 26 Rocker Arms [ ^ 14 Toppets ................. ! 13 Timing Gear Cover 15 Timing Gears ..././...[,.,...,...[ 16 Vaives and Seats ...[,....[.[.[. 11 Valve Guides & Springs ,..,,.....,.... 12 ELECTRICAL SYSTEM Generator and Regulator. 52 Starting Motor !!!!!!!!!!.'! .53 FINAL DRIVE Axle Housings 7g Bevel Pinion 70 Bevel Ring Gear 67 Differential Lock ....... ! 68 Differential Overhaul .' 67 Wheel Ajde Shaft Bearing Adjustment .../...,. 74 Wheei Axle Shaft Bearings Renew 75 Wheel Axle Shaft R&H ;...*; 75 FRONT AXLE Axle Main Member 2 Drag Links and Toe-in ,..[..[. 4 Front Support .../,.. 3 Steering Spindles /....[.[ 1 HYDRAULIC LIFT SYSTEM Back Pressure Valve, R&R 100 Constant Draft Control, Adjustment 89 Control Valve, Overhaul 95 or 96 Cylinder and Piston, Overhaul 94 Implement, Bobbing * ] 85 Implement Position. Adjustment [,[. 90 Lift Cover, R&R ] ' 91 Pump. Overhaul !! 103 Pump, R&R 102 Relief Valve, R&R ^ IQI Safety Valve R&R .'*.. 93 System Pressure Check 101 Valve Linkage, Checking 99 Work Cylinder, R&R ['//, 94 POWER TAKE-OFF Countershaft $2 Input Shaft !!.!!.*. 59 Output Shaft ,[./....]. 79 Shifter Unit /,..../.[.[. 80 REAR AXLE Bearing Adjustment 74 Shaft, R&R 75 STEERING GEAR Adjustment g Overhaul 8 Remove and Reinstall 7 TRANSMISSION Assembly R&R , 60 Clutch Shaft !..!!! 59 Main Transmission 64 PTO Countershaft 62 Secondary Transmission 63 Shifter Rails and Forks 65
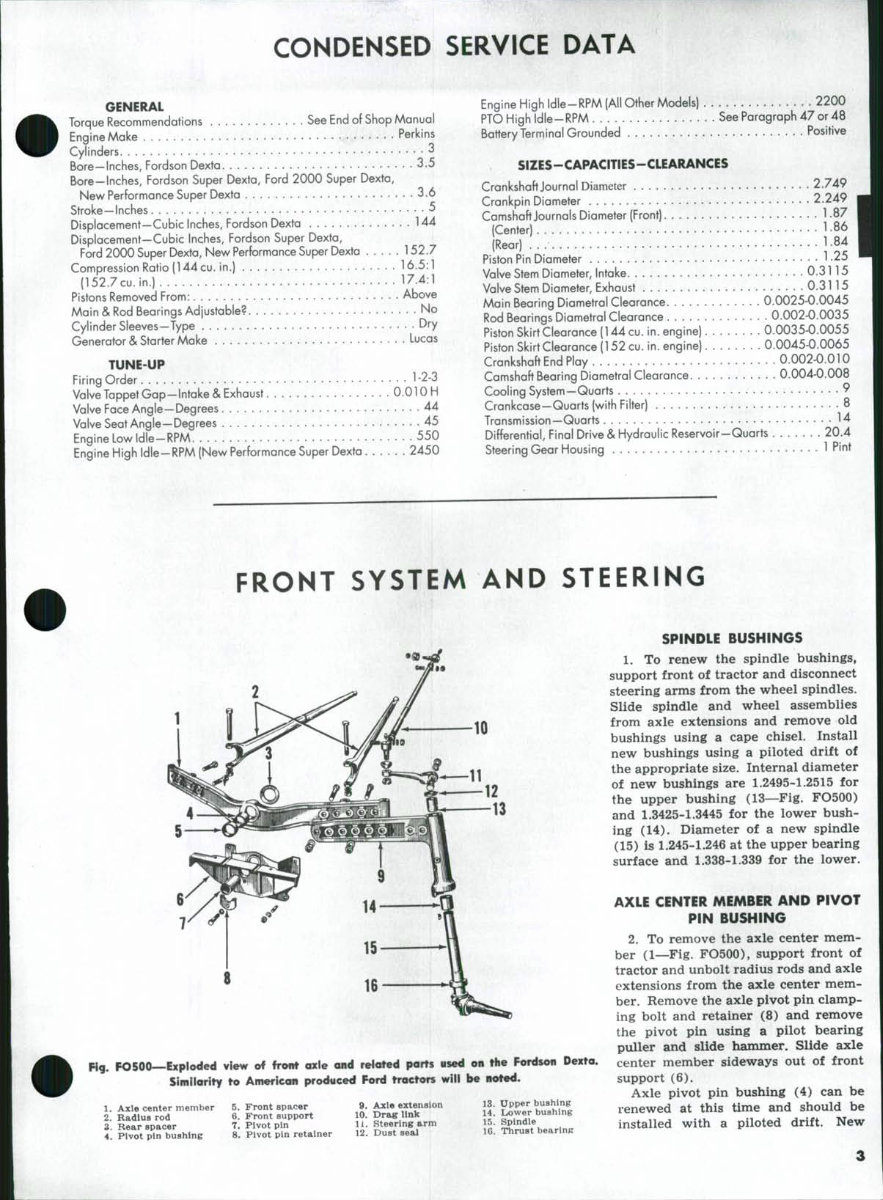
CONDENSED SERVICE DATA GENERAL Torque Recommendations See End of Shop Manual Engine Make Perkins Cylinders ^ Bore—Inches, Fordson Dexta 3.5 Bore-Inches, Fordson Super Dexta, Ford 2000 Super Dexta, New Performance Super Dexta 3.6 Stroke —Inches ^ Displacement—Cubiclnches, Fordson Dexta 144 Displacement—Cubic Inches, Fordson Super Dexta, Ford 2000 Super Dexta, New Performance Super Dexta 152.7 Compression Ratio (144 cu. in.) 16.5:1 (152.7 cu. in.) 17.4:1 Pistons Removed From: Above Main & Rod Bearings Adjustable? No Cylinder Sleeves—Type • • • l^^y Generator & Starter Make Lucas TUNE-UP Firing Order 1-2-3 ValveTappetGap-lntake& Exhaust 0.01 OH Valve Face Angle—Degrees 44 Valve Seat Angle—Degrees 45 Engine Low Idle-RPM 550 Engine High Idle-RPM (New Performance Super Dexta 2450 Engine High Idle-RPM (All Other Models) 2200 PTO High Idle-RPM See Paragraph 47 or 48 Battery Terminal Grounded Positive SIZES-CAPACITIES-CLEARANCES Crankshaft Journal Diameter 2.749 Crankpin Diameter 2.249 Camshaftjournals Diameter (Front) 1-87 (Center) 1-86 (Rear) 1-84 Piston Pin Diameter 1-25 Valve Stem Diameter, Intake 0.3115 Valve Stem Diameter, Exhaust 0.3115 Main Bearing Diametral Clearance 0.0025-0.0045 Rod Bearings Diametral Clearance 0.002-0.0035 PistonSkirtClearance(144cu. in. engine) 0.0035-0.0055 Piston Skirt Clearance (152 cu. in. engine) 0.0045-0.0065 Crankshaft End Play 0.002-0.010 Camshaft Bearing Diametral Clearance 0.004-0.008 Cooling System—Quarts 9 Crankcase—Quarts (with Filter) -8 Transmission—Quarts 14 Differential, Final Drive & Hydraulic Reservoir-Quarts 20.4 Steering Gear Housing 1 Pint FRONT SYSTEM AND STEERING FO500—Exploded view »f front cale and reloted parts used on the Fordson Dexta. ' Similarity to American produced Ford tractors will be noted. 1. Axle center member 2. Radius rod 3. Rear spacer 4. Pivot pin bushing 5. Front spacer 6. Front support 7. Pivot pin 8. Pivot pin retainer 9. Axle extenaion 10. Drag link 11. Steering arm 12. Dust seal 13. Upper bushing 14. Lower bushing 15. Spindle lC. Thrust bearing SPINDLE BUSHINGS 1. To renew the spindle bushings, support front of tractor and disconnect steering arms from the wheel spindles. Slide spindle and wheel assemblies from axle extensions and remove old bushings using a cape chisel. Install new bushings using a piloted drift of the appropriate size. Internal diameter of new bushings are 1.2495-1.2515 for the upper bushing (13—Fig. FO500) and 1.3425-1.3445 for the lower bush- ing (14). Diameter of a new spindle (15) is 1.245-1.246 at the upper bearing surface and 1.338-1.339 for the lower. AXLE CENTER MEMBER AND PIVOT PIN BUSHING 2. To remove the axle center mem- ber (1—Fig. FO500), support front of tractor and unbolt radius rods and axle extensions from the axle center mem- ber. Remove the axle pivot pin clamp- ing bolt and retainer (8) and remove the pivot pin using a pilot bearing puller and slide hammer. Slide axle center member sideways out of front support (6). Axle pivot pin bushing (4) can be renewed at this time and should be installed with a piloted drift. New
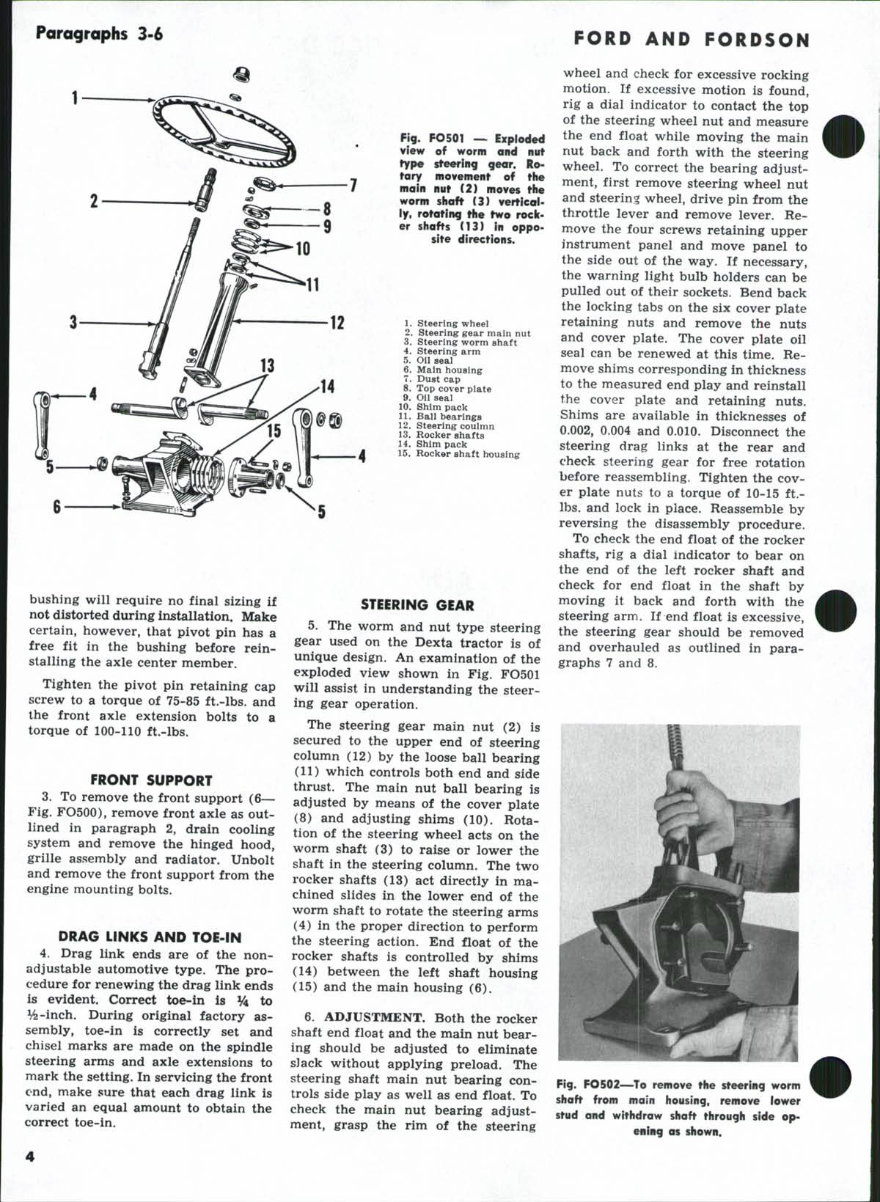
Paragraphs 3-6 FORD AND FORDSON Fig. FO501 — Exploded view of worm and nut type steering gear. Ro- tary movement of the main nut (2) moves the worm shaft (3) vertical- ly, rotating the two rock- er shafts (13) in oppo- site directions. 1. steering wheel 2. Steering gear main nut 3. Steering worm shaft 4. Steering arm 5. on seal 6. Main housing 7. Dust cap 8. Top cover piate 9. Oil seai 10. Shim pack 11. Bali bearings 12. Steering coulmn 13. Rocker shafts 14. Shim pack 15. Rocker shaft housing bushing will require no final sizing if not distorted during installation. Make certain, however, that pivot pin has a free fit in the bushing before rein- stalling the axle center member. Tighten the pivot pin retaining cap screw to a torque of 75-85 ft.-lbs. and the front axle extension bolts to a torque of 100-110 ft.-lbs. FRONT SUPPORT 3. To remove the front support (6— Fig. FO500), remove front axle as out- lined in paragraph 2, drain cooling system and remove the hinged hood, grille assembly and radiator. Unbolt and remove the front support from the engine mounting bolts. DRAG LINKS AND TOE-IN 4. Drag link ends are of the non- adjustable automotive type. The pro- cedure for renewing the drag link ends is evident. Correct toe-in is % to %-inch. During original factory as- sembly, toe-in is correctly set and chisel marks are made on the spindle steering arms and axle extensions to mark the setting. In servicing the front end, make sure that each drag link is varied an equal amount to obtain the correct toe-in. STEERING GEAR 5. The worm and nut type steering gear used on the Dexta tractor is of unique design. An examination of the exploded view shown in Fig. FO501 will assist in understanding the steer- ing gear operation. The steering gear main nut (2) is secured to the upper end of steering column (12) by the loose ball bearing (11) which controls both end and side thrust. The main nut ball bearing is adjusted by means of the cover plate (8) and adjusting shims (10). Rota- tion of the steering wheel acts on the worm shaft (3) to raise or lower the shaft in the steering column. The two rocker shafts (13) act directly in ma- chined slides in the lower end of the worm shaft to rotate the steering arms (4) in the proper direction to perform the steering action. End float of the rocker shafts is controlled by shims (14) between the left shaft housing (15) and the main housing (6). 6. ADJUSTMENT. Both the rocker shaft end float and the main nut bear- ing should be adjusted to eliminate sJack without applying preload. The steering shaft main nut bearing con- trols side play as well as end float. To check the main nut bearing adjust- ment, grasp the rim of the steering wheel and check for excessive rocking motion. If excessive motion is found, rig a dial indicator to contact the top of the steering wheel nut and measure the end float while moving the main nut back and forth with the steering wheel. To correct the bearing adjust- ment, first remove steering wheel nut and steering wheel, drive pin from the throttle lever and remove lever. Re- move the four screws retaining upper instrument panel and move panel to the side out of the way. If necessary, the warning light bulb holders can be pulled out of their sockets. Bend back the locking tabs on the six cover plate retaining nuts and remove the nuts and cover plate. The cover plate oil seal can be renewed at this time. Re- move shims corresponding in thickness to the measured end play and reinstall the cover plate and retaining nuts. Shims are available in thicknesses of 0.002, 0.004 and 0.010. Disconnect the steering drag links at the rear and check steering gear for free rotation before reassembling. Tighten the cov- er plate nuts to a torque of 10-15 ft.- lbs. and lock in place. Reassemble by reversing the disassembly procedure. To check the end float of the rocker shafts, rig a dial indicator to bear on the end of the left rocker shaft and check for end float in the shaft by moving it back and forth with the steering arm. If end float is excessive, the steering gear should be removed and overhauled as outlined in para- graphs 7 and 8. Fig. FO502—To remove the steering worm shaft from main housing, remove lower stud and withdraw shaft through side op- ening as shown.
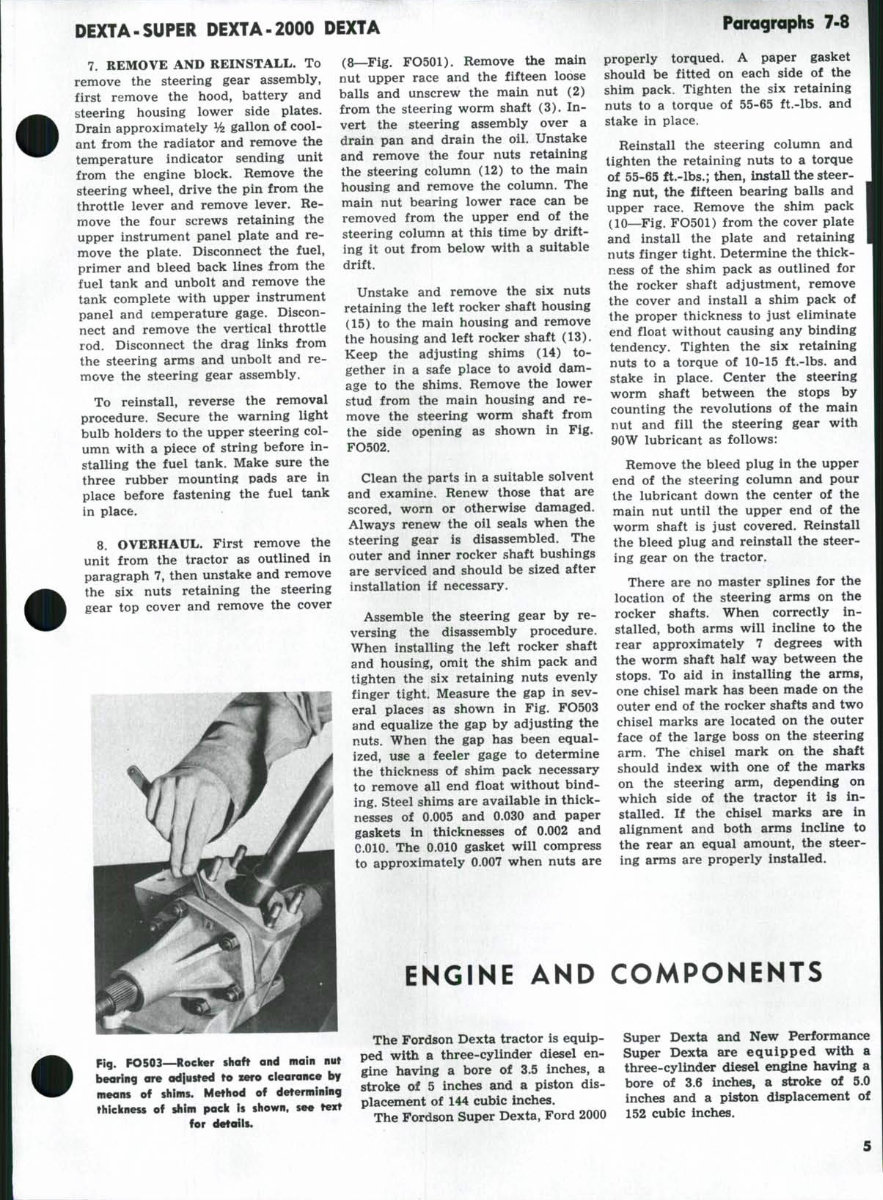
DEXTA-SUPER DEXTA-2000 DEXTA Paragraphs 7-8 7. REMOVE AND REINSTALL. To remove the steering gear assembly, first remove the hood, battery and steering housing lower side plates. Drain approximately Vz gallon of cool- ant from the radiator and remove the temperature indicator sending unit from the engine block. Remove the steering wheel, drive the pin from the throttle lever and remove lever. Re- move the four screws retaining the upper instrument panel plate and re- move the plate. Disconnect the fuel, primer and bleed back lines from the fuel tank and unbolt and remove the tank complete with upper instrument panel and temperature gage. Discon- nect and remove the vertical throttle rod. Disconnect the drag links from the steering arms and unbolt and re- move the steering gear assembly. To reinstall, reverse the removal procedure. Secure the warning light bulb holders to the upper steering col- umn with a piece of string before in- stalling the fuel tank. Make sure the three rubber mounting pads are in place before fastening the fuel tank in place. 8. OVERHAUL. First remove the unit from the tractor as outlined in paragraph 7, then unstake and remove the six nuts retaining the steering gear top cover and remove the cover (8—Fig. FO501). Remove the main nut upper race and the fifteen loose balls and unscrew the main nut (2) from the steering worm shaft (3). In- vert the steering assembly over a drain pan and drain the oil. Unstake and remove the four nuts retaining the steering column (12) to the main housing and remove the column. The main nut bearing lower race can be removed from the upper end of the steering column at this time by drift- ing it out from below with a suitable drift. Unstake and remove the six nuts retaining the left rocker shaft housing (15) to the main housing and remove the housing and left rocker shaft (13). Keep the adjusting shims (14) to- gether in a safe place to avoid dam- age to the shims. Remove the lower stud from the main housing and re- move the steering worm shaft from the side opening as shown in Fig. FO502. Clean the parts in a suitable solvent and examine. Renew those that are scored, worn or otherwise damaged. Always renew the oil seals when the steering gear is disassembled. The outer and inner rocker shaft bushings are serviced and should be sized after installation if necessary. Assemble the steering gear by re- versing the disassembly procedure. When installing the left rocker shaft and housing, omit the shim pack and tighten the six retaining nuts evenly finger tight. Measure the gap in sev- eral places as shown in Fig. FO503 and equalize the gap by adjusting the nuts. When the gap has been equal- ized, use a feeler gage to determine the thickness of shim pack necessary to remove all end float without bind- ing. Steel shims are available in thick- nesses of 0.005 and 0.030 and paper gaskets in thicknesses of 0.002 and 0.010. The 0.010 gasket will compress to approximately 0.007 when nuts are properly torqued. A paper gasket should be fitted on each side of the shim pack. Tighten the six retaining nuts to a torque of 55-65 ft.-lbs. and stake in place. Reinstall the steering column and tighten the retaining nuts to a torque of 55-65 ft.-lbs.; then, install the steer- ing nut, the fifteen bearing balls and upper race. Remove the shim pack (10—Fig. FO501) from the cover plate and install the plate and retaining nuts finger tight. Determine the thick- ness of the shim pack as outlined for the rocker shaft adjustment, remove the cover and install a shim pack of the proper thickness to just eliminate end float without causing any binding tendency. Tighten the six retaining nuts to a torque of 10-15 ft.-lbs. and stake in place. Center the steering worm shaft between the stops by counting the revolutions of the main nut and fill the steering gear with 90W lubricant as follows: Remove the bleed plug in the upper end of the steering column and pour the lubricant down the center of the main nut until the upper end of the worm shaft is just covered. Reinstall the bleed plug and reinstall the steer- ing gear on the tractor. There are no master splines for the location of the steering arms on the rocker shafts. When correctly in- stalled, both arms will incline to the rear approximately 7 degrees with the worm shaft half way between the stops. To aid in installing the armg, one chisel mark has been made on the outer end of the rocker shafts and two chisel marks are located on the outer face of the large boss on the steering arm. The chisel mark on the shaft should index with one of the marks on the steering arm, depending on which side of the tractor it is in- stalled. If the chisel marks are in alignment and both arms incline to the rear an equal amount, the steer- ing arms are properly installed. ENGINE AND COMPONENTS Fig. FO503—Roeiier shaft and main nut bearing are adjusted to zero clearance by means of shims. Method of determining thickness of shim pack is shown, see text for details. The Fordson Dexta tractor is equip- ped with a three-cylinder diesel en- gine having a bore of 3.5 inches, a stroke of 5 inches and a piston dis- placement of 144 cubic inches. The Fordson Super Dexta, Ford 2000 Super Dexta and New Performance Super Dexta are equipped with a three-cylinder diesel engiie having a bore of 3.6 inches, a stroke of 5.0 inches and a piston displacement of 152 cubic inches.
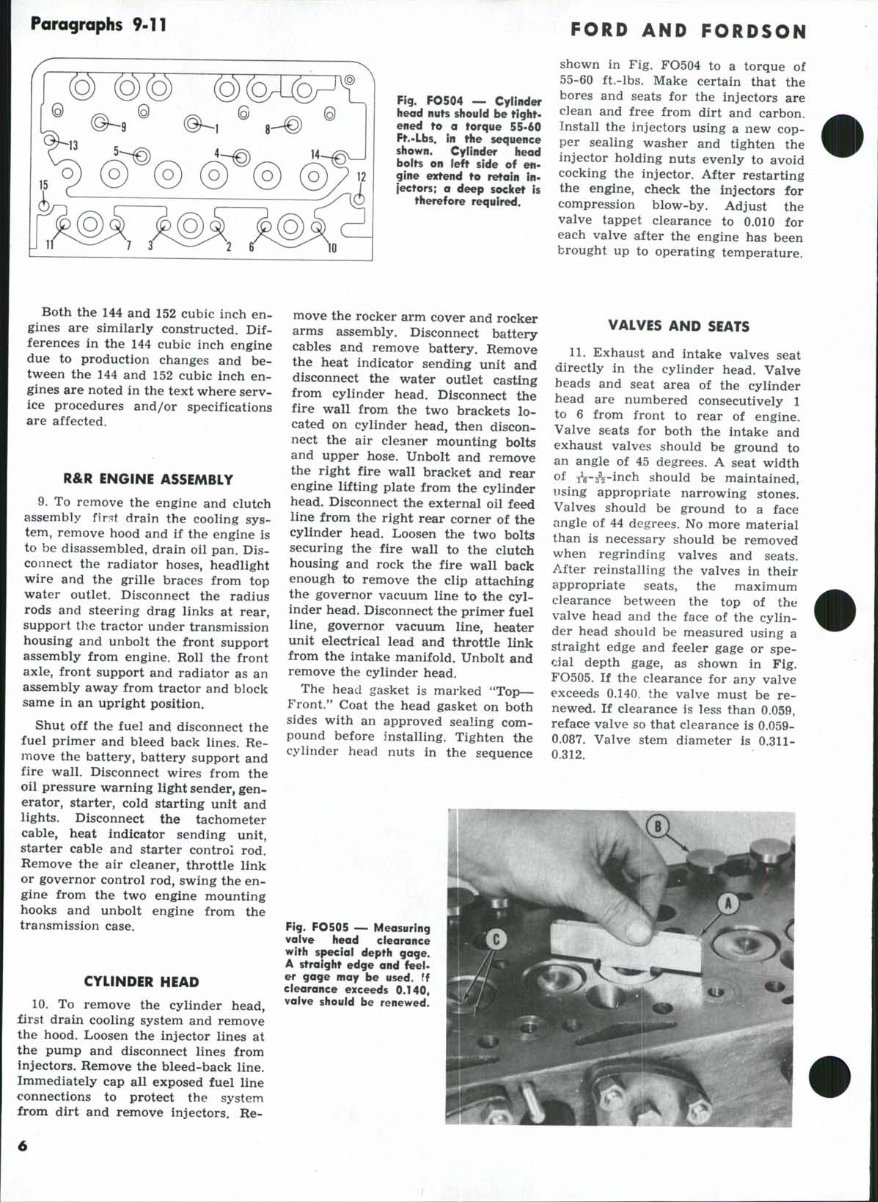
Paragraphs 9-11 FORD AND FORDSON Fig. FO504 — Cyiinder head nuts shouid be Hghf- ened to a forque 55-60 Ff.-Lbs. in the sequence shown. Cyiinder head bolts on left side of en- gine extend to retain in- jectors; a deep socicet is therefore required. shewn in Fig. FO504 to a torque of 55-60 ft.-lbs. Make certain that the bores and seats for the injectors are clean and free from dirt and carbon. Install the injectors using a new cop- per sealing washer and tighten the injector holding nuts evenly to avoid cocking the injector. After restarting the engine, check the injectors for compression blow-by. Adjust the valve tappet clearance to 0.010 for each valve after the engine has been brought up to operating temperature. Both the 144 and 152 cubic inch en- gines are similarly constructed. Dif- ferences in the 144 cubic inch engine due to production changes and be- tween the 144 and 152 cubic inch en- gines are noted in the text where serv- ice procedures and/or specifications are affected. R&R ENGINE ASSEMBLY 9. To remove the engine and clutch assembly first drain the cooling sys- tem, remove hood and if the engine is to be disassembled, drain oil pan. Dis- connect the radiator hoses, headlight wire and the grille braces from top water outlet. Disconnect the radius rods and steering drag links at rear, support the tractor under transmission housing and unbolt the front support assembly from engine. Roll the front axle, front support and radiator as an assembly away from tractor and block same in an upright position. Shut off the fuel and disconnect the fuel primer and bleed back lines. Re- move the battery, battery support and fire wall. Disconnect wires from the oil pressure warning light sender, gen- erator, starter, cold starting unit and lights. Disconnect the tachometer cable, heat indicator sending unit, starter cable and starter control rod. Remove the air cleaner, throttle link or governor control rod, swing the en- gine from the two engine mounting hooks and unbolt engine from the transmission case. CYLINDER HEAD 10. To remove the cylinder head, first drain cooling system and remove the hood. Loosen the injector lines at the pump and disconnect lines from injectors. Remove the bleed-back line. Immediately cap all exposed fuel line connections to protect the system from dirt and remove injectors. Re- move the rocker arm cover and rocker arms assembly. Disconnect battery cables and remove battery. Remove the heat indicator sending unit and disconnect the water outlet casting from cylinder head. Disconnect the fire wall from the two brackets lo- cated on cylinder head, then discon- nect the air cleaner mounting bolts and upper hose. Unbolt and remove the right fire wall bracket and rear engine lifting plate from the cylinder head. Disconnect the external oil feed line from the right rear corner of the cylinder head. Loosen the two bolts securing the fire wall to the clutch housing and rock the fire wall back enough to remove the clip attaching the governor vacuum line to the cyl- inder head. Disconnect the primer fuel line, governor vacuum line, heater unit electrical lead and throttle link from the intake manifold. Unbolt and remove the cylinder head. The head gasket is marked "Top— Front.*' Coat the head gasket on both sides with an approved sealing com- pound before installing. Tighten the cylinder head nuts in the sequence VALVES AND SEATS 11. Exhaust and intake valves seat directly in the cylinder head. Valve heads and seat area of the cylinder head are numbered consecutively 1 to 6 from front to rear of engine. Valve seats for both the intake and exhaust valves should be ground to an angle of 45 degrees. A seat width of A-A-inch should be maintained, using appropriate narrowing stones. Valves should be ground to a face angle of 44 degrees. No more material than is necessary should be removed when regrinding valves and seats. After reinstalling the valves in their appropriate seats, the maximum clearance between the top of the valve head and the face of the cylin- der head should be measured using a straight edge and feeler gage or spe- cial depth gage, as shown in Fig. FO505. If the clearance for any valve exceeds 0.140, the valve must be re- newed. If clearance is less than 0.059, reface valve so that clearance is 0.059- 0.087. Valve stem diameter is 0.311- 0.312. Fig. FO505 — Measuring vaive head clearance with speciai depth gage. A straight edge and feei- er gage may be used. If ciearance exceeds 0.140, vaive should be renewed.
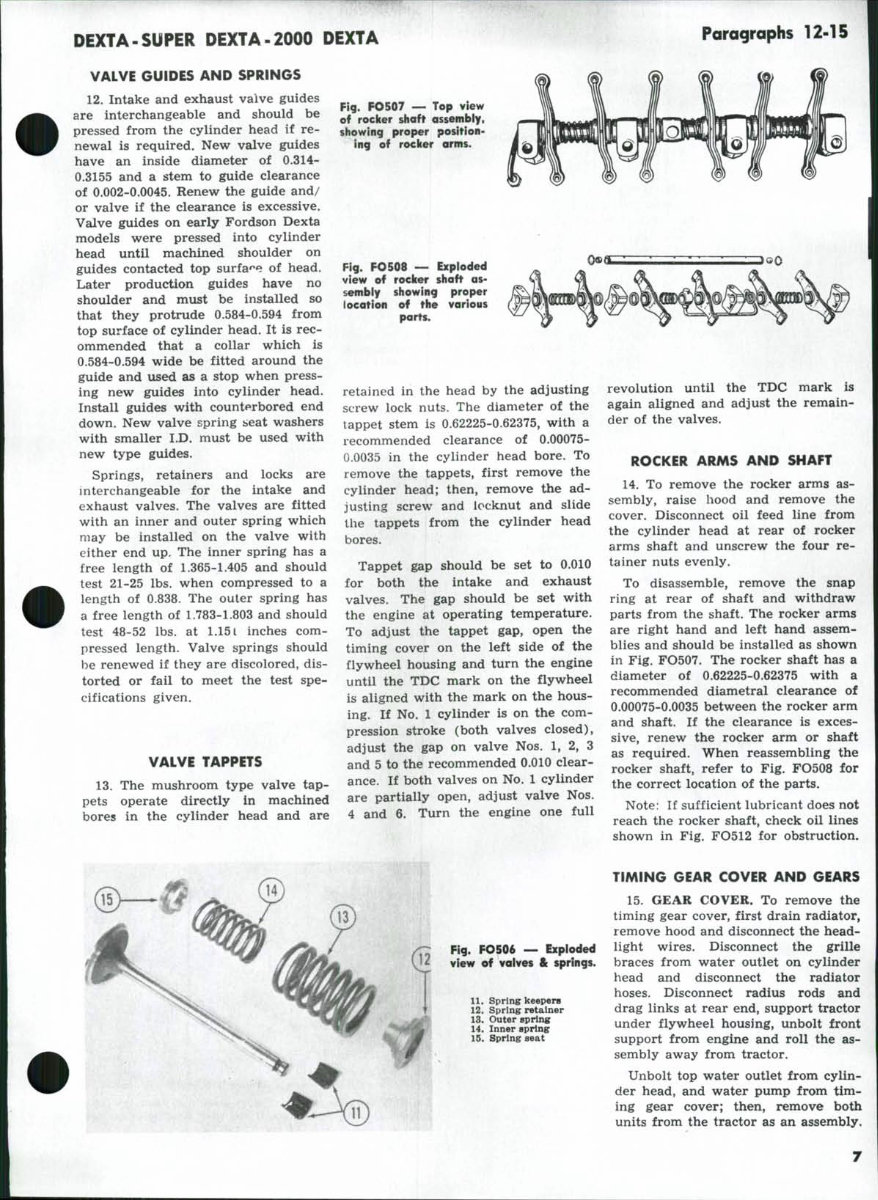
DEXTA-SUPER DEXTA-2000 DEXTA Paragraphs 12-15 VALVE GUIDES AND SPRINGS 12. Intake and exhaust valve guides are interchangeable and should be pressed from the cylinder head if re- newal is required. New valve guides have an inside diameter of 0.314- 0.3155 and a stem to guide clearance of 0.002-0.0045. Renew the guide and/ or valve if the clearance is excessive. Valve guides on early Fordson Dexta models were pressed into cylinder head until machined shoulder on guides contacted top surfa'^e of head. Later production guides have no shoulder and must be installed so that they protrude 0.584-0.594 from top surface of cylinder head. It is rec- ommended that a collar which is 0.584-0.594 wide be fitted around the guide and used as a stop when press- ing new guides into cylinder head. Install guides with count*»rbored end down. New valve spring seat washers with smaller I.D. must be used with new type guides. Springs, retainers and locks are interchangeable for the intake and exhaust valves. The valves are fitted with an inner and outer spring which may be installed on the valve with either end up. The inner spring has a free length of 1.365-1.405 and should test 21-25 lbs. when compressed to a length of 0.838. The outer spring has a free length of 1.783-1.803 and should test 48-52 lbs. at 1.151 inches com- pressed length. Valve springs should be renewed if they are discolored, dis- torted or fail to meet the test spe- cifications given. VALVE TAPPETS 13. The mushroom type valve tap- pets operate directly in machined bores in the cylinder head and are Fig. FO507 — Top view of rocicer shaft assembiy, showing proper position- ing of rocker arms. Fig. FO508 — Expioded view of rocker shaft as- sembiy showing proper location of the various parts. retained in the head by the adjusting screw lock nuts. The diameter of the tappet stem is 0.62225-0.62375, with a recommended clearance of 0.00075- 0.0035 in the cylinder head bore. To remove the tappets, first remove the cylinder head; then, remove the ad- justing screw and locknut and slide the tappets from the cylinder head bores. Tappet gap should be set to 0.010 for both the intake and exhaust valves. The gap should be set with the engine at operating temperature. To adjust the tappet gap, open the timing cover on the left side of the flywheel housing and turn the engine until the TDC mark on the flywheel is aiigned with the mark on the hous- ing. If No. 1 cylinder is on the com- pression stroke (both valves closed), adjust the gap on valve Nos. 1, 2, 3 and 5 to the recommended 0.010 clear- ance. If both valves on No. 1 cylinder are partially open, adjust valve Nos. 4 and 6. Turn the engine one full revolution until the TDC mark is again aligned and adjust the remain- der of the valves. ROCKER ARMS AND SHAFT 14. To remove the rocker arms as- sembly, raise hood and remove the cover. Disconnect oil feed line from the cylinder head at rear of rocker arms shaft and unscrew the four re- tainer nuts evenly. To disassemble, remove the snap ring at rear of shaft and withdraw parts from the shaft. The rocker arms are right hand and left hand assem- blies and should be installed as shown in Fig. FO507. The rocker shaft has a diameter of 0.62225-0.62375 with a recommended diametral clearance of 0.00075-0.0035 between the rocker arm and shaft. If the clearance is exces- sive, renew the rocker arm or shaft as required. When reassembling the rocker shaft, refer to Fig. FO508 for the correct location of the parts. Note: If sufficient lubricant does not reach the rocker shaft, check oil lines shown in Fig. FO512 for obstruction. Fig. FO506 ~ Expioded view of vaives & springs. 11. Spring keepers 12. Spring retainer 13. Outer spHncr 14. Inner spring 15. Spring seat TIMING GEAR COVER AND GEARS 15. GEAR COVER. To remove the timing gear cover, first drain radiator, remove hood and disconnect the head- light wires. Disconnect the grille braces from water outlet on cylinder head and disconnect the radiator hoses. Disconnect radius rods and drag links at rear end, support tractor under flywheel housing, unbolt front support from engine and roll the as- sembly away from tractor. Unbolt top water outlet from cylin- der head, and water pump from tim- ing gear cover; then, remove both units from the tractor as an assembly.
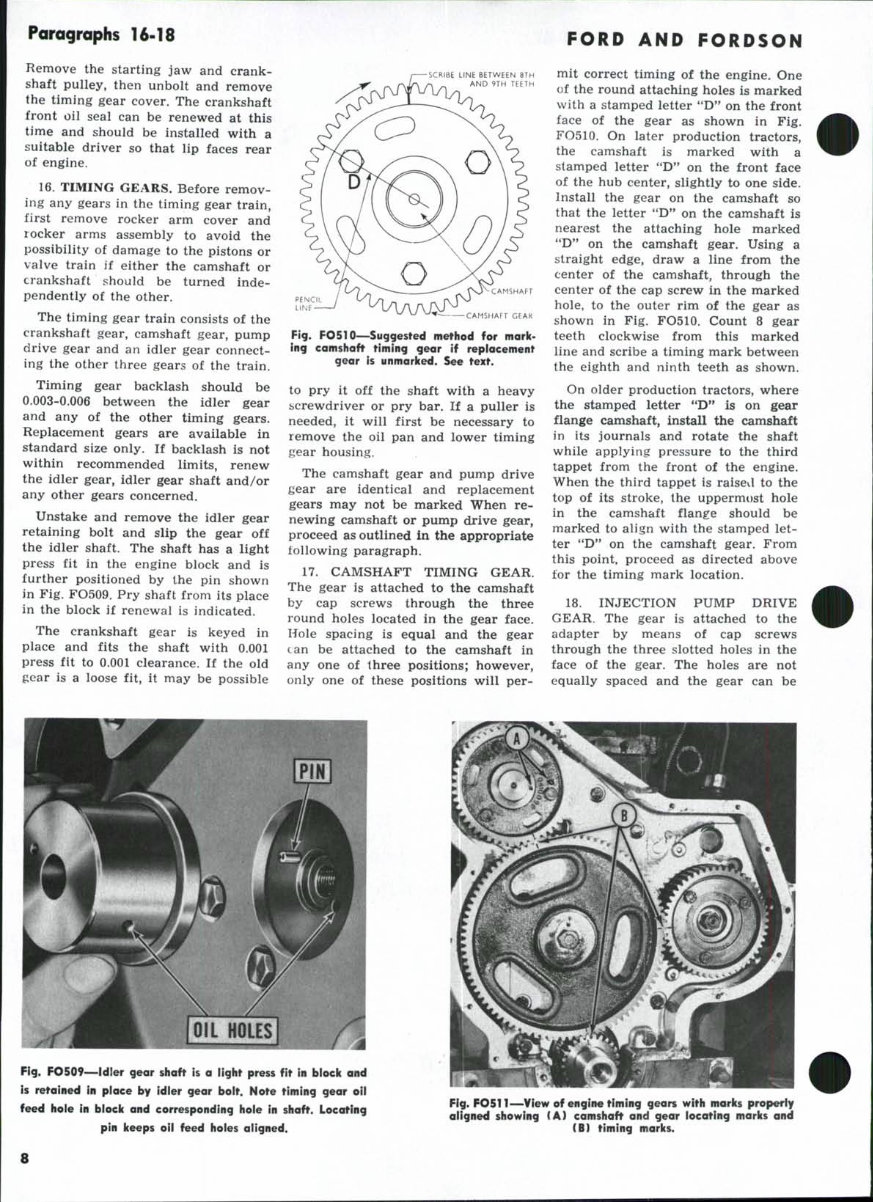
Paragraphs 16-18 Remove the starting jaw and crank- shaft pulley, then unbolt and remove the timing gear cover. The crankshaft front oil seal can be renewed at this time and should be installed with a suitable driver so that lip faces rear of engine. 16. TIMING GEARS. Before remov- ing any gears in the timing gear train, first remove rocker arm cover and rocker arms assembly to avoid the possibility of damage to the pistons or valve train if either the camshaft or crankshaft should be turned inde- pendently of the other. The timing gear train consists of the crankshaft gear, camshaft gear, pump drive gear and an idler gear connect- ing the other three gears of the train. Timing gear backlash should be 0.003-0.006 between the idler gear and any of the other timing gears. Replacement gears are available in standard size only. If backlash is not within recommended limits, renew the idler gear, idler gear shaft and/or any other gears concerned. Unstake and remove the idler gear retaining bolt and slip the gear off the idler shaft. The shaft has a light press fit in the engine block and is further positioned by the pin shown in Fig. FO509. Pry shaft from its place in the block if renewal is indicated. The crankshaft gear is keyed in place and fits the shaft with 0.001 press fit to 0.001 clearance. If the old gear is a loose fit, it may be possible SCRIBE LINE BETWEEN 8TH AND 9TH TEETH CAMSHAFT GEAR Fig. FO510—Suggested method for mark- ing camshaft timing gear if replacement gear is unmarked. See text. to pry it off the shaft with a heavy screwdriver or pry bar. If a puller is needed, it will first be necessary to remove the oil pan and lower timing gear housing. The camshaft gear and pump drive gear are identical and replacement gears may not be marked When re- newing camshaft or pump drive gear, proceed as outlined in the appropriate following paragraph. 17. CAMSHAFT TIMING GEAR. The gear is attached to the camshaft by cap screws through the three round holes located in the gear face. Hole spacing is equal and the gear can be attached to the camshaft in any one of three positions; however, only one of these positions will per- FORD AND FORDSON mit correct timing of the engine. One of the round attaching holes is marked with a stamped letter "D" on the front face of the gear as shown in Fig. FO510. On later production tractors, the camshaft is marked with a stamped letter "D" on the front face of the hub center, slightly to one side. Install the gear on the camshaft so that the letter "D" on the camshaft is nearest the attaching hole marked "D" on the camshaft gear. Using a straight edge, draw a line from the center of the camshaft, through the center of the cap screw in the marked hole, to the outer rim of the gear as shown in Fig. FO510. Count 8 gear teeth clockwise from this marked line and scribe a timing mark between the eighth and ninth teeth as shown. On older production tractors, where the stamped letter *'D" is on gear flange camshaft, install the camshaft in its journals and rotate the shaft while applying pressure to the third tappet from the front of the engine. When the third tappet is raisevl to the top of its stroke, the uppermost hole in the camshaft flange should be marked to align with the stamped let- ter "D*' on the camshaft gear. From this point, proceed as directed above for the timing mark location. 18. INJECTION PUMP DRIVE GEAR. The gear is attached to the adapter by means of cap screws through the three slotted holes in the face of the gear. The holes are not equally spaced and the gear can be Fig. FOS09—idler gear shaft is a light press fit In biock and is retained in piace by idier gear boit. Note timing gear oil feed hoie in biock and corresponding hole in shaft. Locating pin keeps oii feed holes aligned. Fig. F0511—View of engine timing gears with marks properiy aiigned showing (A) camshaft and gear iocating marks and (B) timing marks. 8
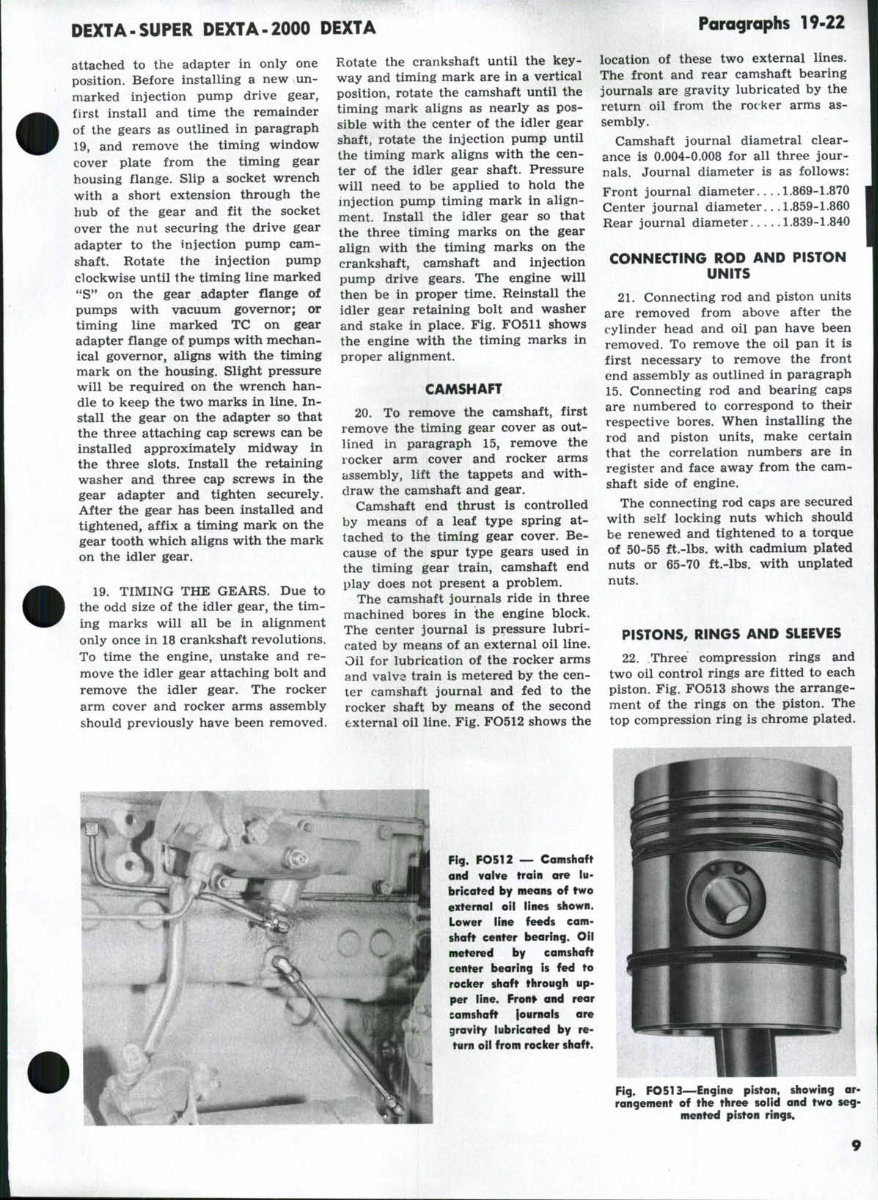
DEXTA-SUPER DEXTA-2000 DEXTA Paragraphs 19-22 attached to the adapter in only one position. Before installing a new un- marked injection pump drive gear, first install and time the remainder of the gears as outlined in paragraph 19, and remove the timing window cover plate from the timing gear housing flange. Slip a socket wrench with a short extension through the hub of the gear and fit the socket over the nut securing the drive gear adapter to the injection pump cam- shaft. Rotate the injection pump clockwise until the timing line marked "S" on the gear adapter flange of pumps with vacuum governor; or timing line marked TC on gear adapter flange of pumps with mechan- ical governor, aligns with the timing mark on the housing. Slight pressure will be required on the wrench han- dle to keep the two marks in line. In- stall the gear on the adapter so that the three attaching cap screws can be installed approximately midway in the three slots. Install the retaining washer and three cap screws in the gear adapter and tighten securely. After the gear has been installed and tightened, affix a timing mark on the gear tooth which aligns with the mark on the idler gear. 19. TIMING THE GEARS. Due to the odd size of the idler gear, the tim- ing marks will all be in alignment only once in 18 crankshaft revolutions. To time the engine, unstake and re- move the idler gear attaching bolt and remove the idler gear. The rocker arm cover and rocker arms assembly should previously have been removed. Rotate the crankshaft until the key- way and timing mark are in a vertical position, rotate the camshaft until the timing mark aligns as nearly as pos- sible with the center of the idler gear shaft, rotate the injection pump until the timing mark aligns with the cen- ter of the idler gear shaft. Pressure will need to be applied to hold the injection pump timing mark in align- ment. Install the idler gear so that the three timing marks on the gear align with the timing marks on the crankshaft, camshaft and injection pump drive gears. The engine will then be in proper time. Reinstall the idler gear retaining bolt and washer and stake in place. Fig. FO511 shows the engine with the timing marks in proper alignment. CAMSHAFT 20. To remove the camshaft, first remove the timing gear cover as out- Uned in paragraph 15, remove the rocker arm cover and rocker arms assembly, lift the tappets and with- draw the camshaft and gear. Camshaft end thrust is controlled by means of a leaf type spring at- tached to the timing gear cover. Be- cause of the spur type gears used in the timing gear train, camshaft end play does not present a problem. The camshaft journals ride in three machined bores in the engine block. The center journal is pressure lubri- cated by means of an external oil line. Oil for lubrication of the rocker arms and valvs train is metered by the cen- ter camshaft journal and fed to the rocker shaft by means of the second external oil line. Fig. FO512 shows the location of these two external lines. The front and rear camshaft bearing journals are gravity lubricated by the return oil from the rocker arms as- sembly. Camshaft journal diametral clear- ance is 0.004-0.008 for all three jour- nals. Journal diameter is as follows: Front journal diameter 1.869-1.870 Center journal diameter.. .1.859-1.860 Rear journal diameter 1.839-1.840 CONNECTING ROD AND PISTON UNITS 21. Connecting rod and piston units are removed from above after the cylinder head and oil pan have been removed. To remove the oil pan it is first necessary to remove the front end assembly as outlined in paragraph 15. Connecting rod and bearing caps are numbered to correspond to their respective bores. When installing the rod and piston units, make certain that the correlation numbers are in register and face away from the cam- shaft side of engine. The connecting rod caps are secured with self locking nuts which should be renewed and tightened to a torque of 50-55 ft,-lbs. with cadmium plated nuts or 65-70 ft.-lbs. with unplated nuts. PISTONS, RINGS AND SLEEVES 22. Three compression rings and two oil control rings are fitted to each piston. Fig. FO513 shows the arrange- ment of the rings on the piston. The top compression ring is chrome plated. Fig. FO512 — Camshaft and vaive train are iu- bricated by means of two external oil lines shown. Lower iine feeds cam- shaft center bearing. Oii metered by camshaft center bearing is fed to rocker shaft through up- per iine. Fron» and rear camshaft lournals are gravity tubricated by re- turn oii from rocker shaft. Fig. FO513—Engine piston, showing ar- rangement of the three solid and two seg- mented piston rings.
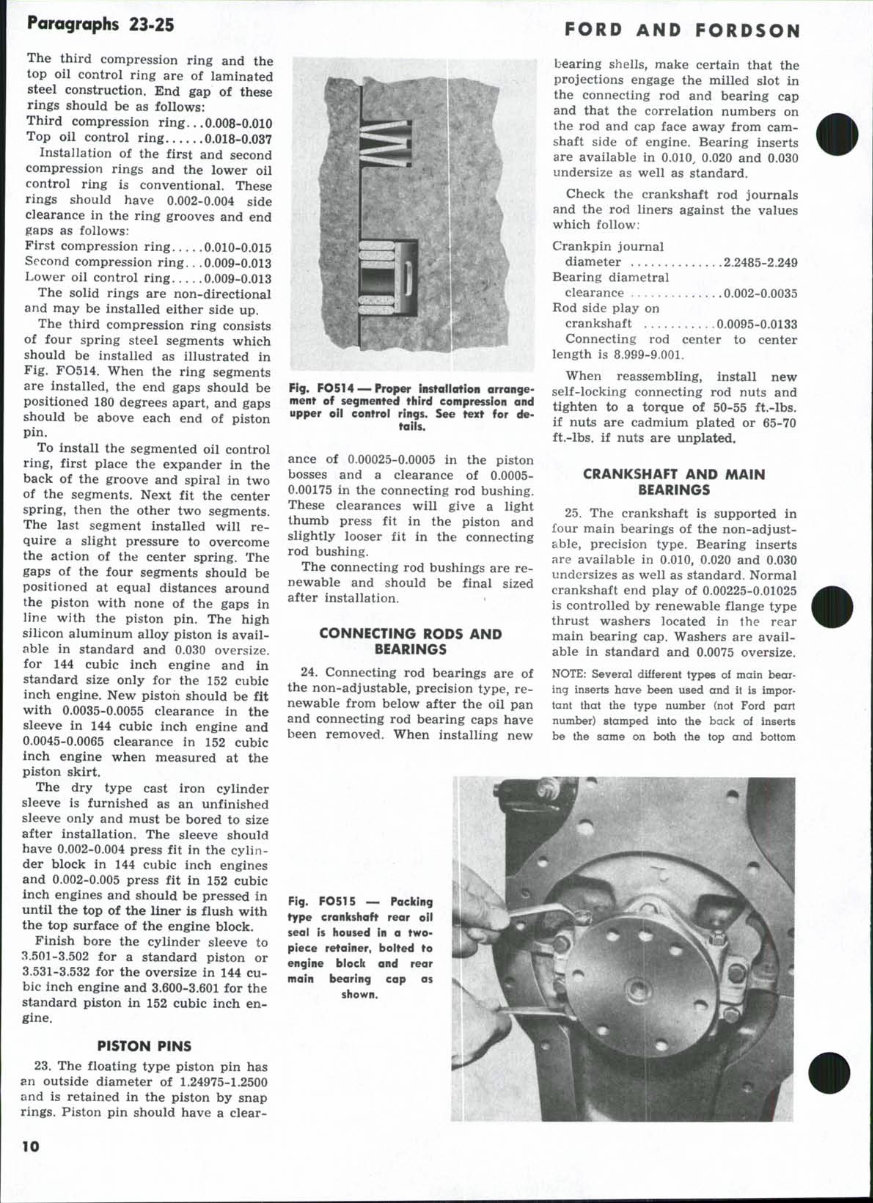
Paragraphs 23-25 FORD AND FORDSON The third compression ring and the top oil control ring are of laminated steel construction. End gap of these rings should be as follows: Third compression ring.. .0.008-0.010 Top oil control ring 0.018-0.037 Installation of the first and second compression rings and the lower oil control ring is conventional. These rings should have 0.002-0.004 side clearance in the ring grooves and end gaps as follows: First compression ring 0.010-0.015 Second compression ring.. .0.009-0.013 Lower oil control ring 0.009-0.013 The solid rings are non-directional and may be installed either side up. The third compression ring consists of four spring steel segments which should be installed as illustrated in Fig. FO514. When the ring segments are installed, the end gaps should be positioned 180 degrees apart, and gaps should be above each end of piston pin. To install the segmented oil control ring, first place the expander in the back of the groove and spiral in two of the segments. Next fit the center spring, then the other two segments. The last segment installed will re- quire a slight pressure to overcome the action of the center spring. The gaps of the four segments should be positioned at equal distances around the piston with none of the gaps in line with the piston pin. The high silicon aluminum alloy piston is avail- able in standard and 0.030 oversize, for 144 cubic inch engine and in standard size only for the 152 cubic inch engine. New piston should be fit with 0.0035-0.0055 clearance in the sleeve in 144 cubic inch engine and 0.0045-0.0065 clearance in 152 cubic inch engine when measured at the piston skirt. The dry type cast iron cylinder sleeve is furnished as an unfinished sleeve only and must be bored to size after installation. The sleeve should have 0.002-0,004 press fit in the cylin- der block in 144 cubic inch engines and 0.002-0.005 press fit in 152 cubic inch engines and should be pressed in until the top of the liner is flush with the top surface of the engine block. Finish bore the cylinder sleeve to 3.501-3.502 for a standard piston or 3.531-3.532 for the oversize in 144 cu- bic inch engine and 3.600-3.601 for the standard piston in 152 cubic inch en- gine. PISTON PINS 23. The floating type piston pin has an outside diameter of 1.24975-1.2500 and is retained in the piston by snap rings. Piston pin should have a clear- Fig. FO5T4 — Proper instoMotiofi arrange- ment of segmented third compression ond upper oil control rings. See text for de- tails. ance of 0.00025-0.0005 in the piston bosses and a clearance of 0.0005- 0.00175 in the connecting rod bushing. These clearances will give a light thumb press fit in the piston and slightly looser fit in the connecting rod bushing. The connecting rod bushings are re- newable and should be final sized after installation. CONNECTING RODS AND BEARINGS 24. Connecting rod bearings are of the non-adjustable, precision type, re- newable from below after the oil pan and connecting rod bearing caps have been removed. When installing new bearing shells, make certain that the projections engage the milled slot in the connecting rod and bearing cap and that the correlation numbers on the rod and cap face away from cam- shaft side of engine. Bearing inserts are available in 0.010, 0.020 and 0.030 undersize as well as standard. Check the crankshaft rod journals and the rod liners against the values which follow: Crankpin journal diameter 2.2485-2.249 Bearing diametral clearance 0.002-0.0035 Rod side play on crankshaft 0.0095-0.0133 Connecting rod center to center length is 8.999-9.001. When reassembling, install new self-locking connecting rod nuts and tighten to a torque of 50-55 ft.-lbs. if nuts are cadmium plated or 65-70 ft.-lbs. if nuts are unplated. CRANKSHAFT AND MAIN BEARINGS 25. The crankshaft is supported in four main bearings of the non-adjust- able, precision type. Bearing inserts are available in 0.010, 0.020 and 0.030 undersizes as well as standard. Normal crankshaft end play of 0.00225-0.01025 is controlled by renewable flange type thrust washers located in the rear main bearing cap. Washers are avail- able in standard and 0.0075 oversize. NOTE: Several diiferent types of main bear- ing inserts have been used and it is impor- tant that the type number (not Ford part number) stamped into the back oi inserts be the same on both the top and bottom Fig. FO515 — Packing type crankshaft rear oil seal is housed in a two- piece retainer, bolted to engine block and rear main bearing cap as shown. 10
DEXTA-SUPER DEXTA-2000 DEXTA Paragraphs 26-28 Insert of any one bearinc, journal. It is rec- ommended that the main bearing inserts be all of one type number. Also, the locking tab on the bottom Gaearing cap) thrust washer has been changed in production at engine Serial No. 1449364 and the correct thrust washer must be used. To remove the front main bearing cap, it is first necessary to remove the timing gear cover, lower timing gear housing and oil pump. To re- move the rear main bearing cap, it is first necessary to remove the engine as outlined in paragraph 9 and re- move the clutch, flywheel, adapter plate and rear oil seal retainer. Check the crankshaft and main bearing inserts against the values which follow: Crankpin diameter 2.2485-2.249 Main journal diameter.. .2.7485-2.749 Main bearing diametral clearance 0.0025-0.0045 Main bearing bolt torque .90-95 ft.-lbs. CRANKSHAFT OIL SEALS 26. The crankshaft front oil seal is mounted in the timing gear cover and may be renewed after the front cover is removed. Removal procedure for the timing gear cover is outlined in paragraph 15. Press the new seal into the cover with the lip to the inside. The crankshaft rear oil seal can be renewed after detaching engine from clutch housing as outlined in para- graph 56 and removing the clutch, flywheel and engine adapter plate. The rear oil seal retainer is secured to the rear of the engine block and rear main bearing cap by six cap screws and the two halves of the re- tainer are held together by two long bolts and self-locking nuts as shown Fig. FO516—After insfallatioii of runout should be eliecked as shown. Run- out shouid not exceed 0.004. in Fig. FO515. The packing type seal halves should be soaked in clean en- gine oil for a period of one hour be- fore installing in the retainer halves. Press the packings firmly in their re- tainers, leaving 0.010-0.020 of the packing ends protruding above the face of the retainer. Using new gas- kets, fit the two halves of the retainer around the crankshaft and install and tighten the long bolts and self-locking nuts holding the retainer together; then, install and tighten the six cap screws securing the oil seal assembly to engine block and main bearing cap. FLYWHEEL NOTE: The same flywheel part number is listed for all models. However, after introduction of the Simms "Minimec" fuel injection pump with a m e c h a n i c a l gov- ernor, two "SPILL" timing marks were placed on the flywheel. One mark at 26' BTDC is for use with fuel injection pumps having a vacuum governor and the second mark at 20" BTDC is lor use with the mechanical governor type fuel injection pump. If a serv- ice flywheel having only one "SPILL" timing mark at 26" BTDC is being installed on a tractor equipped with a mechanical governor type fuel injection pump, a second "SPILL" timing mark at 20* BTDC must be located and stamped into the flywheel so that the pump may be timed. Refer to Fig. FO516A and proceed as follows: Scribe a mark on the flywheel in relation to established "TDC" and "SPILL" marks as shown in Fig. FO516A. Permanently mark flywheel along scribed mark with a sharp cold chisel and, using metal lettter dies, stamp "SPILL" and "20* BTDC" on flywheel. Also stamp "26" BTDC" on flywheel at original "SPILL" mark. 27. The flywheel can be removed after detaching the engine from the transmission case and removing the clutch assembly. Caution: The flywheel is secured to the crankshaft flange by six cap screws which are safety wired. The flywheel or crankshaft flange are not fitted with locating dowels. Use care after removing the retaining screws to prevent the flywheel from falling from its place on the crankshaft and inflicting possible personal injury. The starter ring gear is secured to the front of the flywheel by six cap screws and lock washers. Install a new ring gear with the rounded ends of the gear teeth to the front of the engine. When reinstalling the flywheel, carefully clean the mating surfaces of the flywheel and crankshaft flange. Fig. FO516A—If insfalling a flywkeel having only the 26" BTDC timing mark in engine equipped wirh mechanical governor type fuel infection pump, locate and stamp the 20** BTDC timing mark on flywheel accord- ing to dimensions shown above. Measure- ments ore made around circumference of flywheel. Tighten the retaining cap screws to a torque of 75 ft.-lbs., affix a dial indi- cator to the adapter plate and check the flywheel runout as shown in Fig. FO516. Runout should not exceed C.004 when measured 3% inches from the outside edge of the flywheel. A greater runout would indicate the presence of dirt or foreign matter be- tween the flywheel and crankshaft flange, a sprung crankshaft or an im- properly ground flywheel face. NOTE: Prior to Fordson Dexta tractor Serial No. 957E-33407, models equipped with double clutch have spacer washers located between the clutch adapter plate and engine flywheel at each adapter plate retaining bolt. Spacer washers are not required with double clutch adapter plate used on later production tractors. OIL PUMP AND RELIEF VALVE 28. The oil pump assembly is mounted to the front face of the front main bearing cap and secured to the cap by three screws. The pump is driven from the crankshaft timing gear through an idler gear mounted on the pump flange. To remove the oil pump, first re- move the timing gear cover as out- lined in paragraph 15 then unbolt and remove the oil pan. Remove the pump suction and pressure lines and unbolt and remove the lower section of the timing gear housing. Remove the snap ring retaining the oil pump idler gear and lift off the gear. Remove the three cap screws retaining the oil pump to the main bearing cap and re- move the pump from its doweled po- sition on the cap. 11
You're Reading a Preview
What's Included?
Lifetime Access
Fast Download Speeds
Online & Offline Access
Access PDF Contents & Bookmarks
Full Search Facility
Print one or all pages of your manual
$39.99
Ford Fordson Dexta Factory Service & Work Shop Manual
Upon purchasing this manual, you will receive a .PDF file containing an email contact. After contacting us, you will receive a reply with a link to access the manual for your Ford Fordson Dexta.
This comprehensive manual covers every nut and bolt on your machine, with hundreds of pages detailing how to diagnose and fix any issue, from simple tasks like an oil change to more complex procedures like a transmission swap. The manual includes numerous illustrations to assist you and features easy-to-understand text throughout.
You can easily navigate the manual using the search function and print out the necessary pages. This Factory Service Repair Manual provides a step-by-step guide to maintaining and repairing your vehicle, imparting the same knowledge that factory-trained technicians possess. By utilizing the information in this manual, both professional mechanics and DIY enthusiasts can confidently make informed decisions regarding the maintenance and repair of their machine.
Rest assured, in addition to the high-quality service manual, we are committed to providing excellent customer service, ensuring your satisfaction with your purchase.
Reviews
Q&A
Recently Viewed
5,521,897Happy Clients
2,594,462eManuals
1,120,453Trusted Sellers
15Years in Business
Price:
Actual Price:
Ford Fordson Dexta Factory Service & Work Shop Manual



 Lifetime Access


