Contents INTRODUCTION Power Take-Off (PTO) ................................................................. 31 Gearbox .................................................................................. 31.220 Hydraulic systems....................................................................... 35 Pump control valves ...................................................................... 35.102 Variable displacement pump ............................................................. 35.106 Reservoir, cooler, and filters .............................................................. 35.300 Liquid fertilizer system hydraulic circuit ................................................... 35.747 Sprayer boom hydraulic system .......................................................... 35.911 Electrical systems ....................................................................... 55 Harnesses and connectors ............................................................... 55.100 Spray function controls ................................................................... 55.635 Chemical applicators ................................................................... 63 Liquid fertilizer system .................................................................... 63.100 84588404 13/07/2012
INTRODUCTION 84588404 13/07/2012 1
Contents INTRODUCTION Safety rules - Do not operate tag ............................................................... 3 Liquid System 610 Safety rules - Signal words ..................................................................... 4 Liquid System 610 Personal safety - California Proposition 65 Warning ........................................... 5 Liquid System 610 Basic instructions - Shop and assembly ........................................................ 6 Liquid System 610 Torque - Minimum tightening torques for normal assembly ..................................... 8 Liquid System 610 Torque - Standard torque data for hydraulics ................................................. 13 Liquid System 610 Maintenance Chart ............................................................................ 15 Liquid System 610 Definition - Important notice regarding equipment servicing .................................. 16 Liquid System 610 General specification - Fuse and relay locations ............................................. 17 Liquid System 610 84588404 13/07/2012 2
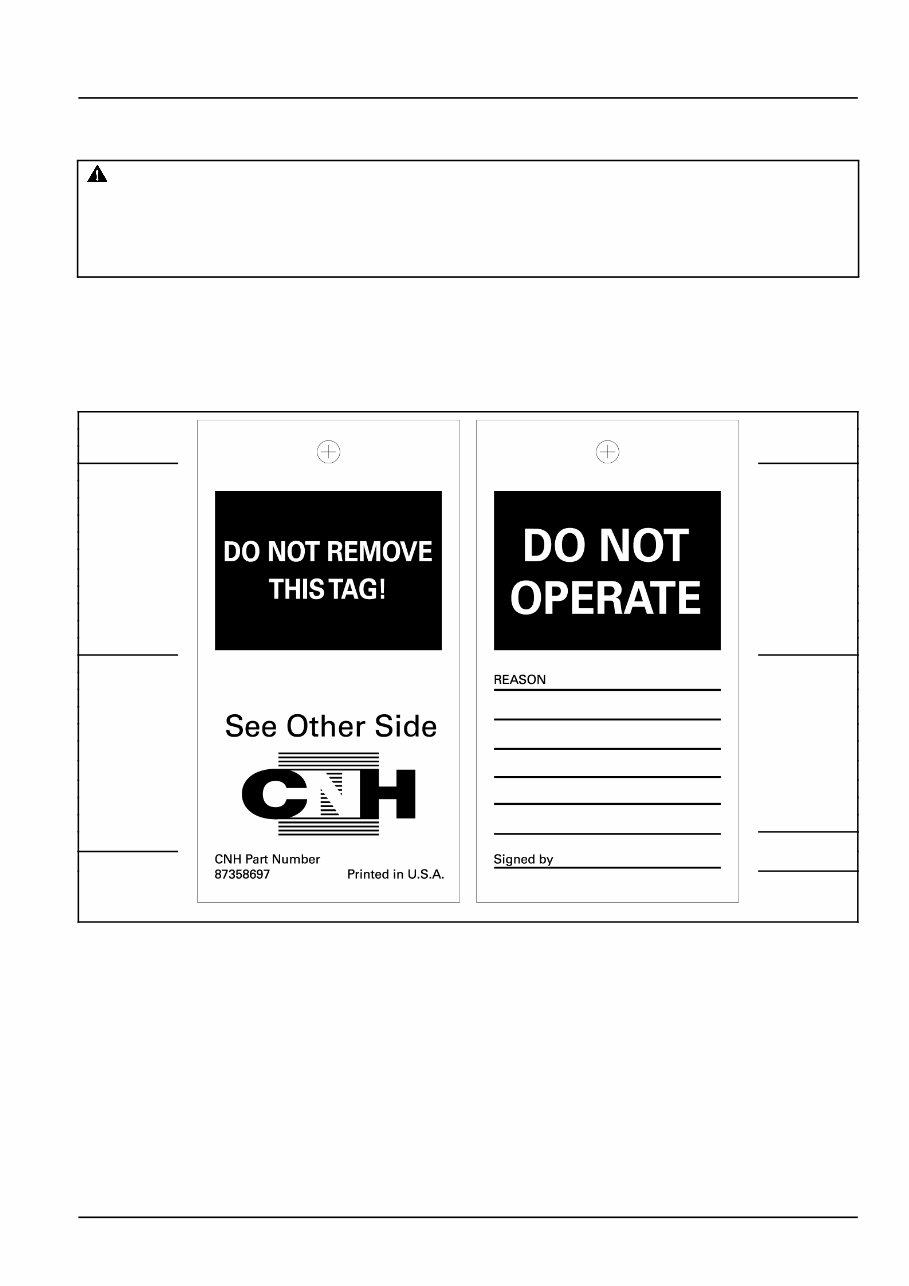
INTRODUCTION Safety rules - Do not operate tag Liquid System 610 WARNING Maintenance hazard! Before you start servicing the machine, attach a DO NOT OPERATE warning tag to the machine in a visible area. Failure to comply could result in death or serious injury. W0004A Attach a DO NOT OPERATE (TAG) to the machine in an area that is clearly visible whenever the machine is not operating properly and/or requires service. Complete the tag information for the "REASON" the tag is attached by describing the malfunction or service required. Validate the reason for attaching the tag by signing your name in the designated area on the tag. The tag should only be removed by the person who signed and attached the tag, after validating the repairs or services have been completed. (A) (D) (E) (B) (F) (C) 87358697 1 Tag Components A. DO NOT REMOVE THIS TAG! - (Warning) The tag should only be removed by the person who signed and attached the tag, after validating the repairs or services have been completed. B. See Other Side - (Reference to additional information on opposite side of the tag.) C. CNH Part Number - (Request this part number from you Service Parts Dealer to obtain this DO NOT OPERATE tag.) D. DO NOT OPERATE - (Warning!) E. REASON - (Area for describing malfunction or service required before operation.) F. Signed by - (Signature area - to be signed by the person validating the reason for installation of the tag.) 84588404 13/07/2012 3
INTRODUCTION Safety rules - Signal words Liquid System 610 Personal safety This is the safety alert symbol. It is used to alert you to potential personal injury hazards. Obey all safety messages that follow this symbol to avoid possible death or injury. Throughout this manual and on machine decals, you will find the signal words DANGER, WARNING, and CAUTION followed by special instructions. These precautions are intended for the personal safety of you and those working with you. Read and understand all the safety messages in this manual before you operate or service the machine. DANGER indicates a hazardous situation which, if not avoided, will result in death or serious injury. The color associated with DANGER is RED. WARNING indicates a hazardous situation which, if not avoided, could result in death or serious injury. The color associated with WARNING is ORANGE. CAUTION, used with the safety alert symbol, indicates a hazardous situation which, if not avoided, could result in minor or moderate injury. The color associated with CAUTION is YELLOW. FAILURE TO FOLLOW DANGER, WARNING, AND CAUTION MESSAGES COULD RESULT IN DEATH OR SERIOUS INJURY. Machine safety NOTICE: Notice indicates a situation which, if not avoided, could result in machine or property damage. The color associated with Notice is BLUE. Throughout this manual you will find the signal word Notice followed by special instructions to prevent machine or property damage. The word Notice is used to address practices not related to personal safety. Information NOTE: Note indicates additional information which clarifies steps, procedures, or other information in this manual. Throughout this manual you will find the word Note followed by additional information about a step, procedure, or other information in the manual. The word Note is not intended to address personal safety or property damage. 84588404 13/07/2012 4
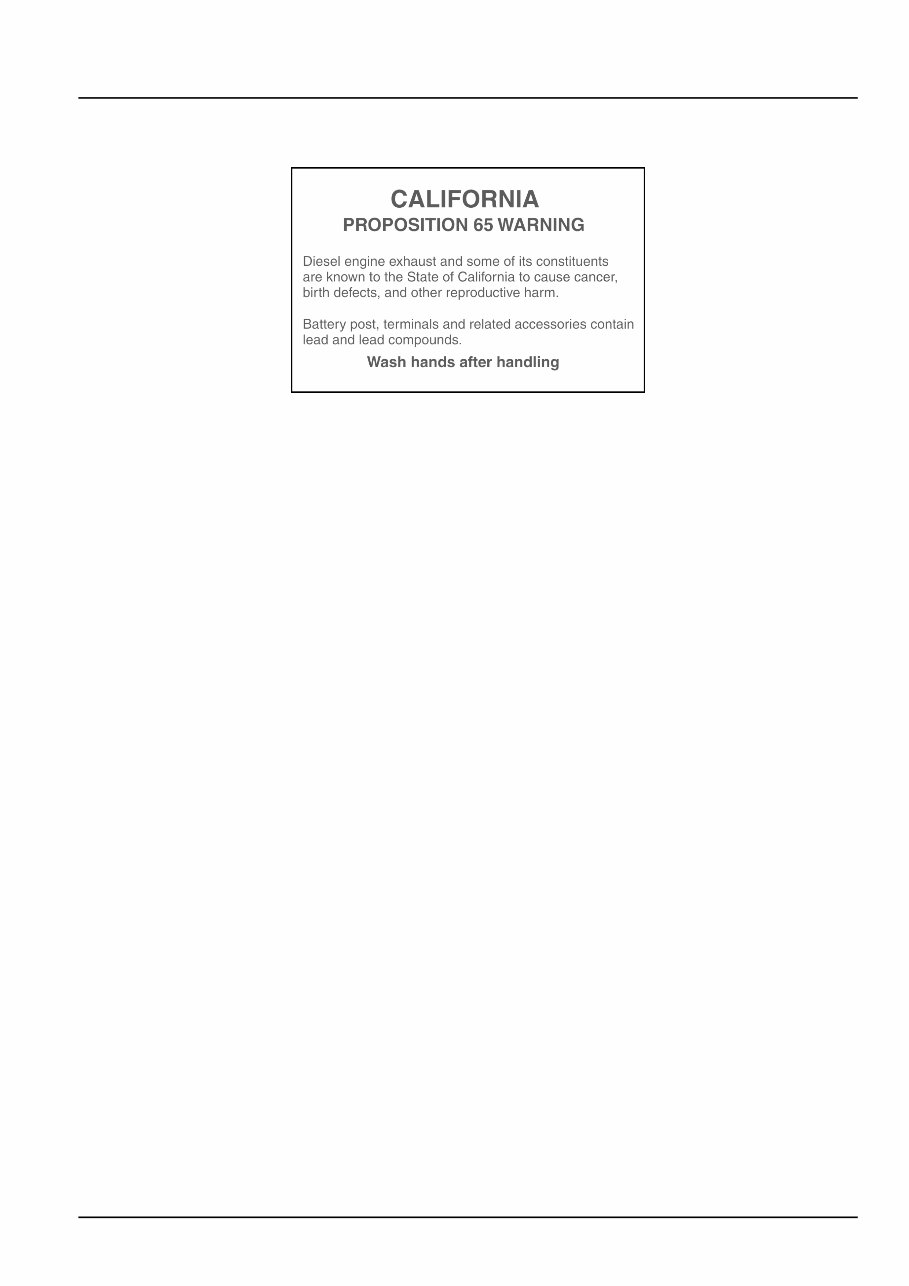
INTRODUCTION Personal safety - California Proposition 65 Warning Liquid System 610 BT09A213 1 84588404 13/07/2012 5
INTRODUCTION Basic instructions - Shop and assembly Liquid System 610 Shimming For each adjustment operation, select adjusting shims and measure individually using a micrometer, then add up the recorded values. Do not rely on measuring the entire shimming set, which may be incorrect, or the rated value indicated on each shim. Rotating shaft seals For correct rotating shaft seal installation, proceed as follows: • Before assembly, allow the seal to soak in the oil it will be sealing for at least thirty minutes. • Thoroughly clean the shaft and check that the working surface on the shaft is not damaged. • Position the sealing lip facing the fluid; with hydrodynamic lips, take into consideration the shaft rotation direction and position the grooves so that they will deviate the fluid towards the inner side of the seal. • Coat the sealing lip with a thin layer of lubricant (use oil rather than grease) and fill the gap between the sealing lip and the dust lip on double lip seals with grease unless instructed otherwise. • Insert the seal in its seat and press down using a flat punch or seal installation tool. Do not tap the seal with a hammer or mallet. • While inserting the seal, check that it is perpendicular to the seat; once settled, make sure that it makes contact with the thrust element, if required. • To prevent damaging the seal lip on the shaft, position a protective guard during installation operations. O-ring seals Lubricate the O-ring seals before inserting them in the seats, this will prevent them from overturning and twisting, which would jeopardize sealing efficiency. Sealing compounds Apply one of the following sealing compounds on the mating surfaces when specified: SILMATE® RTV1473, or LOCTITE® RTV 598 or LOCTITE®INSTANT GASKET 587 BLUE. Before applying the sealing compound, prepare the surfaces as directed on product container or as follows: • Remove any incrustations using a metal brush. • Thoroughly de-grease the surfaces using a locally approved cleaning agent such as safety solvent or brake parts cleaner. Spare parts Only use "CNH Original Parts" or " CASE IH AGRICULTURE Parts". Only genuine spare parts guarantee the same quality, duration and safety as original parts, as they are the same parts that are assembled during standard production. Only "CNH Original Parts" or " CASE IH AGRICULTURE Parts" can offer this guarantee. When ordering spare parts, always provide the following information: • Machine model (commercial name) and serial number • Part number of the ordered part, which can be found in the "Service Parts Catalogue", used for order processing 84588404 13/07/2012 6
INTRODUCTION Protecting the electrical/electronic systems during charging or welding WARNING Battery acid causes burns. Batteries contain sulfuric acid. Avoid contact with skin, eyes or clothing. Antidote (external): Flush with water. Antidote (eyes): flush with water for 15 minutes and seek medical attention immediately. Antidote (internal): Drink large quantities of water or milk. Do not induce vomiting. Seek medical attention immediately. Failure to comply could result in death or serious injury. W0111A To avoid damage to the electronic/electrical systems, always observe the following: 1. Never make or break any of the charging circuit connections, including the battery connections, when the engine is running. 2. Never short any of the charging components to ground. 3. Always disconnect the ground cable from the battery before arc welding on the machine or on any attachments on the machine. • Position the welder ground clamp as close to the welding area as possible • If welding in close proximity to a computer module, then the module should be removed from the machine • Never allow welding cables to lay on, near or across any electrical wiring or electronic component while welding is in progress 4. Always disconnect the negative cable from the battery when charging the battery in the machine with a battery charger. NOTICE: If welding must be performed on the unit, the battery ground cable must be disconnected from the machine battery. The electronic monitoring system and charging system will be damaged if this is not done. Remove the battery ground cable. Reconnect the cable when welding is completed. Tools The tools that CASE IH AGRICULTURE suggests and illustrated in this manual have been: • Specifically researched and designed for use with CASE IH AGRICULTURE machines • Essential for reliable repair operations • Accurately built and rigorously tested so as to offer efficient and long-lasting operation By using these tools, repair personnel will benefit from: • Operating in optimal technical conditions • Obtaining the best results • Saving time and effort • Working in safe conditions NOTE: The terms "front", "rear", "right-hand" and "left-hand" (when referred to different parts) are determined from the rear, facing in the direction of travel of the machine during operation. 84588404 13/07/2012 7
The Case IH Liquid System 610 Planting/Seeding Repair Manual is a comprehensive guide designed to assist both professional mechanics and DIY enthusiasts in maintaining and repairing their equipment with ease.
This workshop manual provides detailed instructions for the removal, installation, disassembly, and assembly of various components, enabling efficient troubleshooting and issue resolution during the planting or seeding process.
Included in this manual are an electrical wiring diagram and hydraulic schematic, offering a clear understanding of the system's inner workings. This knowledge is invaluable for diagnosing and resolving electrical or hydraulic problems.
Furthermore, the manual contains specifications and torque values essential for ensuring proper assembly and operation of the equipment, guaranteeing optimal performance and longevity of your Case IH Liquid System 610.
Available Model:
Case IH Liquid System 610 Planting/Seeding Repair Manual








 Lifetime Access


