2 502 51 03-01 General recommendations Bear in mind: ● Do not start the engine without the clutch drum and shaft fitted. Otherwise there is a risk that the clutch can become loose and cause personal injury. ● Do not touch hot components, e.g. the muffler and clutch before they have cooled sufficiently to avoid burns. ● Avoid getting fuel or oil on your skin or in your mouth. Use barrier cream on your hands. This reduces the risk of infection and makes dirt easier to wash off. Long term contact with engine oil can represent a health hazard. ● Never start the engine indoors. Exhaust fumes are poison- ous! ● Wipe up oil spills from the floor immediately to avoid slipping. ● Do not use tools that are worn or fit badly, for example on nuts and screws. ● Always work on a clean bench. ● Always work logically to ensure all parts are fitted correctly and that nuts and screws are tightened. ● Use the special tools where recommended in order to carry out the work correctly and efficiently. Special tools Some of the work described in the Workshop Manual requires special tools. In each section where this is necessary there is a picture of the tool and an order number. We recommend the use of special tools in order to avoid personal injury and to eliminate expensive damage to the parts in question. Contact faces and gaskets Ensure all surfaces are clean and free from gasket residue. When cleaning use a tool that will not damage the contact face. Any scratches or unevenness should be removed using a flat fine cut file. Sealing rings Always replace a sealing ring that has been dismantled. The sensitive sealing lip can easily be damaged resulting in inferior sealing capacity. Surfaces that the seal shall seal against must also be completely undamaged. Lubricate the sealing lip with grease before it is fitted and ensure that it is not damaged e.g. by shoulders and splines on a shaft. Use tape or a conical sleeve as protection. It is important that the sealing ring faces in the right direction for it to act as it is intended. The workshop used to carry out repairs must be equipped with safety devices in accordance with local directives. No one may carry out repairs without first having read and understood the contents of this Workshop Manual. The boxes below can be found in appropriate parts of this manual. WARNING! The warning box warns of the risk for personal injury if the instructions are not followed. ! NOTE! This box warns of damage to material if the instructions are not followed. The machine is type approved for safety in accordance with applicable legislative demands with the equipment specified in the Operator’s Manual. The assembly of other equipment or accessories or spare parts not approved by Husqvarna can result in the failure to meet these safety demands and that the person carrying out assembly bears responsibility for this. Poisonous fumes When using cleaning agents read the instructions carefully. Ensure there is good ventilation when handling petrol and other volatile fluids. The engine’s exhaust fumes are poisonous. Test run the engine outdoors. Fire risk Handle fuel with respect, as it is extremely inflammable. Do not smoke and ensure there are no open flames or sparks in the vicinity. Make sure there is a working fire extinguisher close at hand. Do not try to extinguish a petrol fire with water. chodina@live.co.uk chodina@live.co.uk
3 1. Starter Contents Models 322, 325 Dismantling, assembling ___________________________ 4 Replacing the drive dogs __________________________ 5 Models 32, Mondo, Mondo Mega Dismantling, assembling ___________________________ 6 Model 18H Dismantling _____________________________________ 6 Assembly ______________________________________ 7 Models 140B, 141B Dismantling, assembling ___________________________ 8 Assembly General ________________________________________ 9 Replacing the drive dogs _______________________ 10 chodina@live.co.uk chodina@live.co.uk
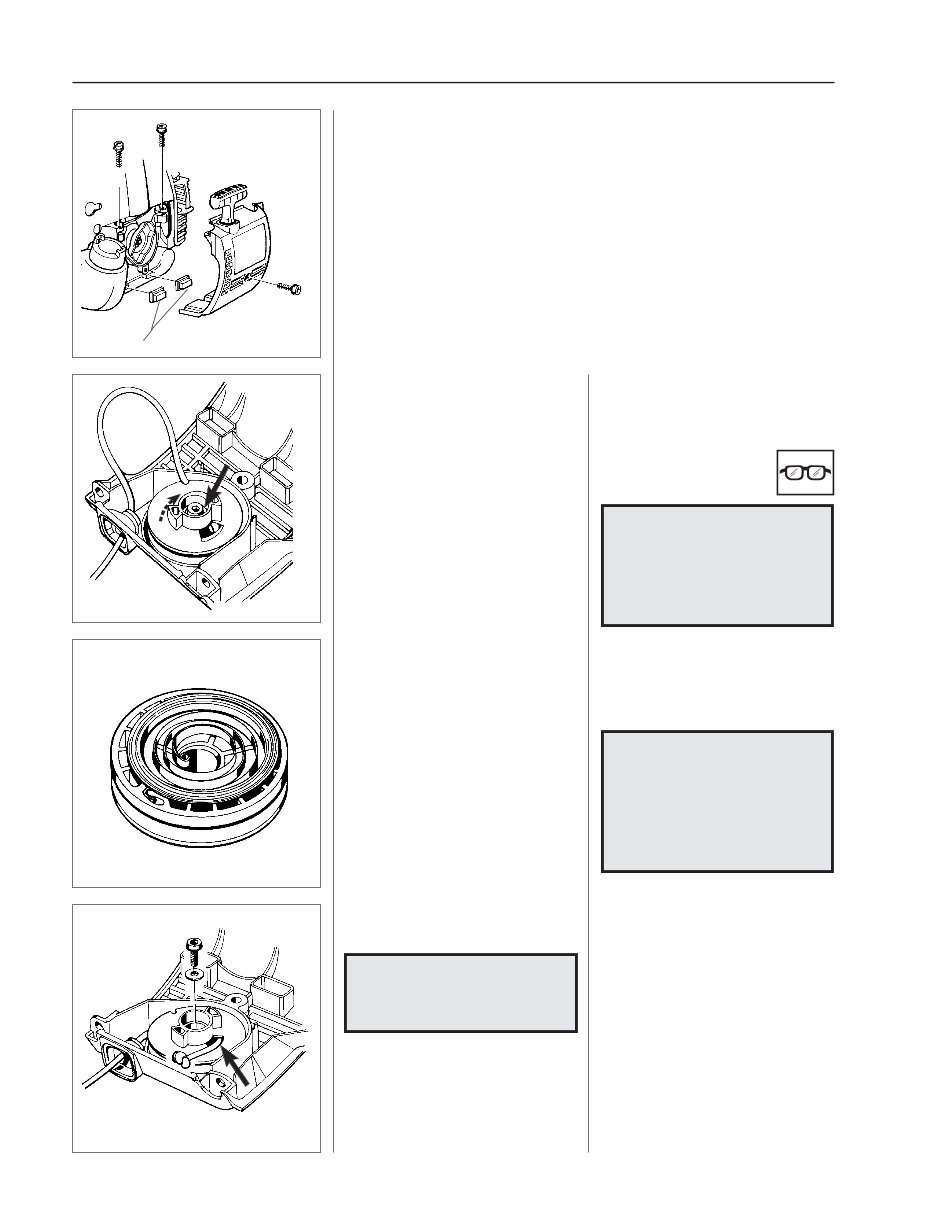
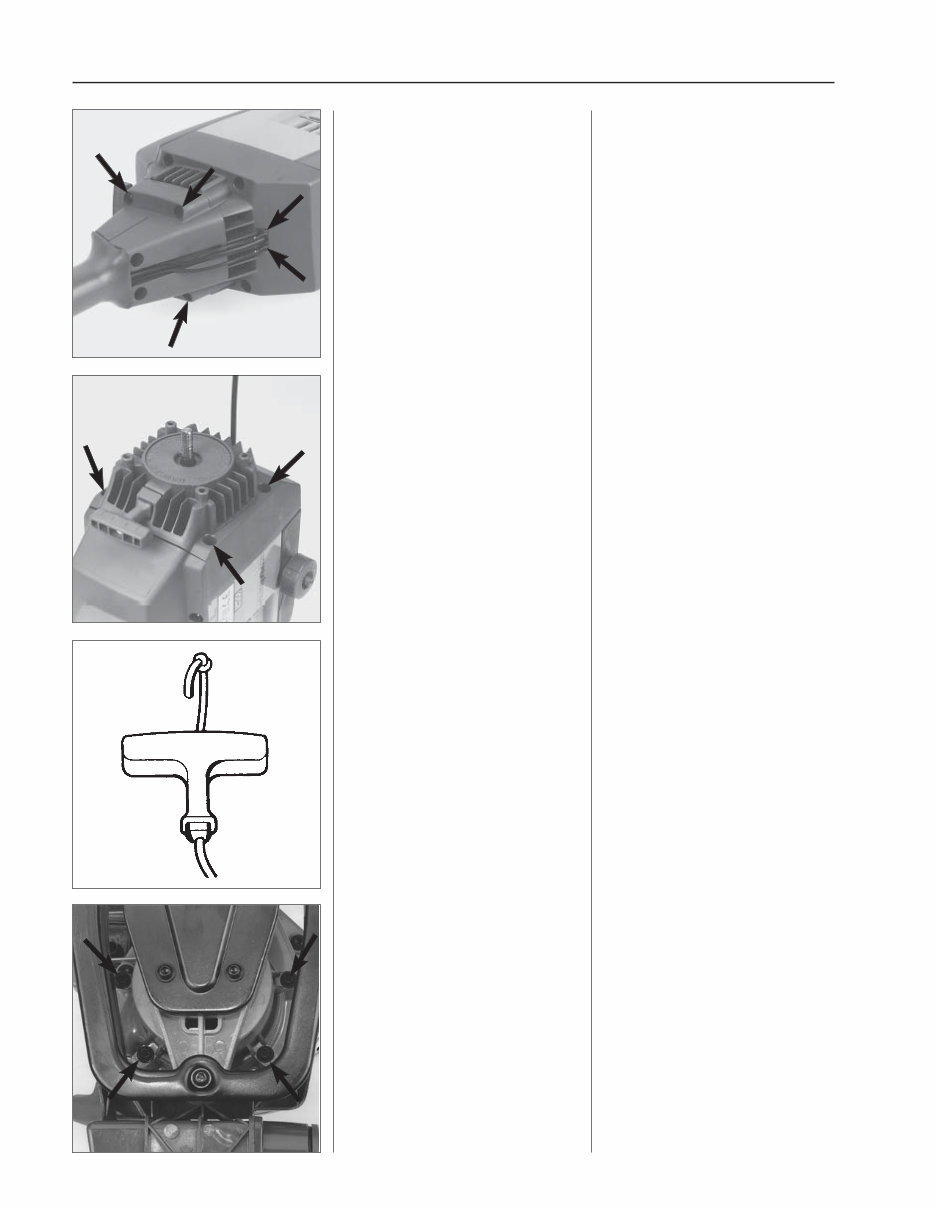
4 1 A Starter Models 322, 325 Dismantling Remove the 3 screws and lift off the starter. NOTE! Ensure the bushings (A) that guide the starter towards the fuel tank are not lost. Offload the spring tension. Remove the screw from the centre of the starter pulley and lift off the starter pulley. Offload the spring tension in the same way as described for model 265. Remove the screw in the centre of the starter pulley. Carefully lift out the starter pulley from the starter housing. Assembly Clean the component parts and assemble in the reverse order as set out for disman- tling. Assembly Clean component parts before assem- bling. Replace the return spring/starter pulley and starter cord, if necessary. Assemble the starter pulley. Assemble a new starter cord. Lubricate the spindle with a little grease and fit the starter pulley. Position the washer and tighten the screw. Assemble a new starter cord. Slide it into the starter pulley’s slot as illustrated and then out through the cord guide in the starter housing. Make sure the knot on the end of the cord is as small as possible! WARNING! Wear protective glasses. The return spring lies tensioned in the starter and can fly out and cause personal injury with careless handling. ! NOTE! The return spring and starter pulley are supplied pre-assembled and are fitted in the starter housing as a single unit. Exercise care when opening the packaging so that the spring does not fly out. NOTE! A new starter cord can be fitted without the need of dismantling the starter! chodina@live.co.uk chodina@live.co.uk
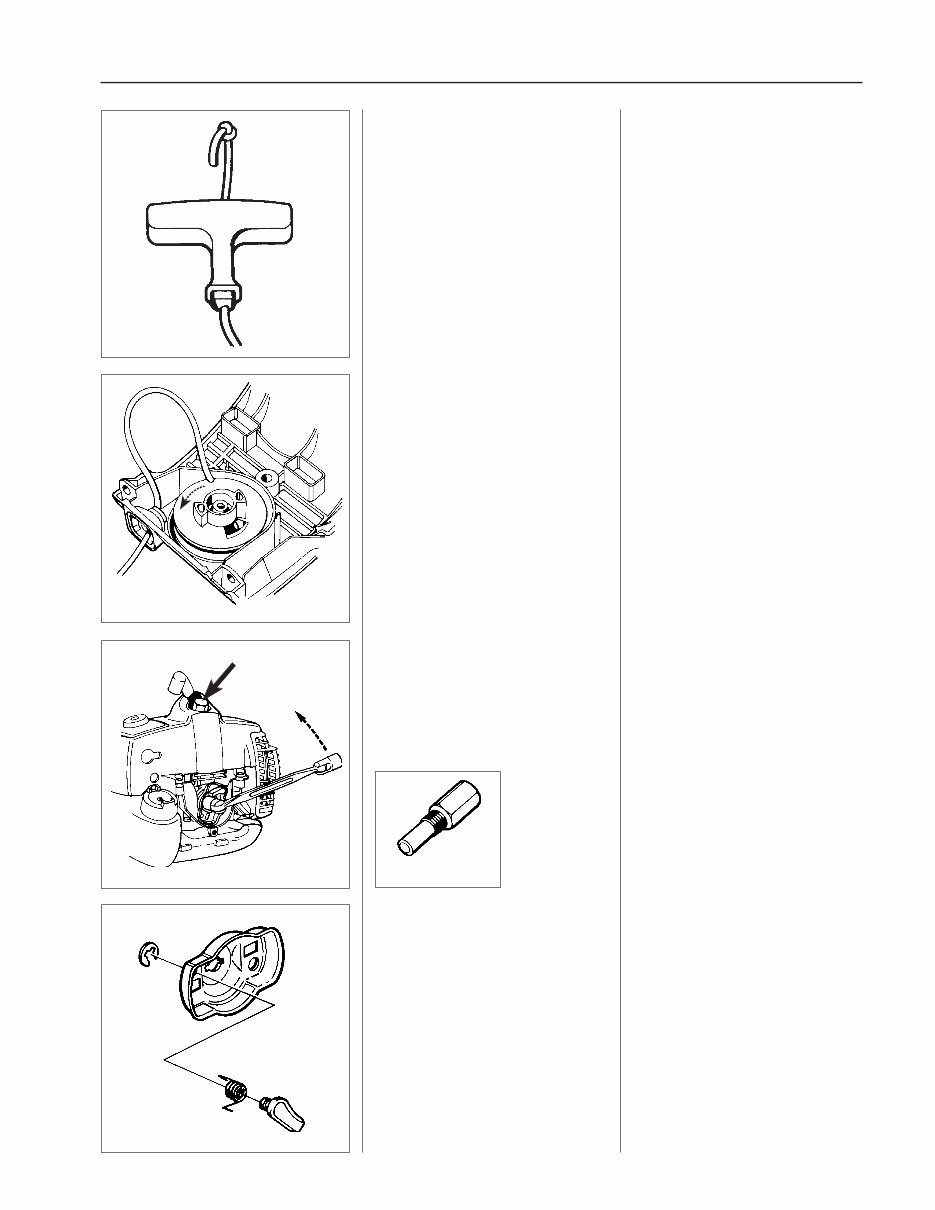
5 1 504 91 06-05 Assemble the starter handle. Assemble the starter handle in the same way as described for model 265, but tie a double knot, as the cord is lighter. Starter Remove the circlip holdings the drive dog. Lift out the drive dog and spring for re- placement. Assemble in the reverse order as set out for dismantling. Remove the circlip and replace any dam- aged drive dogs or springs, if necessary. Replacing the drive dogs Dismantle the drive body. Replacing the drive dogs Fit the piston stop no 504 91 06-05 in the spark plug hole and loosen the nuts hold- ing the drive body. Tension the return spring. Check the spring tension. Fit the starter on the engine body. Do not forget the guide sleeves for the fuel tank. Tension the return spring. Pull out the starter cord fully and lift it out of the cut- out in the starter pulley. Now turn the starter pulley anticlock- wise, 6 turns. Check the spring tension. With the starter cord fully extended it should still be pos- sible to turn the starter pulley further, at least a half turn. chodina@live.co.uk chodina@live.co.uk
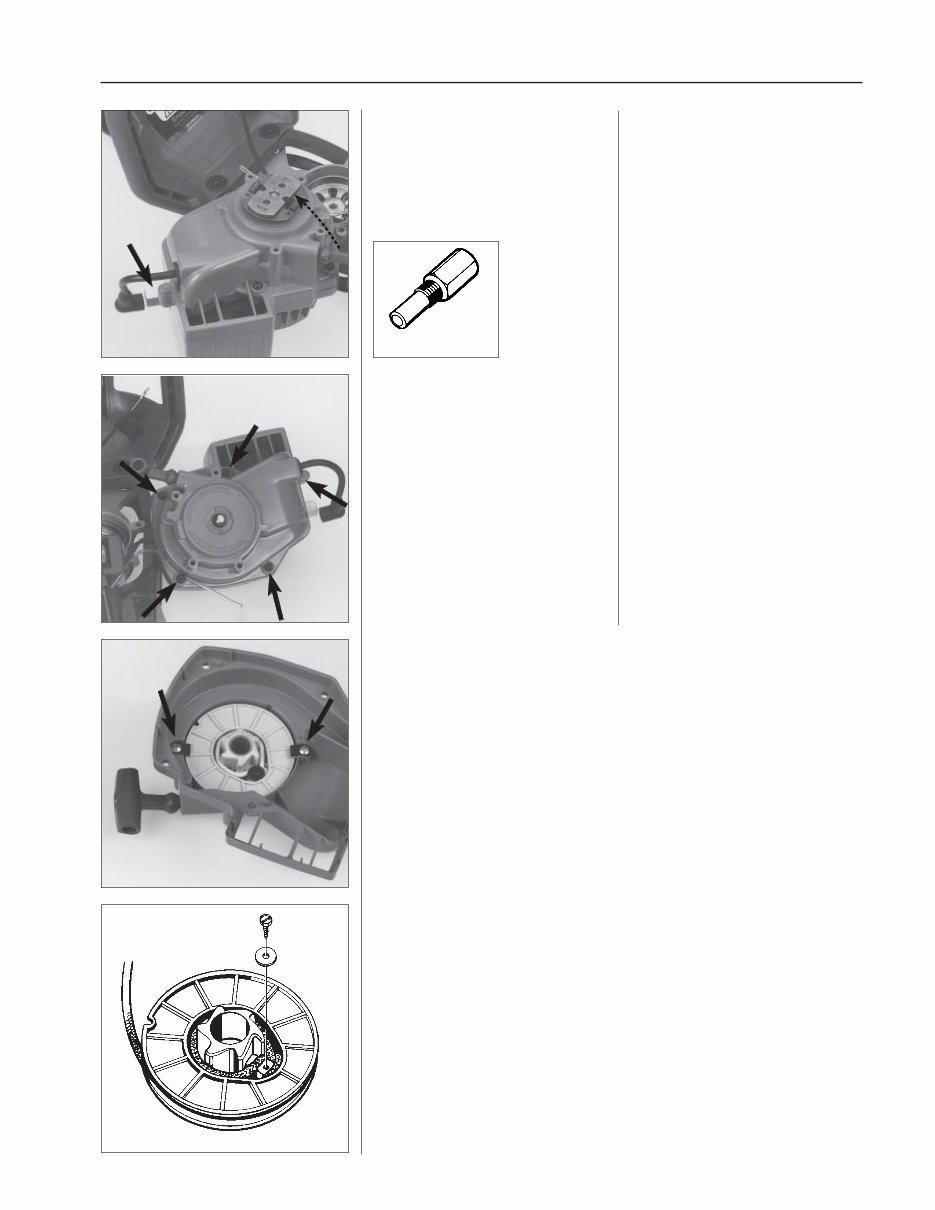
6 1 Starter Models 32, Mondo, Mondo Mega Dismantling Disconnect the electrical cables. Remove the shaft complete with handle. Models 32, Mondo, Mondo Mega Dismantling Disconnect the electrical cables by the engine body and remove the 4 screws (models Mondo and Mondo Mega have 3 screws) that hold the shaft and handle on the starter housing. Lift off the shaft. Dismantle the starter. Remove the 4 screws and lift off the starter. Model 32 Pull out the electrical cables from the starter housing using flat nose pliers. Model Mondo Also dismantle the screw by the spark plug. Assembly Assemble the starter handle. Assembly Assemble the starter handle in the same way as described for model 265. Tie a double knot, as the cord is lighter than on model 265. Model 18H Dismantling Dismantle the air filter, throttle cable and carburettor. Remove the 4 screws holding the engine body and gear housing. Model 18H Dismantling The starter is positioned between the crankcase and the cutting equipment drive. First dismantle the spark plug, air filter, throttle cable and carburettor. Turn the trimmer upside down so that the screws holding the engine body are ac- cessible. Remove the 4 screws. chodina@live.co.uk chodina@live.co.uk
7 1 504 91 06-06 Starter Assembly (also see model Mondo) Place a new spring cassette in position in the starter housing. Replace the cord and attach as illustrated. Assemble the starter pulley. Assemble the starter handle (see model 265). Tension the return spring. Repeat tensioning the spring and fit the locking plates. The following procedures are the same as for models 32, Mondo: Remove the locking plates holding the starter pulley axially. Offload the spring tension. Dismantle the starter pulley and spring cassette from the starter housing. Dismantle the starter. Remove the 5 screws holding the starter housing Lubricate the ignition cable with a few drops of oil and remove the rubber grom- met in the cover. Lift off the starter housing. Dismantle the starter from the engine. Assemble the piston stop no. 504 91 06- 05 in the cylinder. Unscrew the centrifugal clutch. First loosen it using a hammer and punch, anticlockwise. Dismantle the centrifugal clutch. chodina@live.co.uk chodina@live.co.uk
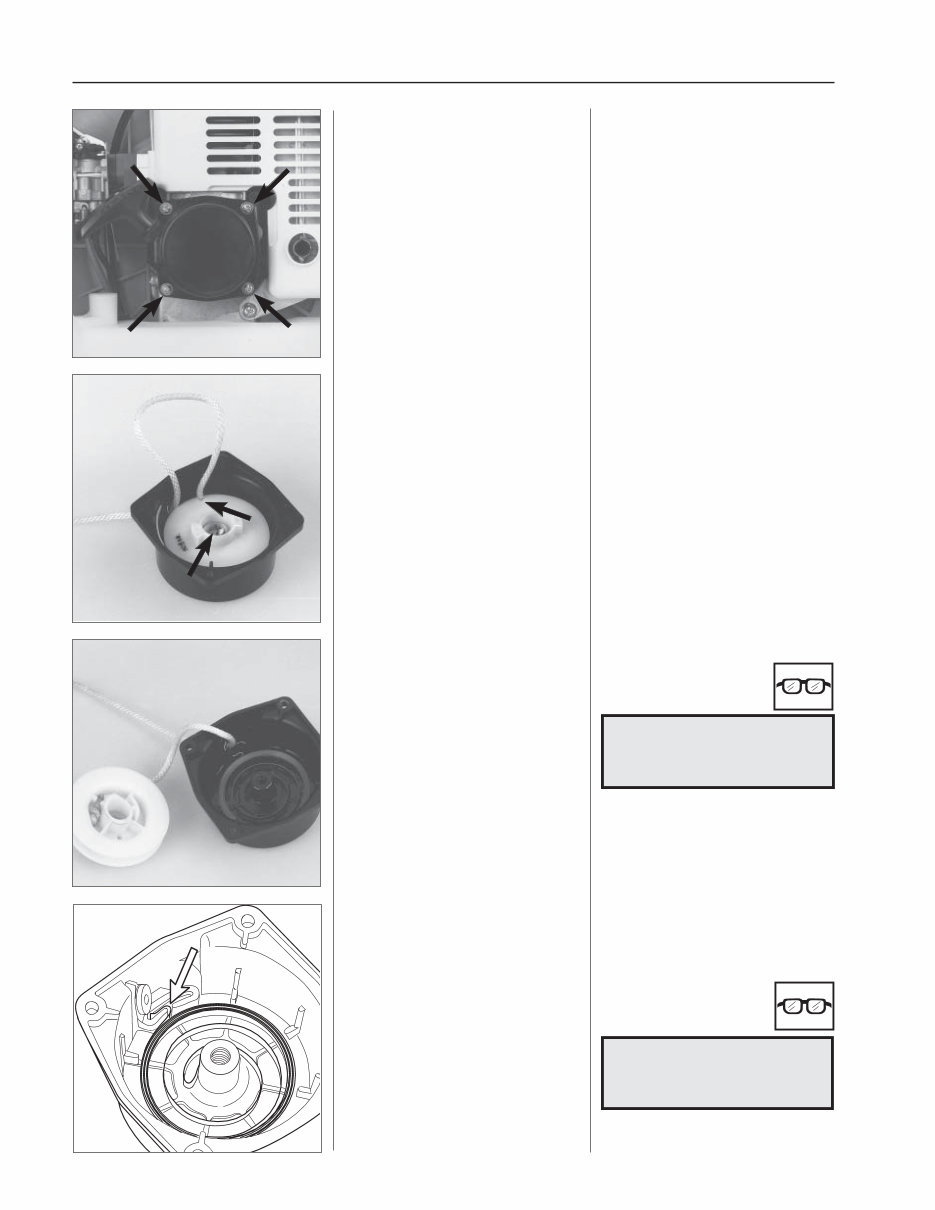
8 1 Starter Models 140B, 141B Dismantling Remove the screws and lift off the starter. Models 140B, 141B Dismantling Remove the 4 screws holding the starter against the engine body. Offload the spring tension and remove the starter pulley from the starter hous- ing. Lift the starter cord out of the cut-out in the starter pulley. Offload the spring tension by allowing the starter pulley to rotate backwards. Stop the pulley using your thumb. Remove the screw and washer from the centre of the starter pulley. Lift off the starter pulley. Dismantle the return spring. Clean and replace any damaged parts. Carefully lift off the starter pulley and return spring. Assembly Fit a new return spring in the starter housing. Assembly Fit a new return spring in the starter housing. Exercise great care so that it does not fly out. The return spring lies tensioned in the starter housing and can fly out and cause personal injury with careless handling. Clean and replace any damaged parts. WARNING! Use protective glasses. ! Check that the spring’s mounting is fac- ing the right way! WARNING! Use protective glasses. ! chodina@live.co.uk chodina@live.co.uk
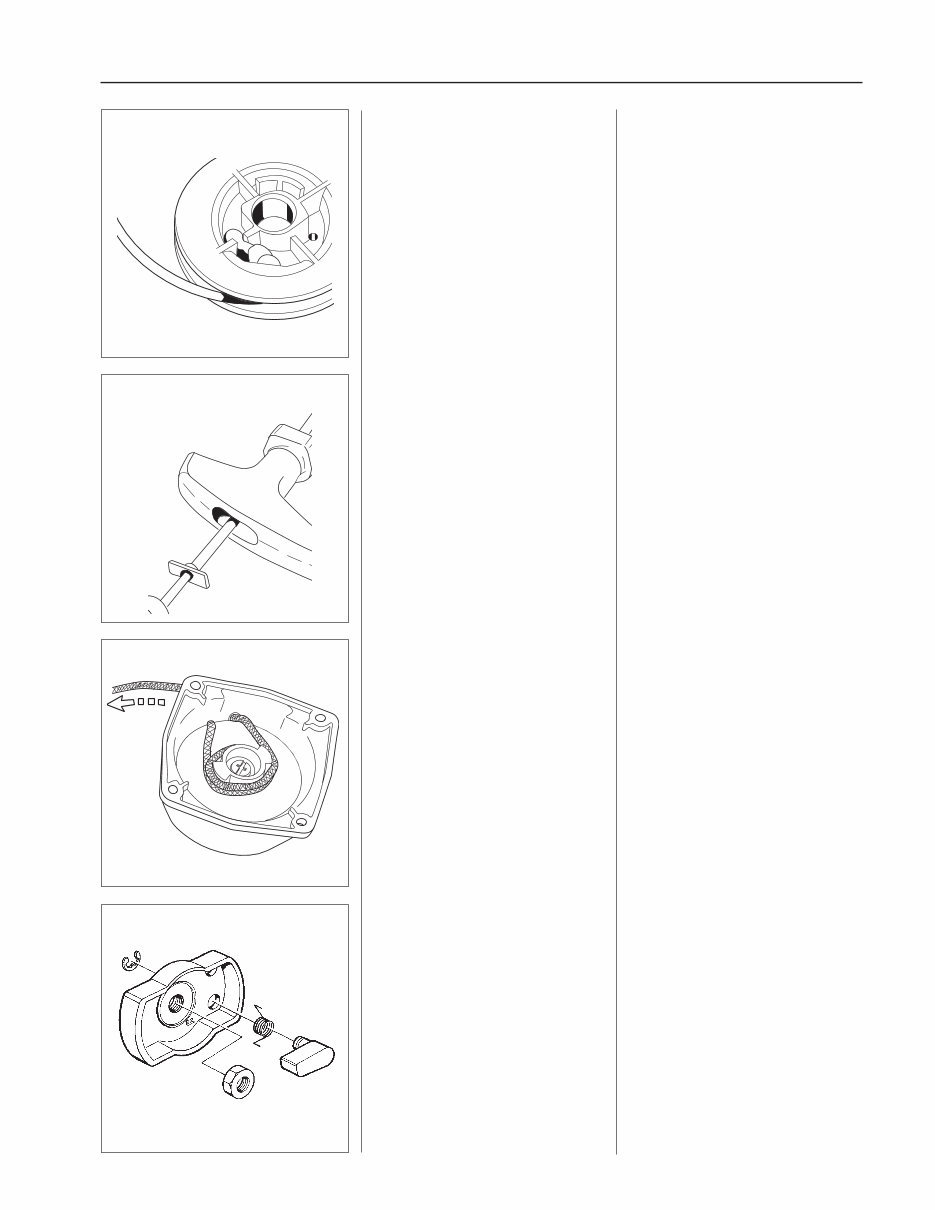
9 1 Starter Tension the return spring. Check that the pulley can be turned a further half turn with the starter cord fully extended! Tension the return spring. ● Pull out the cord approx. 30 cm and stop the starter pulley using your thumb. ● Lift the starter cord up in the cut-out in the starter pulley. ● Wind the cord 2 turns anticlockwise around the hub on the starter pulley. ● Pull out the starter cord fully. Assemble the starter handle. The collar on the washer should face towards the starter handle. Assemble the starter handle. Attach a new starter cord in the starter pulley as illustrated. Wind the cord 4 turns clockwise around the starter pulley. Lubricate the spindle and return spring with a few drops of oil. Place the starter pulley in position and tighten the screw in the centre. Do not forget the washer. Replace the starter cord and attach as illustrated. Wind the cord 4 turns clockwise around the starter pulley. Lubricate the spindle and return spring and assemble the starter pulley. Models 140B, 141B Drive dogs Dismantle the drive from the crankshaft. Replace the drive dogs if they are dam- aged or worn. chodina@live.co.uk chodina@live.co.uk
This workshop service repair manual covers all repairs A-Z, both mechanical and electrical, for all models and engine types for the stated years. It includes detailed pictures and diagrams to aid in the repair procedures. The manual is printable, allowing you to print only the pages needed. Whether you are a professional mechanic or a DIY enthusiast, this manual provides the knowledge needed to perform servicing and repairs. It is an easy-to-use layout format that offers comprehensive coverage of repair procedures, saving you money and time. The delivery of this manual is instant upon payment, and it is compatible with any PC/MAC computer using Microsoft Windows.
Comprehensive coverage of all repairs A-Z, mechanical and electrical
Detailed pictures and diagrams included
Printable pages for convenience
Specific to the stated model and engine types
Instant delivery upon payment
Compatible with any PC/MAC computer using Microsoft Windows
With the information and knowledge contained in this manual, you can save money by performing repairs and maintenance yourself, avoiding overpriced mechanic services. This manual is designed for easy use, making it accessible to anyone who can open an email. It is a valuable resource for anyone looking to better understand their vehicle's parts and repair procedures.





 Lifetime Access




