1992-2001 Mercruiser Sterndrive V6 V8 Service & Repair Manual
What's Included?
Lifetime Access
Fast Download Speeds
Online & Offline Access
Access PDF Contents & Bookmarks
Full Search Facility
Print one or all pages of your manual
CONTENTS 1 GENERAL INFORMATION AND BOATING SAFETY 2 TOOLS AND EQUIPMENT 4 ENGINE MECHANICAL 4 CYLINDER 5 ENGINE MECHANICAL V6 &V8 6 ENGINE OVERHAUL 7 FUEL SYSTEMS CARBURETORS 9 COOLING SYSTEM HOW TO USE THIS MANUAL BOATING SAFETY SAFETY IN SERVICE TOOLS AND EQUIPMENT TOOLS FASTENERS,MEASUREMENTS AND CONVERSATIONS ENGINE & DRIVE MAINTENANCE FLUIDS AND LUBRICANTS LUBRICATION POINTS BOAT MAINTENANCE WINTER STORAGE SPRING COMMISSIONING FIRING ORDERS SPECIFICATION CHARTS ENGINE MECHANICAL SPECIFICATION CHARTS ENGINE MECHANICAL SPECIFICATION CHARTS ENGINE RECONDITIONING FUEL AND COMBUSTION CARBURETED FUEL SYSTEM CARBURETOR SPECIFICATIONS APPLICATION CHART FUEL AND COMBUSTION ELECTRONIC FUEL INJECTION SYSTEM DIAGNOSIS VACUUM DIAGRAMS WIRING SCHEMATICS ECM PIN LOCATIONS DIAGNOSTIC TROUBLE CODES SPECIFICATIONS COOLING SYSTEMS MAINTENANCE AND TESTING DRAIN DIAGRAMS FLOW DIAGRAMS 1-1 1-3 1-10 2-1 2-3 2-10 3-2 3-27 3-39 3-46 3-51 3-51 3-52 3-53 4-2 4-9 5-2 5-24 6-2 7-2 7-3 7-33 7-4 8-2 8-3 8-26 8-39 8-41 8-54 8-65 8-68 9-2 9-2 9-14 9-18
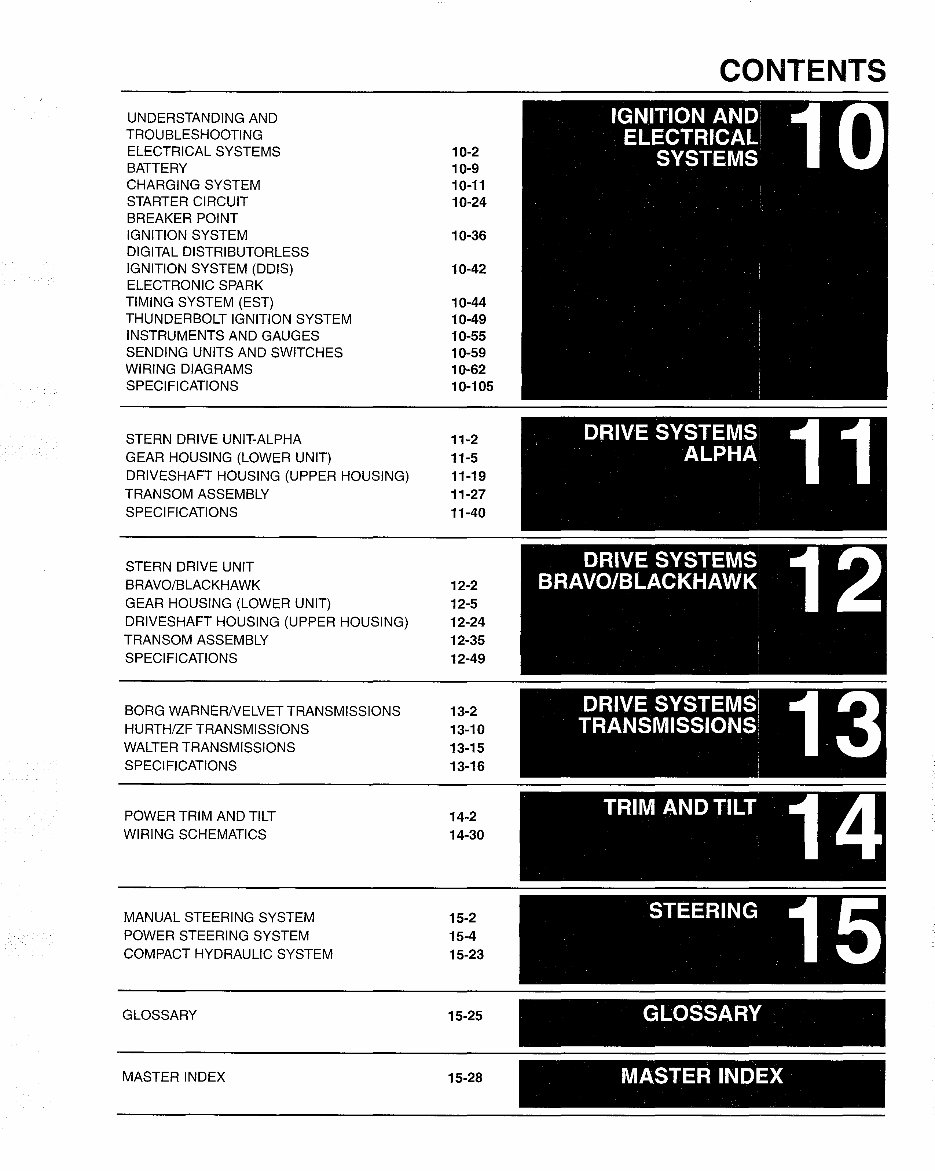
UNDERSTANDING AND TROUBLESHOOTING ELECTRICAL SYSTEMS BATIERY CHARGING SYSTEM STARTER CIRCUIT BREAKER POINT IGNITION SYSTEM DIGITAL DISTRIBUTORLESS IGNITION SYSTEM (DDIS) ELECTRONIC SPARK TIMING SYSTEM (EST) THUNDERBOLT IGNITION SYSTEM INSTRUMENTS AND GAUGES SENDING UNITS AND SWITCHES WIRING DIAGRAMS SPECIFICATIONS STERN DRIVE UNIT-ALPHA GEAR HOUSING (LOWER UNIT) DRIVESHAFT HOUSING (UPPER HOUSING) TRANSOM ASSEMBLY SPECIFICATIONS STERN DRIVE UNIT BRAVO/BLACKHAWK GEAR HOUSING (LOWER UNIT) DRIVESHAFT HOUSING (UPPER HOUSING) TRANSOM ASSEMBLY SPECIFICATIONS BORG WARNERNELVET TRANSMISSIONS HURTH/ZF TRANSMISSIONS WALTER TRANSMISSIONS SPECIFICATIONS POWER TRIM AND TILT WIRING SCHEMATICS MANUAL STEERING SYSTEM POWER STEERING SYSTEM COMPACT HYDRAULIC SYSTEM GLOSSARY MASTER INDEX 10-2 10-9 10-11 10-24 10-36 10-42 10-44 10-49 10-55 10-59 10-62 10-105 11-2 11-5 11-19 11-27 11-40 12-2 12-5 12-24 12-35 12-49 13-2 13-10 13-15 13-16 14-2 14-30 15-2 15-4 15-23 15-25 15-28 CONTENTS DRIVE SYSTEMSI 1 3 TRANSMISSIONS TRIM AND TILT: 14 I STEERING 15 GLOSSARY MASTER INDEX
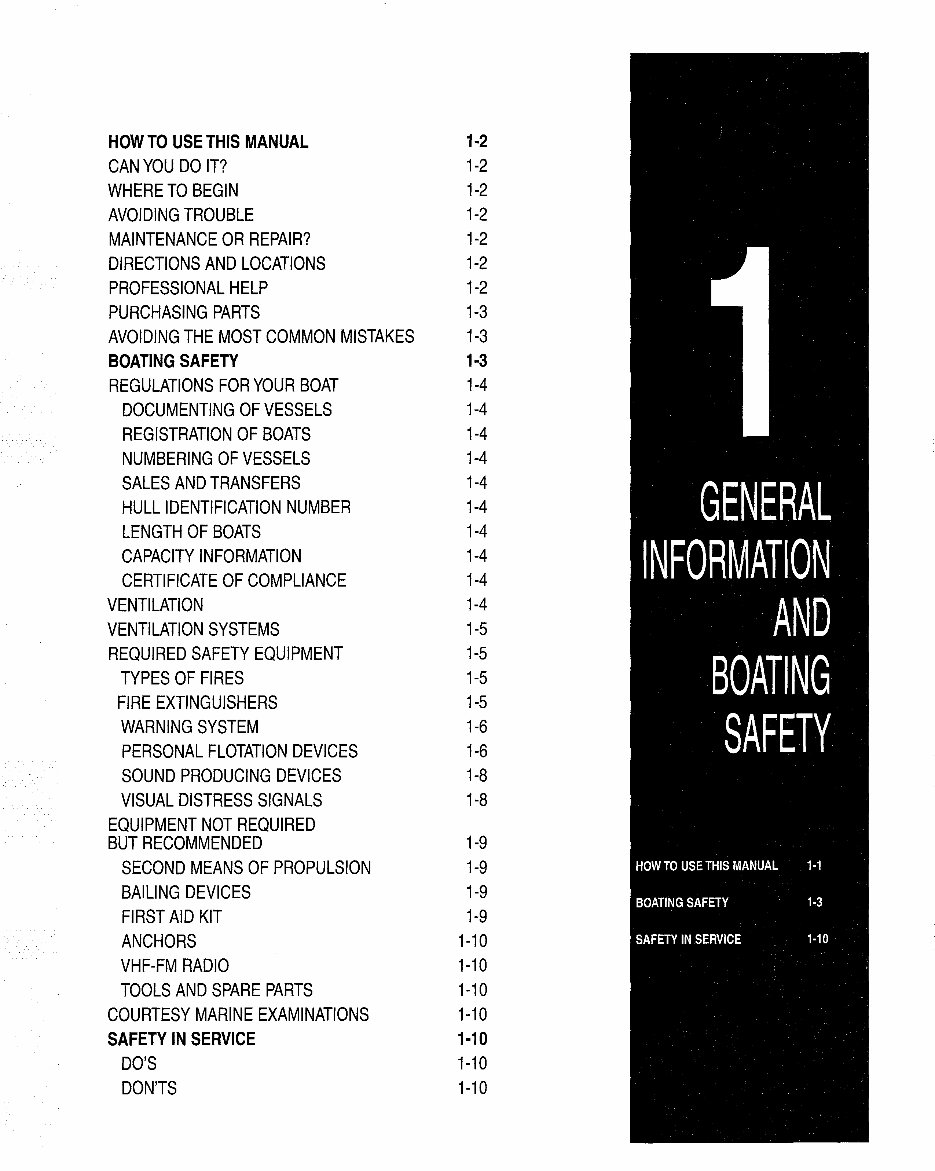
HOW TO USE THIS MANUAL 1·2 CAN YOU DO IT? 1-2 WHERE TO BEGIN 1-2 AVOIDING TROUBLE 1-2 MAINTENANCE OR REPAIR? 1-2 DIRECTIONS AND LOCATIONS 1-2 PROFESSIONAL HELP 1-2 PURCHASING PARTS 1-3 AVOIDING THE MOST COMMON MISTAKES 1-3 BOATING SAFETY 1·3 REGULATIONS FOR YOUR BOAT 1-4 DOCUMENTING OF VESSELS 1-4 REGISTRATION OF BOATS 1-4 NUMBERING OF VESSELS 1-4 SALES AND TRANSFERS 1-4 HULL IDENTIFICATION NUMBER 1-4 LENGTH OF BOATS 1-4 CAPACITY INFORMATION 1-4 CERTIFICATE OF COMPLIANCE 1-4 VENTILATION 1-4 VENTILATION SYSTEMS 1-5 REQUIRED SAFETY EQUIPMENT 1-5 TYPES OF FIRES 1-5 FIRE EXTINGUISHERS 1-5 WARNING SYSTEM 1-6 PERSONAL FLOTATION DEVICES 1-6 SOUND PRODUCING DEVICES 1-8 VISUAL DISTRESS SIGNALS 1-8 EQUIPMENT NOT REQUIRED BUT RECOMMENDED 1-9 SECOND MEANS OF PROPULSION 1-9 BAILING DEVICES 1-9 FIRST AID KIT 1-9 ANCHORS 1-10 VHF-FM RADIO 1-10 TOOLS AND SPARE PARTS 1-10 COURTESY MARINE EXAMINATIONS 1-10 SAFETY IN SERVICE 1·10 DO'S 1-10 DON'TS 1-10
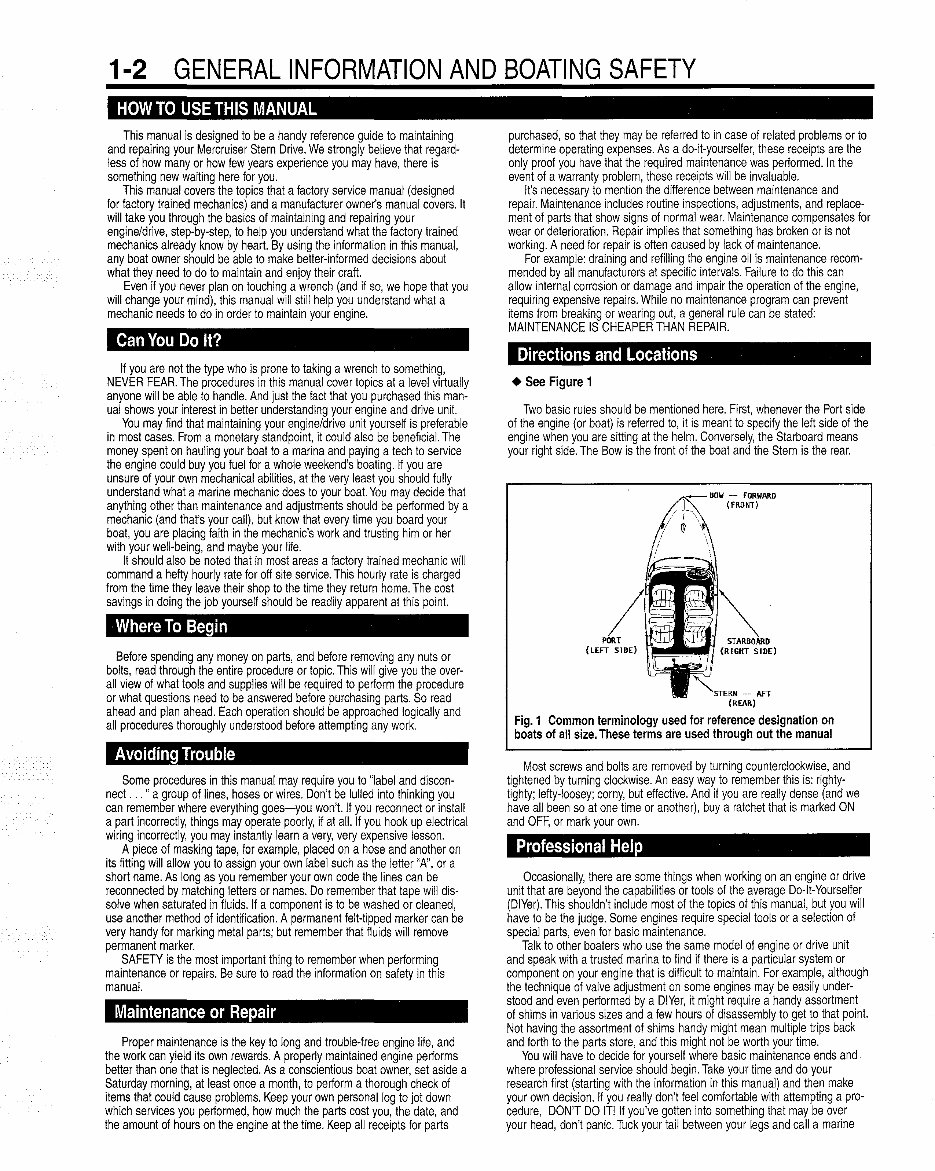
1-2 GENERAL INFORMATION AND BOATING SAFETY HOW TO USE THIS MANUAL This manual is designed to be a handy reference guide to maintaining and repairing your Mercruiser Stern Drive. We strongly believe that regard- less of how many or how few years experience you may have, there is something new waiting here for you. This manual covers the topics that a factory service manual (designed for factory trained mechanics) and a manufacturer owner's manual covers. It will take you through the basics of maintaining and repairing your engine/drive, step-by-step, to help you understand what the factory trained mechanics already know by heart. By using the information in this manual, any boat owner should be able to make better-informed decisions about what they need to do to maintain and enjoy their craft. Even if you never plan on touching a wrench (and if so, we hope that you will change your mind), this manual will still help you understand what a mechanic needs to do in order to maintain your engine. Can You Do It? If you are not the type who is prone to taking a wrench to something, NEVER FEAR. The procedures in this manual cover topics at a level virtually anyone will be able to handle. And just the fact that you purchased this man- ual shows your interest in better understanding your engine and drive unit. You may find that maintaining your engine/drive unit yourself is preferable in most cases. From a monetary standpoint, it could also be beneficial. The money spent on hauling your boat to a marina and paying a tech to service the engine could buy you fuel for a whole weekend's boating. If you are unsure of your own mechanical abilities, at the very least you should fully understand what a marine mechanic does to your boat. You may decide that anything other than maintenance and adjustments should be pertormed by a mechanic (and that's your call), but know that every time you board your boat, you are placing faith in the mechanic's work and trusting him or her with your well-being, and maybe your life. It should also be noted that in most areas a factory trained mechanic will command a hefty hourly rate for off site service. This hourly rate is charged from the time they leave their shop to the time they return home. The cost savings in doing the job yourself should be readily apparent at this point. Where To Begin Before spending any money on parts, and before removing any nuts or bolts, read through the entire procedure or topiC. This will give you the over- all view of what tools and supplies will be required to pertorm the procedure or what questions need to be answered before purchasing parts. So read ahead and plan ahead. Each operation should be approached logically and all procedures thoroughly understood before attempting any work. Avoiding Trouble Some procedures in this manual may require you to "label and discon- nect ... " a group of lines, hoses or wires. Don't be lulled into thinking you can remember where everything goes-you won't. If you reconnect or install a part incorrectly, things may operate poorly, if at all. If you hook up electrical wiring incorrectly, you may instantly learn a very, very expensive lesson. A piece of masking tape, for example, placed on a hose and another on its fitting will allow you to assign your own label such as the letter "A", or a short name. As long as you remember your own code the lines can be reconnected by matching letters or names. Do remember that tape will dis- solve when saturated in fluids. If a component is to be washed or cleaned, use another method of identification. A permanent felt-tipped marker can be very handy for marking metal parts; but remember that fluids will remove permanent marker. SAFETY is the most important thing to remember when pertorming maintenance or repairs. Be sure to read the information on safety in this manual. Maintenance or Repair Proper maintenance is the key to long and trouble-free engine life, and the work can yield its own rewards. A properly maintained engine pertorms better than one that is neglected. As a conscientious boat owner, set aside a Saturday morning, at least once a month, to pertorm a thorough check of items that could cause problems. Keep your own personal log to jot down which services you pertormed, how much the parts cost you, the date, and the amount of hours on the engine at the time. Keep all receipts for parts purchased, so that they may be referred to in case of related problems or to determine operating expenses. As a do-it-yourselfer, these receipts are the only proof you have that the required maintenance was pertormed. In the event of a warranty problem, these receipts will be invaluable. It's necessary to mention the difference between maintenance and repair. Maintenance includes routine inspections, adjustments, and replace- ment of parts that show signs of normal wear. Maintenance compensates for wear or deterioration. Repair implies that something has broken or is not working. A need for repair is often caused by lack of maintenance. For example: draining and refilling the engine oil is maintenance recom- mended by all manufacturers at specific intervals. Failure to do this can allow internal corrosion or damage and impair the operation of the engine, requiring expensive repairs. While no maintenance program can prevent items from breaking or wearing out, a general rule can be stated: MAINTENANCE IS CHEAPER THAN REPAIR. Directions and Locations • See Figure 1 Two basic rules should be mentioned here. First, whenever the Port side of the engine (or boat) is referred to, it is meant to specify the left side of the engine when you are sitting at the helm. Conversely, the Starboard means your right side. The Bow is the front of the boat and the Stern is the rear. (LEFT SIDE) BOil -- FORWARD (FRONT) -- AFT (REAR) Fig. 1 Common terminology used for reference designation on boats of all size. These terms are used through out the manual Most screws and bolts are removed by turning counterclockwise, and tightened by turning clockwise. An easy way to remember this is: righty- tighty; lefty-Ioosey; corny, but effective. And if you are really dense (and we have all been so at one time or another), buy a ratchet that is marked ON and OFF, or mark your own. Professional Help Occasionally, there are some things when working on an engine or drive unit that are beyond the capabilities or tools of the average Do-It-Yourselfer (DIYer). This shouldn't include most of the topics of this manual, but you will have to be the judge. Some engines require special tools or a selection of special parts, even for basic maintenance. Talk to other boaters who use the same model of engine or drive unit and speak with a trusted marina to find if there is a particular system or component on your engine that is difficult to maintain. For example, although the technique of valve adjustment on some engines may be easily under- stood and even pertormed by a DIYer, it might require a handy assortment of shims in various sizes and a few hours of disassembly to get to that point. Not having the assortment of shims handy might mean multiple trips back and forth to the parts store, and this might not be worth your time. You will have to decide for yourself where basic maintenance ends and where professional service should begin. Take your time and do your research first (starting with the information in this manual) and then make your own decision. If you really don't feel comfortable with attempting a pro- cedure, DON'T DO IT! If you've gotten into something that may be over your head, don't paniC. Tuck your tail between your legs and call a marine
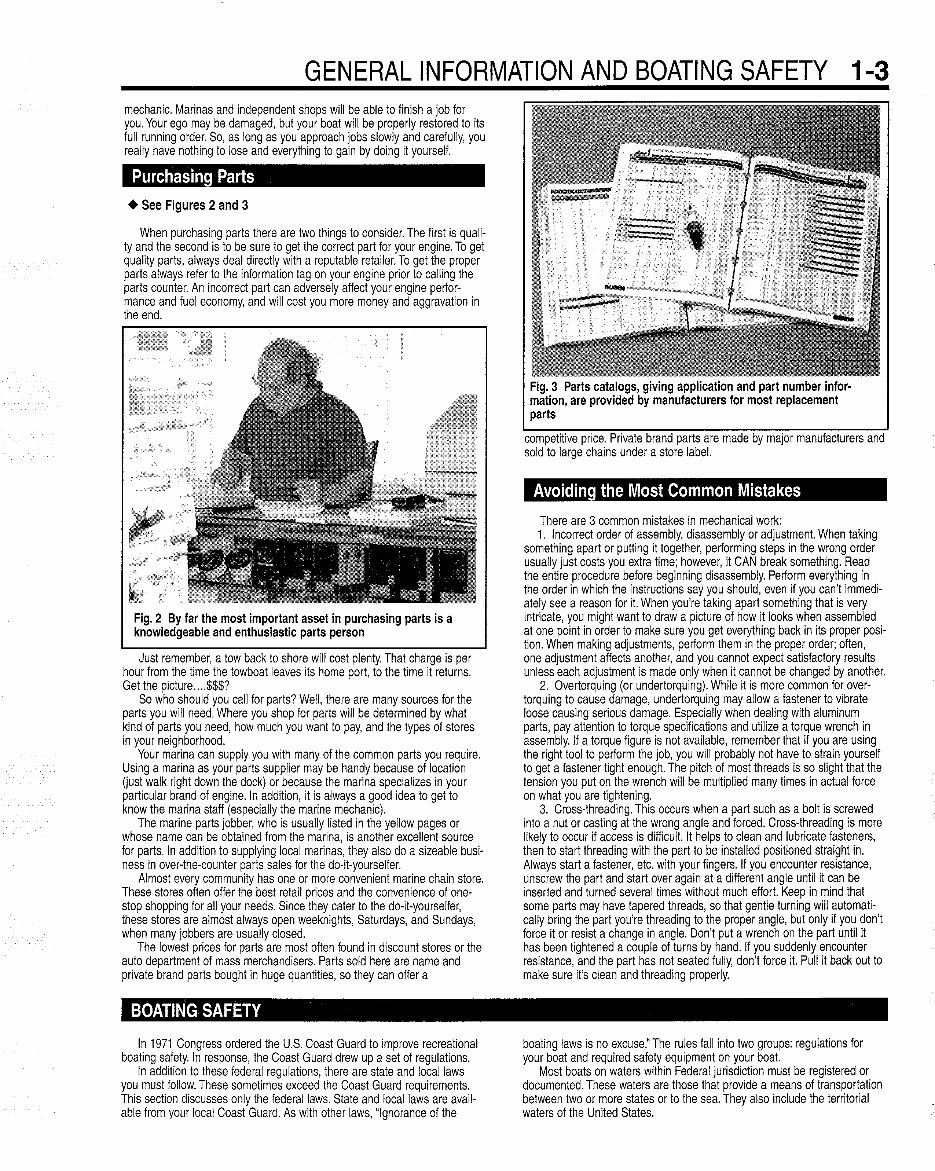
GENERAL INFORMATION AND BOATING SAFETY 1-3 mechanic. Marinas and independent shops will be able to finish a job for you. Your ego may be damaged, but your boat will be properly restored to its full running order. So, as long as you approach jobs slowly and carefully, you really have nothing to lose and everything to gain by doing it yourself. Purchasing Parts • See Figures 2 and 3 When purchasing parts there are two things to consider. The first is quali- ty and the second is to be sure to get the correct part for your engine. To get quality parts, always deal directly with a reputable retailer. To get the proper parts always refer to the information tag on your engine prior to calling the parts counter. An incorrect part can adversely affect your engine perfor- mance and fuel economy, and will cost you more money and aggravation in the end. Fig. 2 By far the most important asset in purchasing parts is a knowledgeable and enthusiastic parts person Just remember, a tow back to shore will cost plenty. That charge is per hour from the time the towboat leaves its home port, to the time it returns. Get the picture .... $$$? So who should you call for parts? Well, there are many sources for the parts you will need. Where you shop for parts will be determined by what kind of parts you need, how much you want to pay, and the types of stores in your neighborhood. Your marina can supply you with many of the common parts you require. Using a marina as your parts supplier may be handy because of location (just walk right down the dock) or because the marina specializes in your particular brand of engine. In addition, it is always a good idea to get to know the marina staff (especially the marine mechanic). The marine parts jobber, who is usually listed in the yellow pages or whose name can be obtained from the marina, is another excellent source for parts. In addition to supplying local marinas, they also do a sizeable busi- ness in over-the-counter parts sales for the do-it-yourselfer. Almost every community has one or more convenient marine chain store. These stores often offer the best retail prices and the convenience of one- stop shopping for all your needs. Since they cater to the do-it-yourselfer, these stores are almost always open weeknights, Saturdays, and Sundays, when many jobbers are usually closed. The lowest prices for parts are most often found in discount stores or the auto department of mass merchandisers. Parts sold here are name and private brand parts bought in huge quantities, so they can offer a BOATING SAFETY In 1971 Congress ordered the U.S. Coast Guard to improve recreational boating safety. In response, the Coast Guard drew up a set of regulations. In addition to these federal regulations, there are state and local laws you must follow. These sometimes exceed the Coast Guard requirements. This section discusses only the federal laws. State and local laws are avail- able from your local Coast Guard. As with other laws, "Ignorance of the Fig. 3 Parts catalogs, giving application and part number infor- mation, are provided by manufacturers for most replacement parts competitive price. Private brand parts are made by major manufacturers and sold to large chains under a store label. Avoiding the Most Common Mistakes There are 3 common mistakes in mechanical work: 1. Incorrect order of assembly, disassembly or adjustment. When taking something apart or putting it together, performing steps in the wrong order usually just costs you extra time; however, it CAN break something. Read the entire procedure before beginning disassembly. Perform everything in the order in which the instructions say you should, even if you can't immedi- ately see a reason for it. When you're taking apart something that is very intricate, you might want to draw a picture of how it looks when assembled at one pOint in order to make sure you get everything back in its proper posi- tion. When making adjustments, perform them in the proper order; often, one adjustment affects another, and you cannot expect satisfactory results unless each adjustment is made only when it cannot be changed by another. 2. Overtorquing (or undertorquing). While it is more common for over- torquing to cause damage, undertorquing may allow a fastener to vibrate loose causing serious damage. Especially when dealing with aluminum parts, pay attention to torque specifications and utilize a torque wrench in assembly. If a torque figure is not available, remember that if you are using the right tool to perform the job, you will probably not have to strain yourself to get a fastener tight enough. The pitch of most threads is so slight that the tension you put on the wrench will be multiplied many times in actual force on what you are tightening. 3. Cross-threading. This occurs when a part such as a bolt is screwed into a nut or casting at the wrong angle and forced. Cross-threading is more likely to occur if access is difficult. It helps to clean and lubricate fasteners, then to start threading with the part to be installed positioned straight in. Always start a fastener, etc. with your fingers. If you encounter resistance, unscrew the part and start over again at a different angle until it can be inserted and turned several times without much effort. Keep in mind that some parts may have tapered threads, so that gentle turning will automati- cally bring the part you're threading to the proper angle, but only if you don't force it or resist a change in angle. Don't put a wrench on the part until it has been tightened a couple of turns by hand. If you suddenly encounter resistance, and the part has not seated fully, don't force it. Pull it back out to make sure it's clean and threading properly. boating laws is no excuse." The rules fall into two groups: regulations for your boat and required safety equipment on your boat. Most boats on waters within Federal jurisdiction must be registered or documented. These waters are those that provide a means of transportation between two or more states or to the sea. They also include the territorial waters of the United States.
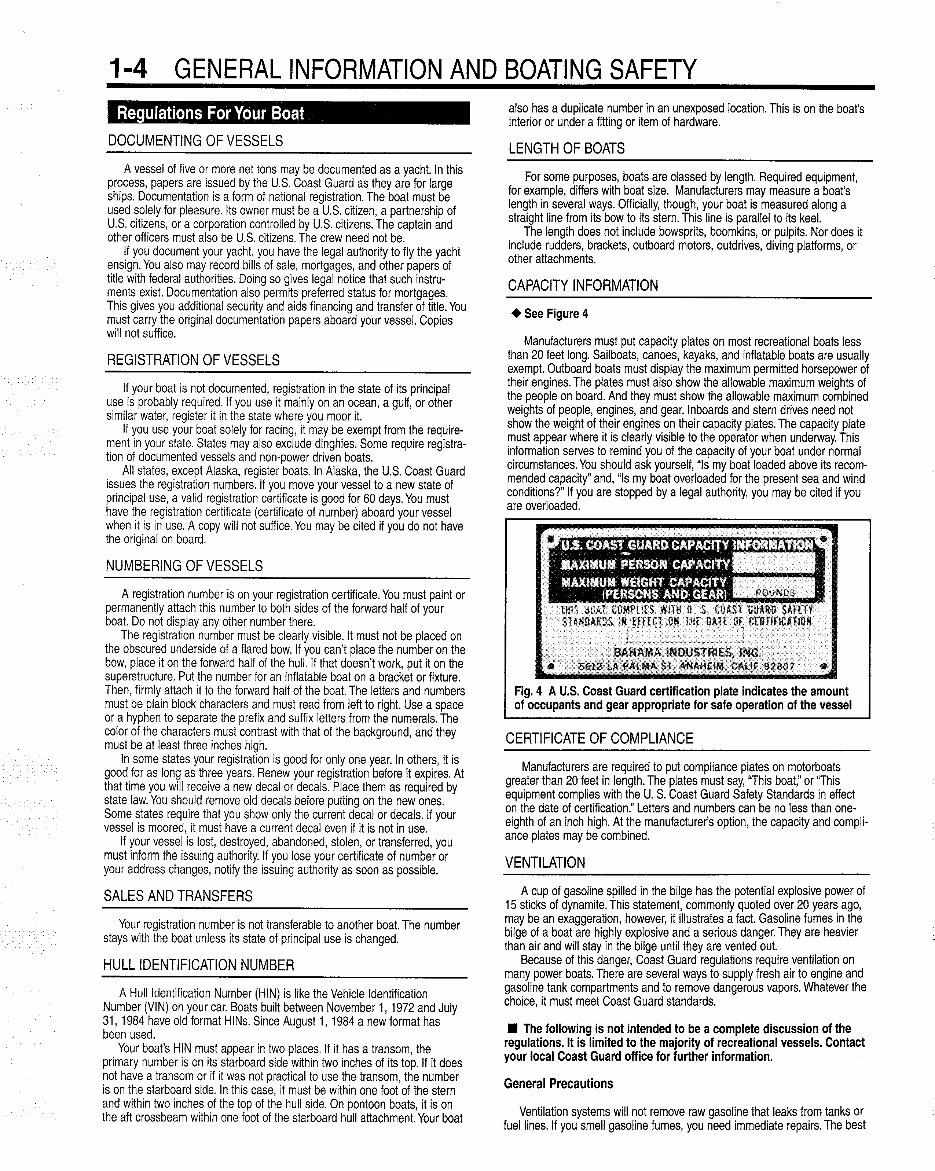
1-4 GENERAL INFORMATION AND BOATING SAFETY Regulations For Your Boat DOCUMENTING OF VESSELS A vessel of five or more net tons may be documented as a yacht. In this process, papers are issued by the U.S. Coast Guard as they are for large ships. Documentation is a form of national registration. The boat must be used solely for pleasure. Its owner must be a U.S,. citizen, a partnership of U.S. citizens, or a corporation controlled by U.S. citizens. The captain and other officers must also be U.S. citizens. The crew need not be. If you document your yacht, you have the legal authority to fly the yacht ensign. You also may record bills of sale, mortgages, and other p~pers of title with federal authorities. Doing so gives legal notice that such instru- ments exist. Documentation also permits preferred status for mortgages. This gives you additional security and aids financing and transfer of titl~. You must carry the original documentation papers aboard your vessel. Copies will not suffice. REGISTRATION OF VESSELS If your boat is not documented, registration in the state of its principal use is probably required. If you use it mainly on an ocean, a gulf, or other similar water, register it in the state where you moor it. . If you use your boat solely for racing, it may b~ exempt from the req~lre- ment in your state. States may also exclude dinghies. Some reqUire registra- tion of documented vessels and non-power driven boats. All states, except Alaska, register boats. In Alaska, the U.S. Coast Guard issues the registration numbers. If you move your vessel to a new state of principal use, a valid registration certificate is good for 60 days. You must have the registration certificate (certificate of number) aboard your vessel when it is in use. A copy will not suffice. You may be cited if you do not have the original on board. NUMBERING OF VESSELS A registration number is on your registration certificate. You must paint or permanently attach this number to both sides of the forward half of your boat. Do not display any other number there. The registration number must be clearly visible. It must not be placed on the obscured underside of a flared bow. If you can't place the number on the bow, place it on the forward half of the hull. If that doesn't work, put it .on the superstructure. Put the number for an inflatable boat on a bracket or fixture. Then, firmly attach it to the forward half of the boat. The let!ers and numbers must be plain block characters and must read from left to right. Use a space or a hyphen to separate the prefix and suffix letters from the numerals. The color of the characters must contrast with that of the background, and they must be at least three inches high. . . In some states your registration is good for only one year. In others, It IS good for as long as three years. Renew your registration before it expires. At that time you will receive a new decal or decals. Place them as reqUired by state law. You should remove old decals before putting on the new ones. Some states require that you show only the current decal or decals. If your vessel is moored, it must have a current decal even if it is not in use. If your vessel is lost, destroyed, abandoned, stolen, or transferred, you must inform the issuing authority. If you lose your certificate of number or your address changes, notify the issuing authority as soon as possible. SALES AND TRANSFERS Your registration number is not transferable to another boat. The number stays with the boat unless its state of principal use is changed. HULL IDENTIFICATION NUMBER A Hull Identification Number (HIN) is like the Vehicle Identification Number (VIN) on your car. Boats built between November 1,1972 and July 31, 1984 have old format HINs. Since August 1, 1984 a new format has been used. Your boat's HIN must appear in two places. If it has a transom, the primary number is on its starboard side within two inches of its top. If it does not have a transom or if it was not practical to use the transom, the number is on the starboard side. In this case, it must be within one foot of the stern and within two inches of the top of the hull side. On pontoon boats, it is on the aft crossbeam within one foot of the starboard hull attachment. Your boat also has a duplicate number in an unexposed location. This is on the boat's interior or under a fitting or item of hardware. LENGTH OF BOATS For some purposes, boats are classed by length. Required equipment, for example, differs with boat size. Manufacturers may measure a boat's length in several ways. Officially, though, y?ur boat IS meas.ured along a straight line from its bow to its stern. Th.ls line IS p~rallel to ItS keel. . The length does not include bowsprits, boomklns, or pulpits. Nor does It include rudders, brackets, outboard motors, outdrives, diving platforms, or other attachments. CAPACITY INFORMATION • See Figure 4 Manufacturers must put capacity plates on most recreational boats less than 20 feet long. Sailboats, canoes, kayaks, and inflatable boats are usually exempt. Outboard boats must display the maximum permitted horsepower of their engines. The plates must also show the allowable maximum weights of the people on board. And they must show the allowable maximum combined weights of people, engines, and gear. Inboards and stern drives need not show the weight of their engines on their capacity plates. The capacity plate must appear where it is clearly visible to the operator when underway. ThiS information serves to remind you of the capacity of your boat under normal circumstances. You should ask yourself, "Is my boat loaded above its recom- mended capacity" and, "Is my boat overloaded for the present se~ and wind conditions?" If you are stopped by a legal authority, you may be Cited If you are overloaded. BAHAMAINOUSTRIES, INC. 5&121:I!!\,AL~~ $1, AiIIAH~I~.CAUf. 92a01 Fig. 4 A U.S. Coast Guard certification plate indicates the amount of occupants and gear appropriate for safe operation of the vessel CERTIFICATE OF COMPLIANCE Manufacturers are required to put compliance plates on motorboats greater than 20 feet in length. The plates must say, ''This boat," or ''This equipment complies with the U. S. Coast Guard Safety Standards In effect on the date of certification." Letters and numbers can be no less than one- eighth of an inch high. At the manufacturer's option, the capacity and compli- ance plates may be combined. VENTILATION A cup of gasoline spilled in the bilge has the potential explosive power of 15 sticks of dynamite. This statement, commonly quoted ov~r 20 years ago, may be an exaggeration, howev~r, it illustrate.s a fact. Gasoline fumes In .the bilge of a boat are highly explosive and a serious danger. They are heaVier than air and will stay in the bilge until they are vented out.. .. Because of this danger, Coast Guard regulations require ventllatl?n on many power boats. There are several ways to supply fresh air to engine and gasoline tank compartments and to remove dangerous vapors. Whatever the choice, it must meet Coast Guard standards. • The following is not intended to be a complete discussion of the regulations. It is limited to the majority of recreational vessels. Contact your local Coast Guard office for further information. General Precautions Ventilation systems will not remove raw gasoline that leaks from tanks or fuel lines. If you smell gasoline fumes, you need immediate repairs. The best
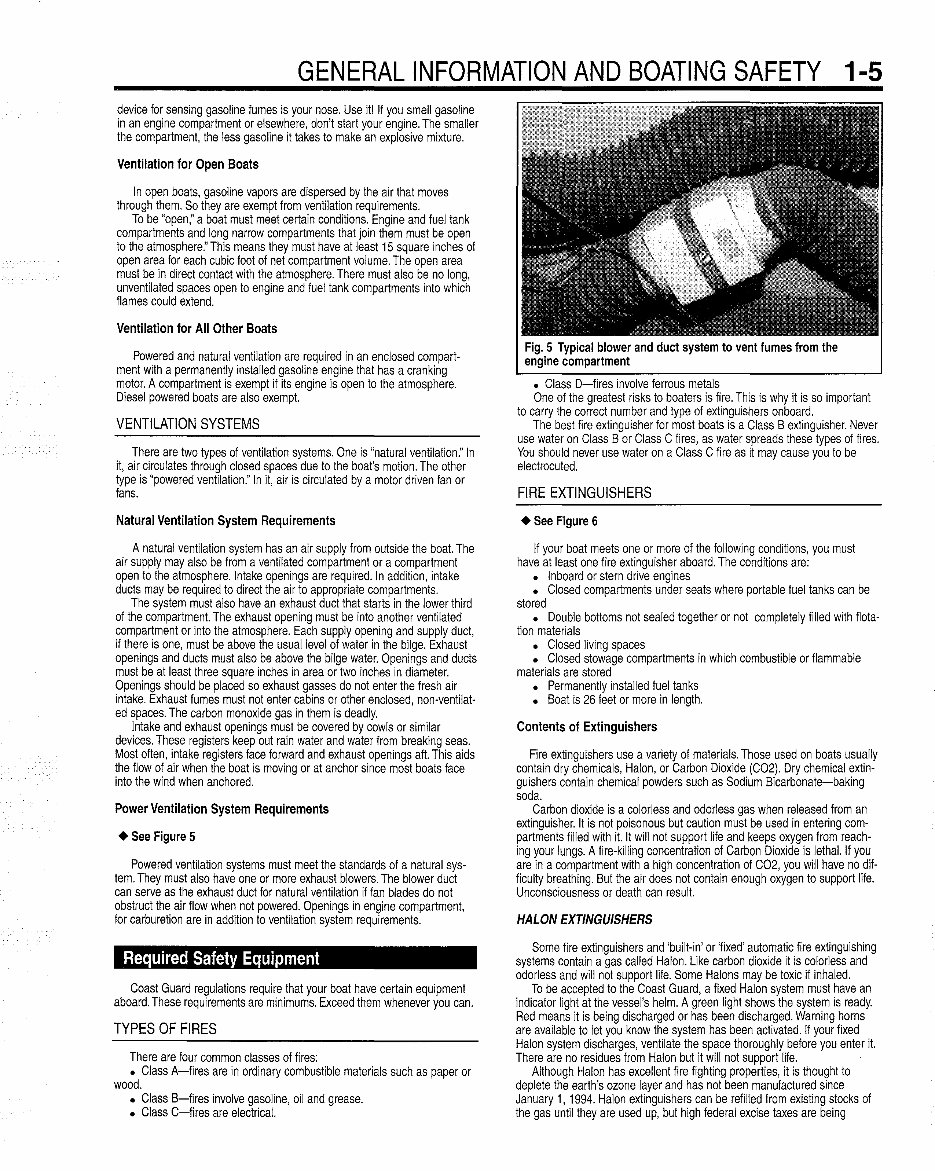
GENERAL INFORMATION AND BOATING SAFETY 1-5 device for sensing gasoline fumes is your nose. Use it! If you smell gasoline in an engine compartment or elsewhere, don't start your engine. The smaller the compartment, the less gasoline it takes to make an explosive mixture. Ventilation for Open Boats In open boats, gasoline vapors are dispersed by the air that moves through them. So they are exempt from ventilation requirements. To be "open," a boat must meet certain conditions. Engine and fuel tank compartments and long narrow compartments that join them must be open to the atmosphere." This means they must have at least 15 square inches of open area for each cubic foot of net compartment volume. The open area must be in direct contact with the atmosphere. There must also be no long, unventilated spaces open to engine and fuel tank compartments into which flames could extend. Ventilation for All Other Boats Powered and natural ventilation are required in an enclosed compart- ment with a permanently installed gasoline engine that has a cranking motor. A compartment is exempt if its engine is open to the atmosphere. Diesel powered boats are also exempt. VENTILATION SYSTEMS There are two types of ventilation systems. One is "natural ventilation." In it, air circulates through closed spaces due to the boat's motion. The other type is "powered ventilation:' In it, air is circulated by a motor driven fan or fans. Natural Ventilation System Requirements A natural ventilation system has an air supply from outside the boat. The air supply may also be from a ventilated compartment or a compartment open to the atmosphere. Intake openings are required. In addition, intake ducts may be required to direct the air to appropriate compartments. The system must also have an exhaust duct that starts in the lower third of the compartment. The exhaust opening must be into another ventilated compartment or into the atmosphere. Each supply opening and supply duct, if there is one, must be above the usual level of water in the bilge. Exhaust openings and ducts must also be above the bilge water. Openings and ducts must be at least three square inches in area or two inches in diameter. Openings should be placed so exhaust gasses do not enter the fresh air intake. Exhaust fumes must not enter cabins or other enclosed, non-ventilat- ed spaces. The carbon monoxide gas in them is deadly. Intake and exhaust openings must be covered by cowls or similar devices. These registers keep out rain water and water from breaking seas. Most often, intake registers face forward and exhaust openings aft. This aids the flow of air when the boat is moving or at anchor since most boats face into the wind when anchored. Power Ventilation System Requirements • See Figure 5 Powered ventilation systems must meet the standards of a natural sys- tem. They must also have one or more exhaust blowers. The blower duct can serve as the exhaust duct for natural ventilation if fan blades do not obstruct the air flow when not powered. Openings in engine compartment, for carburetion are in addition to ventilation system requirements. Required Safety Equipment Coast Guard regulations require that your boat have certain equipment aboard. These requirements are minimums. Exceed them whenever you can. TYPES OF FIRES There are four common classes of fires: • Class A-fires are in ordinary combustible materials such as paper or wood. • Class B-fires involve gasoline, oil and grease. • Class C-fires are electrical. Fig. 5 Typical blower and duct system to vent fumes from the engine compartment • Class D-fires involve ferrous metals One of the greatest risks to boaters is fire. This is why it is so important to carry the correct number and type of extinguishers onboard. The best fire extinguisher for most boats is a Class B extinguisher. Never use water on Class B or Class C fires, as water spreads these types of fires. You should never use water on a Class C fire as it may cause you to be electrocuted. FIRE EXTINGUISHERS • See Figure 6 If your boat meets one or more of the following conditions, you must have at least one fire extinguisher aboard. The conditions are: • Inboard or stern drive engines • Closed compartments under seats where portable fuel tanks can be stored • Double bottoms not sealed together or not completely filled with flota- tion materials • Closed living spaces • Closed stowage compartments in which combustible or flammable materials are stored • Permanently installed fuel tanks • Boat is 26 feet or more in length. Contents of Extinguishers Fire extinguishers use a variety of materials. Those used on boats usually contain dry chemicals, Halon, or Carbon Dioxide (C02). Dry chemical extin- guishers contain chemical powders such as Sodium Bicarbonate-baking soda. Carbon dioxide is a colorless and odorless gas when released from an extinguisher. It is not poisonous but caution must be used in entering com- partments filled with it. It will not support life and keeps oxygen from reach- ing your lungs. A fire-killing concentration of Carbon Dioxide is lethal. If you are in a compartment with a high concentration of C02, you will have no dif- ficulty breathing. But the air does not contain enough oxygen to support life. Unconsciousness or death can result. HALON EXTINGUISHERS Some fire extinguishers and 'built-in' or 'fixed' automatic fire extinguishing systems contain a gas called Halon. Like carbon dioxide it is colorless and odorless and will not support life. Some Halons may be toxic if inhaled. To be accepted to the Coast Guard, a fixed Halon system must have an indicator light at the vessel's helm. A green light shows the system is ready. Red means it is being discharged or has been discharged. Warning horns are available to let you know the system has been activated. If your fixed Halon system discharges, ventilate the space thoroughly before you enter it. There are no residues from Halon but it will not support life. Although Halon has excellent fire fighting properties, it is thought to deplete the earth's ozone layer and has not been manufactured since January 1, 1994. Halon extinguishers can be refilled from existing stocks of the gas until they are used up, but high federal excise taxes are being
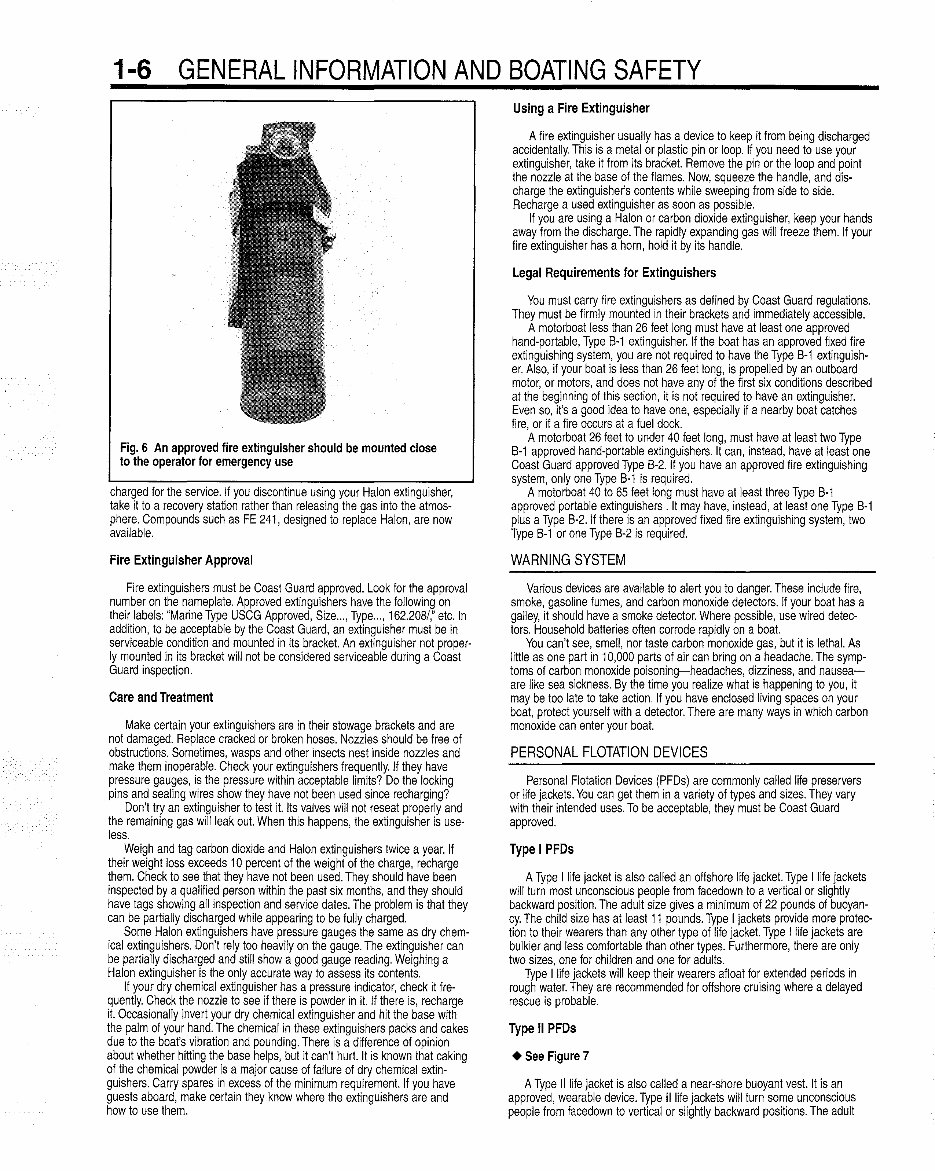
1-6 GENERAL INFORMATION AND BOATING SAFETY Fig. 6 An approved fire extinguisher should be mounted close to the operator for emergency use charged for the service. If you discontinue using your Halon extinguisher, take it to a recovery station rather than releasing the gas into the atmos- phere. Compounds such as FE 241, designed to replace Halon, are now available. Fire Extinguisher Approval Fire extinguishers must be Coast Guard approved. Look for the approval number on the nameplate. Approved extinguishers have the following on their labels: "Marine Type USCG Approved, Size ... , Type ... , 162.208/," etc. In addition, to be acceptable by the Coast Guard, an extinguisher must be in serviceable condition and mounted in its bracket. An extinguisher not proper- ly mounted in its bracket will not be considered serviceable during a Coast Guard inspection. Care and Treatment Make certain your extinguishers are in their stowage brackets and are not damaged. Replace cracked or broken hoses. Nozzles should be free of obstructions. Sometimes, wasps and other insects nest inside nozzles and make them inoperable. Check your extinguishers frequently. If they have pressure gauges, is the pressure within acceptable limits? Do the locking pins and sealing wires show they have not been used since recharging? Don't try an extinguisher to test it. Its valves will not reseat properly and the remaining gas will leak out. When this happens, the extinguisher is use- less. Weigh and tag carbon dioxide and Halon extinguishers twice a year. If their weight loss exceeds 10 percent of the weight of the charge, recharge them. Check to see that they have not been used. They should have been inspected by a qualified person within the past six months, and they should have tags showing all inspection and service dates. The problem is that they can be partially discharged while appearing to be fully charged. Some Halon extinguishers have pressure gauges the same as dry chem- ical extinguishers. Don't rely too heavily on the gauge. The extinguisher can be partially discharged and still show a good gauge reading. Weighing a Halon extinguisher is the only accurate way to assess its contents. If your dry chemical extinguisher has a pressure indicator, check it fre- quently. Check the nozzle to see if there is powder in it. If there is, recharge it. Occasionally invert your dry chemical extinguisher and hit the base with the palm of your hand. The chemical in these extinguishers packs and cakes due to the boat's vibration and pounding. There is a difference of opinion about whether hitting the base helps, but it can't hurt. It is known that caking of the chemical powder is a major cause of failure of dry chemical extin- guishers. Carry spares in excess of the minimum requirement. If you have guests aboard, make certain they know where the extinguishers are and how to use them. Using a Fire Extinguisher A fire extinguisher usually has a device to keep it from being discharged accidentally. This is a metal or plastic pin or loop. If you need to use your extinguisher, take it from its bracket. Remove the pin or the loop and pOint the nozzle at the base of the flames. Now, squeeze the handle, and dis- charge the extinguisher's contents while sweeping from side to side. Recharge a used extinguisher as soon as possible. If you are using a Halon or carbon dioxide extinguisher, keep your hands away from the discharge. The rapidly expanding gas will freeze them. If your fire extinguisher has a horn, hold it by its handle. Legal Requirements for Extinguishers You must carry fire extinguishers as defined by Coast Guard regulations. They must be firmly mounted in their brackets and immediately accessible. A motorboat less than 26 feet long must have at least one approved hand-portable, Type B-1 extinguisher. If the boat has an approved fixed fire extinguishing system, you are not required to have the Type B-1 extinguish- er. Also, if your boat is less than 26 feet long, is propelled by an outboard motor, or motors, and does not have any of the first six conditions described at the beginning of this section, it is not required to have an extinguisher. Even so, it's a good idea to have one, especially if a nearby boat catches fire, or if a fire occurs at a fuel dock. A motorboat 26 feet to under 40 feet long, must have at least two Type B-1 approved hand-portable extinguishers. It can, instead, have at least one Coast Guard approved Type B-2. If you have an approved fire extinguishing system, only one Type B-1 is required. A motorboat 40 to 65 feet long must have at least three Type B-1 approved portable extinguishers. It may have, instead, at least one Type B-1 plus a Type B-2. If there is an approved fixed fire extinguishing system, two Type B-1 or one Type B-2 is required. WARNING SYSTEM Various devices are available to alert you to danger. These include fire, smoke, gasoline fumes, and carbon monoxide detectors. If your boat has a galley, it should have a smoke detector. Where possible, use wired detec- tors. Household batteries often corrode rapidly on a boat. You can't see, smell, nor taste carbon monoxide gas, but it is lethal. As little as one part in 10,000 parts of air can bring on a headache. The symp- toms of carbon monoxide poisoning-headaches, dizziness, and nausea- are like sea sickness. By the time you realize what is happening to you, it may be too late to take action. If you have enclosed living spaces on your boat, protect yourself with a detector. There are many ways in which carbon monoxide can enter your boat. PERSONAL FLOTATION DEVICES Personal Flotation Devices (PFDs) are commonly called life preservers or life jackets. You can get them in a variety of types and sizes. They vary with their intended uses. To be acceptable, they must be Coast Guard approved. Type I PFDs A Type I life jacket is also called an offshore life jacket. Type I life jackets will turn most unconscious people from facedown to a vertical or slightly backward position. The adult size gives a minimum of 22 pounds of buoyan- cy. The child size has at least 11 pounds. Type I jackets provide more protec- tion to their wearers than any other type of life jacket. Type I life jackets are bulkier and less comfortable than other types. Furthermore, there are only two sizes, one for children and one for adults. Type I life jackets will keep their wearers afloat for extended periods in rough water. They are recommended for offshore cruising where a delayed rescue is probable. Type II PFDs • See Figure 7 A Type II life jacket is also called a near-shore buoyant vest. It is an approved, wearable device. Type II life jackets will turn some unconscious people from facedown to vertical or slightly backward positions. The adult
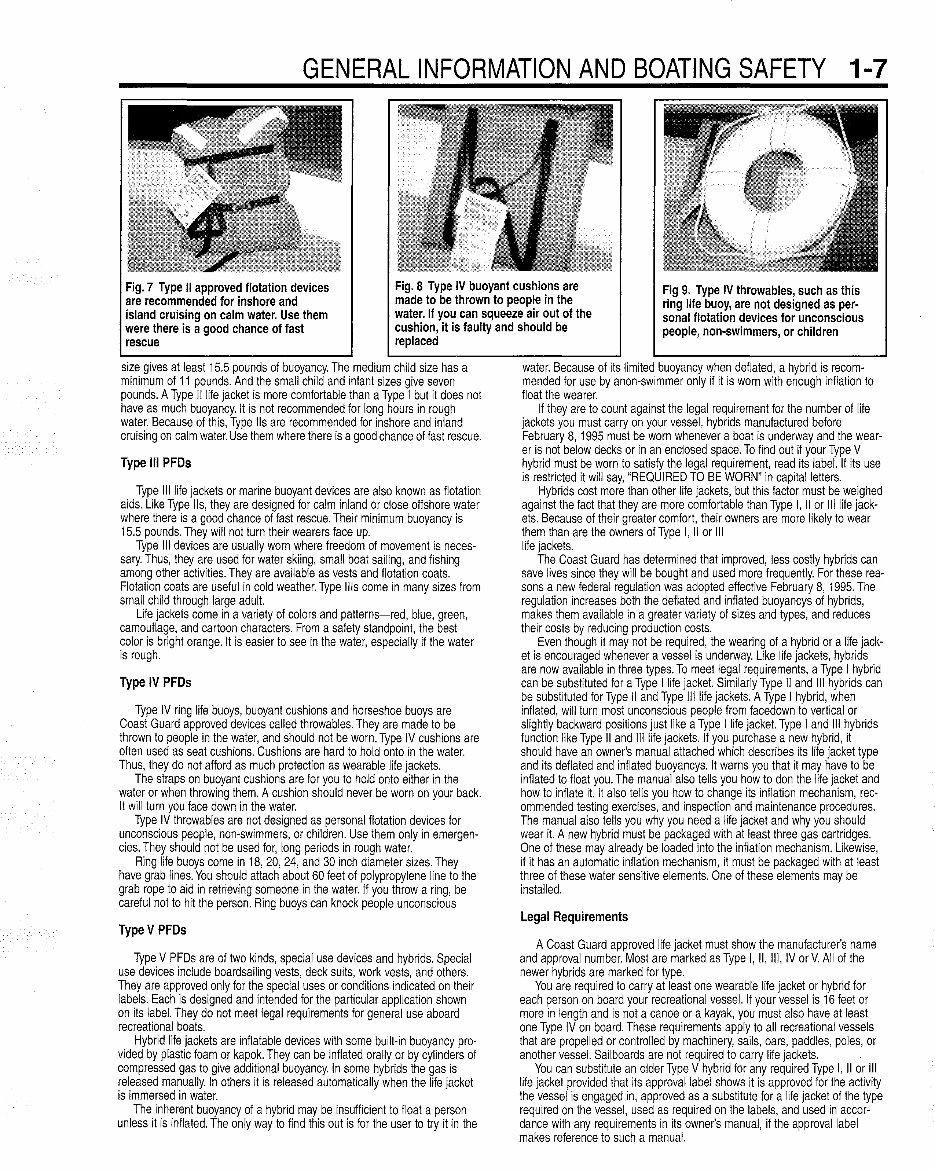
GENERAL INFORMATION AND BOATING SAFETY 1-7 Fig. 7 Type II approved flotation devices are recommended for inshore and island cruising on calm water. Use them were there is a good chance of fast rescue Fig. 8 Type IV buoyant cushions are made to be thrown to people in the water. If you can squeeze air out of the cushion, it is faulty and should be replaced Fig 9. Type IV throwables, such as this ring life buoy, are not designed as per- sonal flotation devices for unconscious people, non-swimmers, or children size gives at least 15.5 pounds of buoyancy. The medium child size has a minimum of 11 pounds. And the small child and infant sizes give seven pounds. A Type II life jacket is more comfortable than a Type I but it does not have as much buoyancy. It is not recommended for long hours in rough water. Because of this, Type lis are recommended for inshore and inland cruising on calm water. Use them where there is a good chance of fast rescue. Type III PFDs Type III life jackets or marine buoyant devices are also known as flotation aids. Like Type lis, they are designed for calm inland or close offshore water where there is a good chance of fast rescue. Their minimum buoyancy is 15.5 pounds. They will not turn their wearers face up. Type III devices are usually worn where freedom of movement is neces- sary. Thus, they are used for water skiing, small boat sailing, and fishing among other activities. They are available as vests and flotation coats. Flotation coats are useful in cold weather. Type Ills come in many sizes from small child through large adult. Life jackets come in a variety of colors and patterns-red, blue, green, camouflage, and cartoon characters. From a safety standpoint, the best color is bright orange. It is easier to see in the water, especially if the water is rough. Type IV PFDs Type IV ring life buoys, buoyant cushions and horseshoe buoys are Coast Guard approved devices called throwables. They are made to be thrown to people in the water, and should not be worn. Type IV cushions are often used as seat cushions. Cushions are hard to hold onto in the water. Thus, they do not afford as much protection as wearable life jackets. The straps on buoyant cushions are for you to hold onto either in the water or when throwing them. A cushion should never be worn on your back. It will turn you face down in the water. Type IV throwables are not designed as personal flotation devices for unconscious people, non-swimmers, or children. Use them only in emergen- cies. They should not be used for, long periods in rough water. Ring life buoys come in 18, 20, 24, and 30 inch diameter sizes. They have grab lines. You should attach about 60 feet of polypropylene line to the grab rope to aid in retrieving someone in the water. If you throw a ring, be careful not to hit the person. Ring buoys can knock people unconscious Type V PFDs Type V PFDs are of two kinds, special use devices and hybrids. Special use devices include boardsailing vests, deck suits, work vests, and others. They are approved only for the special uses or conditions indicated on their labels. Each is designed and intended for the particular application shown on its label. They do not meet legal requirements for general use aboard recreational boats. Hybrid life jackets are inflatable devices with some built-in buoyancy pro- vided by plastic foam or kapok. They can be inflated orally or by cylinders of compressed gas to give additional buoyancy. In some hybrids the gas is released manually. In others it is released automatically when the life jacket is immersed in water. The inherent buoyancy of a hybrid may be insufficient to float a person unless it is inflated. The only way to find this out is for the user to try it in the water. Because of its limited buoyancy when deflated, a hybrid is recom- mended for use by anon-swimmer only if it is worn with enough inflation to float the wearer. If they are to count against the legal requirement for the number of life jackets you must carryon your vessel, hybrids manufactured before February 8, 1995 must be worn whenever a boat is underway and the wear- er is not below decks or in an enclosed space. To find out if your Type V hybrid must be worn to satisfy the legal reqUirement, read its label. If its use is restricted it will say, "REQUIRED TO BE WORN" in capital letters. Hybrids cost more than other life jackets, but this factor must be weighed against the fact that they are more comfortable than Type I, II or III life jack- ets. Because of their greater comfort, their owners are more likely to wear them than are the owners ofType I, II or III life jackets. The Coast Guard has determined that improved, less costly hybrids can save lives since they will be bought and used more frequently. For these rea- sons a new federal regulation was adopted effective February 8, 1995. The regulation increases both the deflated and inflated buoyancys of hybrids, makes them available in a greater variety of sizes and types, and reduces their costs by reducing production costs. Even though it may not be required, the wearing of a hybrid or a life jack- et is encouraged whenever a vessel is underway. Like life jackets, hybrids are now available in three types. To meet legal requirements, a Type I hybrid can be sUbstituted for a Type I life jacket. Similarly Type II and III hybrids can be substituted for Type II and Type III life jackets. A Type I hybrid, when inflated, will turn most unconscious people from facedown to vertical or slightly backward pOSitions just like a Type I life jacket. Type I and III hybrids function like Type II and III life jackets. If you purchase a new hybrid, it should have an owner's manual attached which describes its life jacket type and its deflated and inflated buoyancys. It warns you that it may have to be inflated to float you. The manual also tells you how to don the life jacket and how to inflate it. It also tells you how to change its inflation mechanism, rec- ommended testing exercises, and inspection and maintenance procedures. The manual also tells you why you need a life jacket and why you should wear it. A new hybrid must be packaged with at least three gas cartridges. One of these may already be loaded into the inflation mechanism. Likewise, if it has an automatic inflation mechanism, it must be packaged with at least three of these water sensitive elements. One of these elements may be installed. legal Requirements A Coast Guard approved life jacket must show the manufacturer's name and approval number. Most are marked as Type I, II, III, IV or V. All of the newer hybrids are marked for type. You are required to carry at least one wearable life jacket or hybrid for each person on board your recreational vessel. If your vessel is 16 feet or more in length and is not a canoe or a kayak, you must also have at least one Type IV on board. These requirements apply to all recreational vessels that are propelled or controlled by machinery, sails, oars, paddles, poles, or another vessel. Sailboards are not required to carry life jackets. You can substitute an older Type V hybrid for any required Type I, II or III life jacket provided that its approval label shows it is approved for the activity the vessel is engaged in, approved as a substitute for a life jacket of the type required on the vessel, used as required on the labels, and used in accor- dance with any requirements in its owner's manual, if the approval label makes reference to such a manual.
1-8 GENERAL INFORMATION AND BOATING SAFETY A water skier being towed is considered to be on board the vessel when judging compliance with legal requirements. You are required to keep your Type I, II or III life jackets or equivalent hybrids readily accessible, which means you must be able to reach out and get them when needed. All life jackets must be in good, serviceable condi- tion. General Considerations The proper use of a life jacket requires the wearer to know how it will perform. You can gain this knowledge only through experience. Each person on your boat should be assigned a life jacket. Next, it should be fitted to the person who will wear it. Only then can you be sure that it will be ready for use in an emergency. Boats can sink fast. There may be no time to look around for a life jacket. Fitting one on you in the water is almost impossible. This advice is good even if the water is calm, and you intend to boat near shore. Most drownings occur in inland waters within a few feet of safety. Most victims had life jack- ets, but they weren't wearing them. Keeping life jackets in the plastic covers they came wrapped in and in a cabin assures that they will stay clean and unfaded. But this is no way to keep them when you are on the water. When you need a life jacket it must be readily accessible and adjusted to fit you. You can't spend time hunting for it or learning how to fit it. There is no substitute for the experience of entering the water while wearing a life jacket. Children, especially, need practice. If possible, give, your guests this experience. Tell them they should keep their arms to their sides when jumping in to keep the life jacket from riding up. Let them jump in and see how the life jacket responds. Is it adjusted so it does not ride up? Is it the proper size? Are all straps snug? Are children's life jackets the right sizes for them? Are they adjusted properly? If a child's life jacket fits correct- ly, you can lift the child by the jacket's shoulder straps and the child's chin and ears will not slip through. Non-swimmers, children, handicapped per- sons, elderly persons and even pets should always wear life jackets when they are aboard. Many states require that everyone aboard wear them in hazardous waters. Inspect your lifesaving equipment from time to time. Leave any question- able or unsatisfactory equipment on shore. An emergency is no time for you to conduct an inspection. Indelibly mark your life jackets with your vessel's name, number, and call- ing port. This can be important in a search and rescue effort. It could help concentrate effort where it will do the most good. Care of Life Jackets Given reasonable care, life jackets last many years. Thoroughly dry them before putting them away. Stow them in dry, well-ventilated places. Avoid the bottoms of lockers and deck storage boxes where moisture may collect. Air and dry them frequently. Life jackets should not be tossed about or used as fenders or cushions. Many contain kapok or fibrous glass material enclosed in plastic bags. The bags can rupture and are then unserviceable. Squeeze your life jacket gen- tly. Does air leak out? If so, water can leak in and it will no longer be safe to use. Cut it up so no one will use it, and throw it away. The covers of some life jackets are made of nylon or polyester. These materials are plastics. Like many plastics, they break down after extended exposure to the ultraviolet light in sunlight. This process may be more rapid when the materials are dyed with bright dyes such as "neon" shades. Ripped and badly faded fabric are clues that the covering of your life jacket is deteriorating. A simple test is to pinch the fabric between your thumbs and forefingers. Now try to tear the fabric. If it can be torn, it should definitely be destroyed and discarded. Compare the colors in protected places to those exposed to the sun. If the colors have faded, the materials have been weakened. A fabric-covered life jacket should ordinarily last sev- eral boating seasons with normal use. A life jacket used every day in direct sunlight should probably be replaced more often. SOUND PRODUCING DEVICES All boats are required to carry some means of making an efficient sound signal. Devices for making the whistle or horn noises required by the Navigation Rules must be capable of a four second blast. The blast should be audible for at least one-half mile. Athletic whistles are not acceptable on boats 12 meters or longer. Use caution with athletic whistles. When wet, some of them come apart and loose their "pea:' When this happens, they are useless. If your vessel is 12 meters long and less than 20 meters, you must have a power whistle (or power horn) and a bell on board. The bell must be in operating condition and have a minimum diameter of at least 200 mm (7.9 inches) at its mouth. VISUAL DISTRESS SIGNALS • See Figure 10 Visual Distress Signals (VDS) attract attention to your vessel if you need help. They also help to guide searchers in search and rescue situations. Be sure you have the right types, and learn how to use them properly. It is illegal to fire flares improperly. In addition, they cost the Coast Guard and its Auxiliary many wasted hours in fruitless searches. If you signal a dis- tress with flares and then someone helps you, please let the Coast Guard or the appropriate Search And Rescue Agency (SAR) know so the distress report will be canceled. Recreational boats less than 16 feet long must carry visual distress sig- nals on coastal waters at night. Coastal waters are: • The ocean (territorial sea) • The Great Lakes • Bays or sounds that empty into oceans • Rivers over two miles across at their mouths upstream to where they narrow to two miles. Recreational boats 16 feet or longer must carry VDS at all times on coastal waters. The same requirement applies to boats carrying six or fewer passengers for hire. Open sailboats less than 26 feet long without engines are exempt in the daytime as are manually propelled boats. Also exempt are boats in organized races, regattas, parades, etc. Boats owned in the United States and operating on the high seas must be equipped with VDS. A wide variety of Signaling devices meet Coast Guard regulations. For pyrotechnic devices, a minimum of three must be carried. Any combination can be carried as long as it adds up to at least three signals for day use and at least three signals for night use. Three day/night signals meet both requirements. If possible, carry more than the legal requirement. • The American flag flying upside down is a commonly recognized distress signal. It is not recognized in the Coast Guard regulations, though. In an emergency, your efforts would probably be better used in more effective signaling methods. Types ofVDS VDS are divided into two groups; daytime and nighttime use. Each of these groups is subdivided into pyrotechnic and non-pyrotechnic devices. = r. CODE FLAGS Fig. 10 Internationally accepted distress signals
These comprehensive repair manuals on CD provide complete coverage for Mercruiser Stern Drive Alpha, Bravo, Blackhawk gasoline engines. They are suitable for 4-cylinder, V6, and V8 engines, including carbureted and fuel-injected engines, as well as all inboard transmissions.
The Mercury MerCruiser Stern Drive 1992-2001 CD manual covers a wide range of engines and stern drive units, including Alpha Sterndrive, Blackhawk Sterndrive, Borg Warner Sterndrive, Bravo i/ii/iii 1/11/111 Sterndrive, Hurth Sterndrive, Velvet Sterndrive, Walter Sterndrive, and ZF Inboard.
These manuals feature step-by-step illustrated procedures that guide users through various tasks, including adjustments, general maintenance, and complete repair and rebuild processes.
Separate chapters in the manual cover a diverse range of components and systems, including alternator, anodes (zincs), audio warning system, balance shaft, battery, battery gauge, bell housing, booster cylinder, breaker point ignition system, camshaft, carbureted fuel system, carburetor, charging system, combination manifold, compact hydraulic system, control valve, cool fuel system, cylinder head, cylinder head cover, diagnostic trouble code charts, diagnostic trouble codes (DTC), engine, engine block identification, engine mechanical, engine overhaul tips, engine preparation, engine reconditioning, engine start-up and break-in, exhaust system, flow diagrams, fluid disposal, fluids and lubricants, fuel and combustion, gear ratio identification, gimbal housing/transom plate, heat exchanger, ignition system, ignition timing, instruments and gauges, intake air temperature sensor (IAT), intake manifold, knock sensor (KS), lubrication points, propeller shaft, manifold absolute pressure sensor (MAP), manual steering system, motion sensor - DDIS, oil pan, oil pressure sending unit, oil pump, PCV valve, personal flotation devices, power steering cooler, power steering pump, power steering system, power trim and tilt, power trim pump, pressure cap, propeller(s), rear main seal, rear main seal retainer, rocker arms and push rods, sending units and switches, sensor - Thunderbolt, serial number identification, specifications, starter motor, swivel ring, stern drive unit, swivel ring, system diagnosis, thermostat, throttle body, throttle body adapter plate, throttle position sensor (TP), timing chain and sprockets/gears, tools, tools and equipment, torsional damper, transom assembly, transmission, transom assembly, trim cylinder, troubleshooting, vacuum diagrams, valve adjustment, winter storage, and wiring diagrams.
Recently Viewed
5,521,897Happy Clients
2,594,462eManuals
1,120,453Trusted Sellers
15Years in Business
Price:
Actual Price:
1992-2001 Mercruiser Sterndrive V6 V8 Service & Repair Manual