

GE FRONT LOAD WASHER Repair Service Manual
What's Included?
Fast Download Speeds
Online & Offline Access
Access PDF Contents & Bookmarks
Full Search Facility
Print one or all pages of your manual
GE Appliances
General Electric Company
Louisville, Kentucky 40225
31-9135
GE Front Load
Washer
WBVH6240
WCVH6260
WHDVH626
Technical Service Guide
DECEMBER 2005
GE Consumer & Industrial
Downloaded from www.Manualslib.com manuals search engine

– 2 –
IMPORTANT SAFETY NOTICE
The information in this service guide is intended for use by
individuals possessing adequate backgrounds of electrical,
electronic, and mechanical experience. Any attempt to repair a
major ap pliance may result in personal injury and property
damage. The manufacturer or seller cannot be responsible for the
interpretation of this information, nor can it assume any liability in
connection with its use.
WARNING
To avoid personal injury, disconnect power before servicing
this product. If electrical power is required for diagnosis or test
purposes, disconnect the power immediately after performing the
necessary checks.
RECONNECT ALL GROUNDING DEVICES
If grounding wires, screws, straps, clips, nuts, or washers used to
complete a path to ground are removed for service, they must be
returned to their original position and properly fastened.
GE Consumer & Industrial
Technical Service Guide
Copyright © 2005
All rights reserved. This service guide may not be reproduced in whole or in part
in any form without written permission from the General Electric Company.
Downloaded from www.Manualslib.com manuals search engine

– 3 –
Table of Contents
Basic Wash Cycle ............................................................................................................................................................. 18
Component Locator Views ........................................................................................................................................... 20
Control and Inverter Board Connections ............................................................................................................... 22
Control Board...................................................................................................................................................................... 25
Control Features ................................................................................................................................................................ 6
Control Panel ..................................................................................................................................................................... 24
Dampers ............................................................................................................................................................................... 46
Dispenser Assembly ........................................................................................................................................................ 29
Dispenser Motor ................................................................................................................................................................ 32
Door ....................................................................................................................................................................................... 42
Door Hinge ........................................................................................................................................................................... 44
Door Lock ............................................................................................................................................................................. 26
Door Strike............................................................................................................................................................................ 27
Error Codes .......................................................................................................................................................................... 53
Front Panel ........................................................................................................................................................................... 28
Heater Assembly............................................................................................................................................................... 37
Introduction ......................................................................................................................................................................... 5
Inverter .................................................................................................................................................................................. 39
Line Filter .............................................................................................................................................................................. 28
Motor Assembly ................................................................................................................................................................ 40
Nomenclature .................................................................................................................................................................... 4
Operation Overview......................................................................................................................................................... 18
Outer Tub Assembly and Suspension .................................................................................................................... 49
Pedestal Installation (Washer and Dryer) .............................................................................................................. 12
Programming the Control Board ............................................................................................................................... 26
Pump ...................................................................................................................................................................................... 35
Schematic ............................................................................................................................................................................ 58
Service Panel ...................................................................................................................................................................... 23
Service Test Mode............................................................................................................................................................. 51
Stacking Instructions ...................................................................................................................................................... 15
Top Panel .............................................................................................................................................................................. 23
Tub Gasket (Boot) .............................................................................................................................................................. 44
Using the Washer ............................................................................................................................................................. 10
Warranty for 2005 Product.......................................................................................................................................... 60
Warranty for 2006 and Later Product .................................................................................................................... 61
Washer Components ...................................................................................................................................................... 23
Washer Features............................................................................................................................................................... 8
Wash Basket ....................................................................................................................................................................... 47
Water Level Control ......................................................................................................................................................... 33
Water Valve ......................................................................................................................................................................... 34
Downloaded from www.Manualslib.com manuals search engine
– 4 –
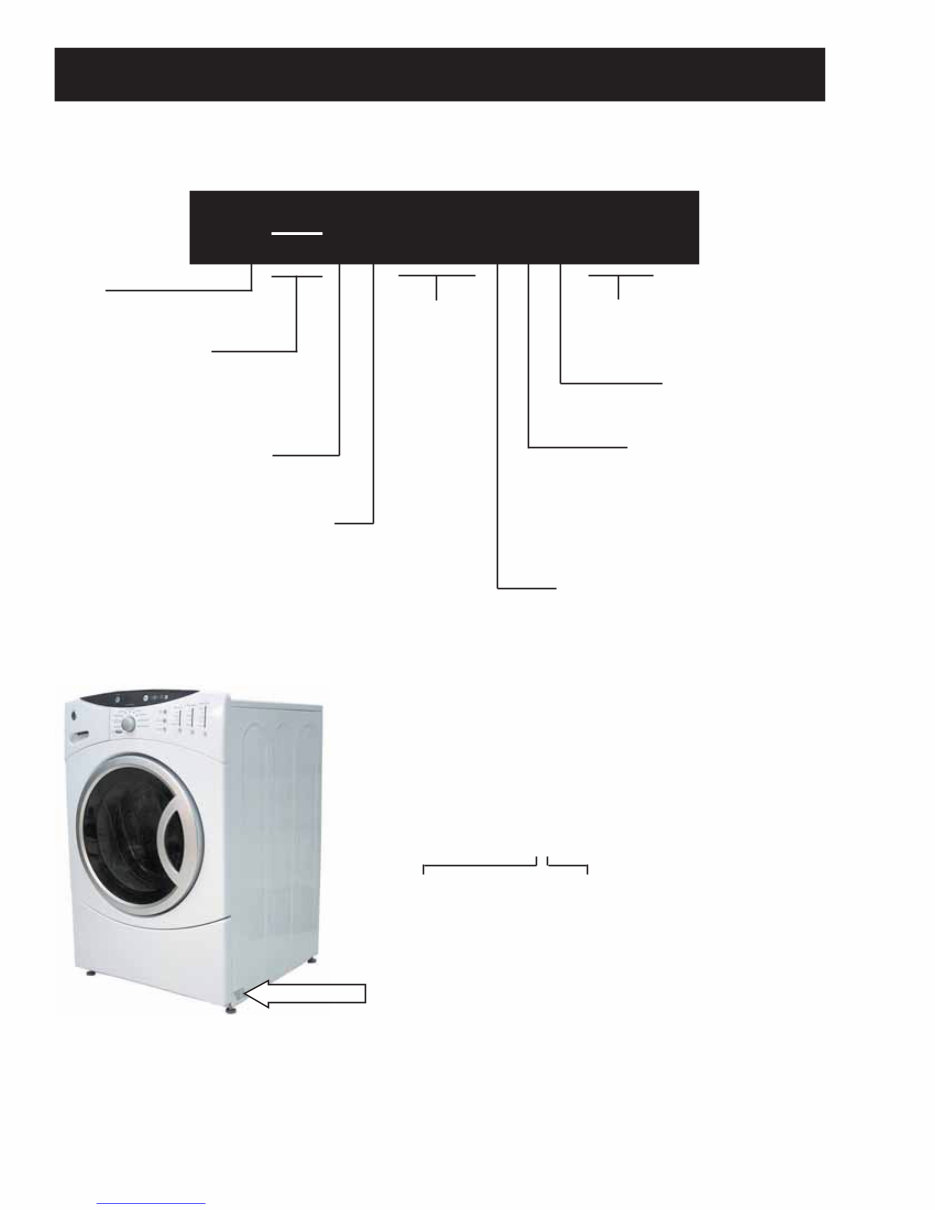
Model Number
Nomenclature
The letter designating
the year repeats every
12 years.
Example:
T - 1974
T - 1986
T - 1998
The nomenclature tag is located on
the bottom front corner on the right
side of the cabinet.
Note: The technical sheet is located
behind the control panel.
Serial Number
The first two characters of the serial number
identify the month and year of manufacture.
Example: AH123456S = January, 2005
A - JAN 2005 - H
D - FEB 2004 - G
F - MAR 2003 - F
G - APR 2002 - D
H - MAY 2001 - A
L - JUN 2000 - Z
M - JUL 1999 - V
R - AUG 1998 - T
S - SEP 1997 - S
T - OCT 1996 - R
V - NOV 1995 - M
Z - DEC 1994 - L
Nomenclature
Capacity/Configuration
V = Very Big
W C V H 6 2 6 0 F 0 W W
Brand
W = General Electric
Feature Packages
B = Base
C = Contract/HPS
HD = Brand Feature Pack
Backsplash Control/Platform
H = Horizontal
Engineering Revision
Alpha or Numeric
Color
WW - White
GG - Granite
Model Year
F - 2005
G - 2006
H - 2007
J - 2008
K - 2009
Fuel/Voltage
0 = US Voltage
Control
Features
Downloaded from www.Manualslib.com manuals search engine
– 5 –
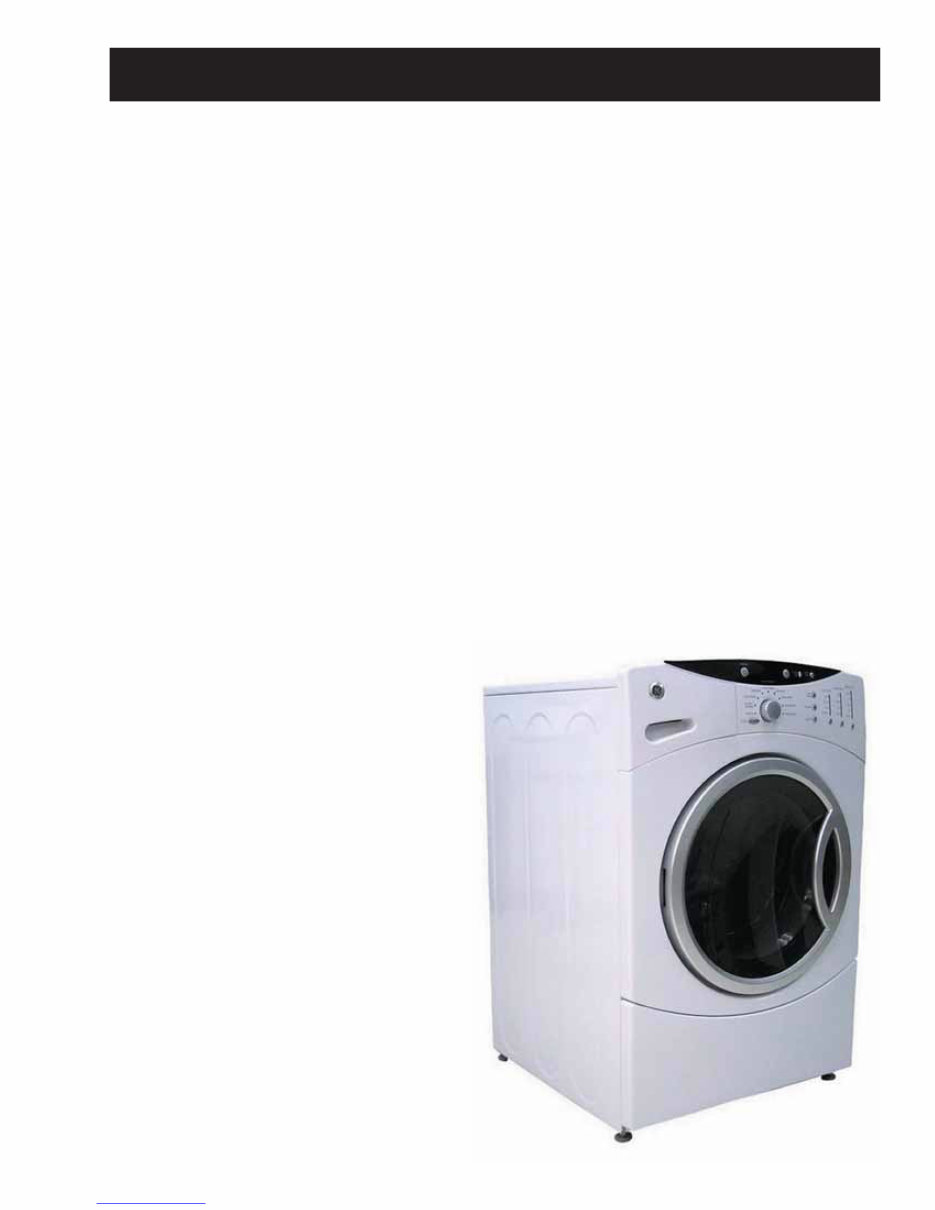
Introduction
The new GE Front Load Washer has the following features:
Energy Star Qualification assures less energy waste and lower utility bills.
10 wash cycles include a variety of fabric-specific settings, from Extra-Heavy Cottons to Easy-Care
Colors.
My Cycle selection saves a favorite cycle for future use.
Dispenser adds diluted detergent, bleach, and fabric softener at the correct time during the wash or rinse
cycles.
A nozzle sprays water on the inner door glass to reduce detergent and mineral buildup.
End-Of-Cycle Signal alerts user when the cycle is done, saving time between loads. Signal volume can be
adjusted.
Overflow protection activates the drain pump whenever water reaches overflow level.
Service test mode built-in. Specific washer components can be operated. Error codes are recorded and
accessible on the control panel's 7-segment display.
Two piece plastic outer tub is formed from tough, lightweight polypropylene.
The wash tub is constructed of durable stainless steel.
Two suspension springs and four dampers provide maximum off-balance load protection with minimal
vibration transfer to the floor.
Intricate door lock keeps the door locked
during operation.
Blackout protection. Restoring power resumes
cycle where it was interrupted. Eliminating
restarting entire wash cycle.
Flush door handle.
UV stabilizers are utilized on the control panel,
top cover, and door outer panel to prevent
yellowing when exposed to sunlight.
The GE dryer can be installed on top of the
washer. (Stacking kit supplied with washer.)
Pedestal available at additional cost. White
(model number SBSD227FWW) and granite
(model number SBSD227FGG).
•
•
•
•
•
•
•
•
•
•
•
•
•
•
•
•
•
Downloaded from www.Manualslib.com manuals search engine
– 6 –
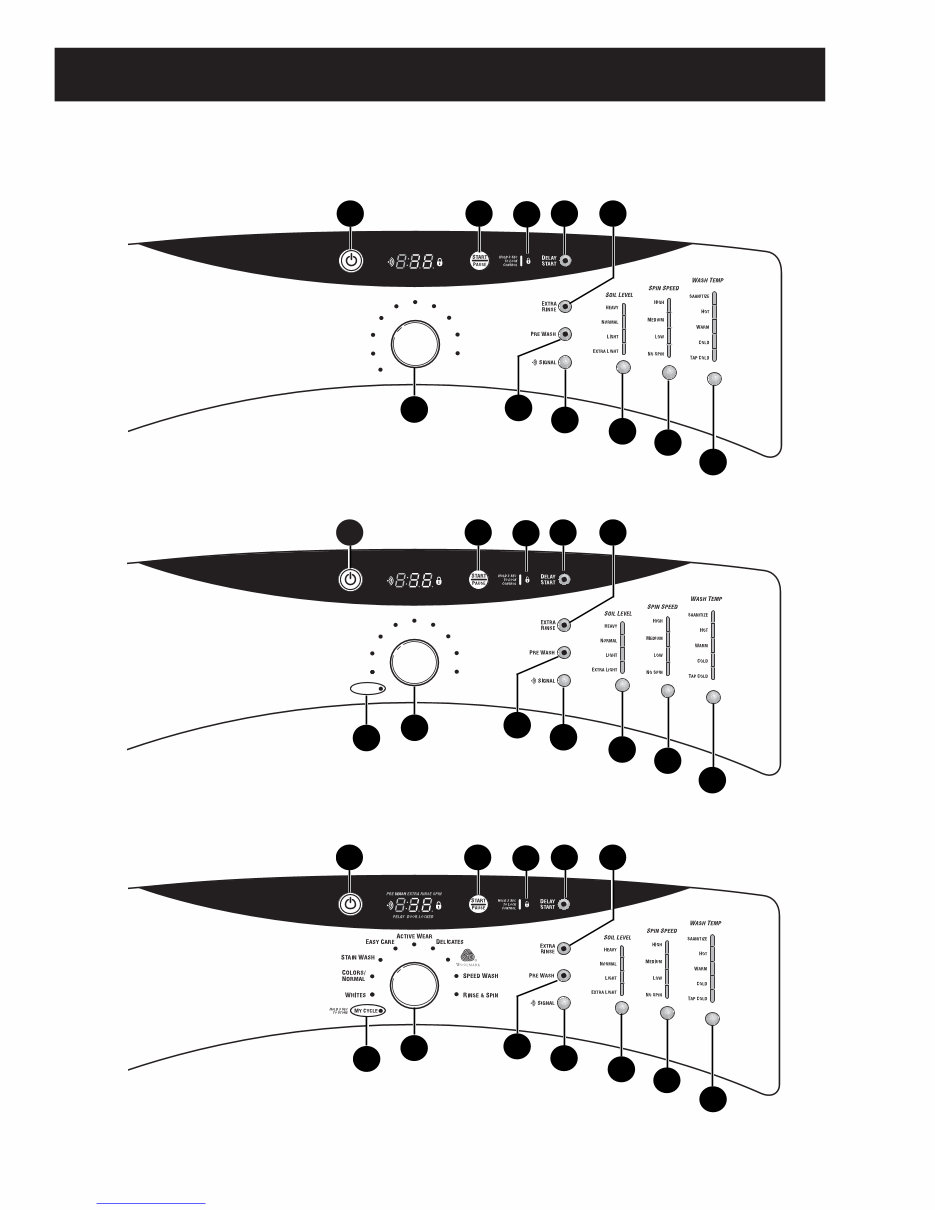
Control Features
(Continued Next Page)
EASY CARE
STAIN WASH
COLORS/
NORMAL
WHITES RINSE & SPIN
SPEED WASH
DELICATES
HANDWASH
ACTIVE WEAR
HOLD3 SEC
TOSTORE MY CYCLE
PRE WASH EXTRA RINSE SPIN
DELAY DOOR LOCKED
1
5
3
4
6
2
Model WCVH6260
11 10
12 7
8
9
1
5
3
4
6
2
Model WHDVH626
11 10
12 7
8
9
ACTIVE WEAR
EASY CARE
STAIN WASH
COLORS/
NORMAL
RINSE & SPIN
DRAIN & SPIN
DELICATES
SPEED WASH
WHITES
HANDWASH
PRE WASH EXTRA RINSE SPIN
DELAY DOOR LOCKED
1
5
3
4
6
2
Model WBVH6240
11 10
7
8
9
Downloaded from www.Manualslib.com manuals search engine
– 7 –
1
2
Power
Press to “wake up” the display. If the display is active, press to put the washer into standby mode.
NOTE: Pressing POWER does not disconnect the appliance from the power supply.
Wash Cycles
The wash cycles are optimized for specific types of wash loads. The chart below will help you match
the wash setting with the loads.
WHITES For heavily to lightly soiled white cottons, household linens, work and play clothes.
COLOR/NORMAL For heavy to lightly soiled colorfast cottons, household linens, work and play clothes.
STAIN WASH For heavy soiled colorfast cottons, household linens, work and play clothes.
EASY CARE For wrinkle-free and permanent press items.
(PERMA PRESS)
ACTIVE WEAR For active sports, exercise and some casual wear clothes. Fabrics include modern technology finishes and
fibers such as spandex, stretch and micro-fibers.
DELICATES For lingerie and special-care fabrics with light to normal soil. Provides gentle tumbling and soak during
wash and rinse.
HANDWASH For items labeled hand-washable with light soils. Provides gentle rocking to mimic the handwashing action.
WOOLMARK The wool wash cycle of this machine has been approved by Woolmark
®
for the washing of machine
washable Woolmark
®
products provided that the products are washed according to the instructions on the
garment label and those issued by the manufacturer of this washing machine.
MY CYCLE Press to use, create, or modify custom wash cycles.
SPEED WASH For lightly soiled items that are needed in a hurry. Cycle time is approximately 30 minutes, depending
on selected options.
DRAIN & SPIN Drain and spin at any time.
RINSE & SPIN To quickly rinse out any items at any time.
Soil Level
Changing the SOIL LEVEL increases or decreases the wash time to remove different amounts
of soil.
To change the SOIL LEVEL, press the SOIL LEVEL button until you have reached the desired
setting. You can choose between Extra Light, Light, Normal or Heavy soil.
Spin Speed
Changing the SPIN SPEED changes the final spin speed of the cycles. Always follow the fabric
manufacturer’s care label when changing the SPIN SPEED.
To change the SPIN SPEED, press the SPIN SPEED button until you have reached the desired
setting. Higher spin speeds are not available on certain cycles, such as Delicates.
Higher spin speeds remove more water from the clothes and will help reduce dry time, but may
also increase the possibility of setting wrinkles on some fabrics.
Wash Temp
Adjust to select the proper water termperature for the wash cycle. The prewash and rinse water is
always cold to help reduce energy usage and reduce setting of stains and wrinkles.
Follow the fabric manufacturer’s care label when selecting the wash temperature.
To change the wash temperature, press the WASH TEMP button until you have reached the desired
setting. The Sanitized wash temperature is not available on certain cycles, such as Delicates.
NOTE: The first 10 seconds of the wash fill is always cold. This feature assists in conditioning the fabric and
preventing stains from setting on garments.
START/PAUSE
Press to start a wash cycle. If the washer is running, pressing it once will pause the washer and
unlock the door. Press again to restart the wash cycle.
NOTE: If the washer is paused and the cycle is not restarted within 2 hours, the current wash cycle will be cancelled.
3
4
5
6
Downloaded from www.Manualslib.com manuals search engine
– 8 –
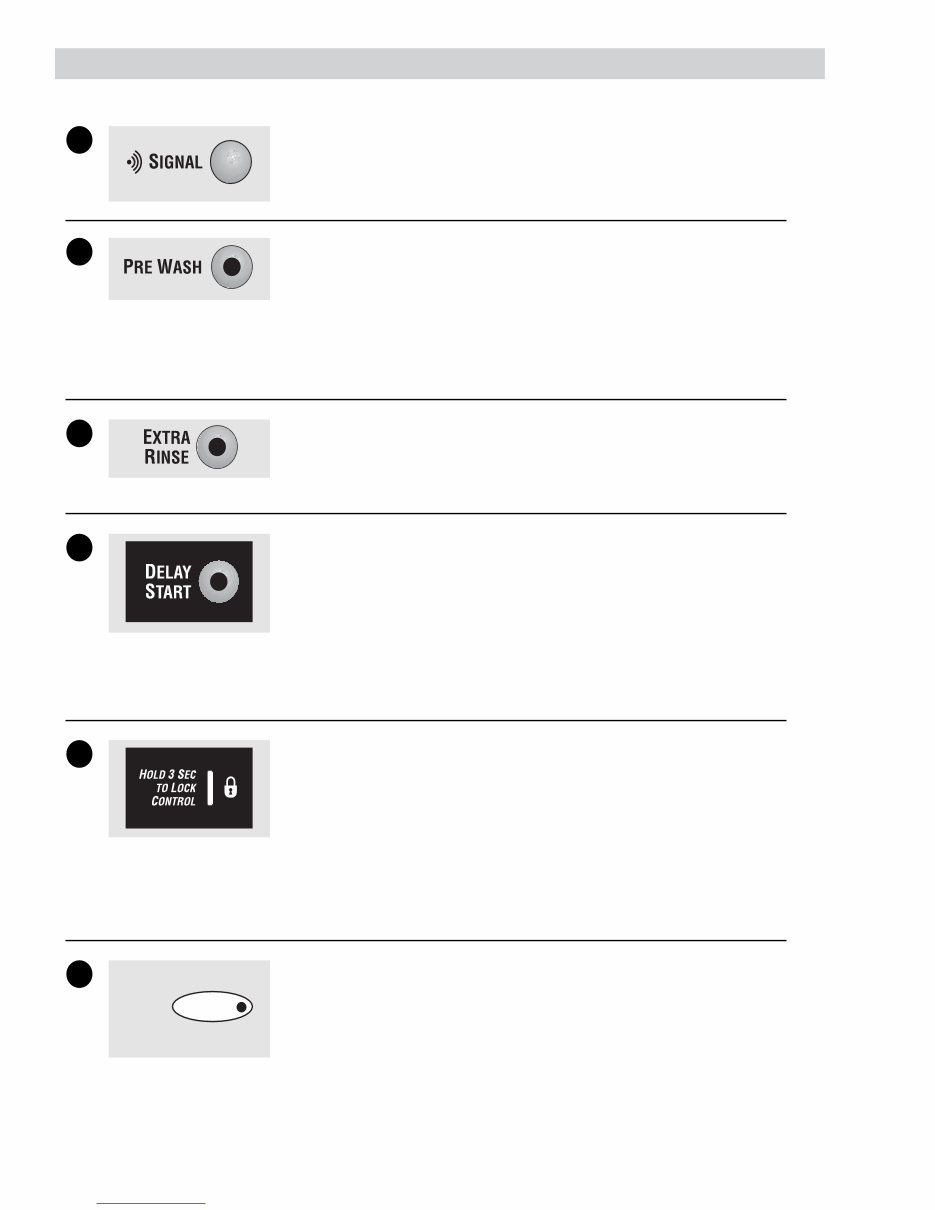
Cycle Signal
Use the SIGNAL button to change the
volume of the end of cycle signal.
Press the button until you reach the
desired volume.
Prewash
Prewash is an extra wash before the
main wash. Use it for heavily soiled
clothes or for clothes with a care label
that recommends prewashing before
washing. Be sure to add high-efficiency
detergent, or the proper wash additive
to the prewash dispenser.
Extra Rinse
Use an extra rinse when additional
rinsing is desired to remove excess dirt
and detergent from soiled loads.
Delay Start
You can delay the start of a wash cycle
for up to 12 hours. Press the DELAY
START button to choose the number of
hours you want to delay the start of the
cycle, then press the START button. The
machine will count down and start
automatically at the correct time.
NOTE: If you forget to fully close the door, a
reminder signal will beep reminding you to do
so.
NOTE: If you open the door when the delay is
counting down, the machine will enter the
pause state. You must close the door and
press START again in order to restart the
countdown.
Lock
You can lock the controls to prevent any
selections from being made. Or you can
lock the controls after you have started a
cycle.
Children cannot accidentally start the washer
by touching pads with this option selected.
To lock the washer, press and hold the
lock button for 3 seconds. To unlock
the washer controls, press and hold the
lock button for 3 seconds.
The control lock icon on the display will
light up when it is on.
NOTE: The POWER button can still be used
when the machine is locked.
HOLD 3 SEC
TO STORE
MY CYCLE
MY CYCLE
To save a favorite cycle, set the desired
settings and hold down the MY CYCLE
button for 3 seconds. A beep will sound
to indicate the cycle has been saved.
To use your custom cycle, press the MY
CYCLE button before washing a load.
To change the saved cycle, set the
desired settings and hold down the MY
CYCLE button for 3 seconds.
NOTE: When using MY CYCLE, wash
options cannot be modified after the cycle
has been started.
NOTE: If you change wash options with MY
CYCLE before starting the cycle, the MY
CYCLE light will turn off and you will be
returned to the base cycle.
7
8
9
10
11
12
(Continued Next Page)
Washer Features
Downloaded from www.Manualslib.com manuals search engine
– 9 –
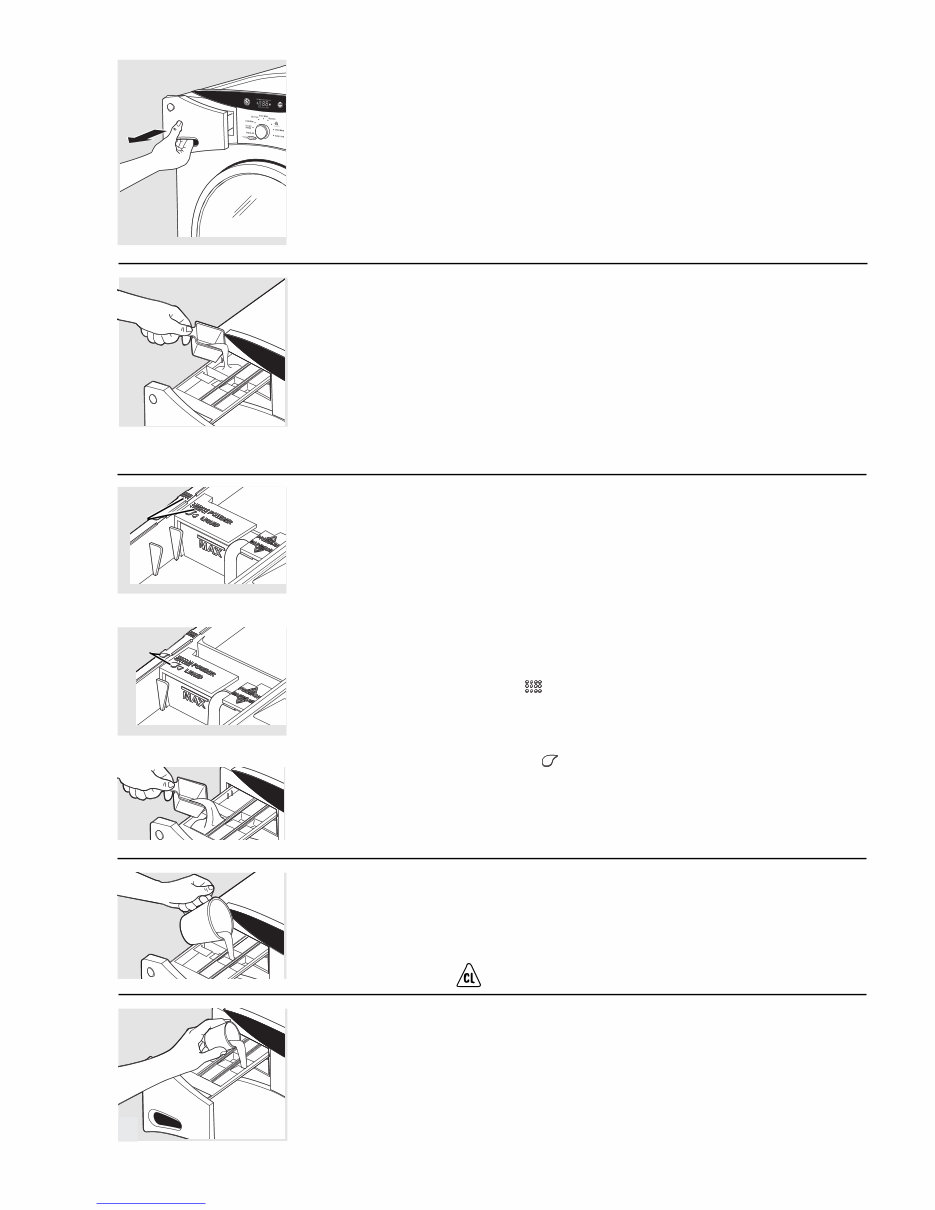
The Dispenser Drawer
Slowly open the dispenser drawer by pulling it
out until it stops.
After adding laundry products, slowly close the
dispenser drawer. Closing the drawer too quickly
could result in early dispensing of the bleach,
fabric softener or detergent.
You may see water in the bleach and fabric softener
compartments at the end of the cycle. This is a result
of the flushing/siphoning action and is part of the
normal operation of the washer.
The Liquid Bleach Compartment
If desired, measure out the recommended
amount of liquid bleach, not to exceed
1/3 cup (80 ml) and pour into the center
compartment labeled “LIQUID BLEACH”
marked with this symbol .
Do not exceed the maximum fill line. Overfilling can
cause early dispensing of the bleach which could result
in damaged clothes.
NOTE: Do not use powdered bleach in the dispenser.
The Fabric Softener Compartment
If desired, pour the recommended amount of
liquid fabric softener into the compartment
labeled “FABRIC SOFTENER.”
Use only liquid fabric softener in the
dispenser.
Dilute with water to the maximum fill line.
Do not exceed the maximum fill line. Overfilling can
cause early dispensing of the fabric softener which
could stain clothes.
NOTE: Do not pour fabric softener directly on
the wash load.
The Detergent Compartment
■ High efficiency detergent is
recommended for this washer. Use the
detergent manufacturer’s recommended
amount.
The detergent selection insert must be placed
in the detergent compartment in a specific
position according to what type of detergent
you are using.
■ Powder Detergent – Place the insert in the
rear position. The Powder Icons must
line up on center when the insert is in the
powder position.
■ Liquid Detergent – Place the insert in the
forward position. The Liquid Icons
must line up on center when the insert is
in the liquid position.
Move the insert by pulling it up and replace
it by sliding it down between either the rear
or front detergent compartment molded rails,
as desired, for powder or liquid detergent.
■ Add measured detergent to the front left
detergent compartment of the dispenser
drawer.
■ Detergent is flushed from the
dispenser at the beginning of the
wash cycle. Either powdered or liquid
detergent can be used.
■ Detergent usage may need to be adjusted
for water temperature, water hardness,
size and soil level of the load. Avoid using
too much detergent in your washer as it
can lead to oversudsing and detergent
residue being left on the clothes.
Insert in rear position for powder detergent
Insert in forward position for liquid detergent
The Prewash Compartment
■ Only use the Prewash Compartment if you
are selecting the Prewash cycle for heavily
soiled clothes. Add measured detergent or
prewash additive to the back left prewash
compartment of the dispenser drawer.
■ Detergent or prewash additive is flushed
from the dispenser in the prewash cycle
(if selected).
NOTE: Liquid detergent will drain into the washer
drum as it is added.
■ Detergent usage may need to be adjusted
for water temperature, water hardness,
size and soil level of the load. Avoid using
too much detergent in your washer as it
can lead to over sudsing and detergent
residue being left on the clothes.
Powder
Icons
Liquid
Icons
Downloaded from www.Manualslib.com manuals search engine
– 10 –
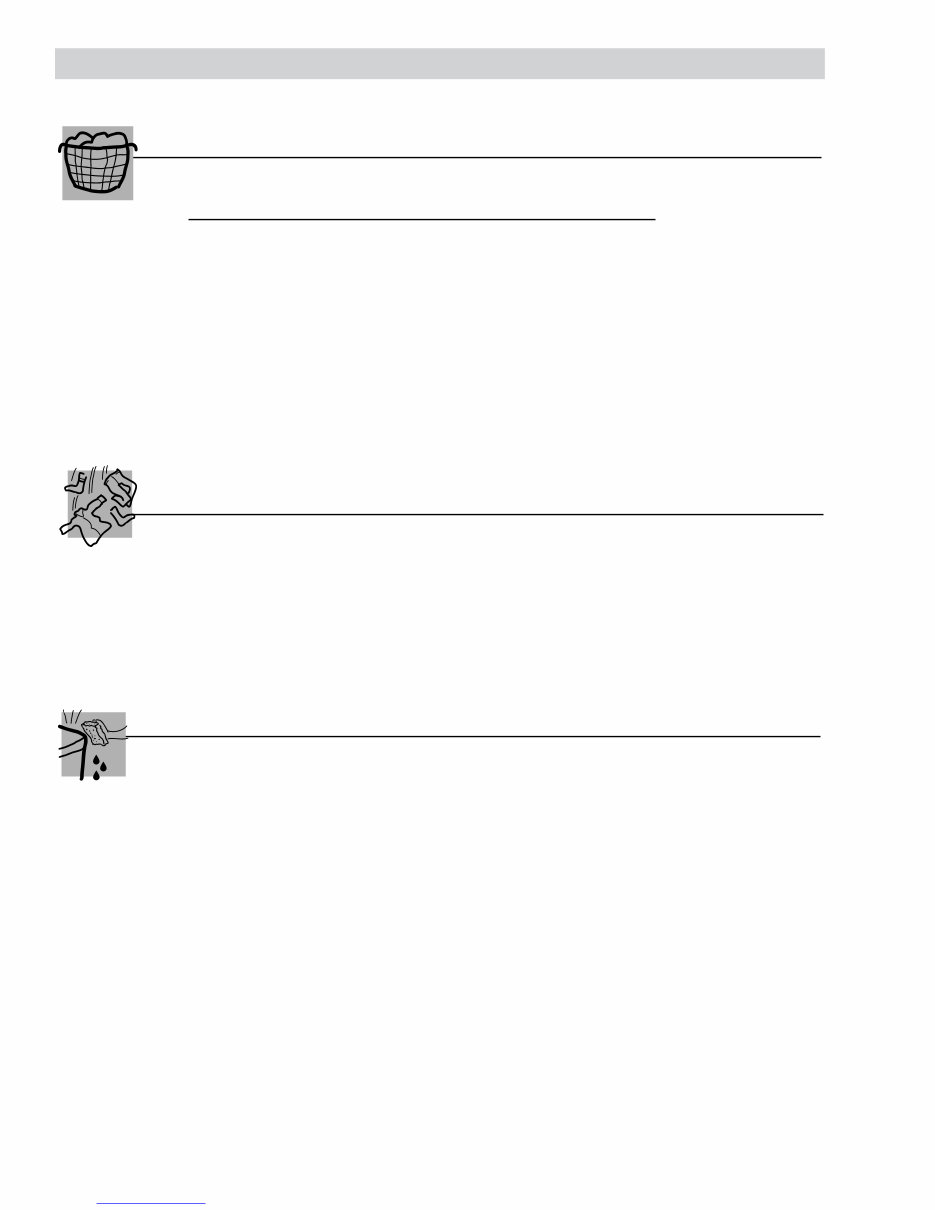
Sorting Wash Loads
Loading the Washer
Wash drum may be fully loaded with loosely
added items. Do not wash fabrics containing
flammable materials (waxes, cleaning fluids, etc.).
To add items after washer has started,
press START/PAUSE and wait until the door is
unlatched. The washer may take up to 30 seconds
to unlock the door after pressing START/PAUSE
depending on the machine conditions. Do not
try to force open the door when it is locked. After
the door unlocks, open gently. Add items, close
the door and press START/PAUSE to restart.
Colors
Whites
Lights
Darks
Soil
Heavy
Normal
Light
Fabric
Delicates
Easy Care
Sturdy Cottons
Lint
Lint Producers
Lint Collectors
■ Combine large and small items in a load. Load large items first. Large items should not be more than half the
total wash load.
■ Washing single items is not recommended. This may cause an out-of-balance load. Add one or two similar
items.
■ Pillows and comforters should not be mixed with other items. This may cause an out-of-balance load.
Sort laundry into loads that can be washed together.
Using the Washer
(Continued Next Page)
Care and Cleaning
Exterior: Immediately wipe off any spills. Wipe with damp cloth. Do not hit surface with
sharp objects.
Interior: Dry around the washer door opening, flexible gasket and door glass. These areas should
always be clean to ensure a water tight seal.
Moving and Storage: Ask the service technician to remove water from drain pump and hoses.
Do not store the washer where it will be exposed to the weather. When moving the washer,
the tub should be kept stationary by using the shipping bolts removed during installation.
If these parts are not available, they can be ordered by
visiting our Website at www.GEAppliances.com or by calling 800.GE.CARES.
Long Vacations: Be sure water supply is shut off at faucets. Drain all water from hoses if weather will
be below freezing.
Downloaded from www.Manualslib.com manuals search engine
You're Reading a Preview
What's Included?
Fast Download Speeds
Online & Offline Access
Access PDF Contents & Bookmarks
Full Search Facility
Print one or all pages of your manual
$30.99
Viewed 11 Times Today


Secure transaction
What's Included?
Fast Download Speeds
Online & Offline Access
Access PDF Contents & Bookmarks
Full Search Facility
Print one or all pages of your manual
$30.99
Get the GE Front Load Washer Repair Service Manual for models WBVH6240, WCVH6260, and WHDVH626. This comprehensive manual covers all repairs and services for this washer, making it useful for both professional mechanics and DIY enthusiasts. The manual is compatible with any Mac or Windows computer and provides fast access to the information you need. Securely purchase it using PayPal or credit cards.


