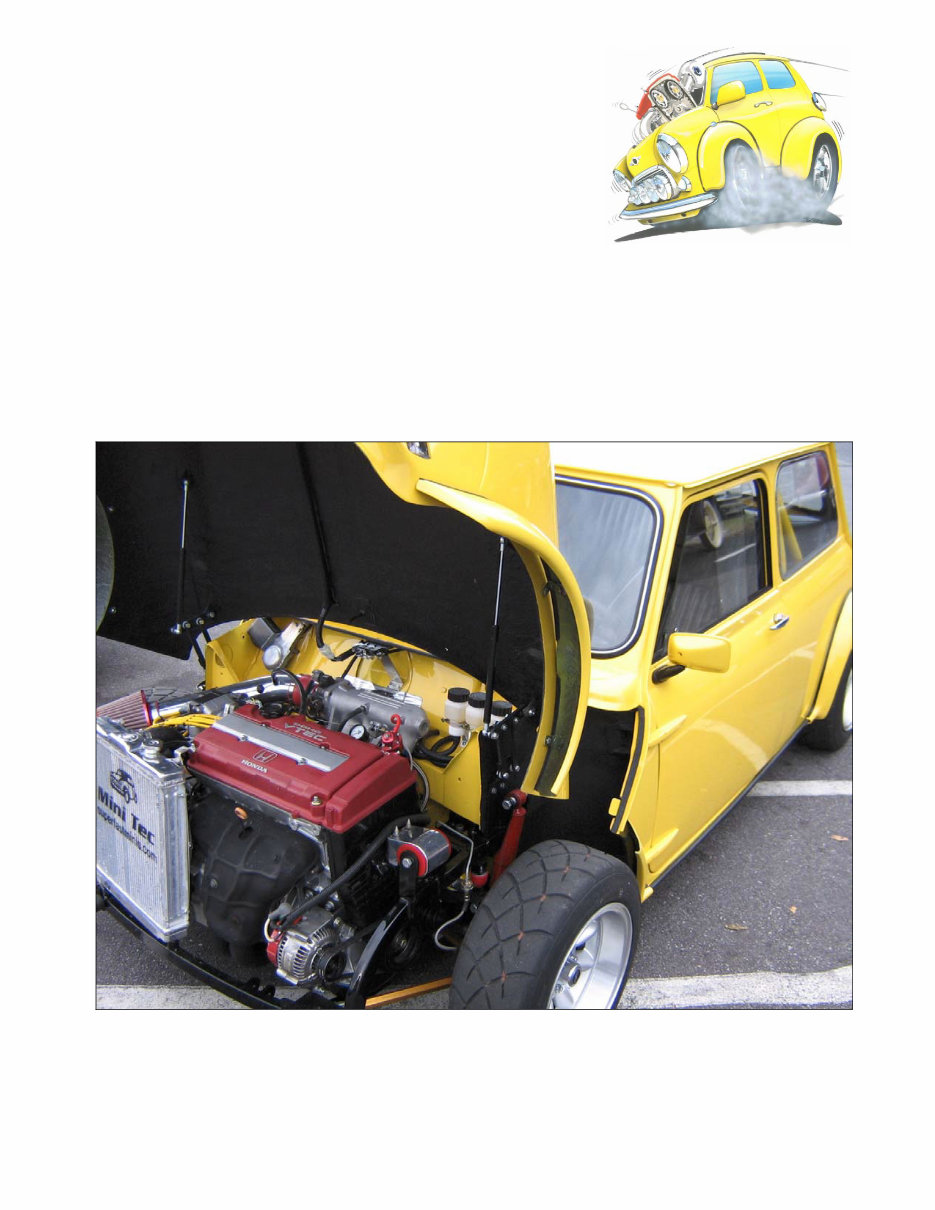
Mt-b kit: Honda Engine Conversions to classic minis mt-b installation manual For Classic minis 1959 2001
2 Dear Customer, We welcome you to the Honda Powered Mini World. Thank you and Congratulations for your purchase. You can be certain that you have made a wise choice with this upgrade. This kit was designed to help put you on the right track when building your ultimate Mini. With the help of this MT-B Kit, you will be driving your Super Fast Mini soon. Mini has been made in many variations with many subtle tweaks and varying build quality over its lifetime. It is impossible to account for all these, and some will even be unique to your car. Additionally, your car is likely 15-20 years old, with all that has happened to it in that time. With all that said, your MT-B kit and these instructions are designed to try to allow for some of these differences. For others, you will have to field fit or adjust as you go. Well do all we can to help keep your project moving along. Please keep in mind that pictures will be of great help, so if you dont have a digital camera, (or always wanted one) now is a good time to get one. In fact, you should take LOTS of pictures to document your project. Your project may seem overwhelming at times, but if you take it one step at a time, in a logical sequence and take an occasional break from it, youll do OK. The purpose of this kit is to make your Honda VTEC installation easy and hassle free. We have taken the research and development headaches out of the install so that you do not have to deal with all of that. The sub-frame mounts to the car. The engine mounts to the sub-frame. And before you know it, you are ready to crank and drive your car. We have broken the whole VTEC Mini build up into sections, from start to finish. We hope that this will be a pleasurable experience for you and we will do everything that we can to make it that. Just remember, we are available to help you 5 days a week. Just give us a call or an email. Thanks and have fun, Mini Tec, L.L.C.
3 Contents Introductory pages Parts Preparation Getting your car ready for the install process Sub-frame installation Upper suspension (including springs) Lower suspension Engine installation Axle Assembly and installation Swivel hub and brakes (steering arm) Shocks Master cylinders Shifter linkage Fuel System Intake modification alternator bracket non a/c models alternator bracket - a/c models cooling system Wiring Suspension setup Check list Test drive 1-3 4 5-7 8 9-11 11-12 12-13 14-15 15 15-16 16 16-18 18 18 19-20 20-21 22 22-25 25 25 26
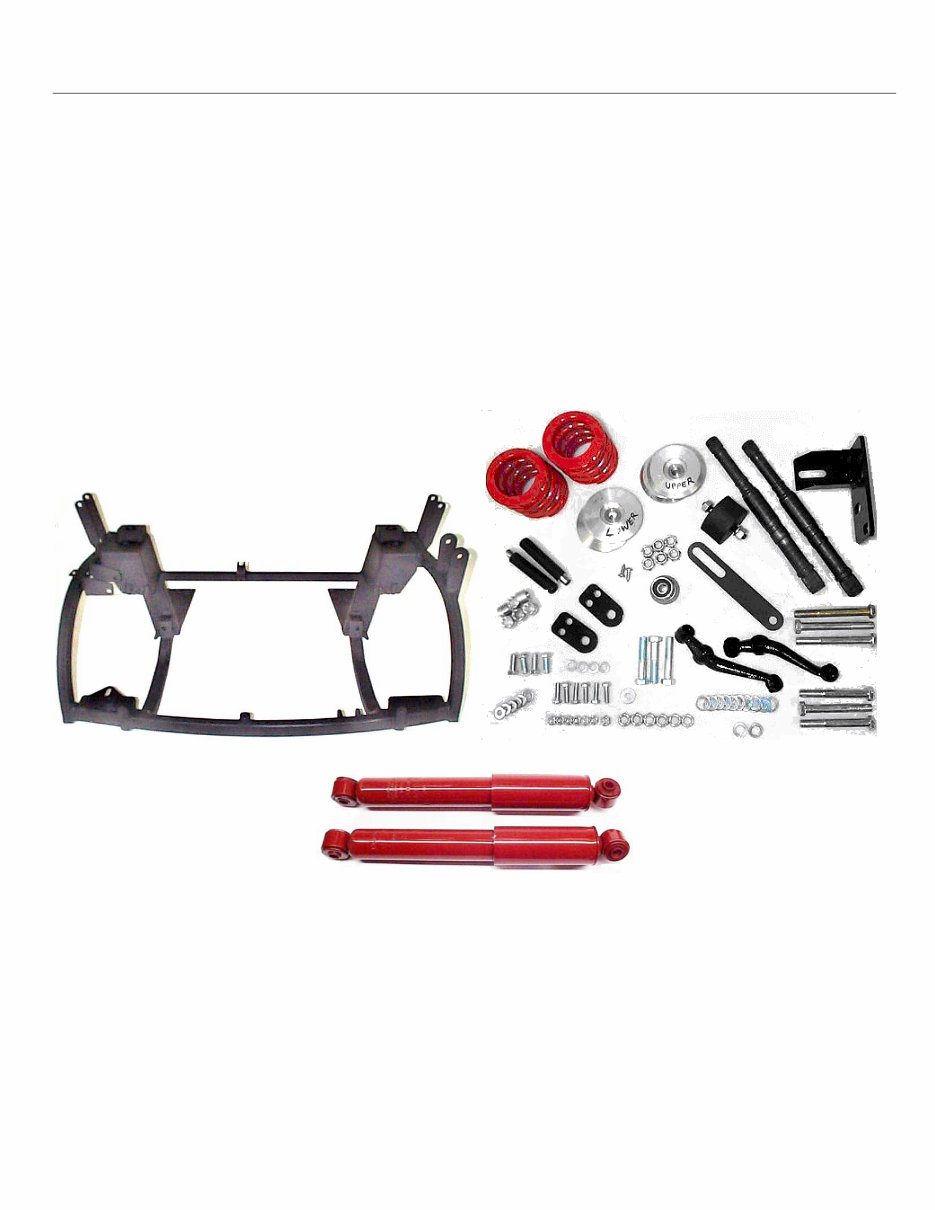
4 Parts This Section contains a list and description of the parts included in the MT-B Kit, and a list of parts that you will need in addition to the MT-B Kit. MT-B Kit Contents: - MT-B Sub-frame - 2 Outer Suspension Springs (Red) - 2 Inner Suspension Springs (Blue) - Front Transmission Stabilizer Bracket - Front Transmission Stabilizer Bracket Mount - Rear Transmission Stabilizer Bracket - 2 HD Shocks - Alternator Bracket - Mounting Hardware - 2 Mini/Honda Axle Shafts - Rear Transmission Stabilizer Bracket Bushing - Front Height Suspension Adjustment Bolts - RH and LH Extended Steering Control Arms Additional Parts Needed: - Complete Mini Upper Arm Suspension (Upper Arm, Axle, Hardware, Knuckle Joint) - Outer CV Joint Assembly (8.4 Disc Brake Type Only) - RH and LH Swivel Hub Assemblies (8.4 Disc Brake Type Only) - Front Disc Brake System: Mini Tecs Superbrake, 8.4 Disc Brakes, Other - Wheels with a 7 Offset to the outside (needed for turning radius clearance) - Cooling System - Engine Swap B Series or D Series (Engine, Transmission, Shifter, Wiring, ECU) - Digital gauges: Speedometer, Coolant Temperature, Oil Pressure, etc
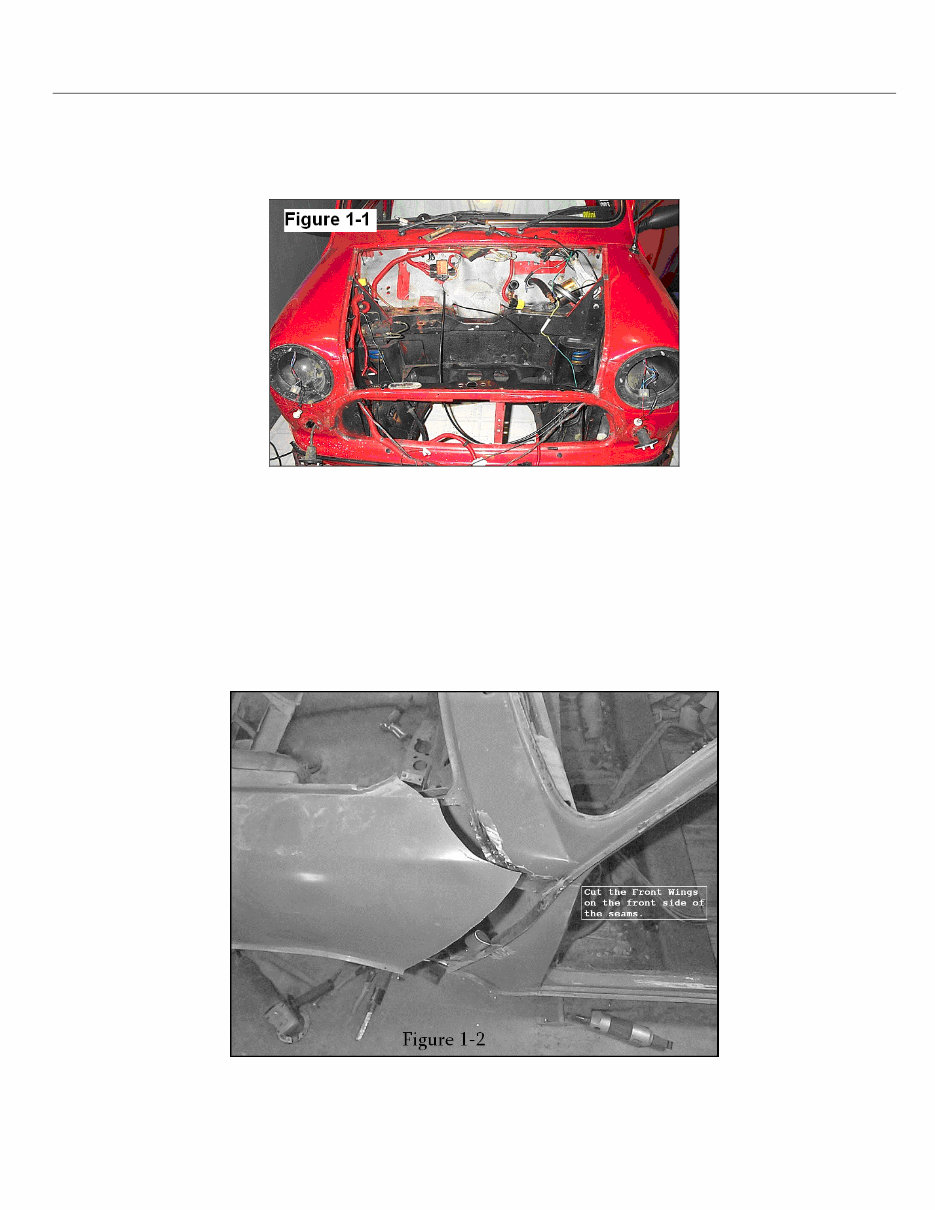
5 Preparation Step 1: Remove stock Mini engine and sub-frame. Then remove everything else in the engine compartment. See Figure 1-1 below. Step 2: Whether you use Mini Tecs MT-B Flip Front End Kit or you do an extension yourself, you will need to cut existing Mini front end after the a-panel seem to remove existing Mini front. See Figure 1-2. Note: For extended metal front ends, it is best to attach the MT-B sub-frame first before performing any body extensions.
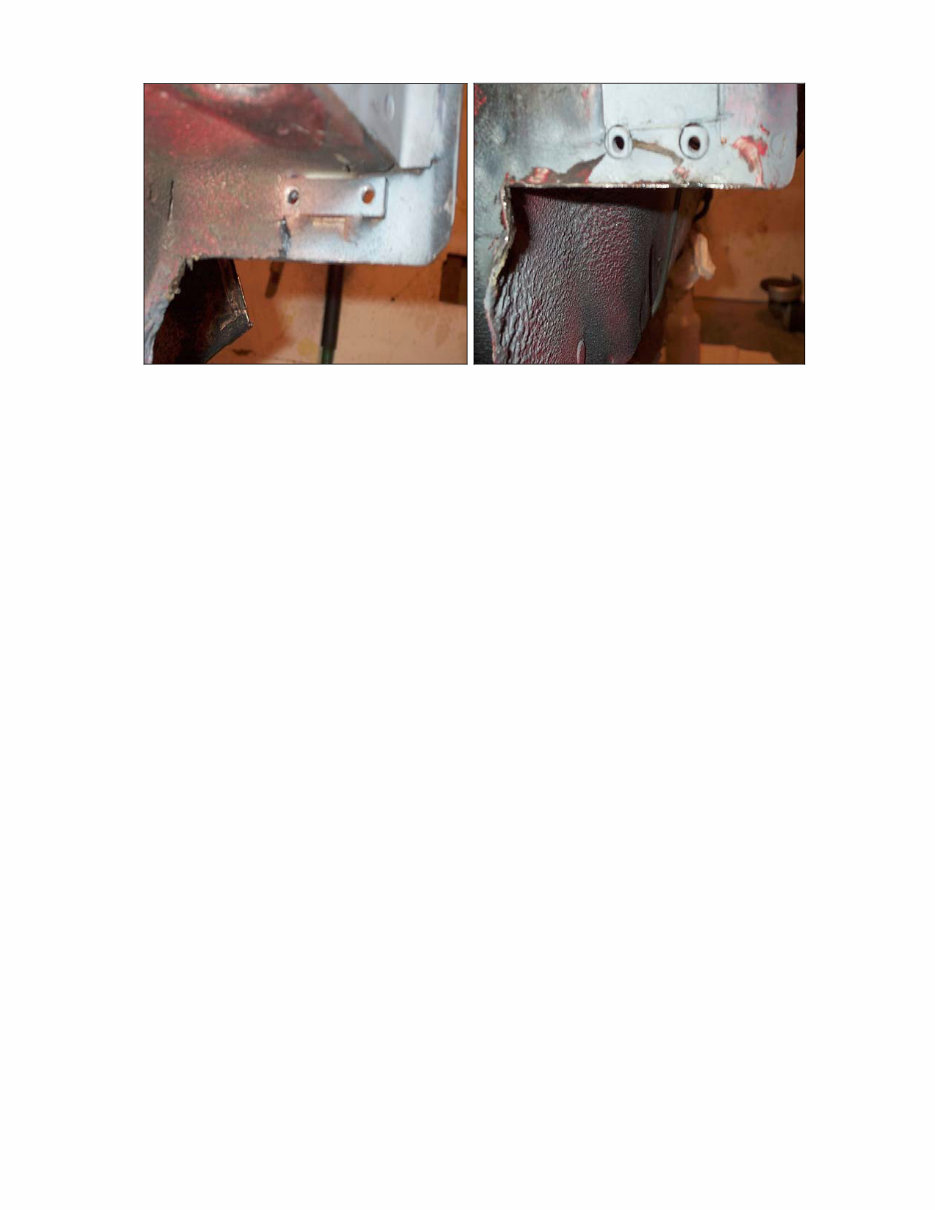
6 Step 3: Clean, Prepare, and Prime the cars firewall and all ruff surfaces (See Figure 1-3). Relieve the firewall approximately ‰ at the center of the car just above the bulkhead, for extra intake clearance. Use a hammer and a hard rounded object for this task. Note: Add additional metal for extra stiffness to the front side of the a-panel as shown in the photo below. A guide tab on the inside of the a-panel will help align the MT-B Flip Front End. Step 9: Cut holes for wiring harness and heater hoses. Remove the bulkhead bracket shown in the photo below. See Figure 2-10.
7 Step 10: Cut out metal just below stock shock mount. (See following two photos) Your Mini should now be prepared for the installation process.
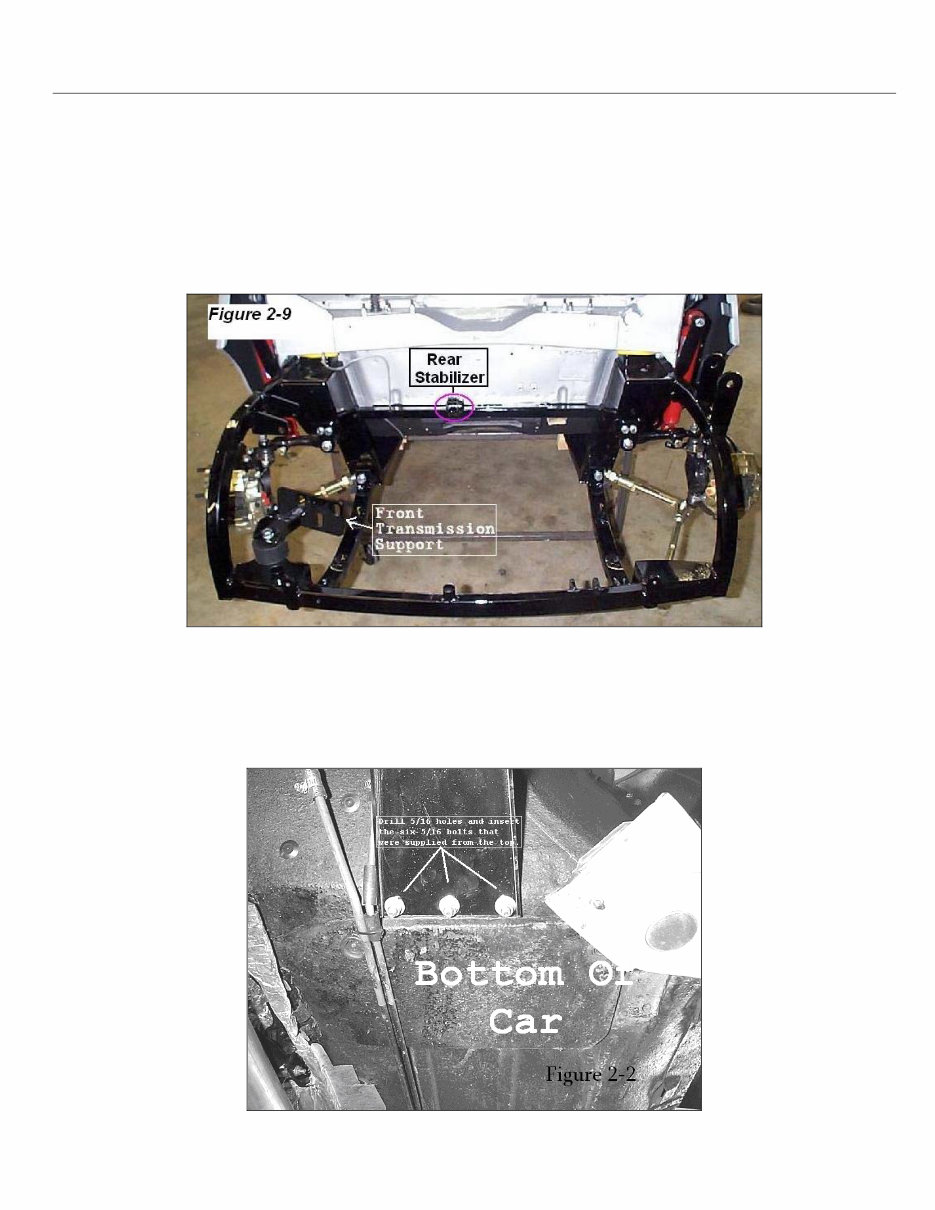
8 Installation *Supplied with kit Sub-frame: Step1: Bolt *MT-B Sub-frame to the Mini using the two stock bulkhead bolts as done on the original Mini sub-frame. For MK1/MK2 Minis, use Mini Tecs Part # 10110 to bolt the sub-frame to the car. (See Figure 2-9) Step 2: Drill six holes to support the lower sub-frame using a 5/16 drill bit. Use *Six 5/16 x 1 bolts, Six 5/16 locking nuts, and Six 5/16 flat washers to fasten the sub-frame to the car on the lower side. (See Figure 2-2)
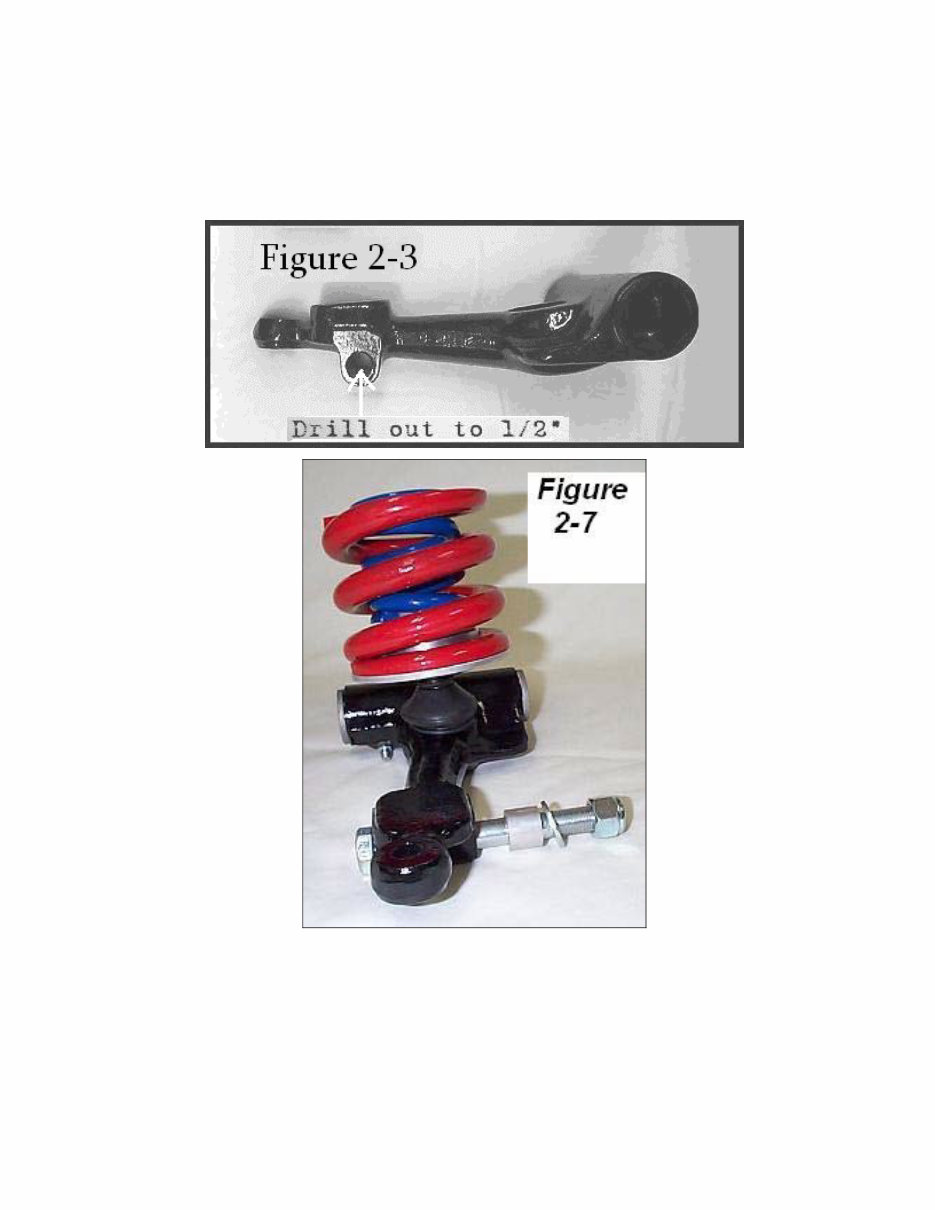
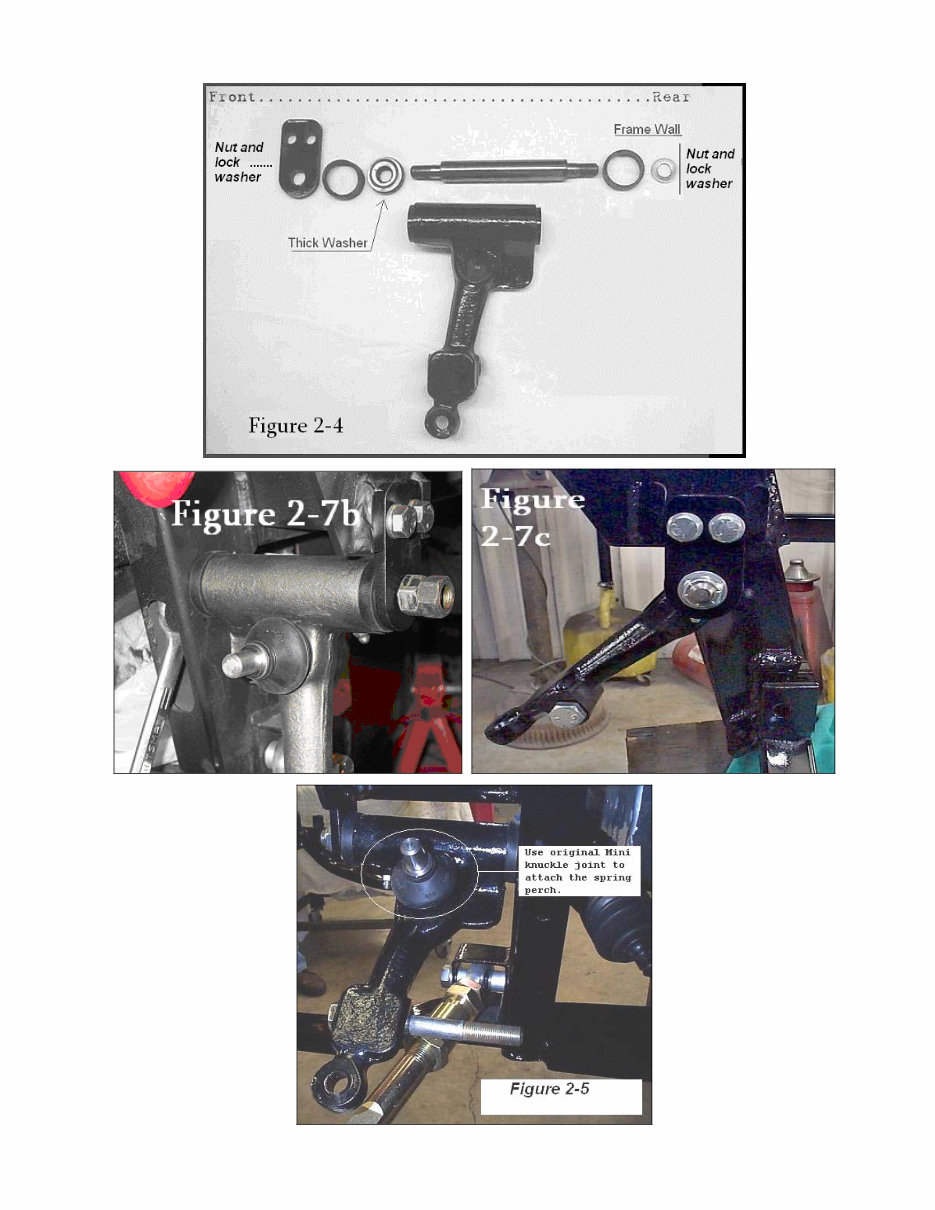
9 Upper Suspension: Step 3: Drill upper suspension arms shock bolt-hole to ‰ using a ‰ drill bit. Insert *‰ x 4 1/2 bolt from the front side of upper arm all the way through. Slide one * Aluminum bushing onto the bolt as a shock spacer. (See Figure 2-3 and Figure 2-7) Step 4: Install Mini upper suspension arms. You will need; RH and LH Stock Mini upper suspension arm assemblies with axles and thrust washers, *four 3/8 x 1 bolts, *four 3/8 lock washers, *two ‰ locking nuts, * two ‰ thin locking nuts, and *four ‰ flat washers. See Figure 2-4 and Figure 2-5
The Installation Manual of Honda Engine Conversions to Classic Minis Mt-b Kit is an essential guide for installing the Minis Mt-b Kit, designed to facilitate the construction of your ultimate Mini. Whether you are a professional mechanic or a DIY enthusiast, this manual provides the necessary instructions for a successful installation.
The purpose of the Minis Mt-b Kit is to simplify the installation of your Honda VTEC engine, making the process easy and hassle-free. The kit eliminates the research and development challenges typically associated with installations, streamlining the process for the user. With the sub-frame mounting to the car and the engine mounting to the sub-frame, the manual ensures a smooth installation, allowing you to quickly get your car up and running.