nintendo wii repair guide.Wii DIy fix.Nintendo Wii console.
What's Included?
Lifetime Access
Fast Download Speeds
Offline Viewing
Access Contents & Bookmarks
Full Search Facility
Print one or all pages of your manual
Wii System Settings Guide and Translation v1.0 Compiled by The Goonfather Property of www.sheylara.com Please forward all comments, queries and error reports to wii@sheylara.com
System Settings Using the System Settings, you can adjust settings that affect many aspects of your console, such as the Sensor Bar, the Internet connection, WiiConnect24, time settings, and other Wii functions. Please choose from the list of options below. How to Access the System Settings 1. With the Wii console properly connected, power on the console to reach the Wii Channel menu. 2. Use the Wii Remote to move the cursor over the "Wii" button in the bottom-left corner of the screen and press the A Button. 3. From the main Wii Menu and System Settings screen, use the Wii Remote to move the cursor over the "Wii Settings" option (wrench). 4. Press the A Button to enter the System Settings. Once inside the Wii Settings menu, the following options are available. Click the buttons below to read more information on each topic. If you have not connected your Wii console online yet and performed a system update, the following options will be available.
This option lets you give your Wii console a unique Nickname. Giving your Wii console a nickname will help distinguish it from other Wii consoles that you might connect to. To change the current nickname 1. Access the Wii System Settings (how to). 2. Choose "Console Nickname" on System Settings 1 to display a white rectangle with the current Nickname. 3. Point at the text area (white rectangle) and press the A Button. 4. Use the Wii Remote on the on screen keyboard for entering the new console Nickname. 5. Confirm the Nickname is correct by clicking the "confirm" button on the bottom right corner.
This option lets you adjust the date and time of the console's internal clock. Please note that the Wii console uses a 24 hour clock. For example 1:00 pm is displayed as 13:00. To Access the Calendar 1. Access the Wii System Settings (how to). 2. Choose "Calendar" on System Settings 1. To change the Date 1. Point at the up or down arrows for the part of the date you wish to chance (Month/Day/Year). 2. Press the A Button on the up or down arrow to adjust the date as desired. 3. Point on the "Confirm" button and press the A Button to set the date. To change the Time 1. Point at the up or down arrows for the part of the time you wish to chance (Hour/Minutes). 2. Press the A Button on the up or down arrow to adjust the time as desired. 3. Point on the "Confirm" button and press the A Button to set the date. To Access the Screen Menu 1. Access the Wii System Settings (how to). 2. Choose "Screen" on System Settings 1. There are four options within the Screen menu. Which do you need help with? • Screen Position • Widescreen Settings • TV Resolution • Screen Burn-in Reduction
Screen Position This option adjusts the left and right position that the image is displayed on the television. 1. Point at the left or right arrows next to the number in the center. 2. Press the A Button on with the cursor over the arrows to move the screen position left or right. The maximum amount of change is -8 (Left) or 8+ (Right). 3. Point on the "Confirm" button and press the A Button to set the position. Widescreen Settings You can change the screen format for your Wii display by selecting Widescreen (16:9) or Standard (4:3). Please note that in addition to using the Wii's setting, you must also adjust your television's options to take advantage of its own widescreen mode. Some television sets will not change to widescreen display even when receiving widescreen input from the Wii console. 1. Point at the screen ratio you would like to display the image in and press the A Button. 2. Point on the "Confirm" button and press the A Button to set the position. 3.
TV Resolution Certain Wii software will support a 480p (progressive) picture, which displays at a higher resolution than the standard 480i (interlaced) resolution. Please note that you must have the Wii Component Video Cables, and your TV must support 480p in order to enable it. 1. Point at the screen ration you would like to display the image in and press the A Button. 2. Point on the "Confirm" button and press the A Button to set the position. Screen Burn-in Reduction When images are in the same spots for long periods of time, some television screens suffer "screen burn- in." The Wii Console can help prevent this effect with its Screen Burn-in Reduction feature. When activated, the Wii console will fade the screen when Wii software is paused for five or more minutes. To revert the screen to its original brightness, press any button on the Wii Remote other than the Power Button. Important Notes: • Your TV may also have its own screen burn-in reduction function that may fade back the screen imagery or darken it entirely. • Wii's Screen Burn-in Reduction does not work while playing Nintendo GameCube software. 1. Point at the screen ration you would like to display the image in and press the A Button. 2. Point on the "Confirm" button and press the A Button to set the position.
This option lets you adjust the sound settings of your Wii console. Please note that in order to experience stereo or surround sound, you must have the proper home equipment (such as a stereo TV or home theater). To change the Sound settings 1. Access the Wii System Settings (how to). 2. Choose "Sound" on System Settings 1 to display the three available options. 3. Point at the desired option and press the A Button. o Mono: For use when you are not using a TV or stereo system that does not broadcast in stereo. Devices that are not stereo typically only have one speaker. o Stereo: Use this option if you have stereo (Left and Right Channel) TV or home stereo system. Sound is split up and broadcast into two different channels for a more immersive experience. o Surround: The Wii console can output a Dolby Prologic II for simulated surround sound. Use this option if you have a surround sound setup. Consult the owner's manual for your home theater for more information on working with surround sound. 4. Confirm the setting is as desired by moving the cursor over the "Confirm" button on the bottom right corner and pressing the A Button.
The Wii Parental Control settings offer you a means to manage what Wii content is accessible to the console users. If you apply Parental Controls, you will be prompted to set a 4-digit PIN which will allow you to adjust the Parental Controls settings in the future and also allow you to access content that may be restricted by the Parental Controls settings. The Parental Controls default setting is "OFF" which means that the console will allow all content unless you change the settings. There is one Parental Controls setting per console, so it is recommended that you put the settings on the most secure that you need for your family; you can then share the PIN with users who may be allowed access to blocked content. To adjust the Parental Controls settings 1. Access the Wii System Settings (how to). 2. Click on the blue arrow to reach the Wii System Settings 2 menu options. 3. Choose "Parental Controls" and select "Yes." 4. Enter the 4-digit PIN and select OK. If you have forgotten the PIN, select " I forgot" to answer the secret question. (Answers to the secret question are case sensitive.) 5. You can adjust the "Highest Game Rating Allowed" to be played on the Wii console. Please note that Parental Controls settings do not affect Nintendo GameCube Game Discs. For more information on the ESRB and its ratings, click here.
6. If your Wii console is also connected to the internet, you have the ability to place limits on the following online features: o Internet Channel If you have downloaded the Opera browser (subject to availability) via the Wii Shop Channel, it is possible to allow or restrict use of the browser. o News Channel Control access to the News Channel. o Wii Messages You can disable the Wii console's ability to send and receive messages from other Wii consoles. Wii consoles can only send and receive messages if both of the Wii users have entered each others Wii numbers in their Address Books (how to). Please note that your system will still receive system updates and related business messages from Nintendo regardless of this Parental Controls setting. o Use of Points This setting controls the use of Wii Points, which are used to acquire downloads from the Wii Shop Channel. If this setting is on, users will be required to enter the 4-digit PIN in order to use Wii Points to download items from the Wii Shop Channel. 7. Confirm the setting is as desired by clicking the "confirm" button on the bottom right corner. If Parental Controls are applied and a user attempts to play or download content that exceeds the Parental Controls setting, the user will be prompted to enter the Parental Controls PIN to temporarily disable the Parental Controls. The PIN will be necessary each time a user tries to access restricted content. If your settings only apply to certain members of your household, share the Parental Controls PIN with users who may have unrestricted use of the system.
In order to get the most enjoyment from your Wii console, you have the ability to adjust the settings of the Sensor Bar. Users are prompted to perform these when the system is turned on for the first time. However, if you need to access them again, please read the information below. To adjust the Sensor Bar settings 1. Access the Wii System Settings (how to). 2. Click on the blue arrow to reach the Wii System Settings 2 menu options. 3. Choose "Sensor Bar " and select the option you would like to adjust. o Sensor Bar Position o Sensitivity Sensor Bar Position This setting is important to ensure a proper response when using the Wii Remote. Place the cursor over the option that reflects how you have your Sensor Bar setup (above or below the screen) and press the A Button. Select "Confirm" to save the selection.
Are you experiencing issues with your Nintendo Wii? The Nintendo Wii Repair Fix Troubleshooting Guide DIY Service Manual is here to help. This comprehensive manual is designed to assist both professional mechanics and DIY enthusiasts in resolving common problems encountered with the Nintendo Wii.
Whether you are encountering error messages such as "Disc Not Recognized," "Disc could not be read/Unable to read the disc," or facing automatic disc ejection, this manual provides step-by-step instructions to address these issues. It covers a wide range of topics including memory management, game and disc troubleshooting, common problems, email/message board issues, disassembly and repair guides, balance board problems, Wiimote/Remote issues, sensor bar problems, power problems, and more.
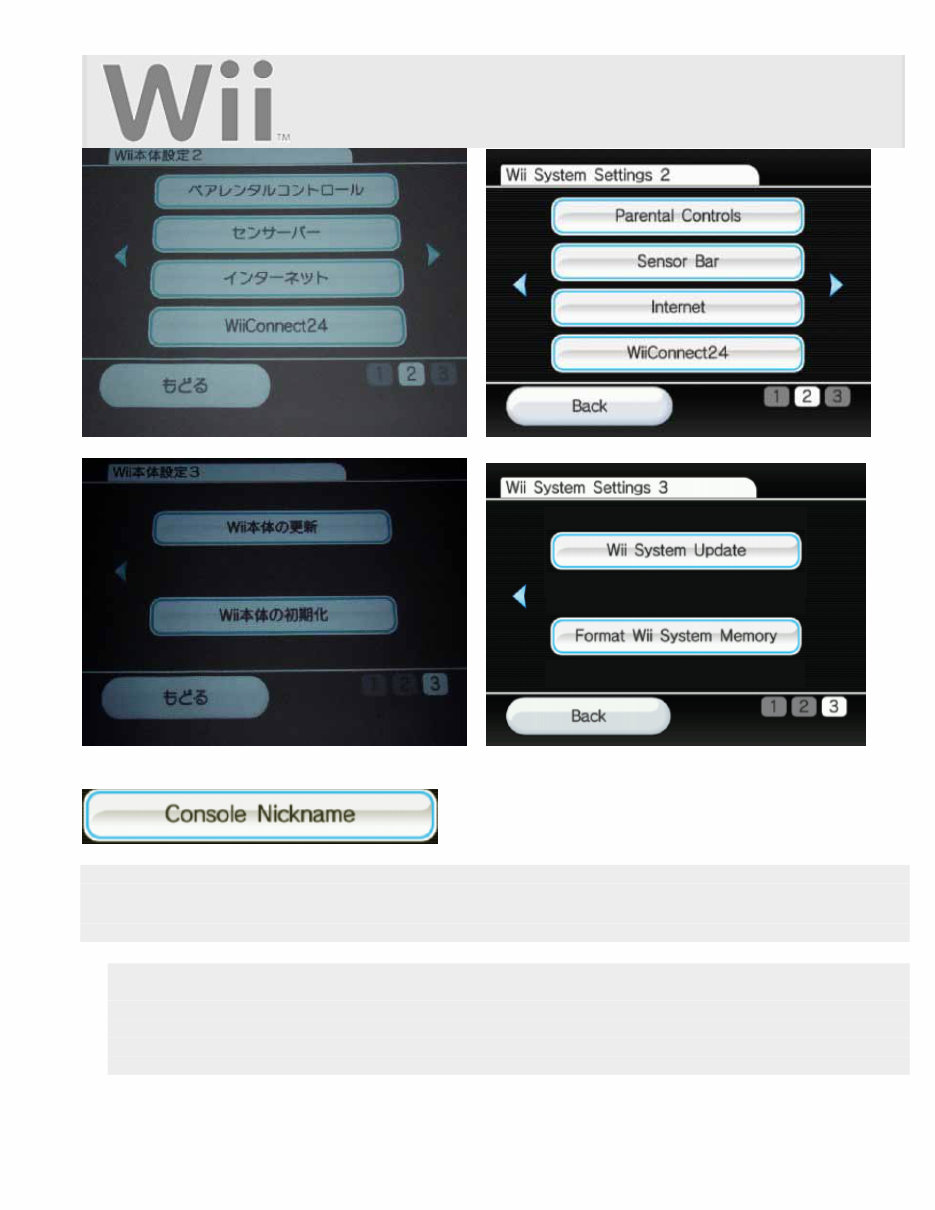
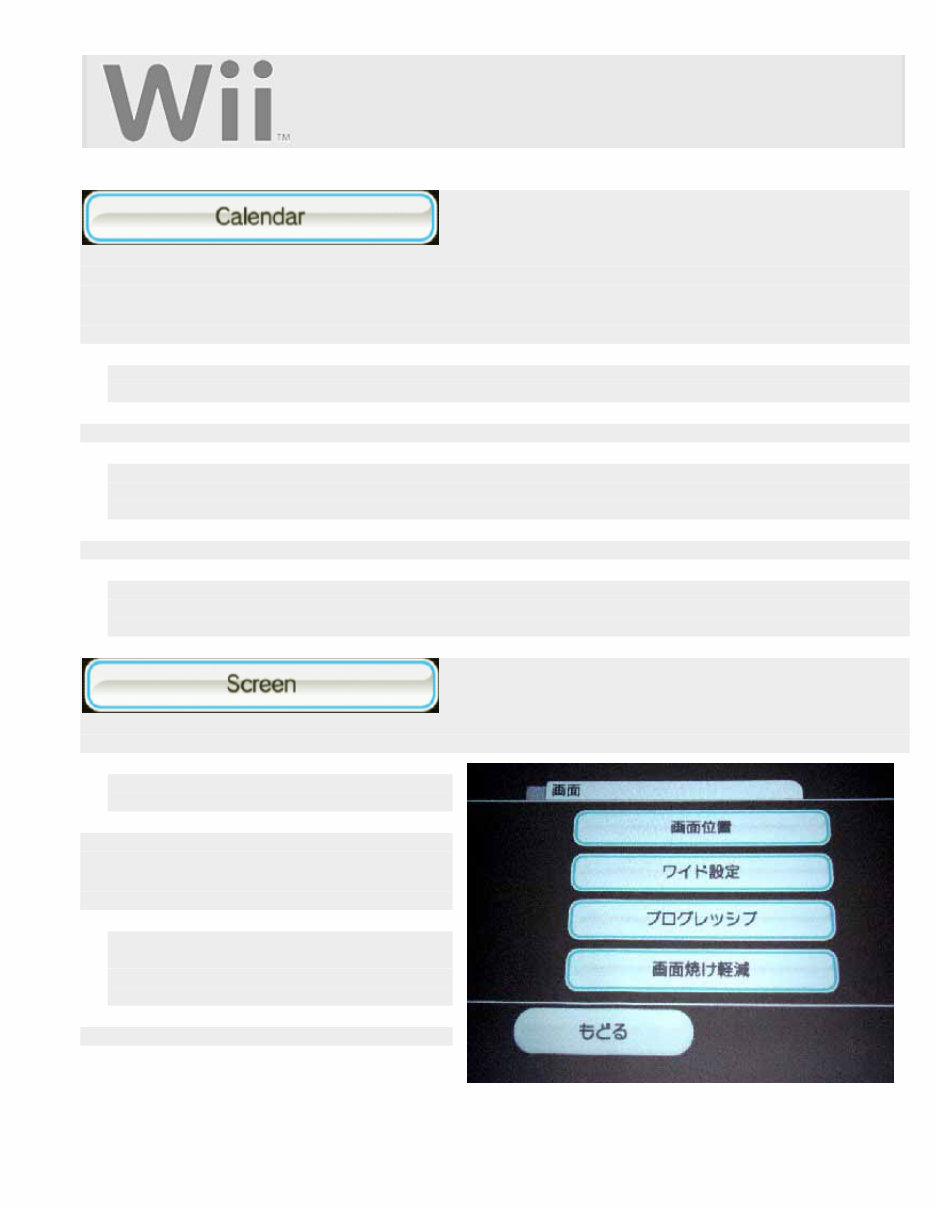
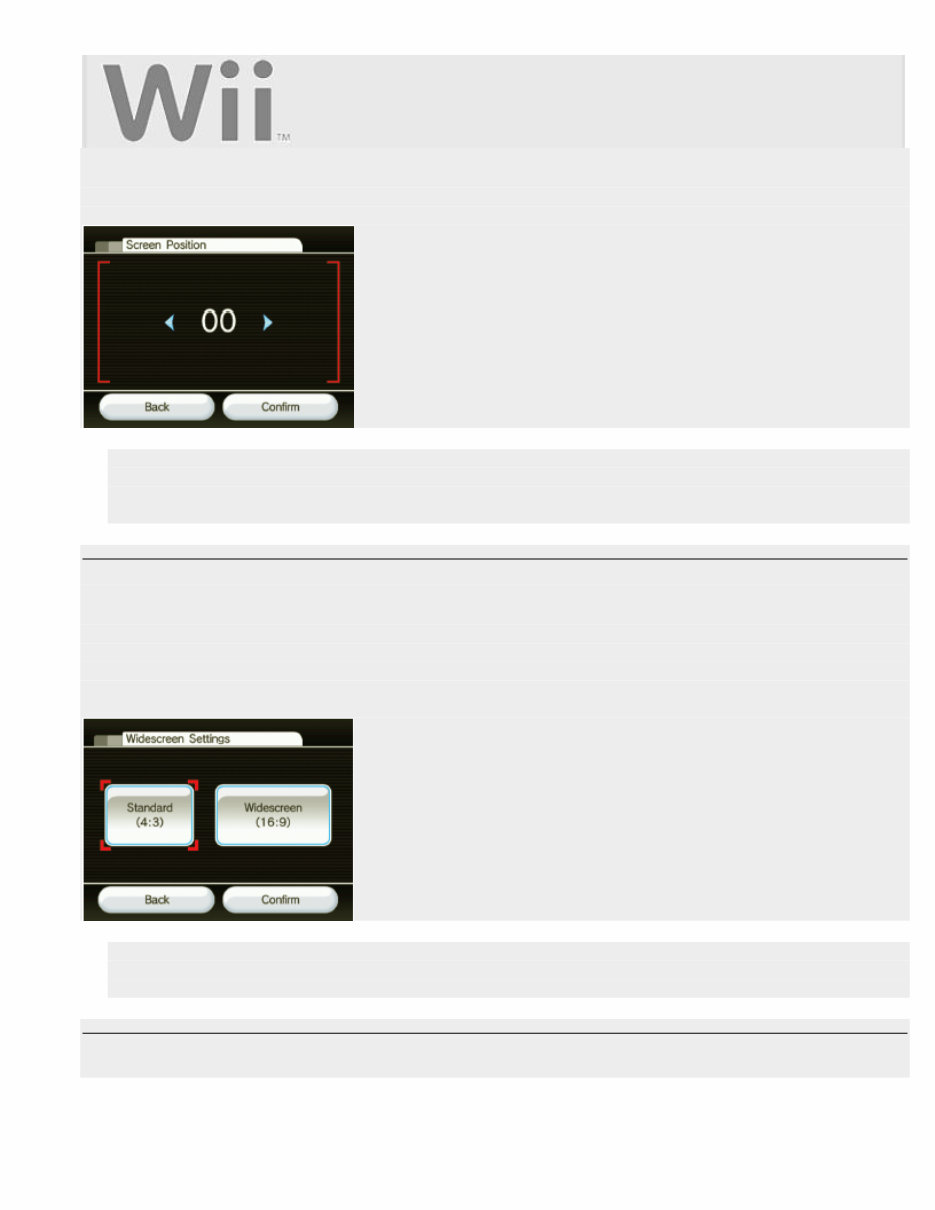
With over 150 pages of detailed information, diagrams, and pictures, this manual equips you with the knowledge to tackle various Nintendo Wii errors and error codes. It also includes instructions to install and remove the e-Reader, a Quick Reference Guide, Tech Report, Wi-Fi USB Connector Instructions, System Settings Guide, and WiiPlay Manual.
By investing in this guide, you can save money on repairs and gain the expertise to troubleshoot and fix your Nintendo Wii. Join the many customers worldwide who have successfully utilized this manual to resolve common issues and get their Nintendo Wii working again. Get your Nintendo Wii working again today with the ultimate repair guide!
Get instant access to this comprehensive manual and take the first step towards becoming an expert in repairing Nintendo Wii units. This manual is designed to be easily understood by individuals with no technical skills, making it accessible to anyone looking to resolve Nintendo Wii issues.
Don't let Nintendo Wii errors disrupt your gaming experience. Purchase this guide and regain the joy of playing your favorite games today!
Recently Viewed
5,521,897Happy Clients
2,594,462eManuals
1,120,453Trusted Sellers
15Years in Business
Price:
Actual Price:
nintendo wii repair guide.Wii DIy fix.Nintendo Wii console.