

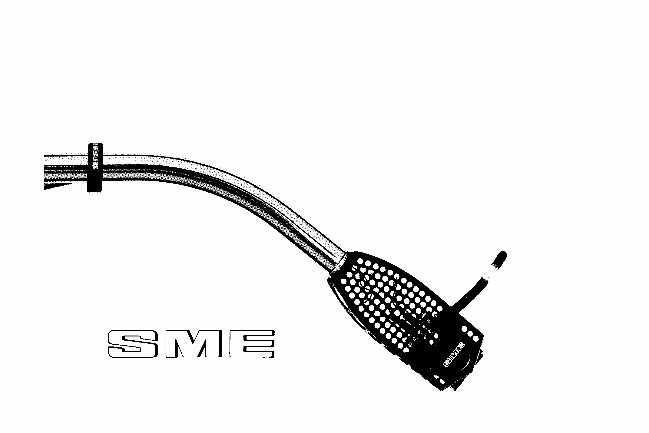
SME Model 3009 Series II IMPROVED Instruction Manual NOS
What's Included?
Fast Download Speeds
Online & Offline Access
Access PDF Contents & Bookmarks
Full Search Facility
Print one or all pages of your manual
INSTRUCTIONS MODEL 3009 SERIES II IMPROVED

SME Model 3009 Series II Improved
precision pick-up arms combine latest
design features with the same high quality
engineering and finish that made their
predecessors famous for more than a
decade.
Each arm is meticulously built and
tested and will meet its specification
reliably through many years of service.
Skilful design and choice of materials
combine high mechanical strength with
low inertia and friction ensuring full
suitability for professional as well as
domestic application.
Technically correct and aesthetically
satisfying the SME has been called
“The best pick-up arm in the world”
and we believe you will find this to be true.

CONTENTS
Page
4 Setting out
5 Fitting the Arm
6 Fitting the Cartridge
7 Model 3009/S2 Improved
(detachable shell)
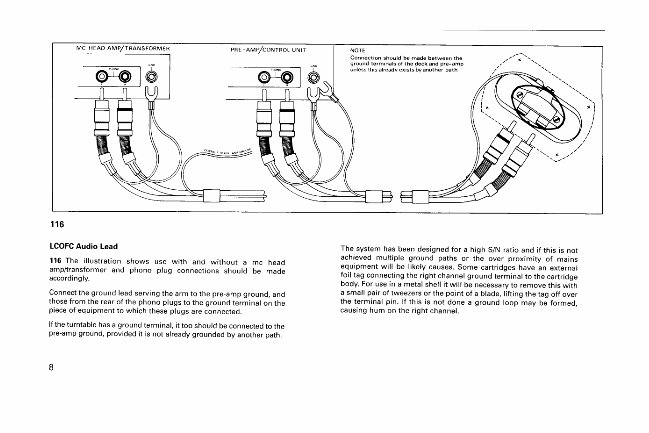
8 Audio Lead
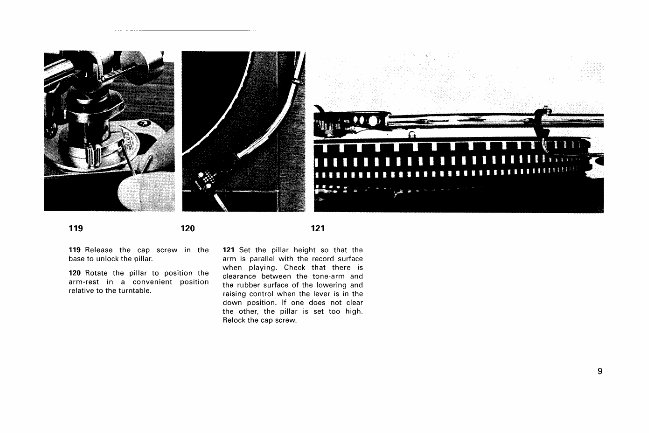
9 Pillar Adjustment
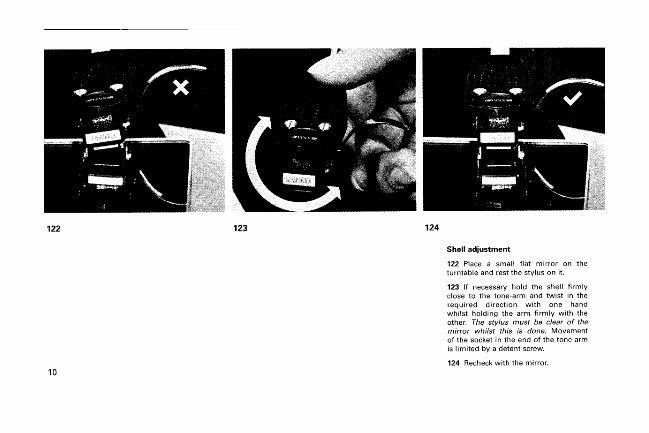
Shell Adjustment
Tracking Adjustment
Balance Adjustment
Bias Adjustment
Operation
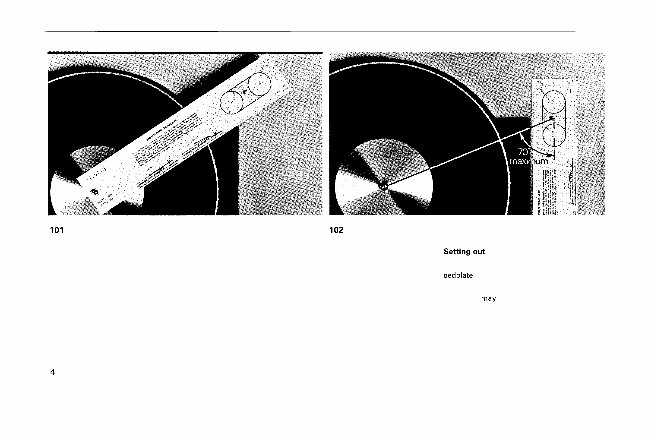
101 Establish the position for the
bedplate with the mounting template.
102 Where space is restricted the
template ma; be rotated up to 70”
off the radial position.
103 103
103 Drill and form the cut-out in
accordance with the template. Ensure
that it is large enough to clear the
screening can completely. Drill the
four %” (1.2 mm.) pilot holes for the
wood-screws.
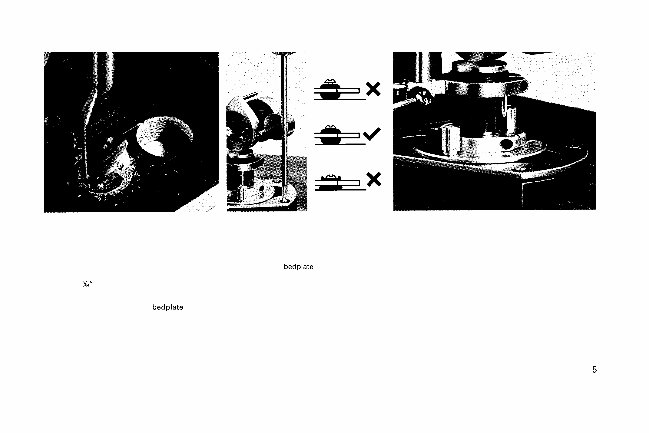
104 Screw down the bedplate with
the four wood-screws.
105 Adjust the screws as shown.
104 104
106 When the surface of
105 105
the turntable
is more than 1%” (41 mm.) above
that on which the bedplate is mounted
a spacer SME Accessory P.l is required.
106 106
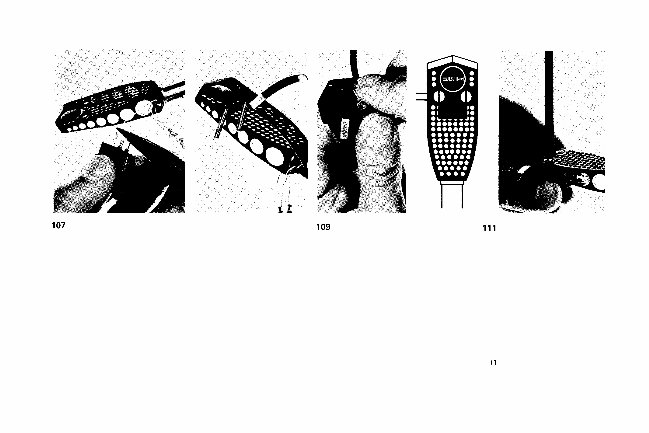
Fitting the cartridge
107 107 Fit the pin jacks to the cartridge
terminals: White to left channel: Red
to right channel: Blue to left ground:
Green to right ground. Tails must
never be soldered direct to the
cartridge terminals.
6
108 110
108 Select screws of appropriate
length. The top of the cartridge should
lie snugly against the shell or as
close to it as possible. The use of the
finger lift is optional. Use spacers only
if cartridge contours make it essential.
109 Fit the nuts.
110 Check that the cartridge lies
symmetrically in the shell. This is
important.
111 Tighten the screws taking care
to preserve (1 IO)
112 112 113
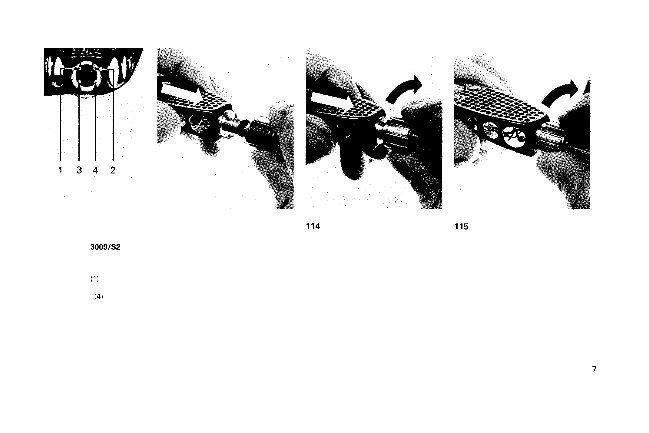
Model 3009/S2 Improved
(detachable shell)
112 Fit the tails to the shell terminals:
White (1) to left channel: Red (2) to
right channel: Blue (3) to left ground:
Green (4) to right ground. Fit the
cartridge as detailed on Page 6.
113 Insert the shell in the arm socket.
114 Press in to contact the thread.
115 Maintaining pressure, rotate the
socket nut to draw the shell firmly
home. Do not over-tighten.
You're Reading a Preview
What's Included?
Fast Download Speeds
Online & Offline Access
Access PDF Contents & Bookmarks
Full Search Facility
Print one or all pages of your manual
$31.99
$41.99
Viewed 54 Times Today


Secure transaction
What's Included?
Fast Download Speeds
Online & Offline Access
Access PDF Contents & Bookmarks
Full Search Facility
Print one or all pages of your manual
$31.99
$41.99
The SME Model 3009 Series II Improved instruction manual consists of 16 pages and covers the following topics:
- Setting Out
- Fitting the Arm
- Fitting the Cartridge
- Model 3009/S2 Improved (detachable shell)
- Audio Lead
- Pillar Adjustment
- Shell Adjustment
- Tracking Adjustment
- Balance Adjustment
- Bias Adjustment
- Operation


