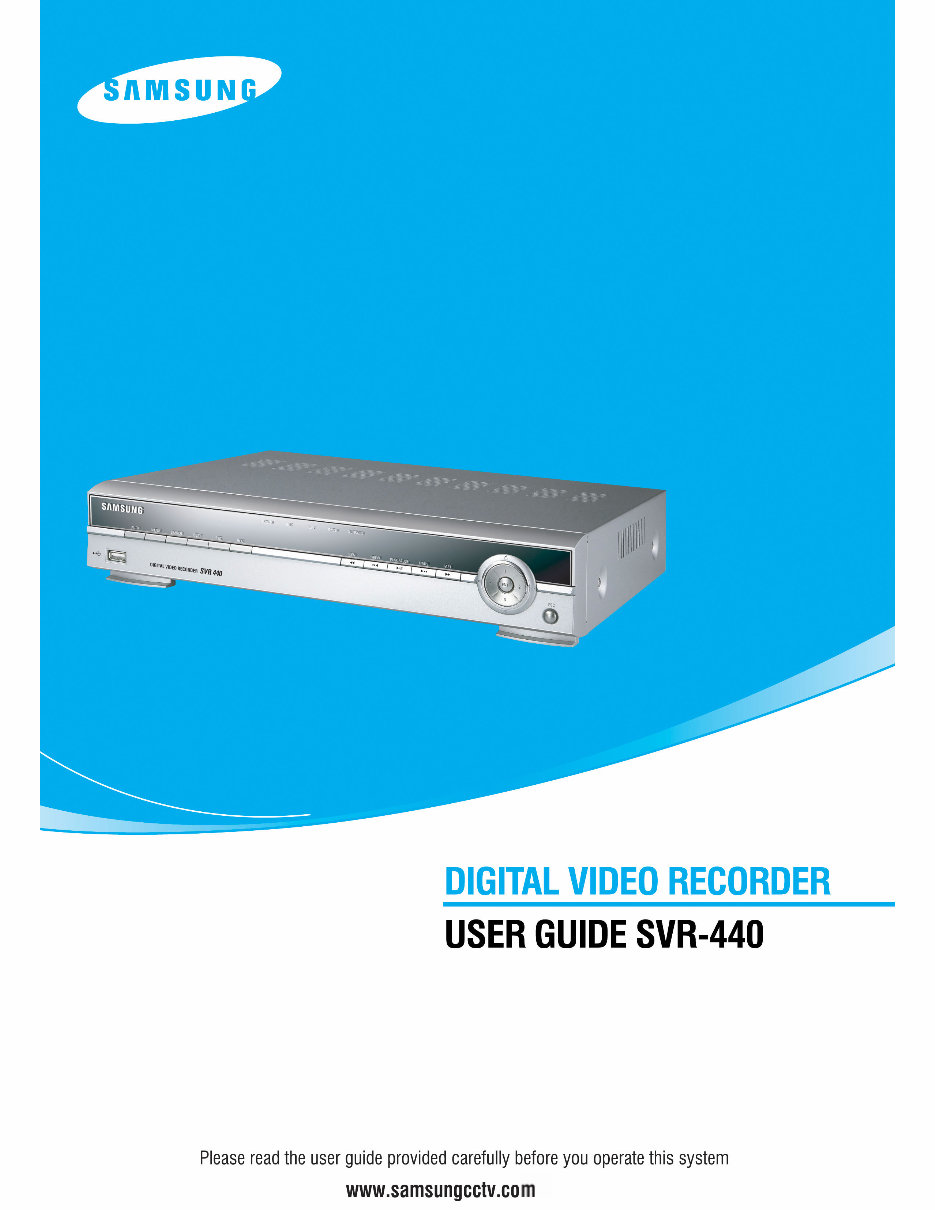
2 Introduction Thank you for purchasing the SVR440 This user manual is for the SVR-440. The term “unit” always refers to the SVR-440. We recommend users who install and operate the unit to thoroughly read this manual and other reference manuals indicated in this manual before installation and operation. This specification is subject to changes without prior notice to incorporate improvements in the performance of the unit. Warranty and Disclaimer The manufacturer does not assume any responsibilities related to the sales of the unit and does not endorse any third party to represent the manufacturer in anyway. The warranty does not apply to malfunctions of the unit or its parts resulting from any accident, negligence, misuse, or misapplication. Also, the warranty does not include accessories or components that the manufacturer does not supply. The warranty is valid for the two years from the date of purchase. However, the malfunctions listed below are not covered by the warranty even during the warranty period. Repair services for the malfunctions below will be available, but with applicable charges. . If any malfunctions occur due to carelessness of the user; . If a user disassembles or replaces any parts of the unit without permission; . If any power other than the rated power is connected to the unit; . If malfunctions occur due to natural disaster (fire, flood, tidal wave, etc.); or, . If consumable parts/items are to be replaced; The warranty specified herein is only for the units delivered. Consumers will be charged for examination and repairs after the expiration of the warranty period (2 years). A fee will be assessed for repairs or examination except within the scope of warranty specified herein even during the warranty period. For out-of-warranty services, please contact your local vendor or service center. ※ But, Consumptive parts such as HDD exclude from free quality guarantee.
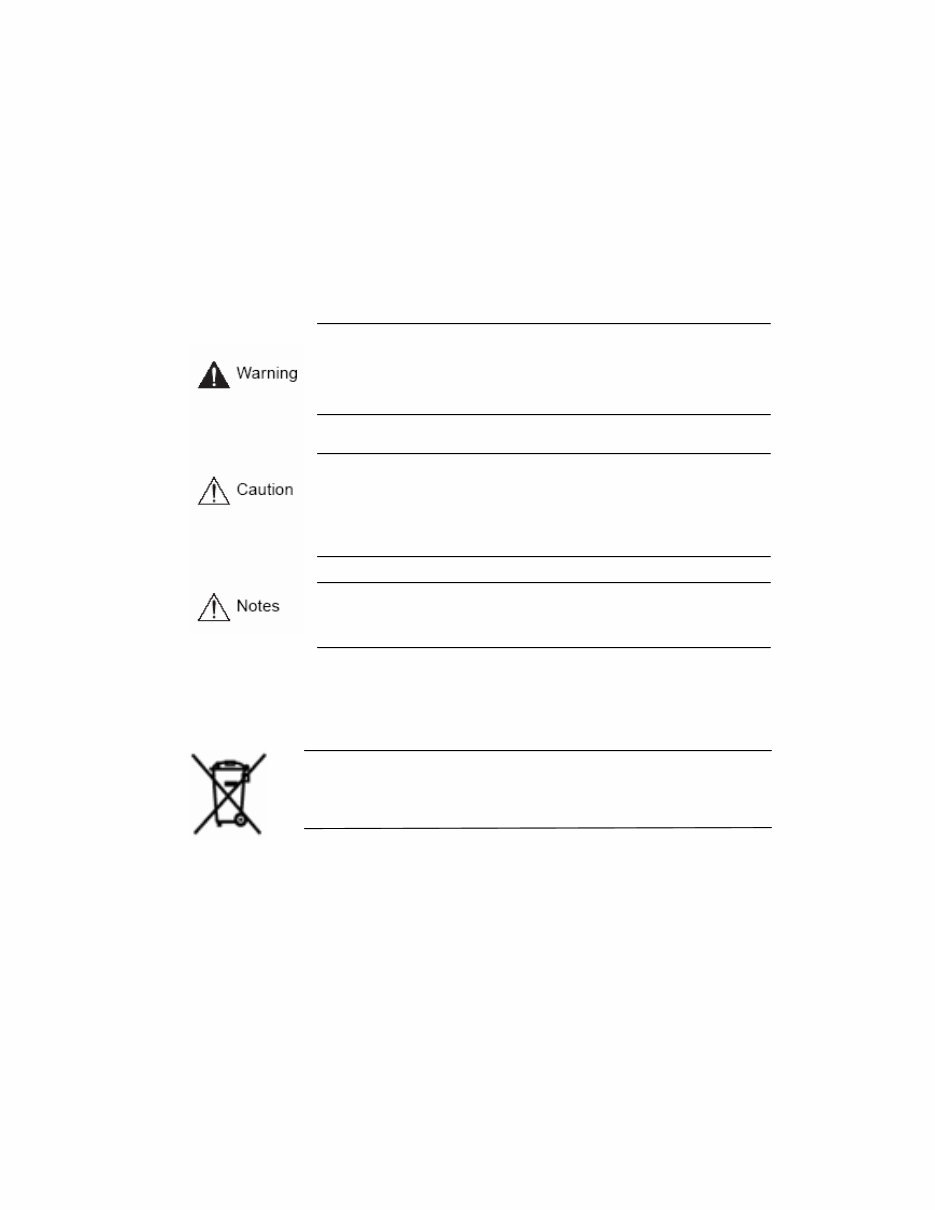
3 Warning Marks Warnings and Cautions – the marks that give warning to users in this manual indicate different levels of importance. These marks are classified by the level and potentiality of risk. It is strongly recommended for users to completely understand these marks before using the unit. This warning is given where carrying out an instruction can cause serious risk of injury or death if the unit is not properly handled or operated. It indicates the operations requiring the highest attention in handling or operating the unit. . This warning is given where carrying out an instruction can cause risk of damage to the equipment or minor injury if the unit is not properly handled or operated. It indicates the operations requiring the proper attention in handling or operating the unit. It provides references or information that may be helpful to users in operating the Unit. WEEE (Waste Electrical and Electronic Equipment) Customers in European Union countries are advised to dispose of this product, at the end of its useful life, as per applicable local laws, regulations and procedures.
4 Table of contents CHAPTER 1 SAFETY CAUTIONS .................................................................. 7 CHAPTER 2 OVERVIEW ................................................................................ 9 2.1 Features ................................................................................................................................................. 9 2.2 Configuration...................................................................................................................................... 11 2.3 Names and Functions of Each Part ................................................................................................... 12 2.3.1 Control Panel on the front ............................................................................................................. 12 2.3.2 Rear Connection Terminals ......................................................................................................... 14 2.3.3 Remote Controller ......................................................................................................................... 15 2.4 Unit Specification ............................................................................................................................... 16 CHAPTER 3 HOW TO INSTALL................................................................... 21 3.1 How to Connect All Parts .................................................................................................................. 21 3.2 Detailed Connection ........................................................................................................................... 22 3.2.1 Camera........................................................................................................................................... 22 3.2.2 Audio ............................................................................................................................................. 22 3.2.3 Monitor .......................................................................................................................................... 23 3.2.4 External Connector ........................................................................................................................ 24 CHAPTER 4 HOW TO SET ........................................................................... 28 4.1 Menu Configuration ........................................................................................................................... 28 4.2 Default Setup....................................................................................................................................... 31 4.3 Menu Screen Setup............................................................................................................................. 34 4.4 SCREEN SETUP ................................................................................................................................ 35 4.4.1 CH1~CH4 ...................................................................................................................................... 36 4.4.2 AUTO SEQUENCE ...................................................................................................................... 37 4.4.3 STATUS DISPLAY ...................................................................................................................... 37
5 4.5 RECORD SETUP ............................................................................................................................... 38 4.5.1 REPEAT RECORD ....................................................................................................................... 38 4.5.2 RECORD SETUP.......................................................................................................................... 39 4.5.3 CH1~CH4 ................................................................................................................................... 39 4.6 SYSTEM SETUP................................................................................................................................ 41 4.6.1 HDD FORMAT ............................................................................................................................. 41 4.6.2 PASSWORD ................................................................................................................................. 41 4.6.3 CLOCK ......................................................................................................................................... 42 4.6.4 ETC(LANGUAGE SETTING) ..................................................................................................... 42 4.7 NETWORK & SERIAL SETUP ....................................................................................................... 43 4.7.1 NETWORK ................................................................................................................................... 43 4.7.2 CLIENT ACCESS ......................................................................................................................... 50 4.7.3 SEND E-MAIL.............................................................................................................................. 50 4.7.4 RS-485/422.................................................................................................................................... 51 4.8 EVENT SETUP .................................................................................................................................. 51 4.8.1 MOTION DETECTTION ............................................................................................................. 52 4.8.2 SENSOR TYPE............................................................................................................................. 53 4.9 PTZ SETUP ........................................................................................................................................ 53 4.9.1 Setup by Channel ........................................................................................................................... 53 4.10 EXIT MENU ..................................................................................................................................... 54 4.11 ETC.................................................................................................................................................... 54 4.11.1 Firmware Upgrade ....................................................................................................................... 54 4.11.2 Solution for time mismatch ......................................................................................................... 55 CHAPTER 5 OPERATIONS .......................................................................... 57 5.1 Preliminary Checks before Starting Operation ............................................................................... 57 5.2 Power Connection............................................................................................................................... 57 5.3 Live Video Screen ............................................................................................................................... 58 5.3.1 Single and Multi Channel Display................................................................................................. 58 5.3.2 Auto Screen Display Switching ..................................................................................................... 58
6 5.4 Recording ............................................................................................................................................ 59 5.4.1 General Recording ......................................................................................................................... 59 5.4.2 Scheduled Recording ..................................................................................................................... 59 5.5 Recorded Video Search ...................................................................................................................... 59 5.5.1 EVENT SEARCH ......................................................................................................................... 60 5.5.2 TIME LINE BAR .......................................................................................................................... 60 5.5.3 GO TO........................................................................................................................................... 61 5.5.4 GO FIRST ..................................................................................................................................... 61 5.5.5 GO LAST ...................................................................................................................................... 61 5.5.6 LOG FILE LIST ............................................................................................................................ 61 5.5.7 COPY LIST ................................................................................................................................... 62 5.6 Recorded File Playback ..................................................................................................................... 64 5.7 PTZ ...................................................................................................................................................... 64 5.7.1 PAN/TILT adjustment ................................................................................................................... 64 5.7.2 ZOOM/FOCUS adjustment ........................................................................................................... 64 5.7.3 INITIALIZE .................................................................................................................................. 65 CHAPTER 6 NETWORK VIEWER PROGRAM ............................................ 66 6.1 Network Viewer Program Installation ............................................................................................. 66 6.1.1 System Requirement ...................................................................................................................... 66 6.1.2 Network Environment ................................................................................................................... 66 6.1.3 Program Installation ...................................................................................................................... 66 6.2 Control Panel for Live screen ............................................................................................................ 68 6.3 Control Panel for Live screen ............................................................................................................ 72 6.4 control Panel for Search screen......................................................................................................... 79 6.5 Other Search Button .......................................................................................................................... 81 6.6 Search ............................................................................................................................................... 82 CHAPTER 7 TROUBLESHOOTING ............................................................. 83
7 Chapter 1 Safety Cautions * Before Installation – On the rear of the unit, ensure accurate setting of supply voltage prior to power connection. – Disconnect the power before installation. – Do not install the unit in humid locations. It may result in a risk of electrical shock or fire. – This unit must be properly grounded to prevent any risks of electrical shock. * During Operation – Do not open the cover of the unit unless you are an authorized installer. It may result in a risk of electric shock. – Operate the unit within the allowable limits of temperature and humidity. – Do not connect several power lines to one outlet at the same time. It may result in a risk of fire. – Do not put heavy objects or containers of water or other liquid on the unit. It may result in failure of the unit. – Do not use near flammable gases or combustible dusts such as propane or gasoline. It may result in a risk of explosion or fire. – Do not touch power plug with wet hands. It may result in a risk of electrical shock. – Random replacement of built-in lithium battery by other types of batteries may cause explosion. Thus, the battery shall be replaced by the same battery. And the used batteries shall be disposed carefully because they can cause environment pollutions. – Be careful to prevent any electrified materials from being absorbed through the ventilation grilles of the cooling fan. – Do not forcefully drag a power cord. It may result in a risk of electric shock or fire if a cord is damaged. * Disassembly and Cleaning – Do not disassemble, repair, or alter the unit without authorization. It may result in a risk of failure, electrical shock, and personal injury. – Do not use water, thinners, or organic solvents for cleaning the unit surface. It may result in a risk of failure or electrical shock. For cleaning the unit surface, use a dry cloth.
8 * During Installation – Install the unit such that a minimum of 15cm space exists between the ventilation grills of the cooling fan and any wall or surface in order to ensure smooth heat release. – Be sure to install the unit on the flat surface. An unsecured fall may result in a risk of failure or personal injury. – Keep away from the direct sunlight or excessive heats. It may result in a risk of distortion or failure of the unit. – If a camera is installed during the DVR recording, the images of other channels can be broken. We recommend to start recording after installation of a camera. * During Operation – Be cautious not to shock or shake the unit while moving or operating the unit. – Do not move the unit while it is in use. – Do not apply strong force or throw the unit. – We recommend using SAMSUNG/Western Digital/Maxtor HDD(7200RPM / EIDE Type)If you add other HDDs, the system may cause abnormal operations. Thus, please contact your local vendor before adding a HDD. The unauthorized addition of HDD shall not be subject to the warranty. FCC Compliance Statement . Caution: Any changes or modifications in construction of this device which are not expressly approved the party responsible for compliance could void the user’s authority to operate the equipment. . NOTE: This equipment has been tested and found to comply with the limits for a Class A digital device, pursuant to part 15 of the FCC Rules. These limits are designed to provide reasonable protection against harmful interference when the equipment is operated in a commercial environment. This equipment generates, uses, and can radiate radio frequency energy and, if not installed and used in accordance with the instruction manual, may cause harmful interference to radio communications, Operation of this equipment in a residential area is likely to cause harmful interference in which case the user will be required to correct the interference at his own expense.
9 Chapter 2 Overview The Samsung SVR-440 is a digital video recorder designed to be used as the security device in small shops, convenience stores, banks, ATMs, etc. It is a stand-alone device, securing system performance and safety. The Samsung SVR-440 saves video images on the HDD instead of on videotapes. Then, it can save quality images even for repetitive recording and facilitates data search as recording and playing video data in the digital file format. Moreover, the Samsung SVR-440 is a user-oriented digital unit with high quality moving pictures and high capacity storage media. It has a variety of functions such as motion detects, PTZ (Pan, Tilt and Zoom) control, password setting, real- time voice data storage, and event lists and log file storage. 2.1 Features Monitoring Screen The Samsung SVR-440 implements high quality live images every channel and provides a wide range of monitoring screens. . Real-Time Full Screen and Split Display Mode . Auto Screen Display Switching(AUTO) . Pan &Tilt control Recording The Samsung SVR-440 can record up to 120 frames per second. It also records events on an event list as well as provides the pre-event recording function. . Simultaneous execution of three functions: recording, playback, and networking . Convenient setting of recording resolution by channel. . Up to 3 kinds of image quality setting available. . Simple setting of the scope of motion detection. . Recording setting up to 120 frames per seconds.(based on 360X240) . Manual and schedule recording. . Event recording using external alarms and motion detection function. . Creating event lists for external alarms and motion detection. . Recording images before the occurrence of events. Playback . Playback by time, date, and channel. . Still image search. . Convenient search using a remote control
10 Storage Media Built-in HDD is the basic memory supply. Using USB memory stick or External CD-RW((Guaranteed to the recommended model only), Users can copy the images on it from the internal HDD. . Basic Memory Supply: Built-in HDD . backup media: : USB memory stick External CD-RW – Maker : LITEON CO., LTD Model : LTR-52327SX Network The Samsung SVR-440 supports a wide range of networks such as LAN and ADSL, DHCP. The user can also easily operate and manage main functions of the unit from a remote place using the exclusive PC viewer. . Live image view from a remote location available (full or quad screen mode selectable). . Search and playback by time or event from a remote location. . 10/100Mbps Ethernet/xDSL supported. . DDNS supported. Others . Simple firmware upgrade using USB memory. . Up to 4 channel voice recording in real time . VGA output supported . Languages for menus – selectable.
Are you experiencing issues with your Samsung Laptop? Why spend a fortune on repairs or replacements when you can take matters into your own hands?
This comprehensive service and repair manual is utilized by Certified Samsung Technicians, providing you with the necessary guidance to troubleshoot and fix your laptop.
Whether you're a professional mechanic or a DIY enthusiast, this manual equips you with valuable insights into:
Product Specifications
Safety & Precautions
Troubleshooting
Disassembly & Reassembly
Wiring Diagrams
Electrical Parts List
Exploded Views
Main Parts List Catalog
Containing detailed instructions and images, this manual ensures you can effectively service and repair your device with ease.
Rest assured, this is the official service and repair manual in PDF format, guaranteeing high-resolution quality for all printed pages.
Gain instant access upon payment, eliminating shipping delays and allowing you to commence repairs promptly.
Specifications:
Language: English
Pages: 114
Platform: Windows and MAC
If you're unable to locate a specific service manual, feel free to reach out to us. With one of the most extensive service manual databases, we're well-equipped to assist you.