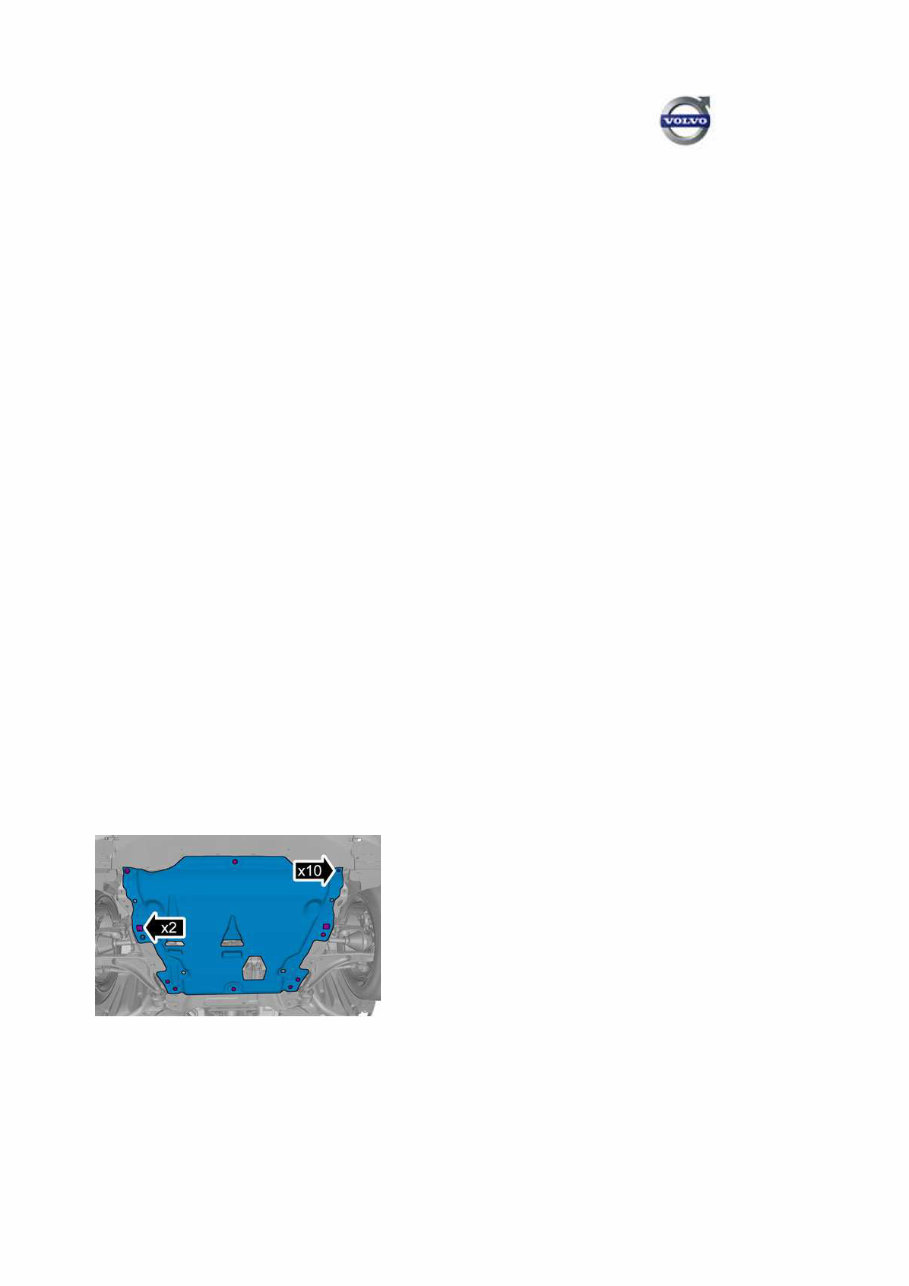
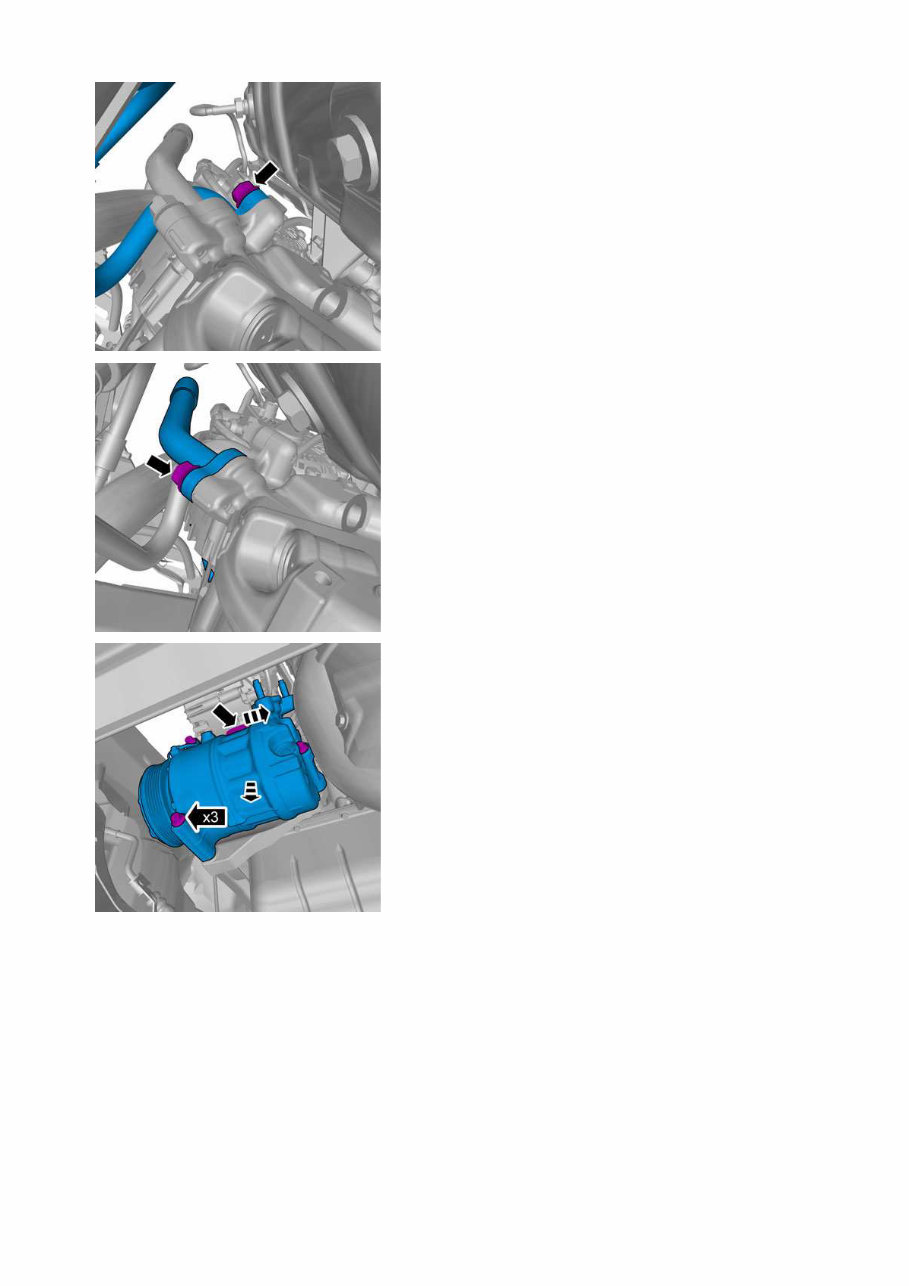
874: Cooling unit, D4162T, MPS6, L.H.D V70 (08-), 2014, D4162T, MPS6, YV1BW848BE1285352, 285352 30/11/2015 PRINT 874: Cooling unit, D4162T, MPS6, L.H.D Operation number: 87404-2 AC compressor Removal Note! Removal steps in this procedure may contain installation details. Drain the refrigerant Refer to: Refrigerant, draining See information about lifting points body Refer to: Jacking points body Remove the auxiliaries belt Refer to: Accessory Drive Belt Remove the screws. Remove the clips. Caution! Make sure that all openings are sealed. Remove the nut. Torque: M8, 24 Nm Tinklio puslapis 1 iš 3 874: Cooling unit, D4162T, MPS6, L.H.D 11/30/2015 file:///C:/Users/user/AppData/Local/Temp/70PK46MK.htm
Caution! Make sure that all openings are sealed. Remove the nut. Torque: M8, 24 Nm Caution! Make sure that all openings are sealed. Disconnect the connector. Remove the screws. Torque: M8, 24 Nm Installation Caution! Only use the specified material to lubricate the seals. Note! Use new seals. Note! Make sure that the seal is Tinklio puslapis 2 iš 3 874: Cooling unit, D4162T, MPS6, L.H.D 11/30/2015 file:///C:/Users/user/AppData/Local/Temp/70PK46MK.htm
correctly located. To install, reverse the removal procedure. Perform vacuum- pumping Refer to: Vacuum pumping See information about refrigerant Refer to: Refrigerant and oil grade Perform refrigerant, filling Refer to: Refrigerant, filling Carry out leakage detection with tracing agent Refer to: Leak detection, tracer agent Perform climate unit, checking Refer to: Climate control system, check 30/11/2015 PRINT Tinklio puslapis 3 iš 3 874: Cooling unit, D4162T, MPS6, L.H.D 11/30/2015 file:///C:/Users/user/AppData/Local/Temp/70PK46MK.htm
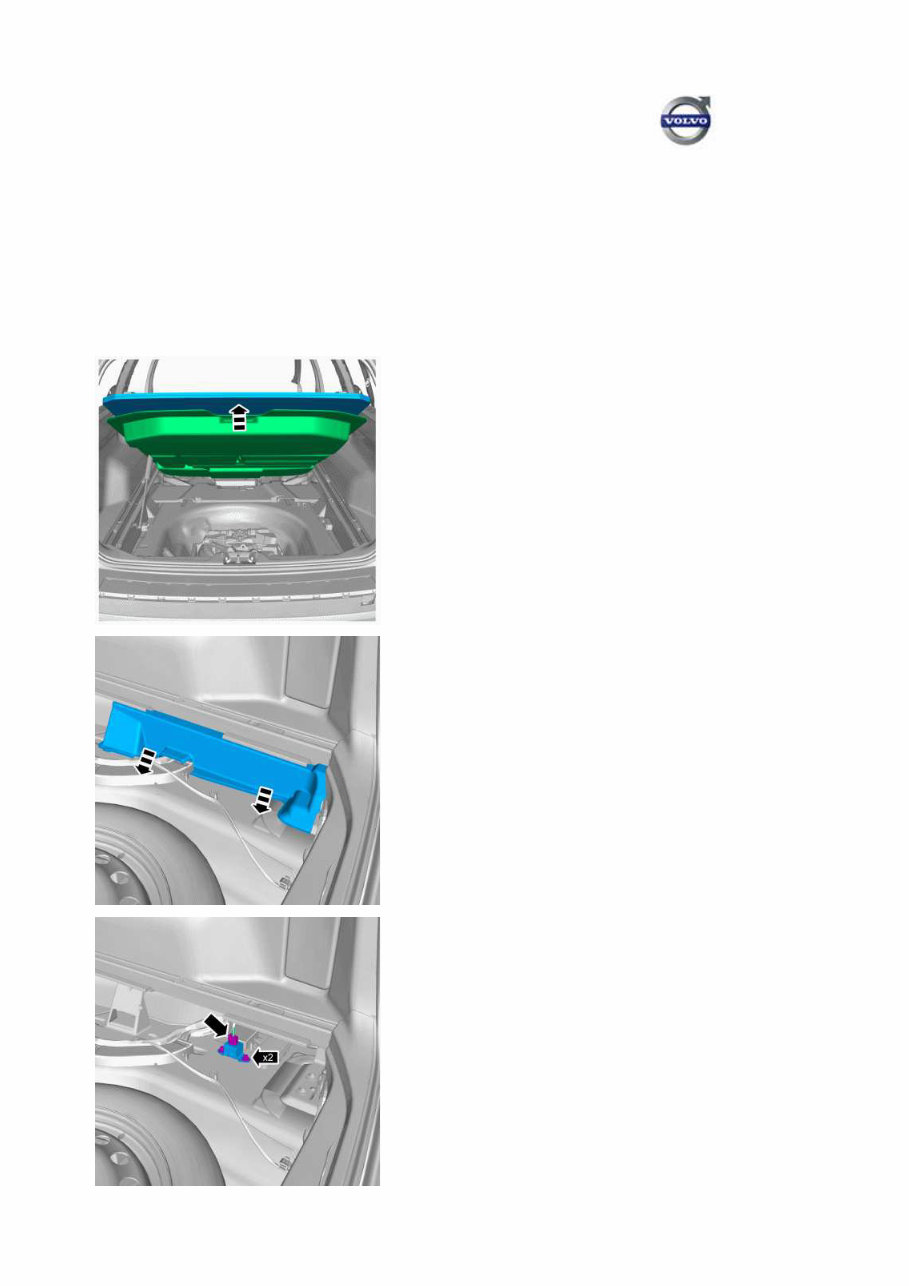
386: Sensor for indicator and warning systems, D4162T, MPS6 V70 (08-), 2014, D4162T, MPS6, YV1BW848BE1285352, 285352 30/11/2015 PRINT 386: Sensor for indicator and warning systems, D4162T, MPS6 Operation number: 38622-2 Acceleration sensor vertical motion rear Removal Tinklio puslapis 1 iš 2 386: Sensor for indicator and warning systems, D4162T, MPS6 11/30/2015 file:///C:/Users/user/AppData/Local/Temp/A8YJ2PC9.htm
Installation To install, reverse the removal procedure. 30/11/2015 PRINT Tinklio puslapis 2 iš 2 386: Sensor for indicator and warning systems, D4162T, MPS6 11/30/2015 file:///C:/Users/user/AppData/Local/Temp/A8YJ2PC9.htm
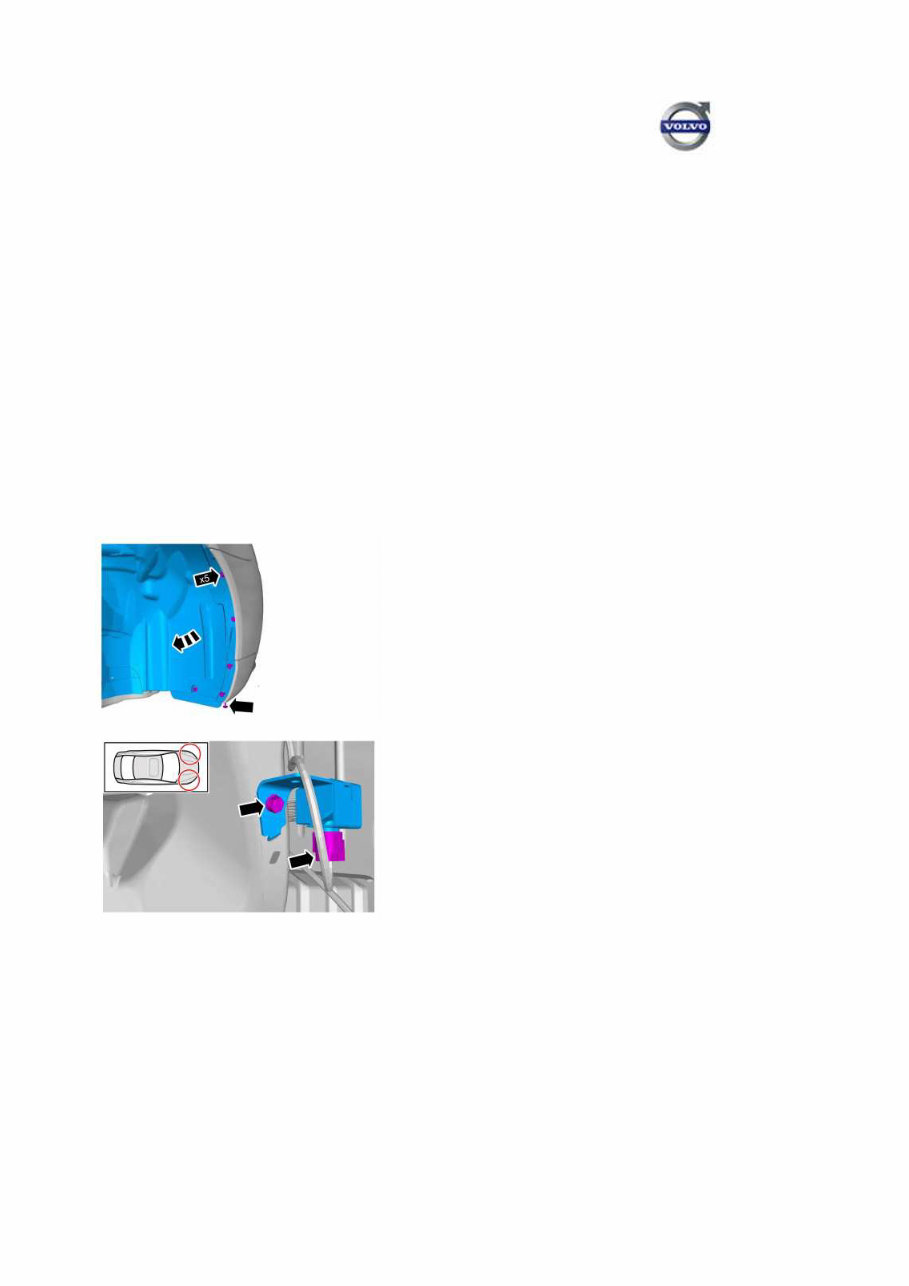
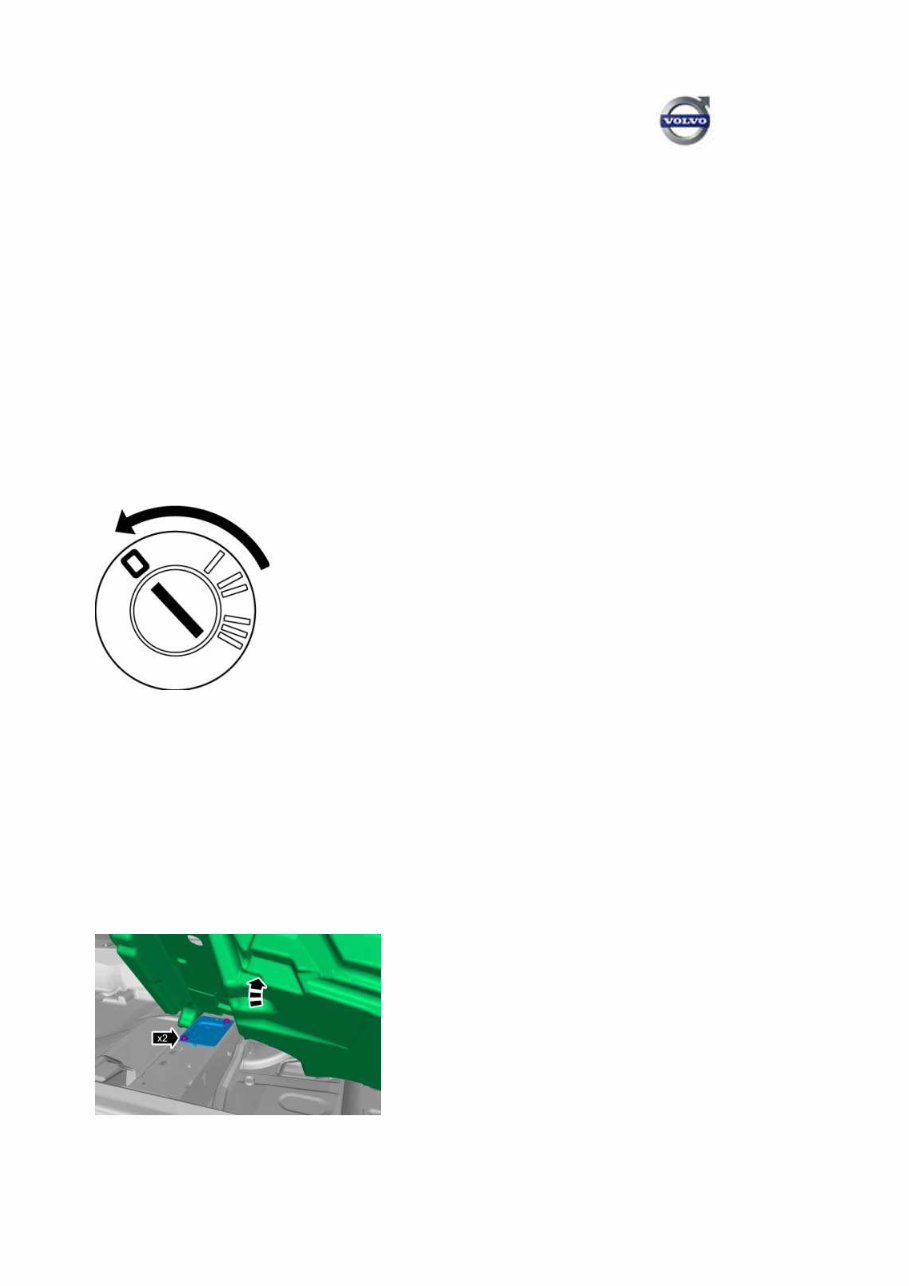
386: Sensor for indicator and warning systems, D4162T, MPS6 V70 (08-), 2014, D4162T, MPS6, YV1BW848BE1285352, 285352 30/11/2015 PRINT 386: Sensor for indicator and warning systems, D4162T, MPS6 Operation number: 38622-2 Acceleration sensor, vertical movement, front Removal Note! Removal steps in this procedure may contain installation details. Torque: M6, 10 Nm Installation To install, reverse the removal procedure. 30/11/2015 PRINT Tinklio puslapis 1 iš 1 386: Sensor for indicator and warning systems, D4162T, MPS6 11/30/2015 file:///C:/Users/user/AppData/Local/Temp/RT7IQSCX.htm
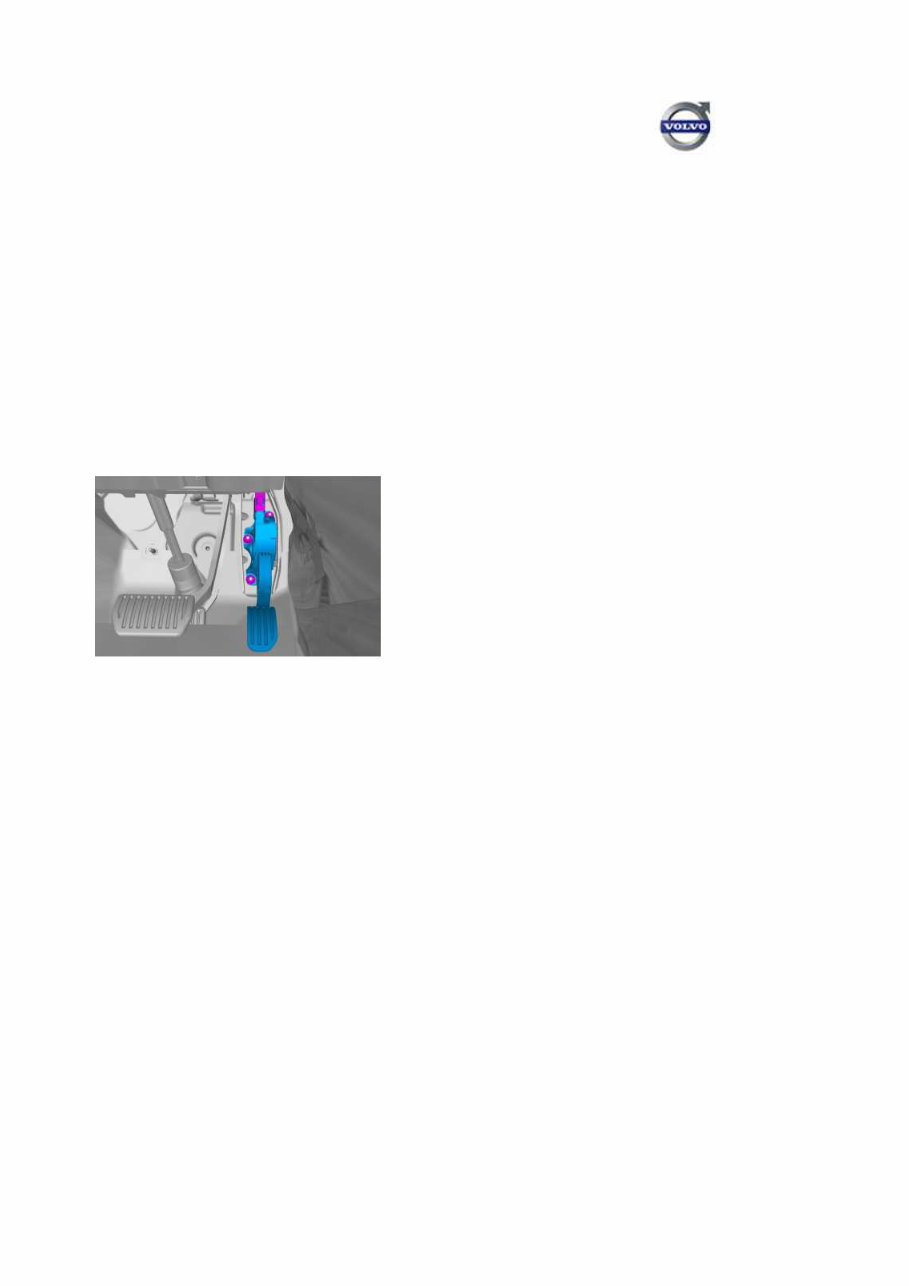
271: Gas pedal control V70 (08-), 2014, D4162T, MPS6, YV1BW848BE1285352, 285352 30/11/2015 PRINT 271: Gas pedal control Operation number: 27116-2 Accelerator pedal Removal Note! Removal steps in this procedure may contain installation details. Torque: M6, 10 Nm Installation To install, reverse the removal procedure. 30/11/2015 PRINT Tinklio puslapis 1 iš 1 271: Gas pedal control 11/30/2015 file:///C:/Users/user/AppData/Local/Temp/7T0FIQ0N.htm
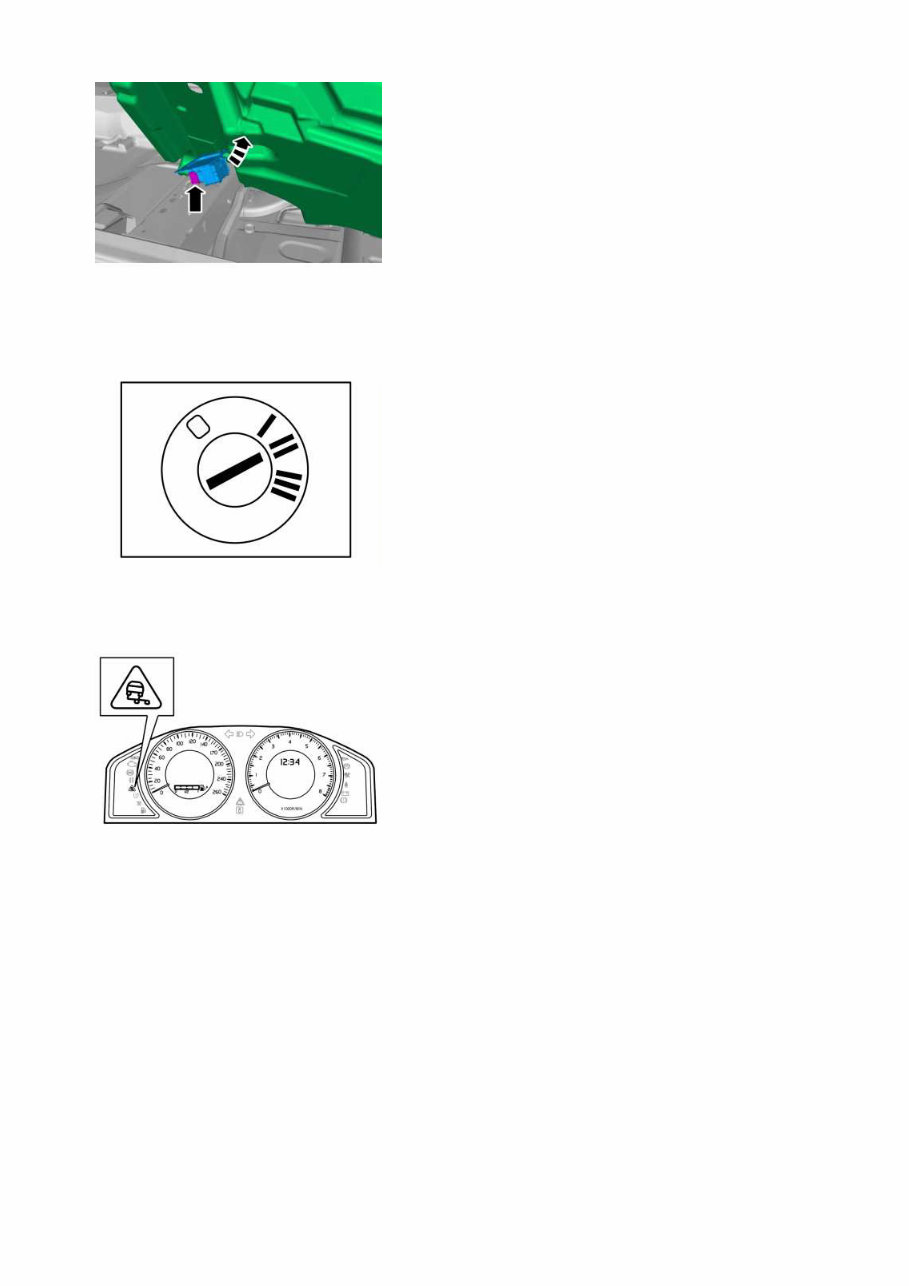
386: Sensor for indicator and warning systems, D4162T, MPS6 V70 (08-), 2014, D4162T, MPS6, YV1BW848BE1285352, 285352 30/11/2015 PRINT 386: Sensor for indicator and warning systems, D4162T, MPS6 Operation number: 38624-2 Accelerometer and yaw angle sensor Removal Note! Removal steps in this procedure may contain installation details. Remove the following items: ◾ Front seat Refer to: ◾ Audio Module Refer to: Audio Module Warning! Make sure that the sensor is correctly installed. Torque: Yaw angle sensor , 3.7 Nm Caution! If accidentally dropped install a new sensor. Tinklio puslapis 1 iš 2 386: Sensor for indicator and warning systems, D4162T, MPS6 11/30/2015 file:///C:/Users/user/AppData/Local/Temp/TNXI0U9U.htm
Installation To install, reverse the removal procedure. Calibrate according to: DIAGNOSTICS/VEHICLE COMMUNICATION/Advanced/BCM/Calibrating Perform test drive schedule (DSTC/BCM), description Refer to: Test Drive Form (DSTC (dynamic stability and traction control) /brake control module), description 30/11/2015 PRINT Tinklio puslapis 2 iš 2 386: Sensor for indicator and warning systems, D4162T, MPS6 11/30/2015 file:///C:/Users/user/AppData/Local/Temp/TNXI0U9U.htm
The 2010 Volvo V70 Service & Repair Manual is a comprehensive guide to maintaining and repairing your Volvo V70. Geared toward both the experienced mechanic and car enthusiast alike, this manual offers detailed instructions, diagrams, and technical insights to support a wide range of repair and service tasks.
Covering all 2010 Volvo V70 models, this manual includes critical specifications for:
2010 Volvo V70 2.4L 5-cylinder
2010 Volvo V70 3.2L 6-cylinder
2010 Volvo V70 T6 3.0L 6-cylinder
2010 Volvo V70 T6 R-Design 3.0L 6-cylinder
Whether you are performing routine maintenance tasks like oil changes and filter replacements or tackling more intricate repairs such as engine overhaul, this manual provides step-by-step guidance and precise technical details to ensure your job is done correctly.
Rely on the 2010 Volvo V70 Service & Repair Manual to keep your vehicle running smoothly and efficiently.