2011 Nissan Murano Cross Cabriolet Service & Repair Manual
What's Included?
Lifetime Access
Fast Download Speeds
Online & Offline Access
Access PDF Contents & Bookmarks
Full Search Facility
Print one or all pages of your manual
Precaution for Supplemental Restraint System (SRS) "AIR BAG" and "SEAT BELT PRE-TENSIONER" The Supplemental Restraint System such as “AIR BAG” and “SEAT BELT PRE-TENSIONER”, used along with a front seat belt, helps to reduce the risk or severity of injury to the driver and front passenger for certain types of collision. This system includes seat belt switch inputs and dual stage front air bag modules. The SRS system uses the seat belt switches to determine the front air bag deployment, and may only deploy one front air bag, depending on the severity of a collision and whether the front occupants are belted or unbelted. Information necessary to service the system safely is included in the “SRS AIR BAG” and “SEAT BELT” of this Service Manual. Always observe the following items for preventing accidental activation. To avoid rendering the SRS inoperative, which could increase the risk of personal injury or death in the event of a collision that would result in air bag inflation, it is recommended that all maintenance and repair be performed by an authorized NISSAN/INFINITI dealer. Improper repair, including incorrect removal and installation of the SRS, can lead to personal injury caused by unintentional activation of the system. For removal of Spiral Cable and Air Bag Module, see “SRS AIR BAG”. Never use electrical test equipment on any circuit related to the SRS unless instructed to in this Service Manual. SRS wiring harnesses can be identified by yellow and/or orange harnesses or harness connectors. PRECAUTIONS WHEN USING POWER TOOLS (AIR OR ELECTRIC) AND HAMMERS Always observe the following items for preventing accidental activation. When working near the Air Bag Diagnosis Sensor Unit or other Air Bag System sensors with the ignition ON or engine running, never use air or electric power tools or strike near the sensor(s) with a hammer. Heavy vibration could activate the sensor(s) and deploy the air bag(s), possibly causing serious injury. When using air or electric power tools or hammers, always switch the ignition OFF, disconnect the battery or batteries, and wait at least 3 minutes before performing any service.
Service Procedure Precautions for Models with a Pop-up Roll Bar Always observe the following items for preventing accidental activation. Risk of passenger injury or death may increase if the pop-up roll bar does not deploy during a roll over collision. In order to reduce the chance of an incident where the pop-up roll bar is inoperative, all maintenance must be performed by a NISSAN or INFINITI dealer. Before removing and installing the pop-up roll bar component parts and harness, always turn the ignition switch OFF, disconnect the battery negative terminal, and wait for 3 minutes or more. (The purpose of this operation is to discharge electricity that is accumulated in the auxiliary power supply circuit in the air bag diagnosis sensor unit.) When repairing, removing, and installing a pop-up roll bar, always refer to SRS AIR BAG and SRS AIR BAG CONTROL warnings in the Service Manual.
Precaution for Battery Service Before disconnecting the battery, lower both the driver and passenger windows. This will prevent any interference between the window edge and the vehicle when the door is opened/closed. During normal operation, the window slightly raises and lowers automatically to prevent any window to vehicle interference. The automatic window function will not work with the battery disconnected.
Precaution for Procedure without Cowl Top Cover When performing the procedure after removing cowl top cover, cover the lower end of windshield with urethane, etc to prevent damage to windshield. NISAS0000000007227642-01-PIIB3706J
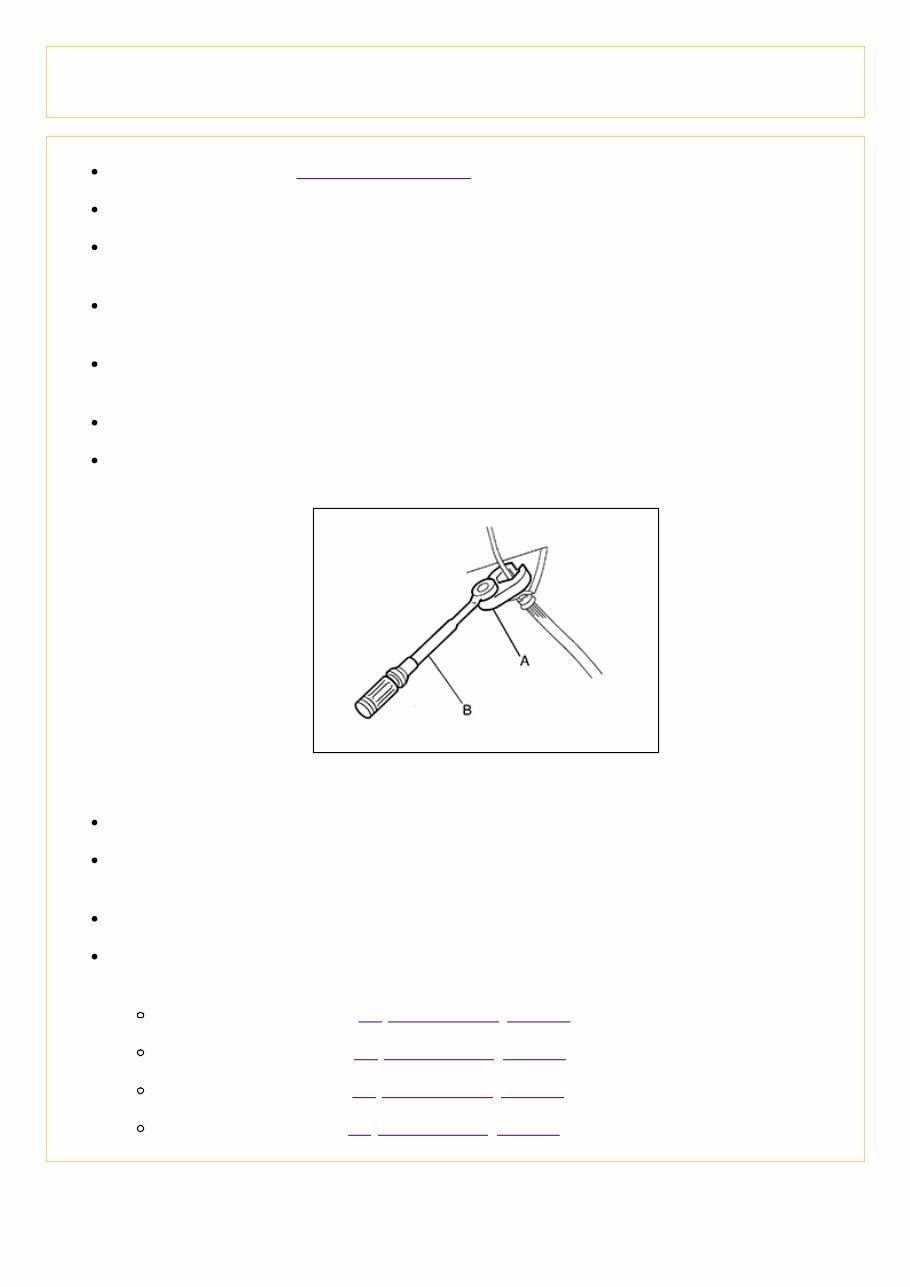
Precaution for Brake System Since dust covering the front and rear brakes has an affect on human body, the dust must be removed with a dust collector. Never splatter the dust with an air blow gun. Brake fluid use refer to Fluids and Lubricants. Never reuse drained brake fluid. Never spill or splash brake fluid on painted surfaces. Brake fluid may seriously damage paint. Wipe it off immediately and wash with water if it gets on a painted surface. Always clean with new brake fluid when cleaning the master cylinder, brake caliper and other components. Never use mineral oils such as gasoline or light oil to clean. They may damage rubber parts and cause improper operation. Always loosen the brake tube flare nut with a flare nut wrench. Tighten the brake tube flare nut to the specified torque with crowfoot (A) and torque wrench (B). NISAS0000000006940138-01- JPFIA0001ZZ Always confirm the specified tightening torque when installing the brake pipes. Turn the ignition switch OFF and disconnect the ABS actuator and electric unit (control unit) connector or the battery negative terminal before performing the work. Check that no brake fluid leakage is present after replacing the parts. Burnish the brake contact surfaces after refinishing or replacing rotors, after replacing pads, or if a soft pedal occurs at very low mileage. Front brake pad: refer to Inspection and Adjustment. Front disc rotor: refer to Inspection and Adjustment. Rear brake pad: refer to Inspection and Adjustment. Rear disc rotor: refer to Inspection and Adjustment.
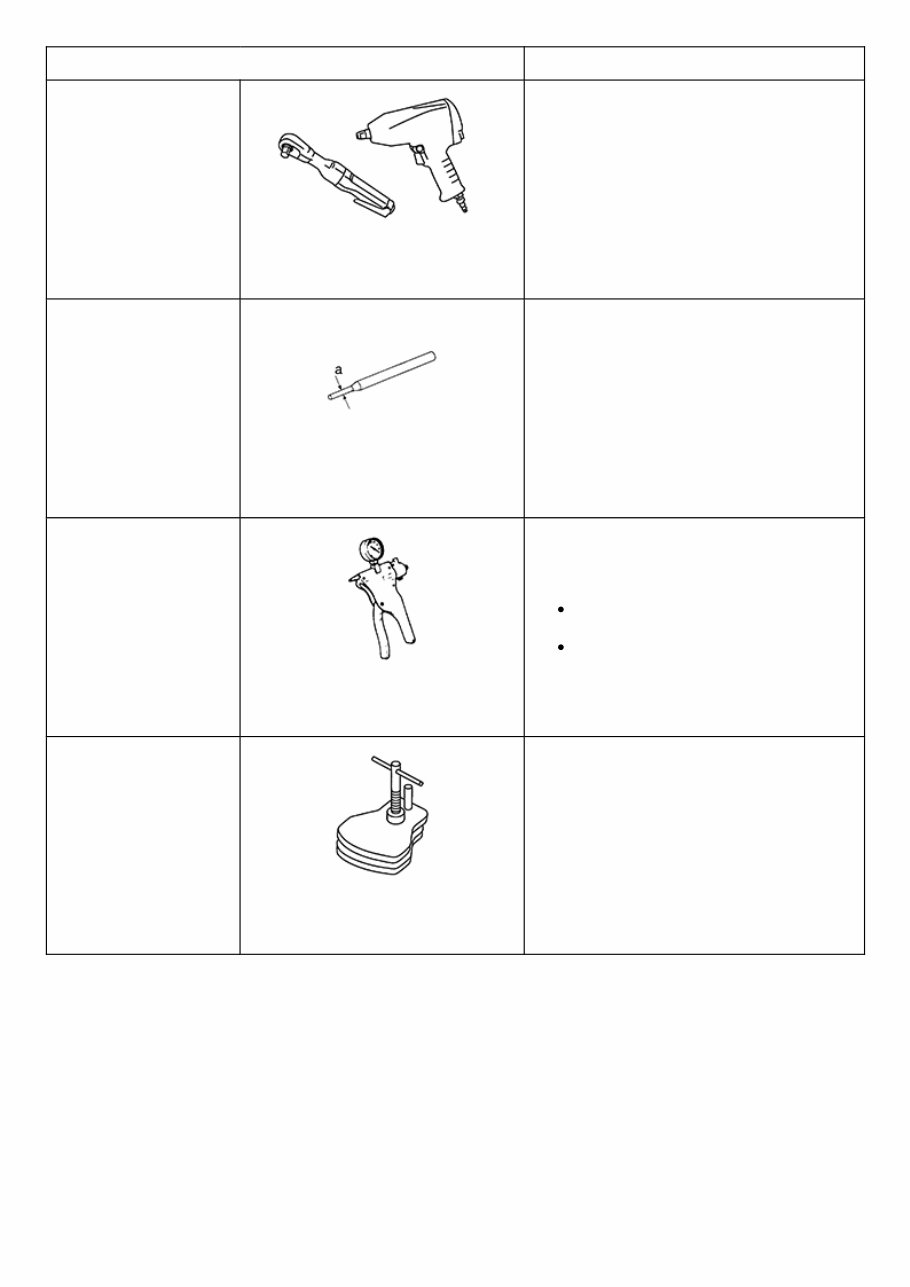
Commercial Service Tool Tool name Description Power tool NISAS0000000006940142-01- PBIC0190E Loosening bolts and nuts Pin punch a: 4 mm (0.16 in) NISAS0000000006940142-02- NT410 Removing and installing reservoir tank Handy vacuum pump NISAS0000000006940142-03- ZZC1313D Air tight Inspection of check valve Brake caliper wrench NISAS0000000006940142-04- NNFIA0040ZZ Return the piston
Use the chart below to find the cause of the symptom. If necessary, repair or replace these parts. Reference page Inspection and Adjustment, Inspection and Adjustment Inspection and Adjustment, Inspection and Adjustment Inspection, Inspection Inspection and Adjustment, Inspection and Adjustment Inspection and Adjustment, Inspection and Adjustment Inspection and Adjustment, Inspection and Adjustment Inspection and Adjustment, Inspection and Adjustment Inspection and Adjustment, Inspection and Adjustment Inspection and Adjustment, Inspection and Adjustment Inspection and Adjustment, Inspection and Adjustment NVH sectio Possible cause and SUSPECTED PARTS Pads - damaged Pads - uneven wear Shims damaged Rotor imbalance Rotor damage Rotor runout Rotor deformation Rotor deflection Rotor rust Rotor thickness variation PRO SHA Symptom BRAKE Noise × × × Shake × Shimmy, Judder × × × × × × × ×: Applicable
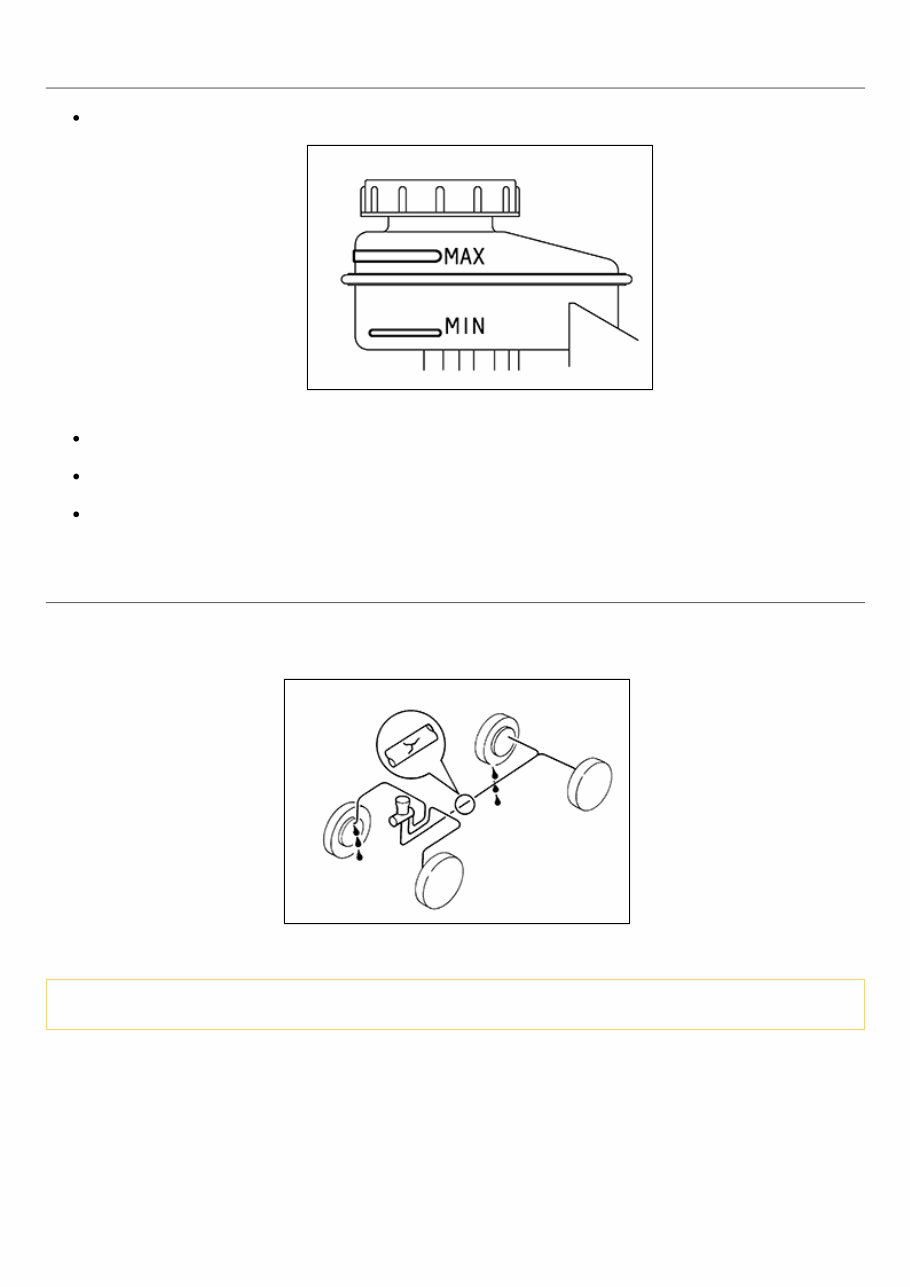
Inspection BRAKE FLUID LEVEL Check that the fluid level in the sub tank is within the specified range (MAX – MIN lines). NISAS0000000006940144-01-JPFIA0295ZZ Visually check for any brake fluid leakage around the sub tank, reservoir tank and hose. Check the brake system for any leakage if the fluid level is extremely low (lower than MIN). Check the brake system for fluid leakage if the warning lamp remains illuminated even after the parking brake is released. BRAKE LINE 1 Check brake line (tubes and hoses) for cracks, deterioration or other damage. Replace any damaged parts. 2 Check for fluid leakage by fully depressing brake pedal while engine is running. NISAS0000000006940144-02-SBR389C If leakage occurs around joints, retighten or, if necessary, replace damaged parts.
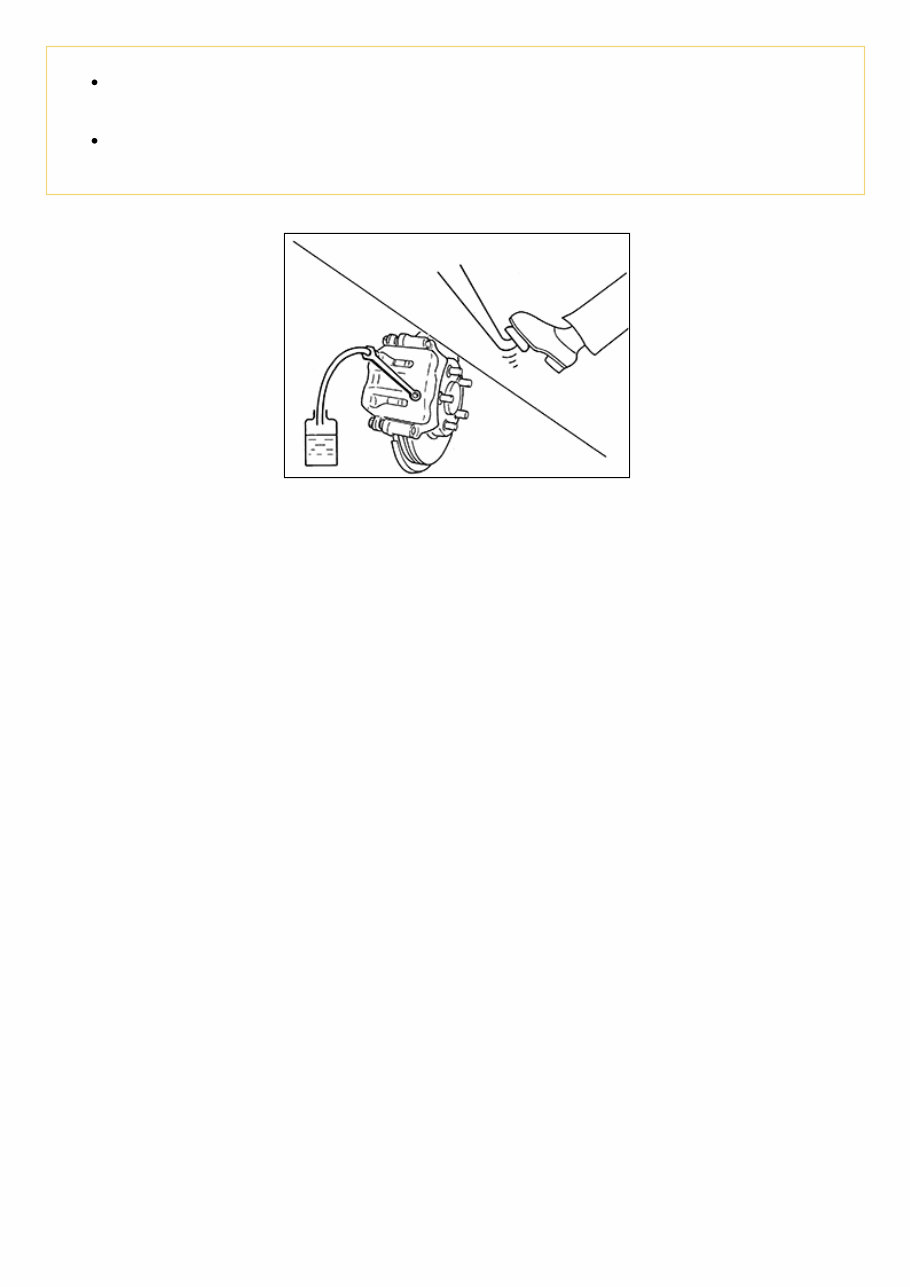
Draining Never spill or splash brake fluid on painted surfaces. Brake fluid may seriously damage paint. Wipe it off immediately and wash with water if it gets on a painted surface. Turn the ignition switch OFF and disconnect the ABS actuator and electric unit (control unit) connector or the battery negative terminal before draining. 1 Connect a vinyl tube to the bleed valve. NISAS0000000006940145-01-BRA0007D 2 Depress the brake pedal and loosen the bleeder valve to gradually discharge brake fluid.
Refilling Turn the ignition switch OFF and disconnect the ABS actuator and electric unit (control unit) connector or the battery negative terminal before refilling. 1 Check that there is no foreign material in the sub tank, and refill with new brake fluid. Never reuse drained brake fluid. 2 Loosen the bleeder valve, slowly depress the brake pedal to the full stroke, and then release the pedal. Repeat this operation at intervals of 2 or 3 seconds until all brake fluid is discharged. Then close the bleeder valve with the brake pedal depressed. Repeat the same work on each wheel. 3 Perform the air bleeding. Refer to Bleeding Brake System.
Tackle vehicle problems with ease using the 2011 Nissan Murano Cross Cabriolet Service & Repair Manual. This highly comprehensive repair manual provides all the troubleshooting and replacement procedures recommended by the manufacturer in one convenient place.
Regular maintenance is essential to keep your vehicle running smoothly, and this manual will help you do just that. With step-by-step instructions, clear images, and exploded-view illustrations, you'll have everything you need to fix any issue that may arise.
Whether you're a seasoned DIYer or a novice mechanic, this repair manual will be your go-to resource for keeping your vehicle in top shape. No more flipping through pages or worrying about greasy, torn, or lost pages - this electronic version can be carried with you wherever you go. It's compatible with any electronic device, from computers to smartphones and tablets, and can even be printed out if you prefer a physical copy.
Don't let vehicle repairs be a hassle - get the 2011 Nissan Murano Cross Cabriolet Service & Repair Manual and take control of your car's maintenance. Your wallet and your peace of mind will thank you.
Printable: Yes
Language: English
Compatibility: Pretty much any electronic device, incl. PC & Mac computers, Android and Apple smartphones & tablets, etc.
Requirements: Adobe Reader (free)
Recently Viewed
5,521,897Happy Clients
2,594,462eManuals
1,120,453Trusted Sellers
15Years in Business
Price:
Actual Price:
2011 Nissan Murano Cross Cabriolet Service & Repair Manual