1992 Mercury Grand Marquis Service & Repair Manual
What's Included?
Lifetime Access
Fast Download Speeds
Online & Offline Access
Access PDF Contents & Bookmarks
Full Search Facility
Print one or all pages of your manual
FORD CROWN VICTORIA AND MERCURY GRAND MARQUIS 1989-94 How to Use this Manual Introduction Chilton's Total Car Care manual for 1989-98 Ford Crown Victoria and Mercury Grand Marquis is intended to help you learn more about the inner workings of your vehicle while saving you money on its upkeep and operation. The beginning of the book will likely be referred to the most, since that is where you will find information for maintenance and tune-up. The other sections deal with the more complex systems of your vehicle. Operating systems from engine through brakes are covered to the extent that the average do-it-yourselfer becomes mechanically involved. This book will not explain such things as rebuilding a differential for the simple reason that the expertise required and the investment in special tools make this task uneconomical. It will, however, give you detailed instructions to help you change your own brake pads and shoes, replace spark plugs, and perform many more jobs that can save you money, give you personal satisfaction and help you avoid expensive problems. A secondary purpose of this book is a reference for owners who want to understand their vehicle and/or their mechanics better. In this case, no tools at all are required. Where to Begin Before removing any bolts, read through the entire procedure. This will give you the overall view of what tools and supplies will be required. There is nothing more frustrating than having to walk to the bus stop on Monday morning because you were short one bolt on Sunday afternoon. So read ahead and plan ahead. Each operation should be approached logically and all procedures thoroughly understood before attempting any work. All sections contain adjustments, maintenance, removal and installation procedures, and in some cases, repair or overhaul procedures. When repair is not considered practical, we tell you how to remove the part and then how to install the new or rebuilt replacement. In this way, you at least save labor costs. "Backyard" repair of some components is just not practical. Avoiding Trouble Many procedures in this book require you to label and disconnect a group of lines, hoses or wires. Don't be lulled into thinking you can remember where everything goes—you won't. If you hook up vacuum or fuel lines incorrectly, the vehicle may run poorly, if at all. If you hook up electrical wiring incorrectly, you may instantly learn a very expensive lesson. You don't need to know the official or engineering name for each hose or line. A piece of masking tape on the hose and a piece on its fitting will allow you to assign your own label such as the letter A or a short name. As long as you remember your own code, the lines can be reconnected by matching similar letters or names. Do remember that tape will dissolve in gasoline or other fluids; if a component is to be washed or cleaned, use another method of identification. A permanent felt-tipped marker or a metal scribe can be very handy for marking metal parts. Remove any tape or paper labels after assembly. Maintenance or Repair? It's necessary to mention the difference between maintenance and repair. Maintenance includes routine inspections, adjustments, and replacement of parts which show signs of normal wear. Maintenance compensates for wear or deterioration. Repair implies that something has broken or is not working. A need for repair is often caused by lack of maintenance. Example: draining and refilling the automatic transmission fluid is maintenance recommended by the manufacturer at specific mileage intervals. Failure to do this can shorten the life of the transmission, requiring very expensive repairs. While no maintenance program can prevent items from breaking or wearing out, a general rule can be stated: MAINTENANCE IS CHEAPER THAN REPAIR. Two basic mechanic's rules should be mentioned here. First, whenever the left side of the vehicle or engine is referred to, it is meant to specify the driver's side. Conversely, the right side of the vehicle means the passenger's side. Second, screws and bolts are removed by turning counterclockwise, and tightened by turning clockwise unless specifically noted. Safety is always the most important rule. Constantly be aware of the dangers involved in working on an automobile and take the proper precautions. See the information in this section regarding SERVICING YOUR VEHICLE SAFELY and the SAFETY NOTICE on the acknowledgment page. Avoiding the Most Common Mistakes Pay attention to the instructions provided. There are 3 common mistakes in mechanical work: 1. Incorrect order of assembly, disassembly or adjustment. When taking something apart or putting it together, Copyright 2004 Thomson Delmar Learning. All rights reserved.
performing steps in the wrong order usually just costs you extra time; however, it CAN break something. Read the entire procedure before beginning disassembly. Perform everything in the order in which the instructions say you should, even if you can't immediately see a reason for it. When you're taking apart something that is very intricate, you might want to draw a picture of how it looks when assembled at one point in order to make sure you get everything back in its proper position. We will supply exploded views whenever possible. When making adjustments, perform them in the proper order. One adjustment possibly will affect another. 2. Overtorquing (or undertorquing). While it is more common for overtorquing to cause damage, undertorquing may allow a fastener to vibrate loose causing serious damage. Especially when dealing with aluminum parts, pay attention to torque specifications and utilize a torque wrench in assembly. If a torque figure is not available, remember that if you are using the right tool to perform the job, you will probably not have to strain yourself to get a fastener tight enough. The pitch of most threads is so slight that the tension you put on the wrench will be multiplied many times in actual force on what you are tightening. A good example of how critical torque is can be seen in the case of spark plug installation, especially where you are putting the plug into an aluminum cylinder head. Too little torque can fail to crush the gasket, causing leakage of combustion gases and consequent overheating of the plug and engine parts. Too much torque can damage the threads or distort the plug, changing the spark gap. There are many commercial products available for ensuring that fasteners won't come loose, even if they are not torqued just right (a very common brand is Loctite®). If you're worried about getting something together tight enough to hold, but loose enough to avoid mechanical damage during assembly, one of these products might offer substantial insurance. Before choosing a threadlocking compound, read the label on the package and make sure the product is compatible with the materials, fluids, etc. involved. 3. Crossthreading. This occurs when a part such as a bolt is screwed into a nut or casting at the wrong angle and forced. Crossthreading is more likely to occur if access is difficult. It helps to clean and lubricate fasteners, then to start threading the bolt, spark plug, etc. with your fingers. If you encounter resistance, unscrew the part and start over again at a different angle until it can be inserted and turned several times without much effort. Keep in mind that many parts, especially spark plugs, have tapered threads, so that gentle turning will automatically bring the part you're threading to the proper angle. Don't put a wrench on the part until it's been tightened a couple of turns by hand. If you suddenly encounter resistance, and the part has not seated fully, don't force it. Pull it back out to make sure it's clean and threading properly. Be sure to take your time and be patient, and always plan ahead. Allow yourself ample time to perform repairs and maintenance. You may find maintaining your car a satisfying and enjoyable experience. Tools And Equipment Introduction Naturally, without the proper tools and equipment it is impossible to properly service your vehicle. It would also be virtually impossible to catalog every tool that you would need to perform all of the operations in this book. Of course, It would be unwise for the amateur to rush out and buy an expensive set of tools on the theory that he/she may need one or more of them at some time. The best approach is to proceed slowly, gathering a good quality set of those tools that are used most frequently. Don't be misled by the low cost of bargain tools. It is far better to spend a little more for better quality. Forged wrenches, 6 or 12-point sockets and fine tooth ratchets are by far preferable to their less expensive counterparts. As any good mechanic can tell you, there are few worse experiences than trying to work on a vehicle with bad tools. Your monetary savings will be far outweighed by frustration and mangled knuckles. Begin accumulating those tools that are used most frequently: those associated with routine maintenance and tune-up. In addition to the normal assortment of screwdrivers and pliers, you should have the following tools: Wrenches/sockets and combination open end/box end wrenches in sizes from 1/8 - 3/4 in. or 3-19mm, as well as a 13/16 in. or 5/8 in. spark plug socket (depending on plug type). If possible, buy various length socket drive extensions. Universal-joint and wobble extensions can be extremely useful, but be careful when using them, as they can change the amount of torque applied to the socket. Jackstands for support. Oil filter wrench. Spout or funnel for pouring fluids. Grease gun for chassis lubrication (unless your vehicle is not equipped with any grease fittings—for details, please refer to information on Fluids and Lubricants, later in this section). Hydrometer for checking the battery (unless equipped with a sealed, maintenance-free battery). A container for draining oil and other fluids. Rags for wiping up the inevitable mess. Copyright 2004 Thomson Delmar Learning. All rights reserved.
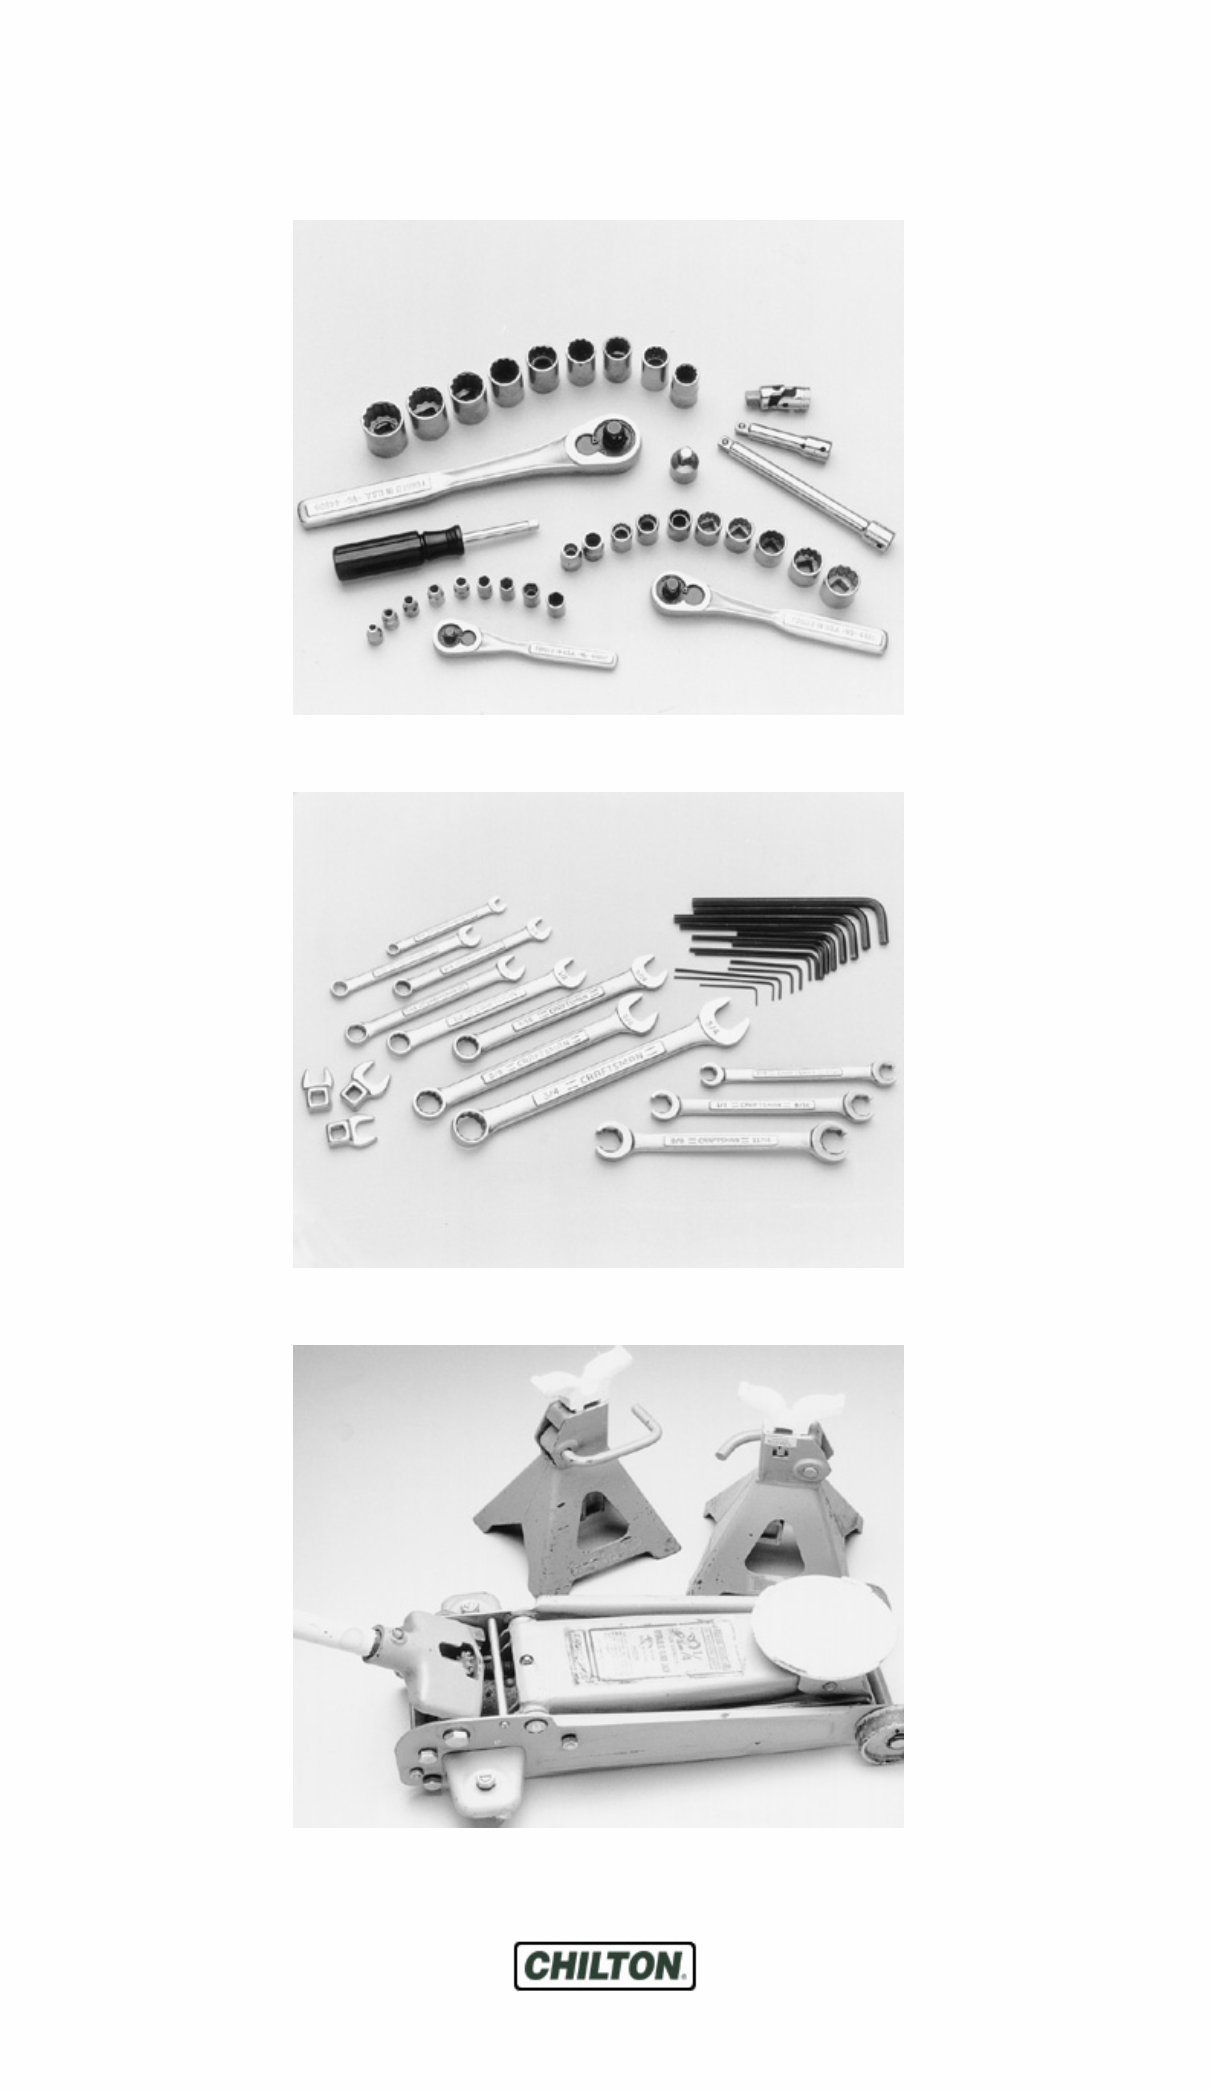
All but the most basic procedures will require an assortment of ratchets and sockets In addition to ratchets, a good set of wrenches and hex keys will be necessary A hydraulic floor jack and a set of jackstands are essential for lifting and supporting the vehicle Copyright 2004 Thomson Delmar Learning. All rights reserved.
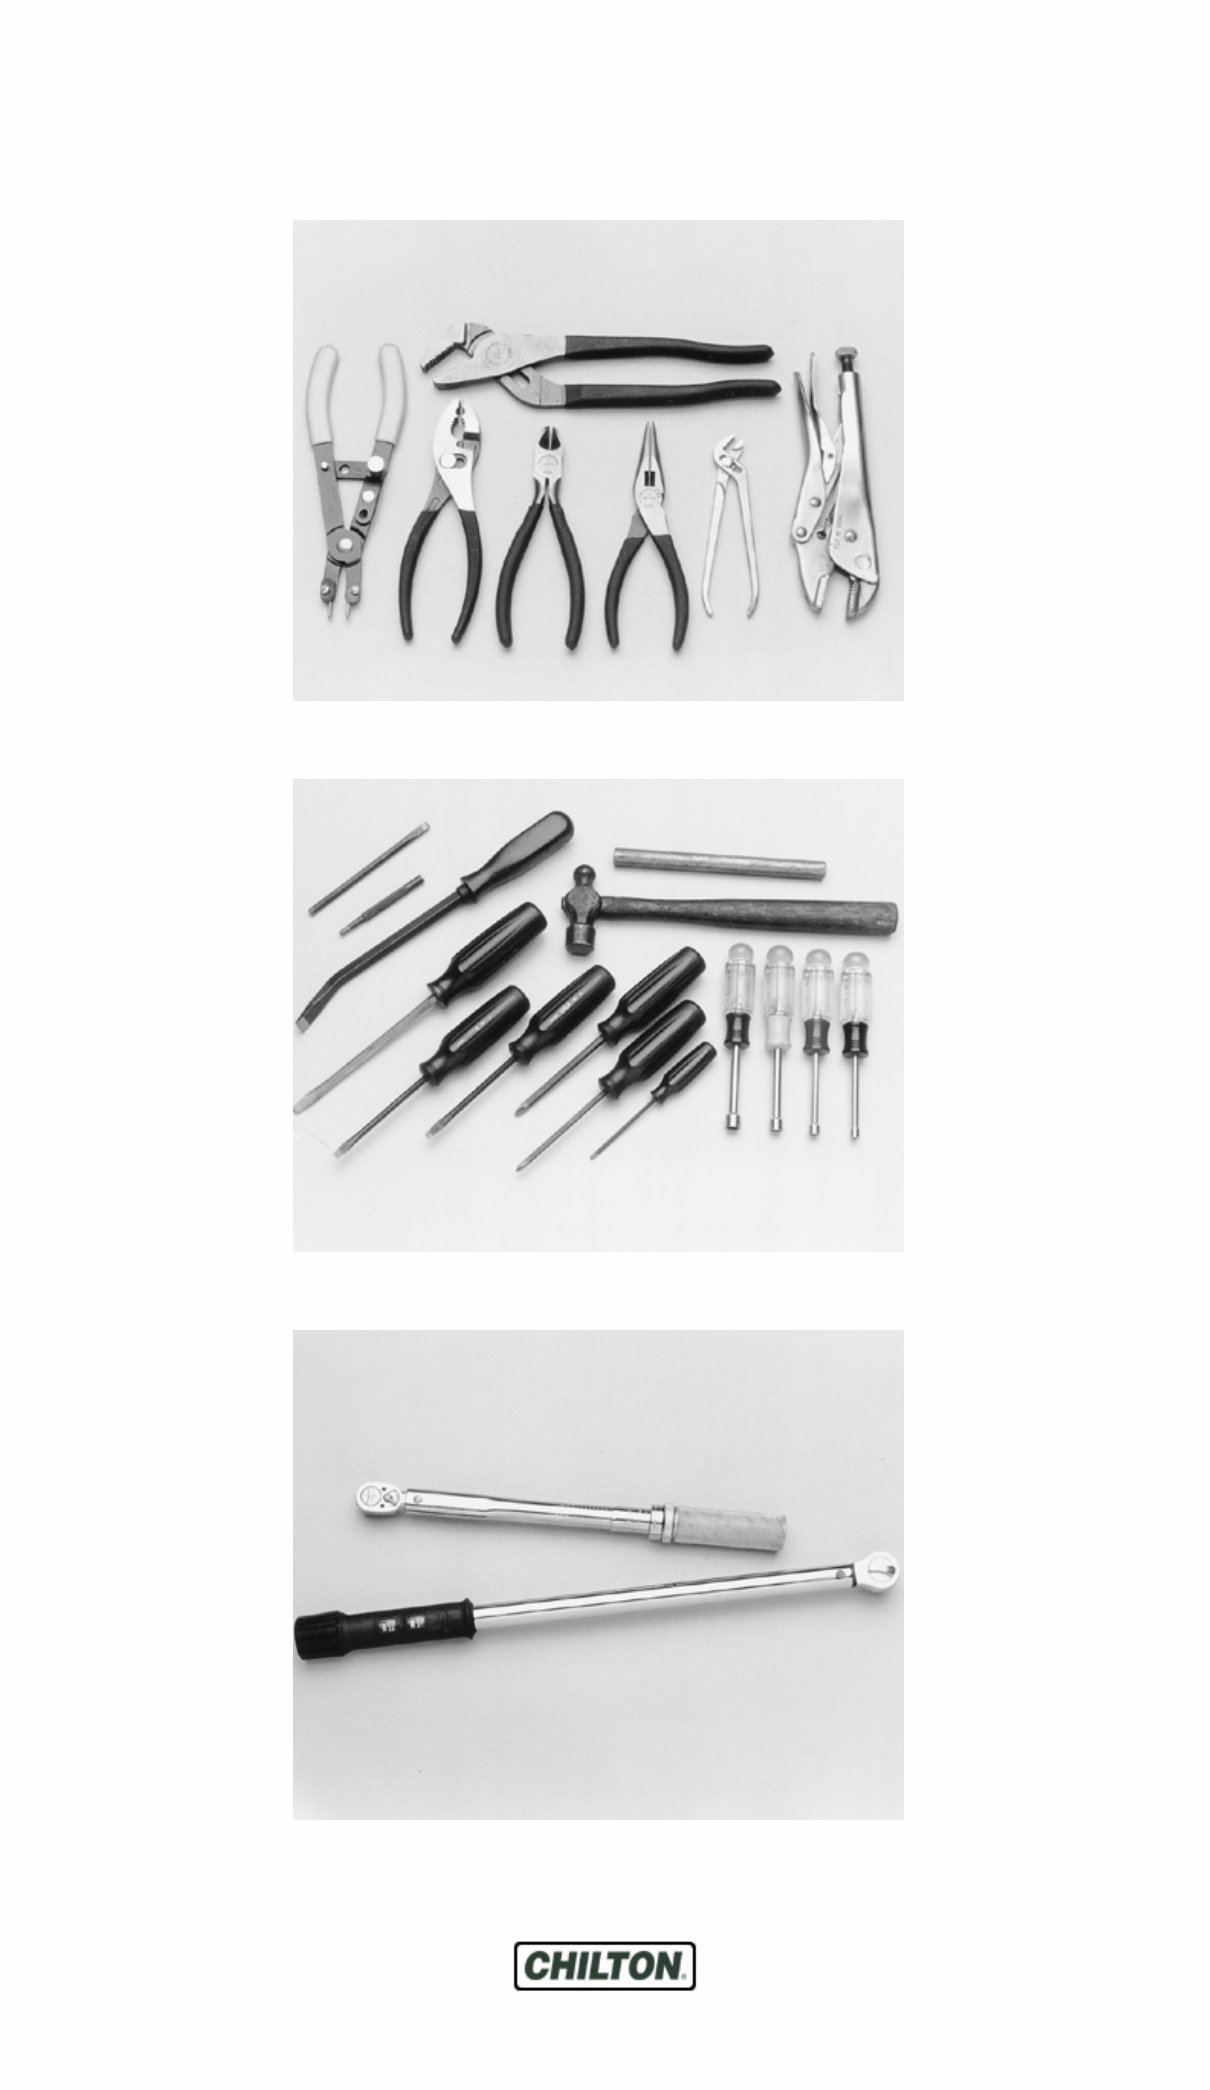
An assortment of pliers, grippers and cutters will be handy for old rusted parts and stripped bolt heads Various drivers, chisels and prybars are great tools to have in your toolbox Many repairs will require the use of a torque wrench to assure the components are properly fastened Copyright 2004 Thomson Delmar Learning. All rights reserved.
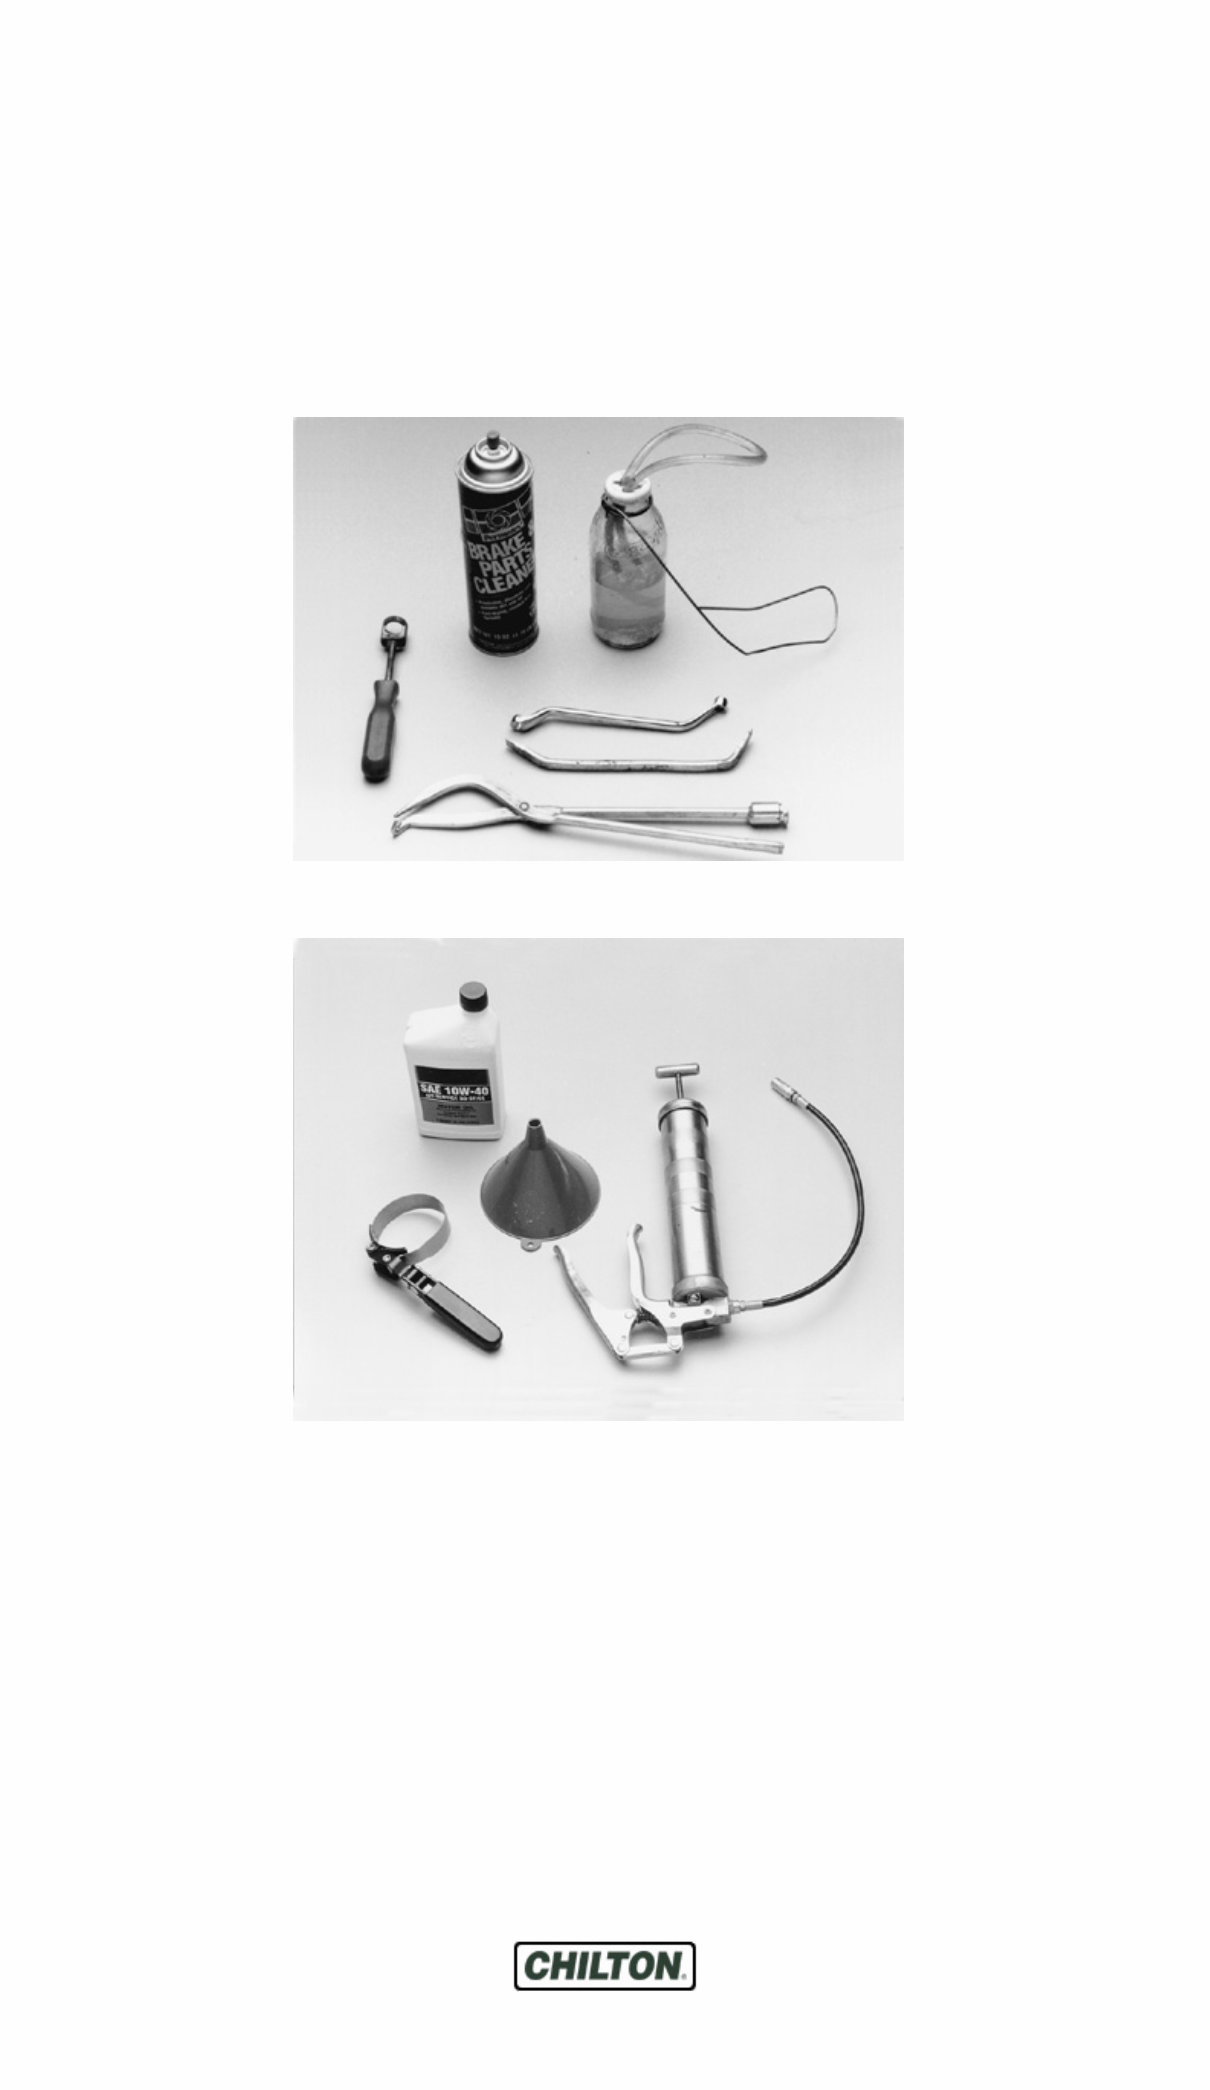
In addition to the above items there are several others that are not absolutely necessary, but handy to have around. These include Oil Dry (or an equivalent oil absorbent gravel—such as cat litter) and the usual supply of lubricants, antifreeze and fluids, although these can be purchased as needed. This is a basic list for routine maintenance, but only your personal needs and desire can accurately determine your list of tools. After performing a few projects on the vehicle, you'll be amazed at the other tools and non-tools on your workbench. Some useful household items are: a large turkey baster or siphon, empty coffee cans and ice trays (to store parts), ball of twine, electrical tape for wiring, small rolls of colored tape for tagging lines or hoses, markers and pens, a note pad, golf tees (for plugging vacuum lines), metal coat hangers or a roll of mechanic's wire (to hold things out of the way), dental pick or similar long, pointed probe, a strong magnet, and a small mirror (to see into recesses and under manifolds). Although not always necessary, using specialized brake tools will save time A few inexpensive lubrication tools will make maintenance easier Copyright 2004 Thomson Delmar Learning. All rights reserved.
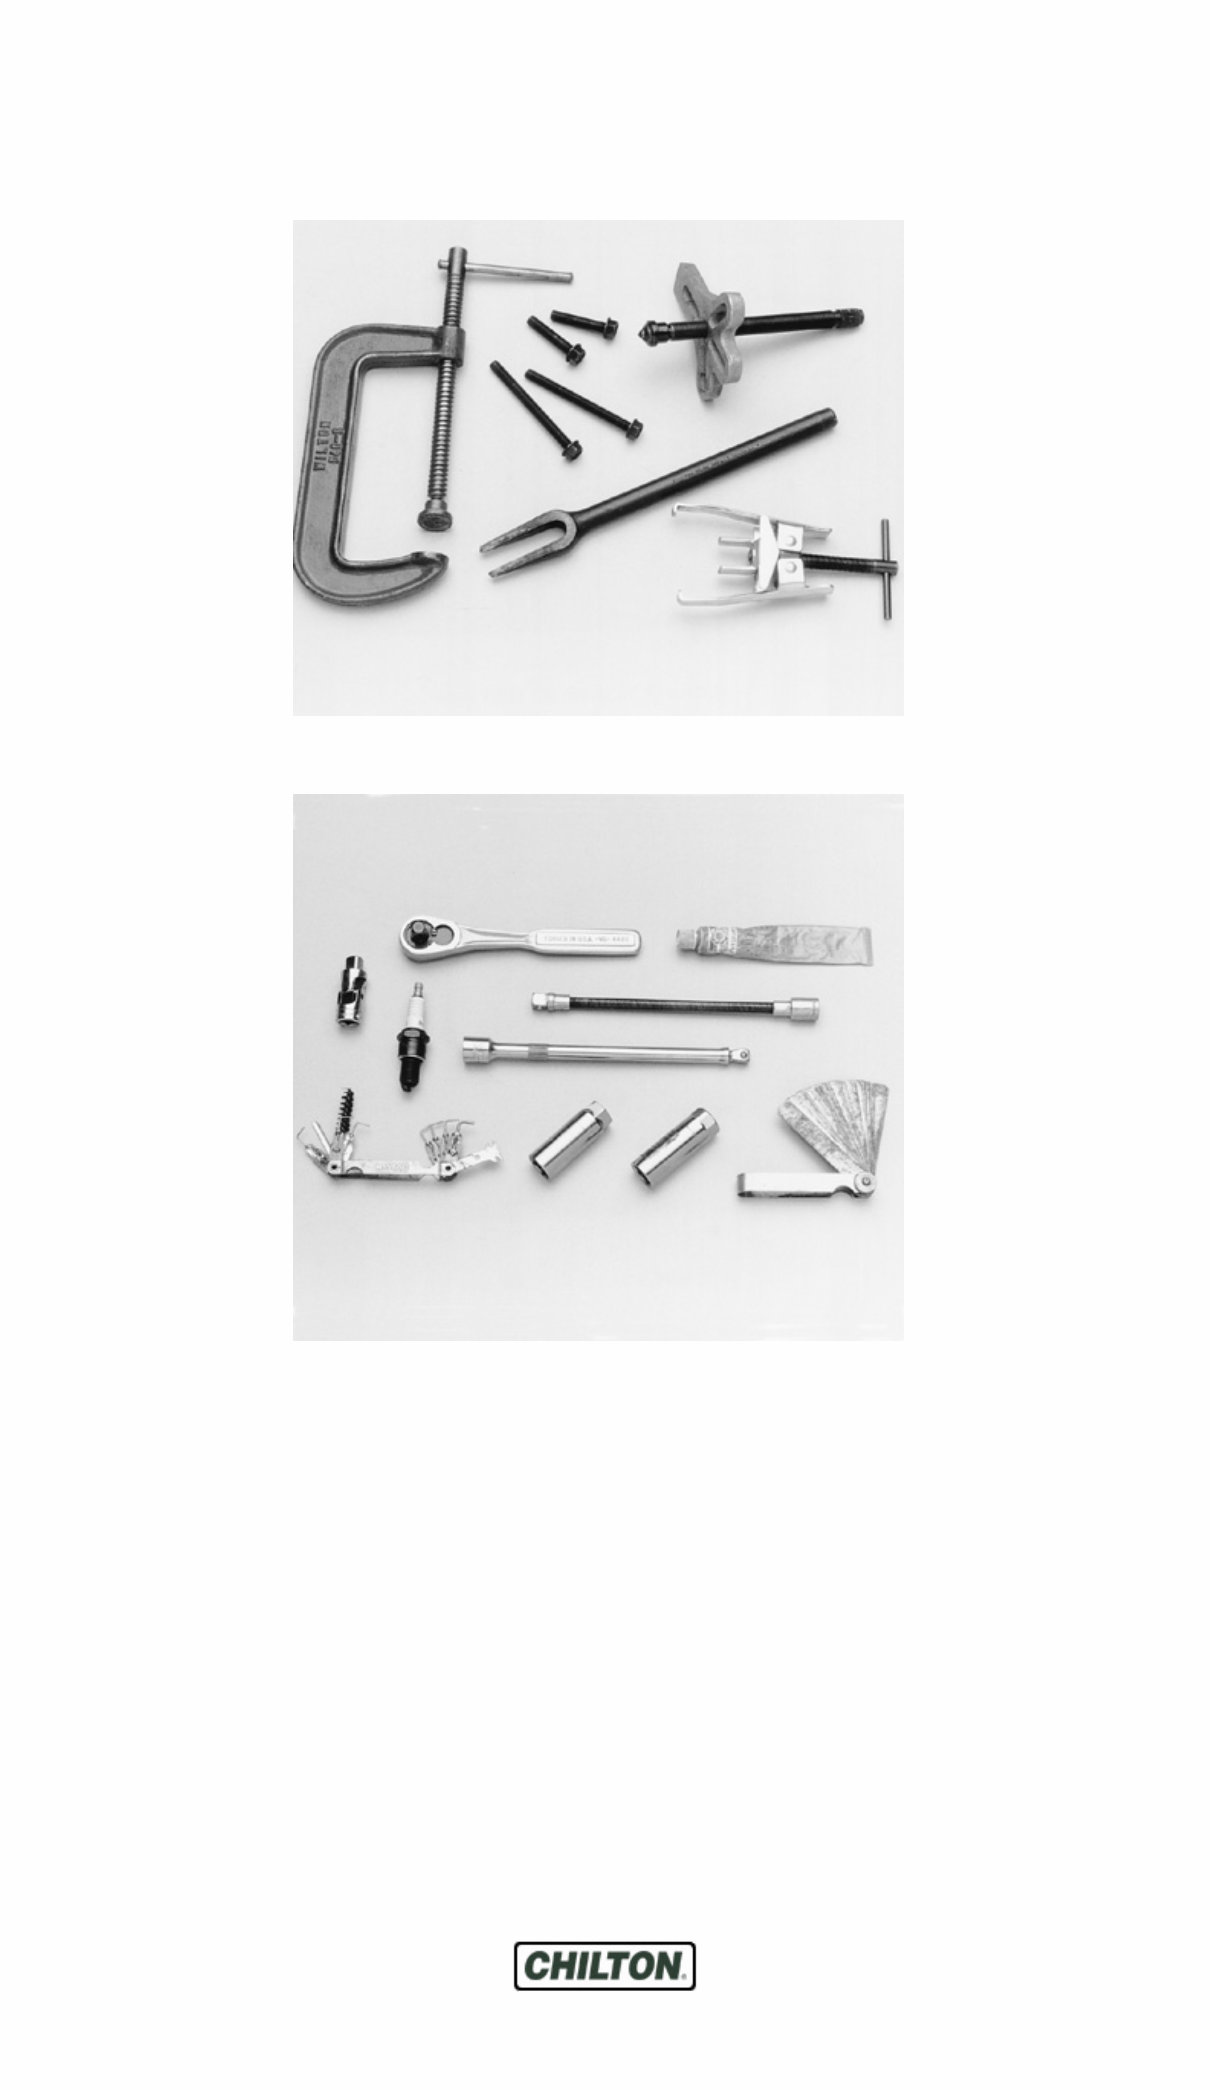
Various pullers, clamps and separator tools are needed for many larger, more complicated repairs A variety of tools and gauges should be used for spark plug gapping and installation Copyright 2004 Thomson Delmar Learning. All rights reserved.
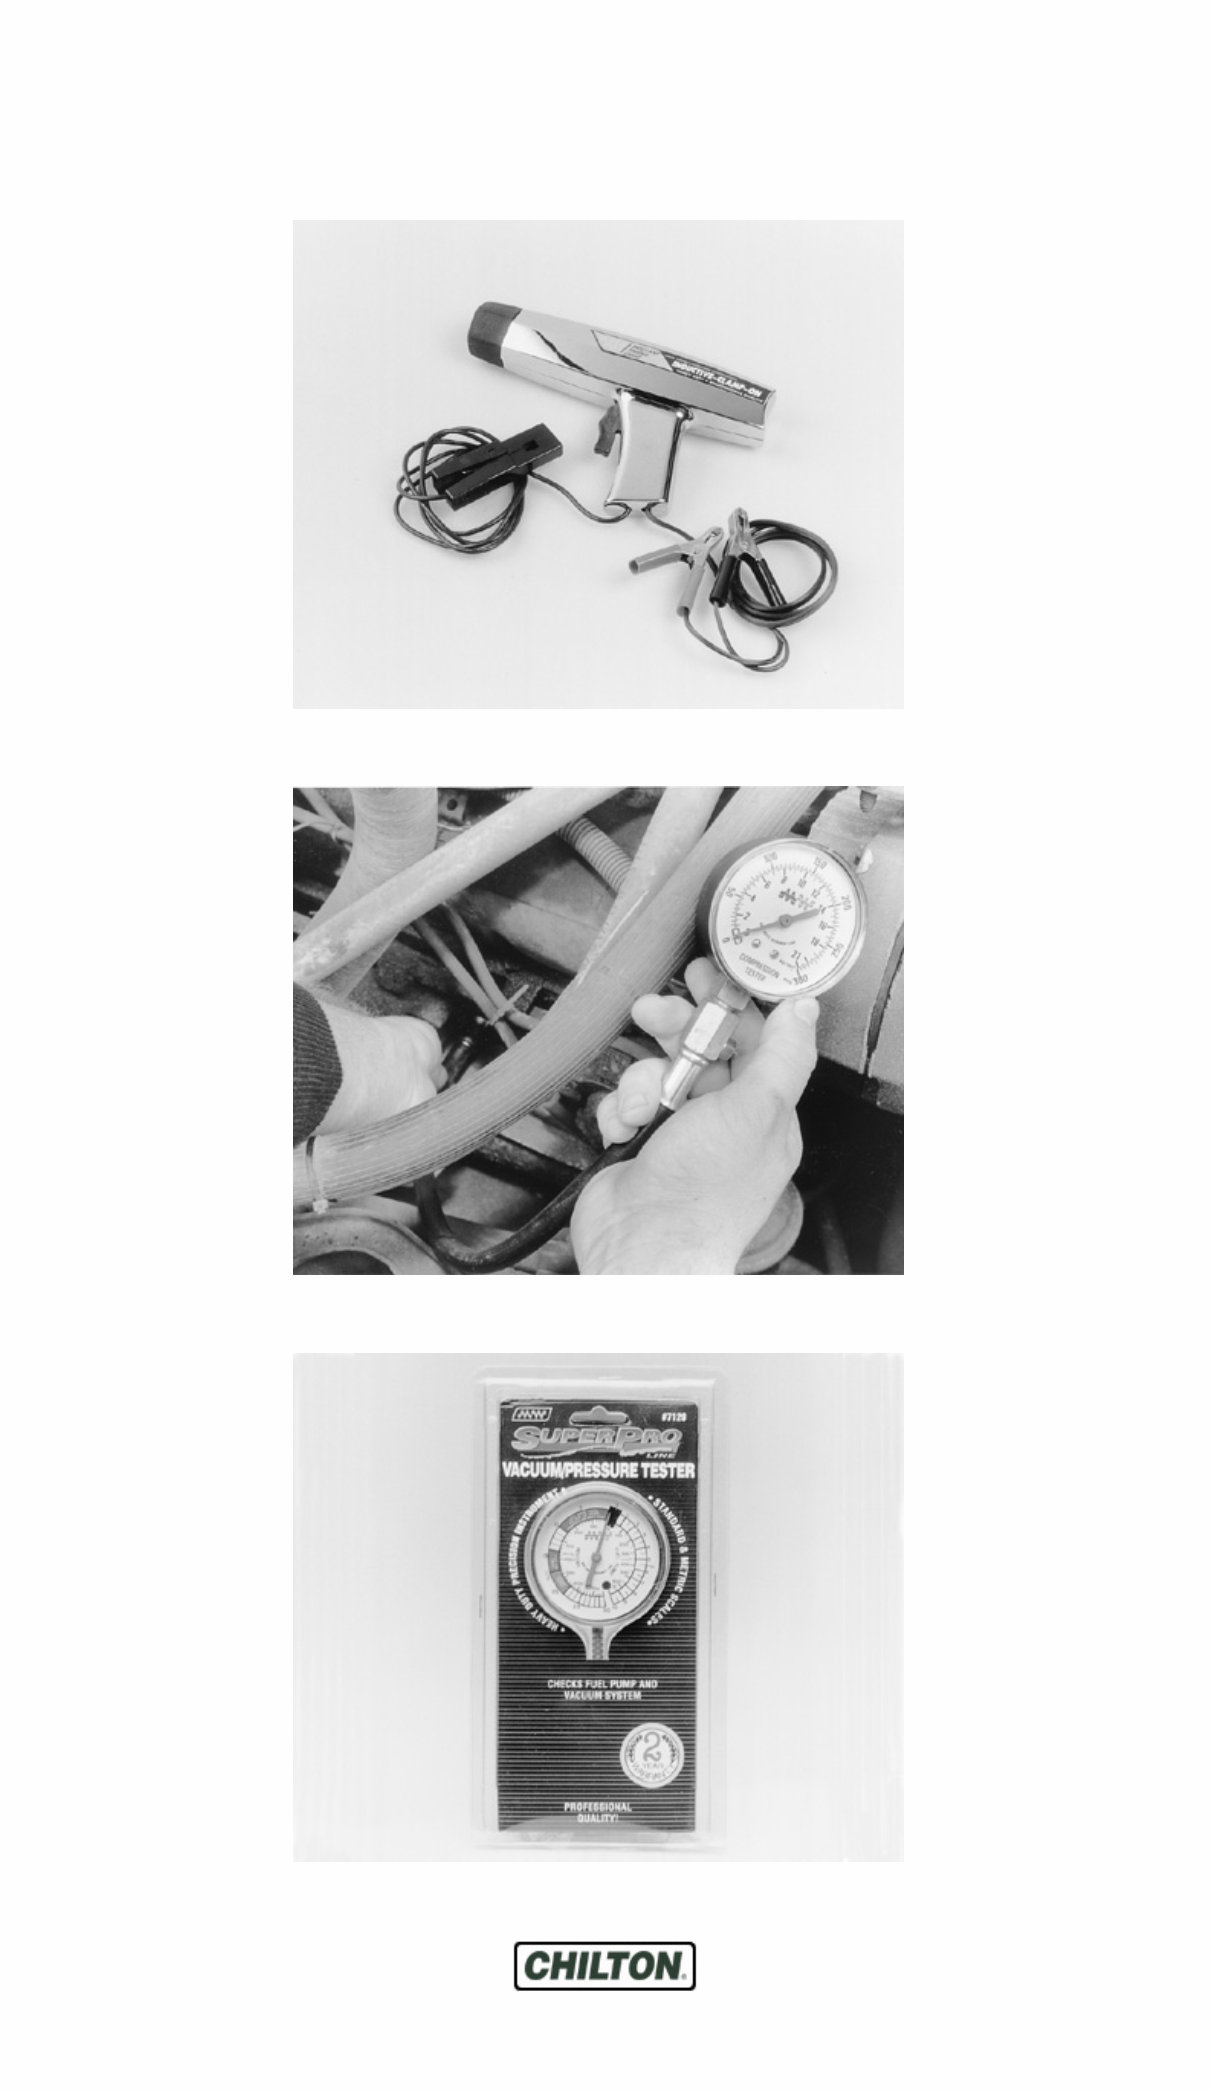
Inductive type timing light A screw-in type compression gauge is recommended for compression testing A vacuum/pressure tester is necessary for many testing procedures Copyright 2004 Thomson Delmar Learning. All rights reserved.
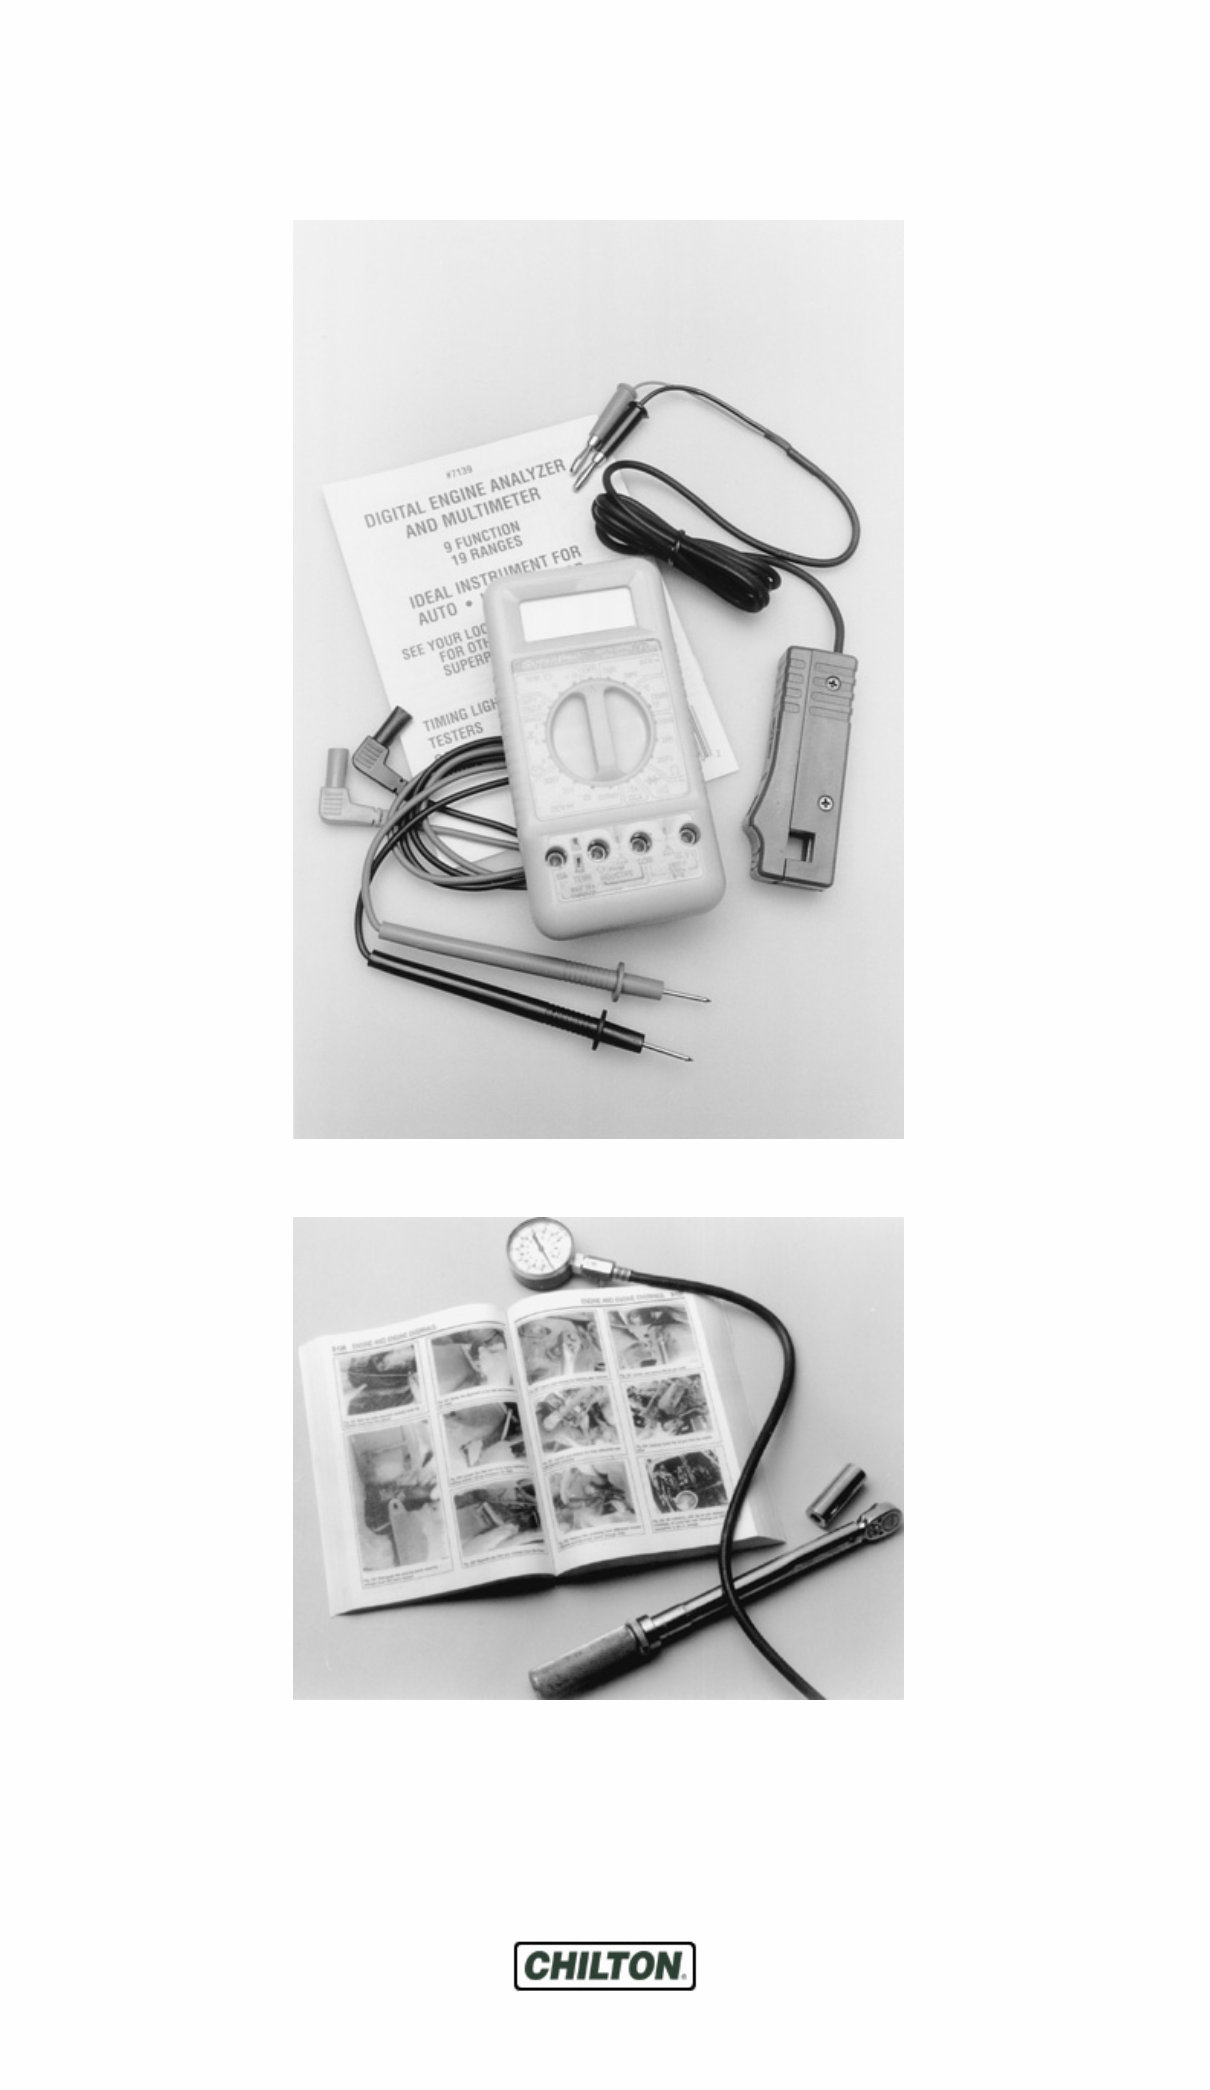
Most modern automotive multimeters incorporate many helpful features Proper information is vital, so always have a Chilton Total Car Care manual handy A more advanced set of tools, suitable for tune-up work, can be drawn up easily. While the tools are slightly more sophisticated, they need not be outrageously expensive. There are several inexpensive tach/dwell meters on the market that are every bit as good for the average mechanic as a professional model. Just be sure that it goes to a least 1200-1500 rpm on the tach scale and that it works on 4, 6 and 8-cylinder engines. The key to these purchases is to make them with an eye towards adaptability and wide range. A basic list of tune-up tools could include: Copyright 2004 Thomson Delmar Learning. All rights reserved.
Tach/dwell meter. Spark plug wrench and gapping tool. Feeler gauges for valve adjustment. Timing light. The choice of a timing light should be made carefully. A light which works on the DC current supplied by the vehicle's battery is the best choice; it should have a xenon tube for brightness. On any vehicle with an electronic ignition system, a timing light with an inductive pickup that clamps around the No. 1 spark plug cable is preferred. In addition to these basic tools, there are several other tools and gauges you may find useful. These include: Compression gauge. The screw-in type is slower to use, but eliminates the possibility of a faulty reading due to escaping pressure. Manifold vacuum gauge. 12V test light. A combination volt/ohmmeter Induction Ammeter. This is used for determining whether or not there is current in a wire. These are handy for use if a wire is broken somewhere in a wiring harness. As a final note, you will probably find a torque wrench necessary for all but the most basic work. The beam type models are perfectly adequate, although the newer click types (breakaway) are easier to use. The click type torque wrenches tend to be more expensive. Also keep in mind that all types of torque wrenches should be periodically checked and/or recalibrated. You will have to decide for yourself which better fits your pocketbook, and purpose. Special Tools Normally, the use of special factory tools is avoided for repair procedures, since these are not readily available for the do-it-yourself mechanic. When it is possible to perform the job with more commonly available tools, it will be pointed out, but occasionally, a special tool was designed to perform a specific function and should be used. Before substituting another tool, you should be convinced that neither your safety nor the performance of the vehicle will be compromised. Special tools can usually be purchased from an automotive parts store or from your dealer. In some cases special tools may be available directly from the tool manufacturer. Servicing Your Vehicle Safely Introduction It is virtually impossible to anticipate all of the hazards involved with automotive maintenance and service, but care and common sense will prevent most accidents. The rules of safety for mechanics range from "don't smoke around gasoline," to "use the proper tool(s) for the job." The trick to avoiding injuries is to develop safe work habits and to take every possible precaution. Copyright 2004 Thomson Delmar Learning. All rights reserved.
1992 Mercury Grand Marquis Service & Repair Manual
The 1992 Mercury Grand Marquis Service & Repair Manual is a crucial resource for maintaining and repairing your Mercury Grand Marquis. Developed by Mercury, this manual provides detailed instructions and precise specifications to ensure accurate maintenance and effective troubleshooting.
Inside, you'll find step-by-step procedures for routine maintenance tasks such as oil changes, brake inspections, and tire rotations. The manual also covers more complex repairs, including engine diagnostics, transmission servicing, and electrical system troubleshooting. Clear diagrams and illustrations help identify components and ensure that repairs are performed accurately and efficiently.
Designed for professional technicians and experienced DIY enthusiasts alike, this manual provides the critical technical information needed to keep your 1992 Mercury Grand Marquis running smoothly. By following the comprehensive guidance provided, you can ensure long-term reliability and optimal performance, preserving the operational lifespan of your classic vehicle.
Printable: Yes Language: English Compatibility: Pretty much any electronic device, incl. PC & Mac computers, Android and Apple smartphones & tablet, etc. Requirements: Adobe Reader (free)
Recently Viewed
5,521,897Happy Clients
2,594,462eManuals
1,120,453Trusted Sellers
15Years in Business
Price:
Actual Price:
1992 Mercury Grand Marquis Service & Repair Manual