

1990 ISUZU AMIGO Service and Repair Manual
What's Included?
Fast Download Speeds
Offline Viewing
Access Contents & Bookmarks
Full Search Facility
Print one or all pages of your manual
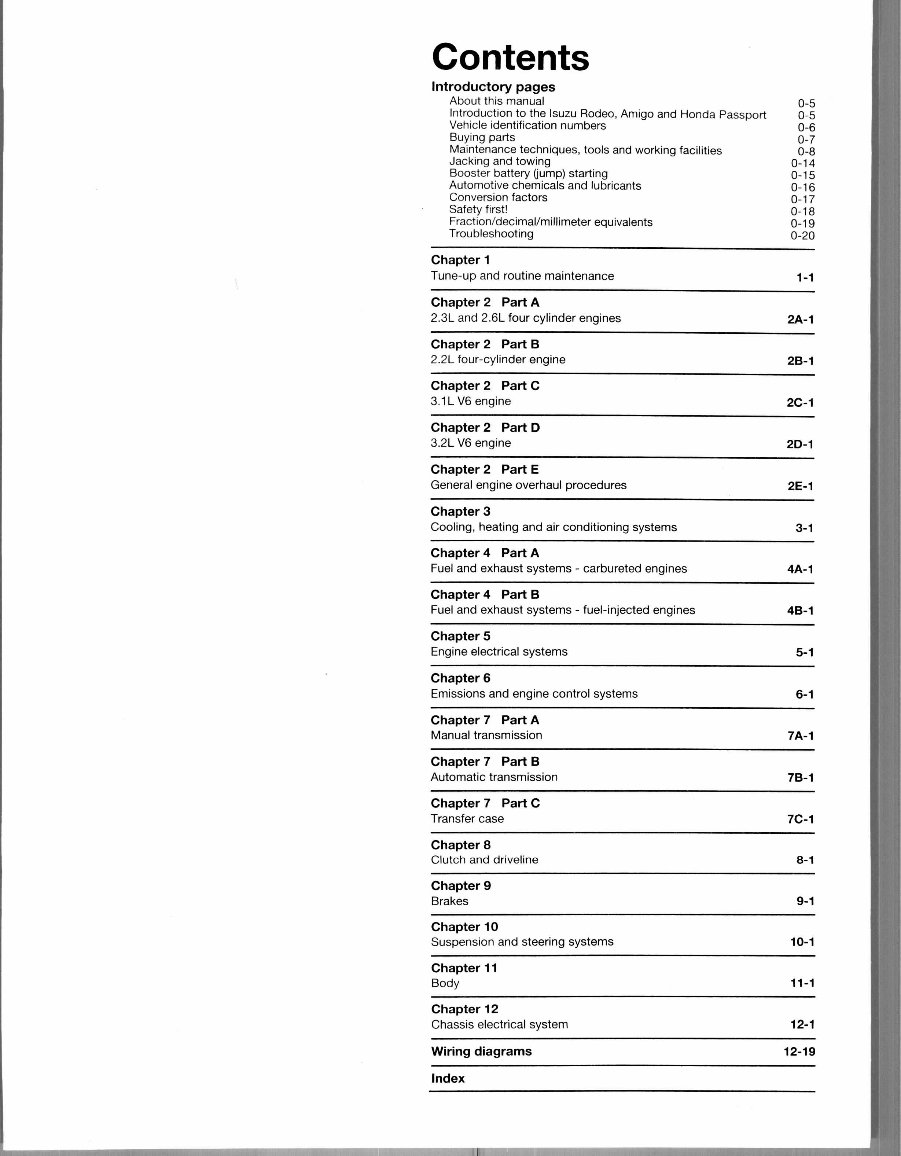
Contents
Introductory pages
About this manual
Introduction to the Isuzu Rodeo, Amigo and Honda Passport
Vehicle identification numbers
Buying parts
Maintenance techniques, tools and working facilities
Jacking and towing
Booster battery (jump) starting
Automotive chemicals and lubricants
Conversion factors
Safety first!
Fraction/decimal/millimeter equivalents
Troubleshooting
Chapter 1
Tune-up and routine maintenance
Chapter 2 Part A
2.3L and 2.6L four cylinder engines
Chapter 2 Part B
2.2L four-cylinder engine
Chapter 2 Part C
3.1 LV6 engine
Chapter 2 Part D
3.2LV6 engine
Chapter 2 Part E
General engine overhaul procedures
Chapter 3
Cooling, heating and air conditioning systems
Chapter 4 Part A
Fuel and exhaust systems - carbureted engines
Chapter 4 Part B
Fuel and exhaust systems - fuel-injected engines
Chapter 5
Engine electrical systems
Chapter 6
Emissions and engine control systems
Chapter 7 Part A
Manual transmission
Chapter 7 Part B
Automatic transmission
Chapter 7 Part C
Transfer case
Chapter 8
Clutch and driveline
Chapter 9
Brakes
Chapter 10
Suspension and steering systems
Chapter 1 1
Body
Chapter 12
Chassis electrical system
Wiring diagrams
0-5
0-5
0-6
0-7
0-8
0-14
0-15
0-16
0-17
0-18
0-19
0-20
1-1
2A-1
2B-1
2C-1
2D-1
2E-1
3-1
4A-1
4B-1
5-1
6-1
7A-1
7B-1
7C-1
8-1
9-1
10-1
11-1
12-1
12-19
Index
0-5
About this manual
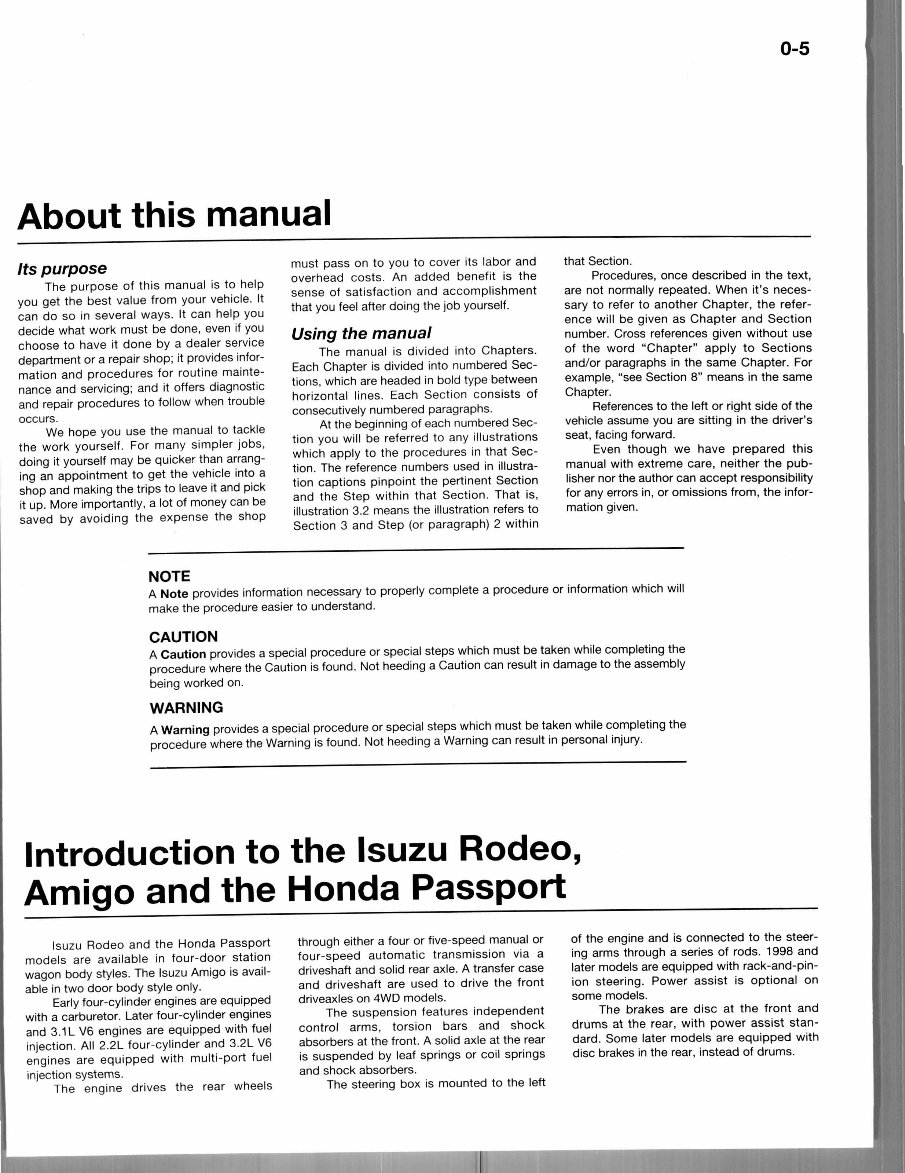
Its purpose
The purpose of this manual is to help
you get the best value from your vehicle. It
can do so in several ways. It can help you
decide what work must be done, even if you
choose to have it done by a dealer service
department or a repair shop; it provides infor-
mation and procedures for routine mainte-
nance and servicing; and it offers diagnostic
and repair procedures to follow when trouble
occurs.
We hope you use the manual to tackle
the work yourself. For many simpler jobs,
doing it yourself may be quicker than arrang-
ing an appointment to get the vehicle into a
shop and making the trips to leave it and pick
it up. More importantly, a lot of money can be
saved by avoiding the expense the shop
must pass on to you to cover its labor and
overhead costs. An added benefit is the
sense of satisfaction and accomplishment
that you feel after doing the job yourself.
Using the manual
The manual is divided into Chapters.
Each Chapter is divided into numbered Sec-
tions, which are headed in bold type between
horizontal lines. Each Section consists of
consecutively numbered paragraphs.
At the beginning of each numbered Sec-
tion you will be referred to any illustrations
which apply to the procedures in that Sec-
tion. The reference numbers used in illustra-
tion captions pinpoint the pertinent Section
and the Step within that Section. That is,
illustration 3.2 means the illustration refers to
Section 3 and Step (or paragraph) 2 within
that Section.
Procedures, once described in the text,
are not normally repeated. When it's neces-
sary to refer to another Chapter, the refer-
ence will be given as Chapter and Section
number. Cross references given without use
of the word "Chapter" apply to Sections
and/or paragraphs in the same Chapter. For
example, "see Section 8" means in the same
Chapter.
References to the left or right side of the
vehicle assume you are sitting in the driver's
seat, facing forward.
Even though we have prepared this
manual with extreme care, neither the pub-
lisher nor the author can accept responsibility
for any errors in, or omissions from, the infor-
mation given.
NOTE
A Note provides information necessary to properly complete a procedure or information which will
make the procedure easier to understand.
CAUTION
A Caution provides a special procedure or special steps which must be taken while completing the
procedure where the Caution is found. Not heeding a Caution can result in damage to the assembly
being worked on.
WARNING
A Warning provides a special procedure or special steps which must be taken while completing the
procedure where the Warning is found. Not heeding a Warning can result in personal injury.
Introduction to the Isuzu Rodeo,
Amigo and the Honda Passport
Isuzu Rodeo and the Honda Passport
models are available in four-door station
wagon body styles. The Isuzu Amigo is avail-
able in two door body style only.
Early four-cylinder engines are equipped
with a carburetor. Later four-cylinder engines
and 3.1L V6 engines are equipped with fuel
injection. All 2.2L four-cylinder and 3.2L V6
engines are equipped with multi-port fuel
injection systems.
The engine drives the rear wheels
through either a four or five-speed manual or
four-speed automatic transmission via a
driveshaft and solid rear axle. A transfer case
and driveshaft are used to drive the front
driveaxles on 4WD models.
The suspension features independent
control arms, torsion bars and shock
absorbers at the front. A solid axle at the rear
is suspended by leaf springs or coil springs
and shock absorbers.
The steering box is mounted to the left
of the engine and is connected to the steer-
ing arms through a series of rods. 1998 and
later models are equipped with rack-and-pin-
ion steering. Power assist is optional on
some models.
The brakes are disc at the front and
drums at the rear, with power assist stan-
dard. Some later models are equipped with
disc brakes in the rear, instead of drums.
mm
0-6
Vehicle identification numbers
Modifications are a continuing and
unpublicized process in vehicle manufactur-
ing. Since spare parts manuals and lists are
compiled
vehicle nu|mbers
identify th'
a numerical basis, the individual
are essential to correctly
component required.
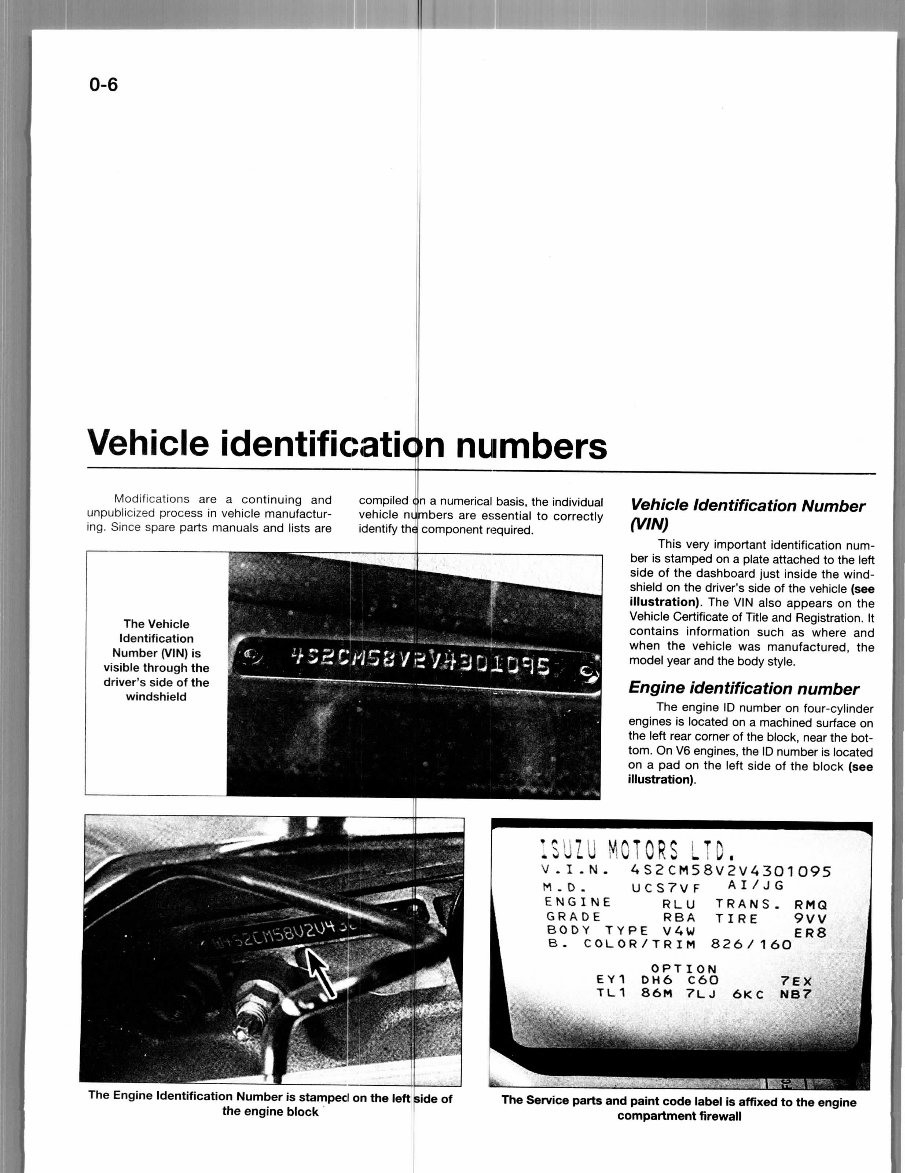
Vehicle Identification Number
(VIN)
This very important identification num-
ber is stamped on a plate attached to the left
side of the dashboard just inside the wind-
shield on the driver's side of the vehicle (see
illustration). The VIN also appears on the
Vehicle Certificate of Title and Registration. It
contains information such as where and
when the vehicle was manufactured, the
model year and the body style.
Engine identification number
The engine ID number on four-cylinder
engines is located on a machined surface on
the left rear corner of the block, near the bot-
tom. On V6 engines, the ID number is located
on a pad on the left side of the block (see
illustration).
The Vehicle
Identification
Number (VIN) is
visible through the
driver's side of the
windshield
iu i UK3 L i I/ ,
4S2CM58V2V4301095
UCS7VF AI/JG
RLU TRANS. RMQ
RBA TIRE 9VV
ER8
V . I. N .
M . D .
ENGINE
GRADE
BODY TYPE VAW
B. COLOR/TRIM
OPTION
EY1 DH6 C6O
TU.1 86M 7LJ 6KC
The Engine Identification Number is stamped on the left side of
the engine block
The Service parts and paint code label is affixed to the engine
compartment firewall
Vehicle identification numbers
0-7
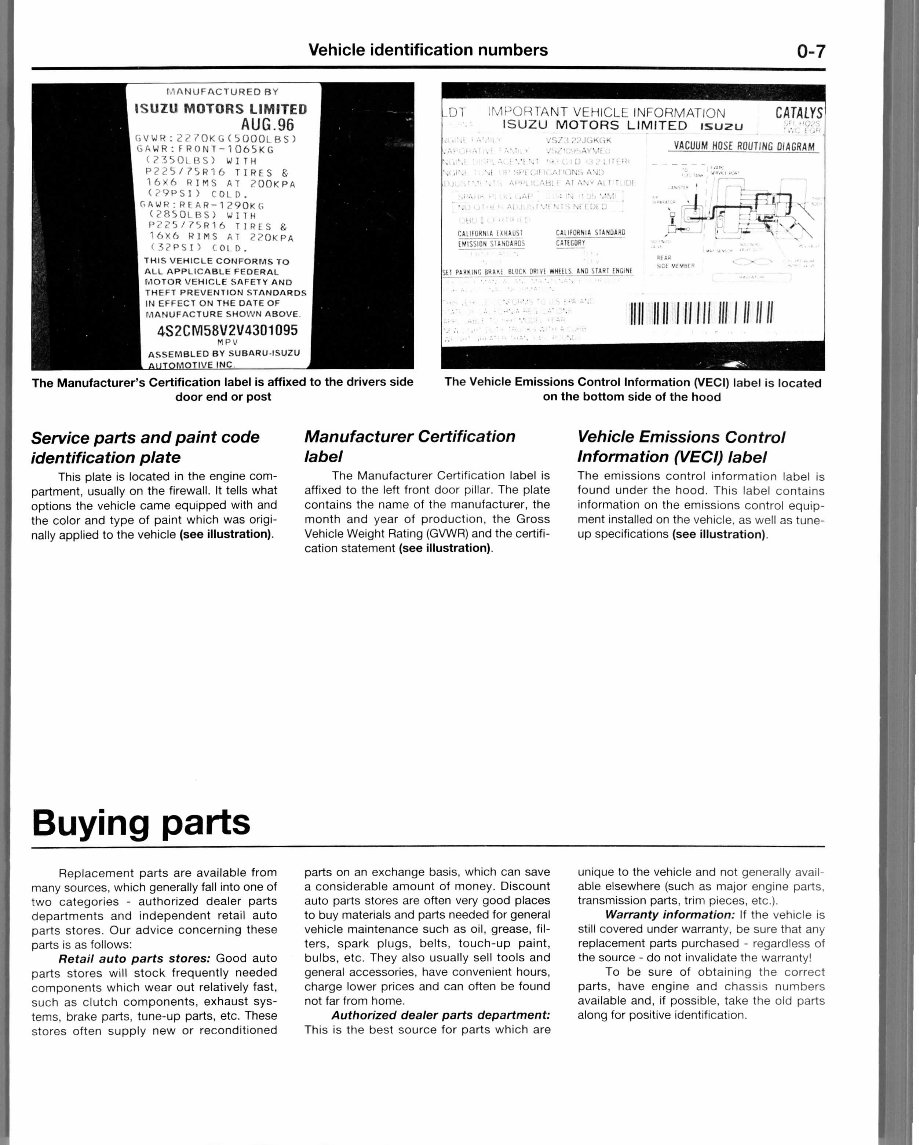
MANUFACTURED BY
ISUZU MOTORS LIMITED
AUG.96
GVWR:Z?/'OKGC'>OOOLBS>
GAWR: FRONT-1065KG
(2350LBS) WITH
P?25/75R16 TIRES &
16X6 RIMS AT ?OOKPA
(?9PSI ) COl D.
GAWR:RFAR-1290KG
<?8SOl. BS> WITH
P225/i">R16 TIRES 8
16X6 RIMS AT ??OKPA
( 3?PS I ) COl D .
THIS VEHICLE CONFORMS TO
ALL APPLICABLE FEDERAL
j MOTOR VEHICLE SAFETY AND
THEFT PREVENTION STANDARDS
IN EFFECT ON THE DATE OF
MANUFACTURE SHOWN ABOVE.
4S2CM58V2V4301095
MPV
SEMBLEO BY SUBARU-ISUZU
J1OTIVE INC
The Manufacturer's Certification label is affixed to the drivers side
door end or post
-DT IMPORTANT VEHICLE INFORMATION CATALYS
ISUZU MOTORS LIMITED isuzu v.M; v
vs/^^Avvf* JM&MLMOMJMiRlM.
-.: : , A •'.'>•,? '•'*.* {. U) ','•• ? I \' ^'^ _..„
'.• : 'jl ! JP SP: CiMs;An()N;> AMD ^ .iv v^:' «.*•
N''rs \ • 1/1 :.,
C»LIFHmil« SHMMRD
CUUSOR*
."HEfl. -*M.. S J**!.M?!,"!. ,1! PIBKIHG B8»« .
The Vehicle Emissions Control Information (VECI) label is located
on the bottom side of the hood
Service parts and paint code
identification plate
This plate is located in the engine com-
partment, usually on the firewall. It tells what
options the vehicle came equipped with and
the color and type of paint which was origi-
nally applied to the vehicle (see illustration).
Manufacturer Certification
label
The Manufacturer Certification label is
affixed to the left front door pillar. The plate
contains the name of the manufacturer, the
month and year of production, the Gross
Vehicle Weight Rating (GVWR) and the certifi-
cation statement (see illustration).
Vehicle Emissions Control
Information (VECI) label
The emissions control information label is
found under the hood. This label contains
information on the emissions control equip-
ment installed on the vehicle, as well as tune-
up specifications (see illustration).
Buying parts
Replacement parts are available from
many sources, which generally fall into one of
two categories - authorized dealer parts
departments and independent retail auto
parts stores. Our advice concerning these
parts is as follows:
Retail auto parts stores: Good auto
parts stores will stock frequently needed
components which wear out relatively fast,
such as clutch components, exhaust sys-
tems, brake parts, tune-up parts, etc. These
stores often supply new or reconditioned
parts on an exchange basis, which can save
a considerable amount of money. Discount
auto parts stores are often very good places
to buy materials and parts needed for general
vehicle maintenance such as oil, grease, fil-
ters, spark plugs, belts, touch-up paint,
bulbs, etc. They also usually sell tools and
general accessories, have convenient hours,
charge lower prices and can often be found
not far from home.
Authorized dealer parts department:
This is the best source for parts which are
unique to the vehicle and not generally avail-
able elsewhere (such as major engine parts,
transmission parts, trim pieces, etc.).
Warranty information: If the vehicle is
still covered under warranty, be sure that any
replacement parts purchased - regardless of
the source - do not invalidate the warranty!
To be sure of obtaining the correct
parts, have engine and chassis numbers
available and, if possible, take the old parts
along for positive identification.

0-8
Maintenance techniques,
tools and working facilities
Maintenance techniques
There are a number of techniques
involved in maintenance and repair that will
be referred to throughout this manual. Appli-
cation of these techniques will enable the
home mechanic to be more efficient, better
organized and capable of performing the var-
ious tasks properly, which will ensure that the
repair job is thorough and complete.
Fasteners
Fasteners are nuts, bolts, studs and
screws used to hold two or more parts
together. There are a few things to keep in
mind when working with fasteners. Almost all
of them use a locking device of some type,
either a lockwasher, locknut, locking tab or
thread adhesive. All threaded fasteners
should be clean and straight, with undam-
aged threads and undamaged corners on the
hex head where the wrench fits. Develop the
habit of replacing all damaged nuts and bolts
with new ones. Special locknuts with nylon or
fiber inserts can only be used once. If they
are removed, they lose their locking ability
and must be replaced with new ones.
Rusted nuts and bolts should be treated
with a penetrating fluid to ease removal and
prevent breakage. Some mechanics use tur-
pentine in a spout-type oil can, which works
quite well. After applying the rust penetrant,
let it work for a few minutes before trying to
loosen the nut or bolt. Badly rusted fasteners
may have to be chiseled or sawed off or
removed with a special nut breaker, available
at tool stores.
If a bolt or stud breaks off in an assem-
bly, it can be drilled and removed with a spe-
cial tool commonly available for this purpose.
Most autof lotive
this task,
such as tl
have been
Flat
machine shops can perform
s well as other repair procedures,
ie repair of threaded holes that
stripped out.
Dashers and lockwashers, when
removed from an assembly, should always
be replaced exactly as removed. Replace any
damaged washers with new ones. Never use
a lockwasher on any soft metal surface (such
as aluminum), thin sheet metal or plastic.
Grade 1 or 2 Grade 5
9
Grade 8
Bolt strength marking (standard/SAE/USS; bottom - metric)
3 Dots
Grade Identification
Hex Nut
Grade 5
Hex Nut
Grade 8
6 Dots
Standard hex nut
strength markings
Grade Identification
Hex Nut
Property
Class 9
Hex Nut
Property
Class 10
Arabic 9
Arabic 10
Class
9.8
Class
8.8
Metric hex nut
strength markings
Metric stud strength markings
f 00-1 HAYNES
You're Reading a Preview
What's Included?
Fast Download Speeds
Offline Viewing
Access Contents & Bookmarks
Full Search Facility
Print one or all pages of your manual
$37.99
Viewed 18 Times Today


Secure transaction
What's Included?
Fast Download Speeds
Offline Viewing
Access Contents & Bookmarks
Full Search Facility
Print one or all pages of your manual
$37.99
The 1990 ISUZU AMIGO Service and Repair Manual is a comprehensive guide to maintaining and fixing your 1990 ISUZU AMIGO. Whether you are a professional mechanic or a DIY enthusiast, this manual is a valuable resource for keeping your vehicle in top shape.
The manual covers a wide range of topics including engine maintenance, electrical systems, transmission repairs, cooling system troubleshooting, and much more. With detailed instructions and illustrations, you'll be able to perform repairs and maintenance tasks with confidence.
The 1990 ISUZU AMIGO Service and Repair Manual is designed specifically for the 1990 ISUZU AMIGO model. It is not compatible with other ISUZU models.
- 1990 ISUZU AMIGO model


