

2022 Honda Civic OEM Service & Repair Manual
What's Included?
Fast Download Speeds
Online & Offline Access
Access PDF Contents & Bookmarks
Full Search Facility
Print one or all pages of your manual

■ Purpose/overview of guidance
This "guidance" describes the attitude and basic knowledge that you should know in advance of any maintenance.
The purpose of this guidance is to improve the maintenance quality and the customers' satisfaction by understanding the attitude and basic knowledge as a mechanic.
■ Before working
1. The vehicle you are doing the maintenance/repair on is the customers property.
Every vehicle you work on is a customer's beloved car. You may forget such a matter when you handle many vehicles in your daily work.
Reliable and accurate work after understanding the intentions of the customer's complaints will eliminate the customer's "worries" and provide them "reassurance".
You should always be aware of the fact that you are entrusted with the repair/maintenance of the customer's beloved car.
2. Differences and ways of thinking between maintenance and repair
Maintenance・・・ Replace consumables, remove factors that may cause deterioration of vehicle performance or inconvenience in function, and maintain/recover of performance/function
Repair・・・・・・・・Restore/replace the broken parts and recover the function of the vehicle
Understand the meaning of each work, check the interview sheet, think about what procedures are necessary for the vehicle, what service the customer wants, and try to do the work properly.
3. Treat the customer's vehicle with great care
It is important to take preventive actions by using steering wheel covers, seat covers, floor papers, fender covers, etc. to protect the customer's vehicle from scratches and dirt.
■ When working
1. Good work comes with safety, certainty and practicality
Safety is a top priority in all operations. A major disaster may lead to problems related to the company's credibility. If each technician works reasonably, and does the method described in the service
manual, he/she will be able to work safely, quickly, and efficiently. You can check the standard operation time in the parts catalog.
2. Organize/order
Organize: Divide things into necessary and unnecessary items and dispose the unnecessary items.
Order: Arrange what you need so that anyone can carry out the task any time.
It is important to organize first, then order. Organizing and ordering are effective not only in preventing disasters but also in improving work efficiency.
3. Examples of wearing proper protective equipment (dust mask, protective glasses, safety shoes, etc.)
Proper protective equipment should be worn to ensure safety while doing each task or when using specific tools.
The following are examples:
Protective equipment for basic work ・・・uniform, work cap, safety shoes
Impact wrench ・・・Protective glasses, earplugs
● Steering wheel cover, Seat cover, Floor paper ● Fender cover
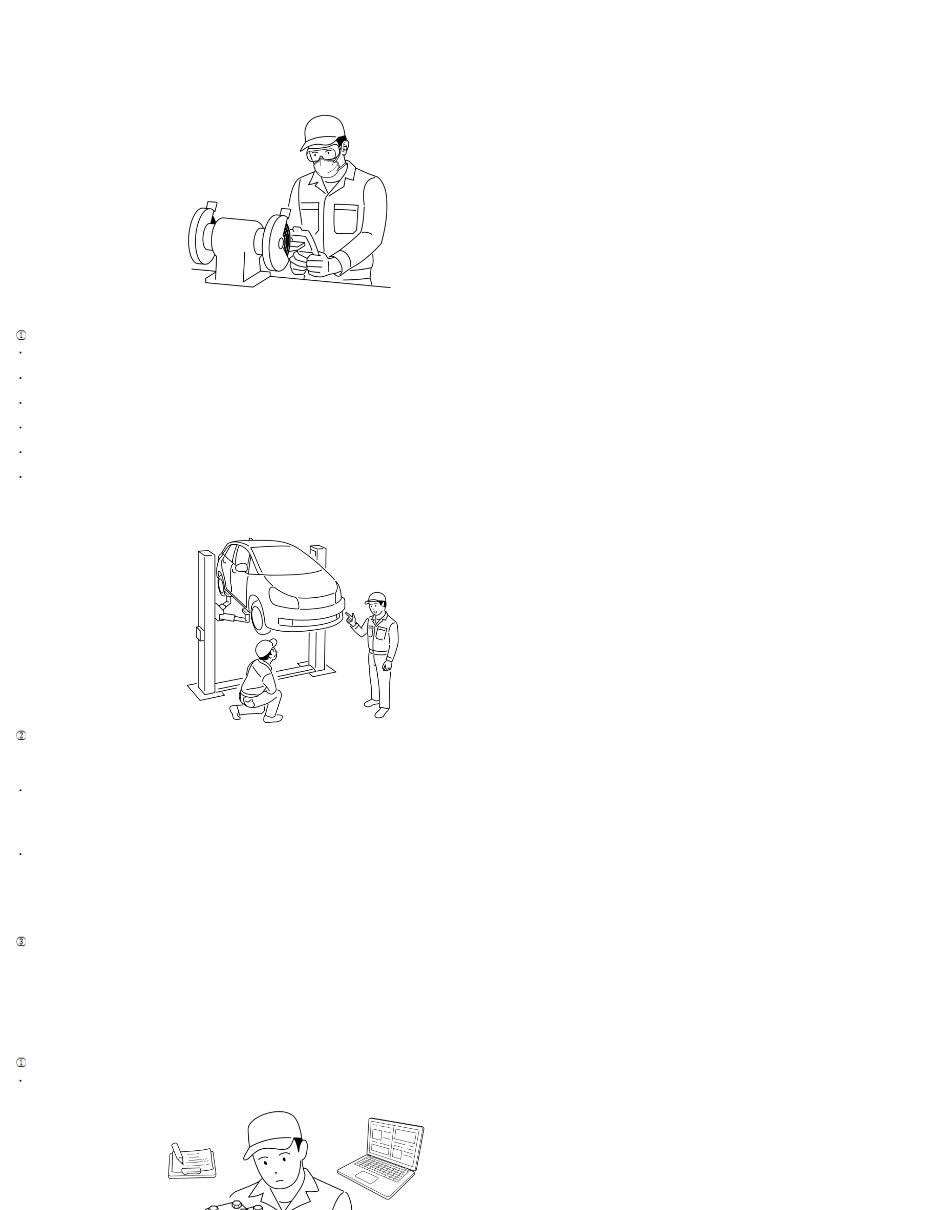
Sander, grinder ・・・Protective glasses, earplugs, dust mask
*When there is a risk of getting caught in rotating objects, do not use cotton work gloves.
Read the instruction manual for each tool carefully and use it properly.
4. Example of proper work
When lifting up a vehicle:
Be sure to set up the lift attachment at the point specified for each model.
Lift the vehicle slightly from the ground, shake the vehicle lightly, and check that the vehicle is stable.
When working with others, talk to each other and check each other's safety.
Never go under the vehicle while operating the lift.
When starting the drive system including the engine and electric powertrain with the vehicle lifted up, pay attention to your surroundings, and the safety of other workers.
Be careful about air ventilation when working with the engine running.
Failure to do the above may result in damage to the vehicle, injury or accidents.
Consideration for fire
It is inevitable to handle flammable substances for maintenance/repair. Therefore, a small fire source often leads to a large fire in factories.
It is important to properly manage the maintenance supplies and work environment.
Do not use spray-type chemicals for parts that generate heat or sparks because they are filled with flammable gas.
-
Some products are flammable, or have flammable gas included in a spray can.
Carefully check the handling precautions for products that are used.
Use products for its intended purposes
-
Highly flammable materials such as parts cleaners can lead to serious accidents if used incorrectly.
Example:
-A fire starting due to parts cleaner being used to check for oil leaks with the engine running.
-Using parts clearer instead of floor cleaner to clean the floor, and a fire starting due to vehicle heat.
Keep up with required qualifications and courses
Always check for the latest information on work-related regulations and qualifications, and make sure that you do not miss any required courses.
5. Work guidance
To do work, various knowledge, experience, and information are required. The basic knowledge is described below. Refer to it as necessary knowledge before starting work.
Removal/installation of parts
When checking a failed part, investigate the cause, remove it, grasp whether it is necessary to disassemble, then do the work according to the procedure shown in the manual.
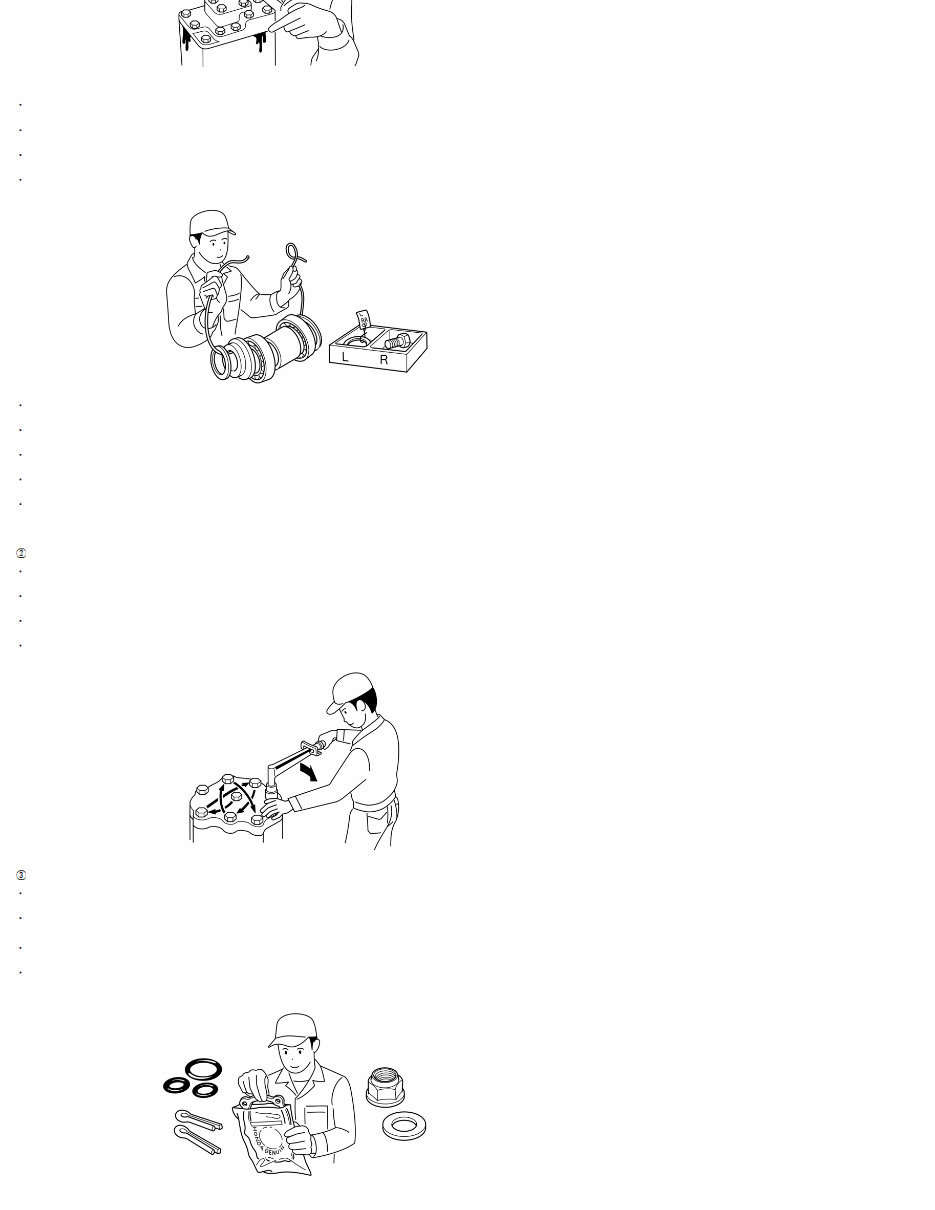
Prepare the necessary parts in advance before starting the work.
Check the assembly condition in advanced before removing and disassembling.
Check the condition of every part you remove, and check for deformation, damages, scratches, etc.
When disassembling parts with a large number of components, the parts look similar, or there are same parts on the right/left of the vehicle, organize them so prevent confusion when assembling.
Assembling or orienting parts incorrectly can cause malfunctions. Make sure you replace/repair it by being organized, and referring to the service manual.
Before assembling, confirm that the parts to be installed are correct.
Make sure not to drop any removed parts to prevent damaging it, and losing any parts. It is unproductive to have to replace or find lost items.
Preventive measures are also required for parts that may fall off or be lost during the removal/installation.
When handling precision parts such as engines/transmissions, be careful not to let foreign material get inside.
Some work such as cleaning the liquid packing may generate dust, but take measures to prevent it from getting inside.
Use of tools
Make sure to use the specific special tool when required/instructed. There are risks of damaging parts and injury if a different tool is used.
When using power tools, read and follow the instruction manual for the tool.
Controlling the torque when using power tools is difficult, be careful when using it for installation.
Tighten bolts, nuts, and screws on the opposite end of each other, from the inside to outside, and the largest to smallest in diameter to the specified torque.
Replacement of parts
Use genuine Honda parts, or the recommended parts/greases in order to maximize the performance of Honda vehicles.
Be sure to replace the parts specified in the service manual, such as gaskets, packings, O-rings, cotter pins, lock washers, self-lock nuts, etc., with new ones when disassembling.
*Never reuse designated replacement parts when assembling, because the original performance may not be delivered.
Inspect rubber parts for deterioration or damage during removal or disassembly, and replace them if necessary.
There are rubber parts that deteriorate when exposed to gasoline, oil, or cleaning oil, etc.
For rubber parts that do not require grease, make sure they are not exposed to them, if they are, wipe it off immediately.
Aluminum parts such as engines, transmissions, and suspensions may use special bolts and nuts. Therefore, when replacing bolts and nuts, be sure to check the part number in the parts list and use
genuine Honda parts.
Thoroughly clean and wash each part to be reused, and inspect and measure in detail as necessary.
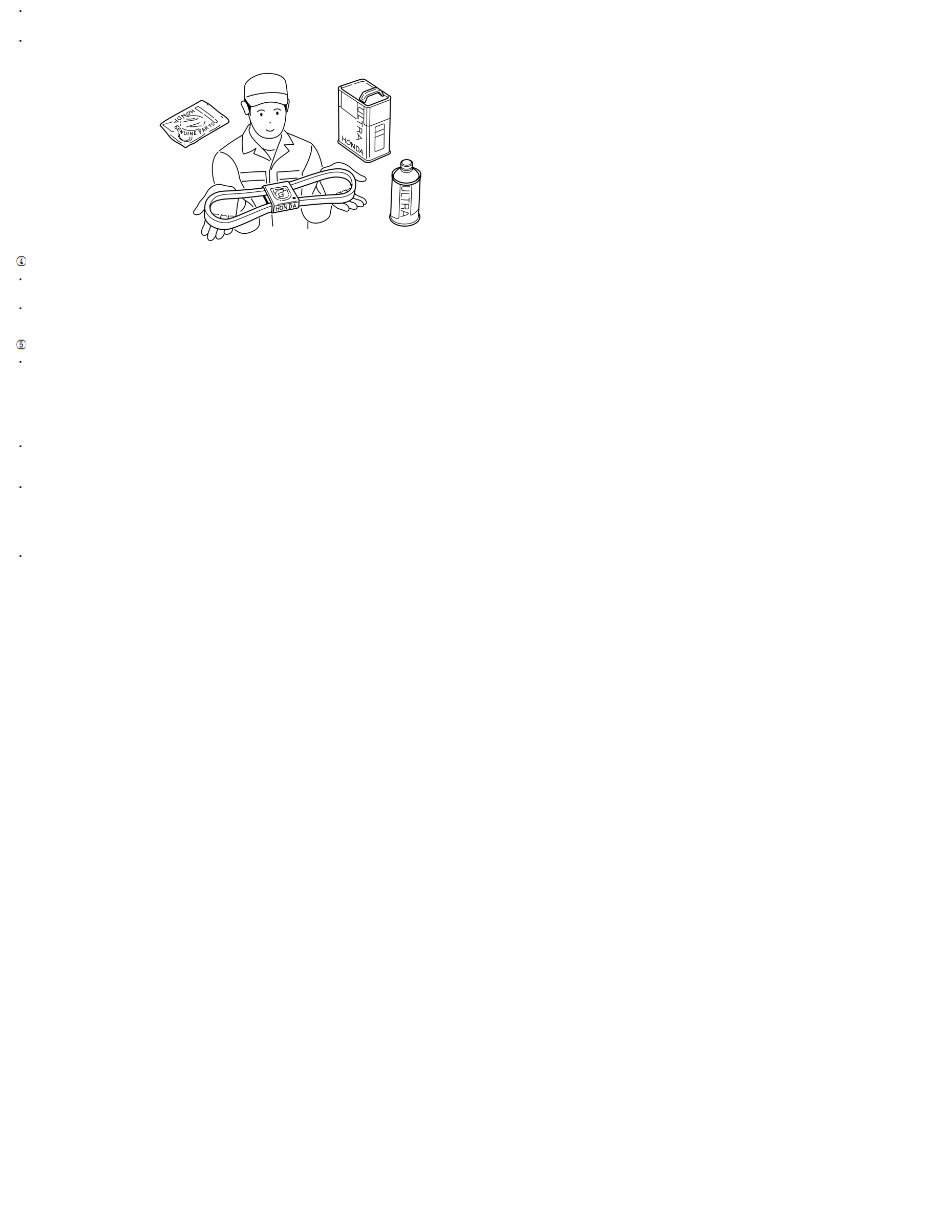
Handling of greases
During assembly and installation, apply the specified grease to the instructed location.
Failing to do so can result in poor performance, and can be the cause of unexpected troubles.
When using grease or spray including silicon, be careful not to get it on the terminals of the surrounding switches and couplers. Also, make sure not to touch them with your hands or gloves that have
grease on them. This can cause connection issues.
Other precautions for work
Do not damage the vehicle or cause bad effects to its function.
Not only does it cause unnecessary man-hours, but it also damages the customer's precious vehicle.
Example:
-Removal/installation of electrical components with the battery connected.
-Unnecessarily revving the engine, or driving the vehicle when there is a problem with it.
-Use of non-designated chemical products on the body and glass.
Make sure to check the condition of the vehicle before and after work. (Change of condition, change of function, degree of recovery, etc.)
Not only can you see the effects of the maintenance you have done, but you may also notice any problems immediately.
Also, make sure you did not leave any tools or parts in/on the vehicle. In some cases, leaving a shop rag in the engine room can lead to a vehicle fire.
When disassembling and assembling parts, check the items below:
- Confirm that the correct parts have been assembled.
- Confirm that the function works normally at the final inspection.
If you get oil or any foreign matter in your eyes, mouth, or on your skin, take appropriate measures such as washing it off with a lot of water and seek medical treatment immediately.
Service Information
The service and repair information contained in this manual is intended for use by qualified, professional technicians. Attempting
service or repairs without the proper training, tools, and equipment could cause injury to you or others. It could also damage the
vehicle or create an unsafe condition.
This manual describes the proper methods and procedures for doing service, maintenance, and repairs. Some procedures require the
use of specially designed tools and dedicated equipment. Any person who intends to use a replacement part, a service procedure, or
a tool that is not recommended by Honda, must determine the risks to their personal safety and the safe operation of the vehicle.
If you need to replace any parts, always use the correct parts supplied by a Honda dealer. Never use inferior quality parts.
FOR YOUR CUSTOMER'S SAFETY
Proper service and maintenance are essential to the customer's safety and the reliability of the vehicle. Any error or oversight while
servicing a vehicle can result in faulty operation, damage to the vehicle, or injury to others.
Improper service or repairs can create an unsafe condition that can cause your customers or others to be seriously hurt or killed.
Follow the procedures and precautions in this manual and other service materials carefully.
FOR YOUR SAFETY
Because this manual is intended for a professional service technician, we do not provide warnings about many basic shop safety
practices (for example, hot parts-wear gloves). If you have not received shop safety training or do not feel confident about your
knowledge of safe servicing practices, we recommend that you do not attempt to do the procedures described in this manual.
Failure to properly follow instructions and precautions can cause you to be seriously hurt or killed.
Follow the procedures and precautions in this manual carefully.
Some of the most important general service safety precautions follow this text. However, we cannot warn you of every conceivable
hazard that can arise in doing service and repair procedures. Only you can decide whether or not you should do a given task.
IMPORTANT SAFETY PRECAUTIONS
Make sure you have a clear understanding of all basic shop safety practices, and that you are wearing appropriate clothing and
using safety equipment. When doing any service task, be especially careful of the following:
-
Read all of the instructions before you begin, and make sure you have the tools, the replacement or repair parts, and the skills
required to do the tasks safely and completely.
-
Protect your eyes by using proper safety glasses, goggles, or face shields anytime you hammer, drill, grind, or work around
pressurized air or liquids and springs, or other stored-energy components. If there is any doubt, put on eye protection.
-
Use other protective wear when necessary, such as gloves or safety shoes. Handling hot or sharp parts can cause severe
burns or cuts. Before you grab something that looks like it can hurt you, stop and put on gloves.
-
Protect yourself and others whenever you have the vehicle up in the air. Anytime you raise the vehicle, either with a lift or a
jack, make sure that it is always securely supported. Use safety stands if needed.
-
Protect yourself by wearing an approved welding helmet, gloves, and safety shoes anytime you are welding. You can receive
burns from hot parts; allow the parts to cool before working in that area.
-
Protect yourself from paints and harmful chemicals by wearing an approved respirator, eye protection, and gloves whenever
you are painting. Spray paint only in an approved paint booth that is well ventilated.
Make sure the engine is off before you begin any servicing procedures, unless the instruction tells you to do otherwise. This will
help eliminate several potential hazards:
-
Carbon monoxide poisoning from engine exhaust. Be sure there is adequate ventilation whenever you run the engine.
-
Burns from hot parts or coolant. Let the engine and exhaust system cool before working in those areas.
-
Injury from moving parts. If the instruction tells you to run the engine, be sure your hands, fingers, and clothing are out of the
way.
Gasoline vapors and hydrogen gases from batteries are explosive. To reduce the possibility of a fire or explosion, be careful when
working around gasoline or batteries:
-
Use only a nonflammable solvent, not gasoline, to clean parts.
-
Never drain or store gasoline in an open container.
-
Keep all cigarettes, sparks, and flames away from the battery and all fuel-related parts.

INDEX
Before Troubleshooting
How to Use the HDS
Intermittent Failures
Electrical Troubleshooting Information
Service Information
Five-Step Troubleshooting
Circuit Measurement Inspection Description
CAN Circuit Troubleshooting Information
Before Troubleshooting
1. Check applicable fuses in the appropriate fuse/relay box.
2. Check the 12 volt battery for damage, state of charge, and clean and tight connections.
Do not quick-charge a 12 volt battery unless the 12 volt battery ground cable has been disconnected; otherwise
you will damage the alternator diodes.
Do not attempt to crank the engine with the 12 volt battery ground cable loosely connected, or you will severely
damage the wiring.
How to Use the HDS
NOTE: For specific operations, refer to the HDS user's manual.
1. If the system indicator(s) stay on, turn the vehicle to the OFF (LOCK) mode, and connect the HDS to the data link
connector (DLC).
2. Turn the vehicle to the ON mode.
3. Make sure the HDS communicates with the vehicle. If it does not, go to the DLC circuit troubleshooting.
4. Check the DTC and note it. Also check the freeze data* and the on-board snapshot data*. Then refer to the indicated
DTC's troubleshooting, and do the appropriate troubleshooting procedure.
*: For applicable systems
NOTE:
The HDS can read the DTC, the freeze data, the current data, and each system data.
Freeze data indicates the system conditions when the first system malfunction that activated the indicator was
detected.
After troubleshooting, clear the DTCs with the HDS.
Intermittent Failures
The term Intermittent Failure means a system may have had a failure, but it checks OK now.
When a DTC troubleshooting results in intermittent failure, try to reproduce the failure under the same conditions with the
on-board snapshot if the on-board snapshot has been recorded.
If you cannot reproduce the condition, check for loose connections and terminals. Also check ground and power
connections related to the circuit that you are troubleshooting.
Service Information
Periodically, new software or new service procedures may become available. Always check online for the latest software or
service information related to the DTCs or symptoms you are troubleshooting.
Five-Step Troubleshooting
1. Verify The Concern:
-
Make sure you understand and can verify the customers concern. Troubleshooting will not work if it doesn't apply to
the symptom, or if there is no current failure.

NOTE: For intermittent concerns, review how often the concern occurs and under what conditions with the
customer as well as service bulletin, news, or other engineering information.
2. Understand The System:
-
Make sure you understand how the system, components, and circuits normally operate. Compare operation to
known good vehicles and systems if necessary. Based on the symptoms and system operation, identify potential
causes of the problem.
3. Isolate The Problem By Testing:
-
Review the potential causes and available published troubleshooting. Eliminate potential causes as possibilities
using troubleshooting testing methods until a failure is found. This may include reviewing multiple symptoms for a
common failure.
4. Fix The Problem:
-
Once a failure is found, repair or replace the component(s) as needed.
5. Make Sure The System Works:
-
Verify the concern is addressed. Operate the system under the same conditions in step 1 and confirm the symptom
is corrected.
Circuit Measurement Inspection Description
When inspecting an electrical circuit, refer to the following information:
Open/Shorted Wire Inspection
Power Supply Inspection
CAN Circuit Troubleshooting Information
NOTE: The F-CAN circuit described below is targeted for vehicles equipped with CAN gateway.
1. Make sure the vehicle is in the OFF (LOCK) mode.
2. Connect the HDS to the data link connector (DLC).
3. Turn the vehicle to the ON mode.
4. Make sure the HDS communicates with the vehicle. If it does not, go to the DLC circuit troubleshooting.
5. B-CAN: From the BODY ELECTRICAL SYSTEM SELECT menu, select B-CAN CONTROL UNITS INFORMATION, and
then select CHECK CONNECTED CONTROL UNITS.
F-CAN: From the SYSTEM SELECT menu, select CAN Gateway, and then select CHECK CONNECTED CONTROL
UNITS.
6. Check that the electronic control units (ECU) are communicating with the HDS.
-
If an ECU is communicating with the HDS, "DETECT" will be displayed.
-
If an ECU is not communicating, or the vehicle is not equipped with that ECU, "NOT AVAILABLE" will be displayed.
7. If a control unit is not communicating, confirm which ECUs are communicating, then refer to the CAN Communication
Line from the Electrical Wiring Diagrams to find the malfunction point.
For example, when “UNIT E” is communicating, but “UNIT F" and “UNIT G" are not communicating, that will direct you
to the malfunction point (A).
HDS
Communication Line
CAN
DETECTION
UNIT*
CAN Line
UNIT B
UNIT C
UNIT D
UNIT E
UNIT A
×
DLC

UNIT F
UNIT G
*CAN Detection Unit:
・For B-CAN Line: MICU
・For F-CAN Line: CAN GATEWAY
×
A

Links:
Electrical Troubleshooting Information
connect the HDS to the data link connector (DLC)
go to the DLC circuit troubleshooting
Open/Shorted Wire Inspection
Power Supply Inspection
Connect the HDS to the data link connector (DLC)
go to the DLC circuit troubleshooting

NOTE: Unless otherwise indicated, the illustrations show 4-door model.
Front Passenger's Compartment:
Rear Passenger's Compartment: Rear Passenger's Compartment:
Steering Wheel: Driver's Doorjamb Area:
SRS WARNING
INFORMATION
FRONT PASSENGER'S
KNEE AIRBAG
MODULE DANGER
SEAT BELT
TENSIONER WARNING
SIDE AIRBAG
MODULE DANGER
MONITOR
NOTICE
DRIVER'S KNEE
AIRBAG MODULE
DANGER
SEAT BELT OUTER LAP
TENSIONER WARNING
FRONT PASSENGER'S
AIRBAG
MODULE DANGER
PASSENGER'S AIRBAG
WARNING TAG (CHILD SEAT)
(USA and Mexico models)
SIDE CURTAIN AIRBAG
MODULE DANGER
REAR SIDE AIRBAG
MODULE DANGER
REAR SEAT BELT
TENSIONER WARNING
You're Reading a Preview
What's Included?
Fast Download Speeds
Online & Offline Access
Access PDF Contents & Bookmarks
Full Search Facility
Print one or all pages of your manual
$63.99
$83.99
Viewed 33 Times Today


Secure transaction
What's Included?
Fast Download Speeds
Online & Offline Access
Access PDF Contents & Bookmarks
Full Search Facility
Print one or all pages of your manual
$63.99
$83.99
The Honda Civic 2022 Repair Manual is an essential guide for all vehicle owners and automotive technicians. This comprehensive manual provides detailed information, practical insights, and step-by-step instructions to maintain, Repair, and repair the 2022 Honda Civic.
The manual includes the following key sections:
- General Information
- Maintenance
- Engine Mechanical
- Engine Electrical
- Engine Cooling
- Fuel and Emissions
- Transaxle and Transmission
- Driveline/Axle
- Suspension
- Steering
- Brakes
- Body and Accessories
- Electrical
- Heating, Ventilation, and Air Conditioning (HVAC)
- Restraints
Each section contains:
- Detailed diagrams and illustrations
- Specifications and standards
- Testing procedures
- Diagnostic codes and troubleshooting tips
- Repair and replacement procedures
Whether you are a professional mechanic or a car enthusiast, the Honda Civic 2022 Repair Manual is an invaluable resource to ensure your vehicle operates at its best. Keep this manual handy for accurate information on servicing your Honda Civic.


