

2005-2007 Honda Accord Service & Repair Manual
What's Included?
Fast Download Speeds
Offline Viewing
Access Contents & Bookmarks
Full Search Facility
Print one or all pages of your manual

2003-07 ENGINE
Engine Assembly - Accord (V6)
ENGINE REMOVAL
Special Tools Required
Front subframe adapter VSB02C000016
Engine support hanger, A and Reds AAR-T-12566
Engine hanger balance bar VSB02000019
1. Make sure you have the anti-theft codes for the radio and navigation system,
then write down the customer's audio presets. Make sure the ignition switch is
OFF.
2. Remove the windshield wiper arms, then remove the cowl cover, refer to
COWL COVER REPLACEMENT .
3. Remove the bulkhead cover:
2-door, refer to FRONT GRILLE REPLACEMENT
4-door, refer to FRONT GRILLE REPLACEMENT
4. Remove the support struts from the engine hood. Move the engine hood to a
vertical position, then reinstall the right side support strut as shown in Fig. 1 .
NOTE:
Use fender covers to avoid damaging painted surfaces.
To avoid damage, unplug the wiring connectors
carefully while holding the connector portion.
Mark all wiring and hoses to avoid misconnection. Also,
be sure that they do not contact other wiring, hoses, or
interfere with other parts.
NOTE: Do not attempt to close the hood with the support strut
in the vertical position, as it will damage the support
strut and hood.
2006 Honda Accord
2003-07 ENGINE Engine Assembly - Accord (V6)
2006 Honda Accord
2003-07 ENGINE Engine Assembly - Accord (V6)
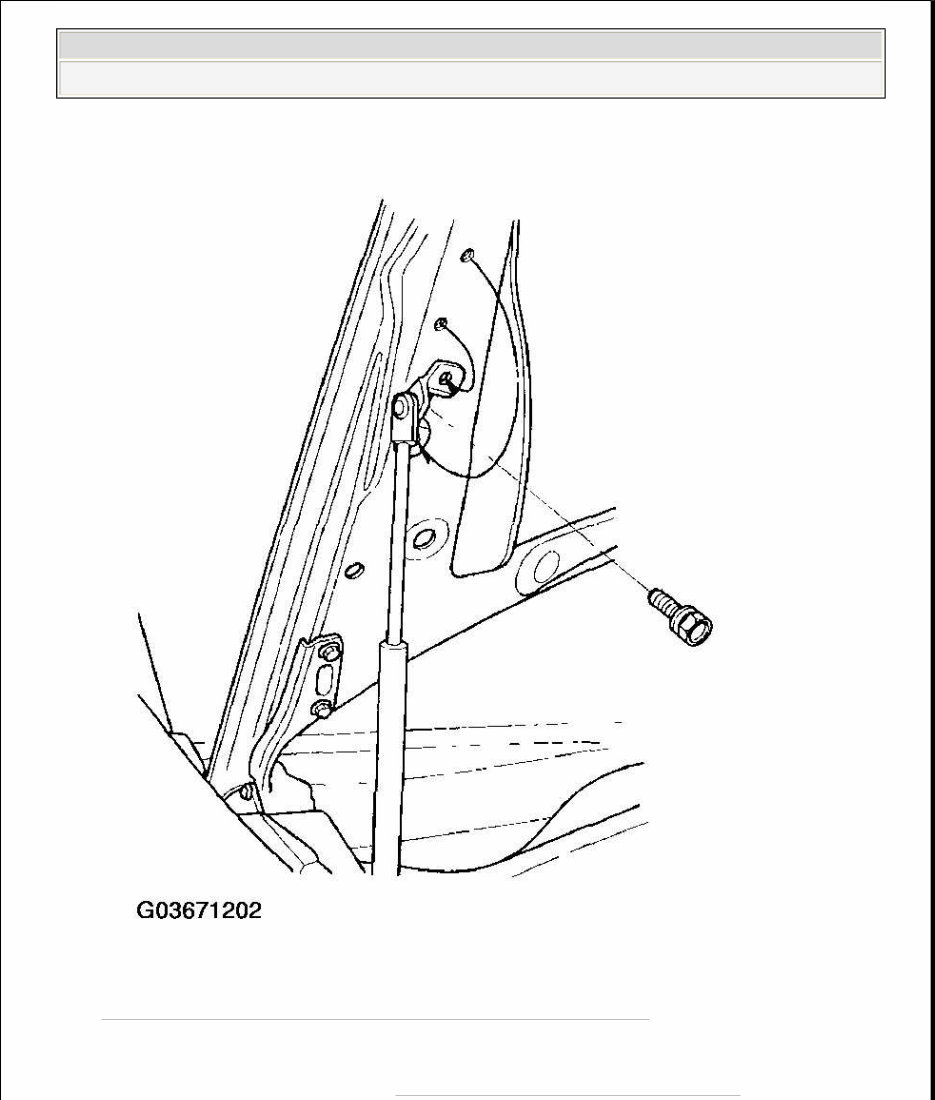
Fig. 1: Identifying Support Strut From Engine Hood
Courtesy of AMERICAN HONDA MOTOR CO., INC.
5. Relieve the fuel pressure (see FUEL PRESSURE RELIEVING ).
2006 Honda Accord
2003-07 ENGINE Engine Assembly - Accord (V6)
6. Drain the power steering system fluid, then plug the fluid reservoir and return
hose (see FLUID REPLACEMENT ).
7. Disconnect the negative cable from the battery first, then disconnect the
positive cable.
8. Remove the battery.
9. Remove the air cleaner housing (see AIR CLEANER
REMOVAL/INSTALLATION ).
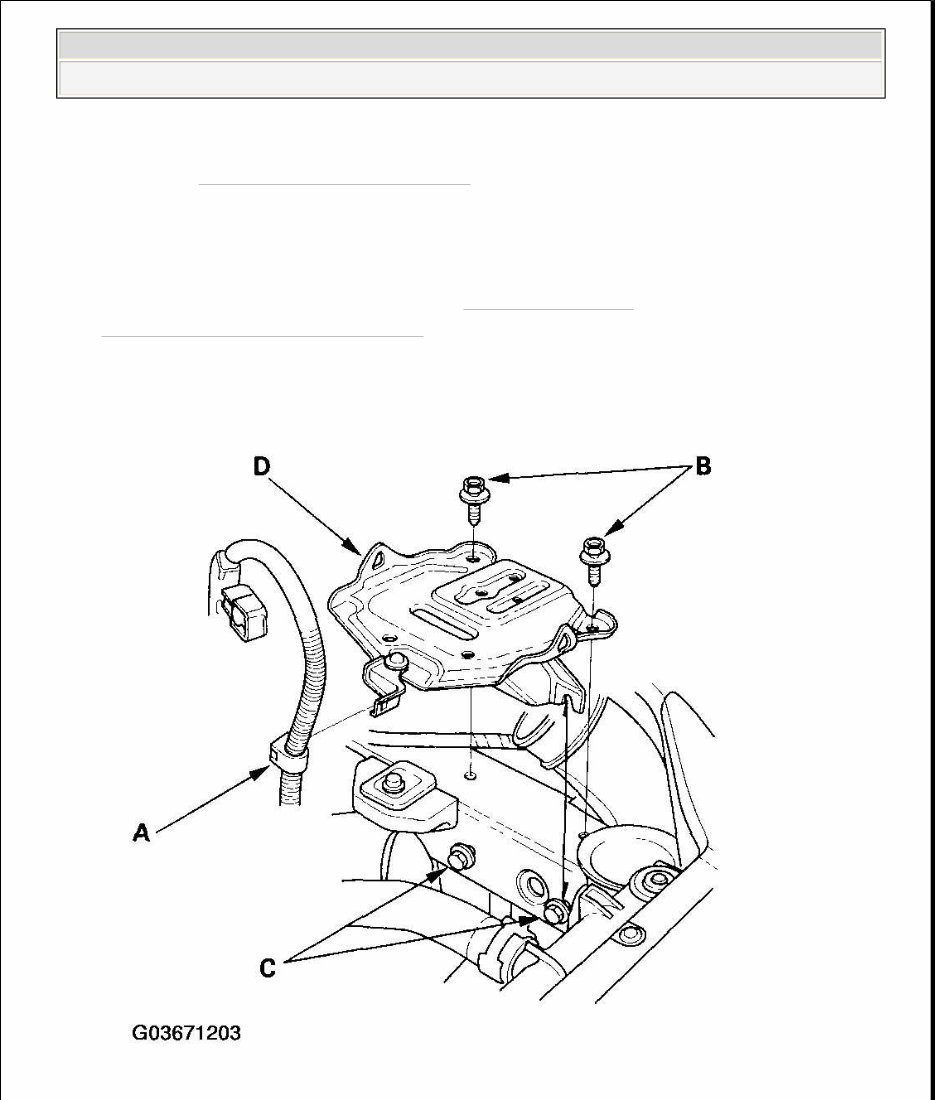
10. Remove the harness clamp (A).
2006 Honda Accord
2003-07 ENGINE Engine Assembly - Accord (V6)
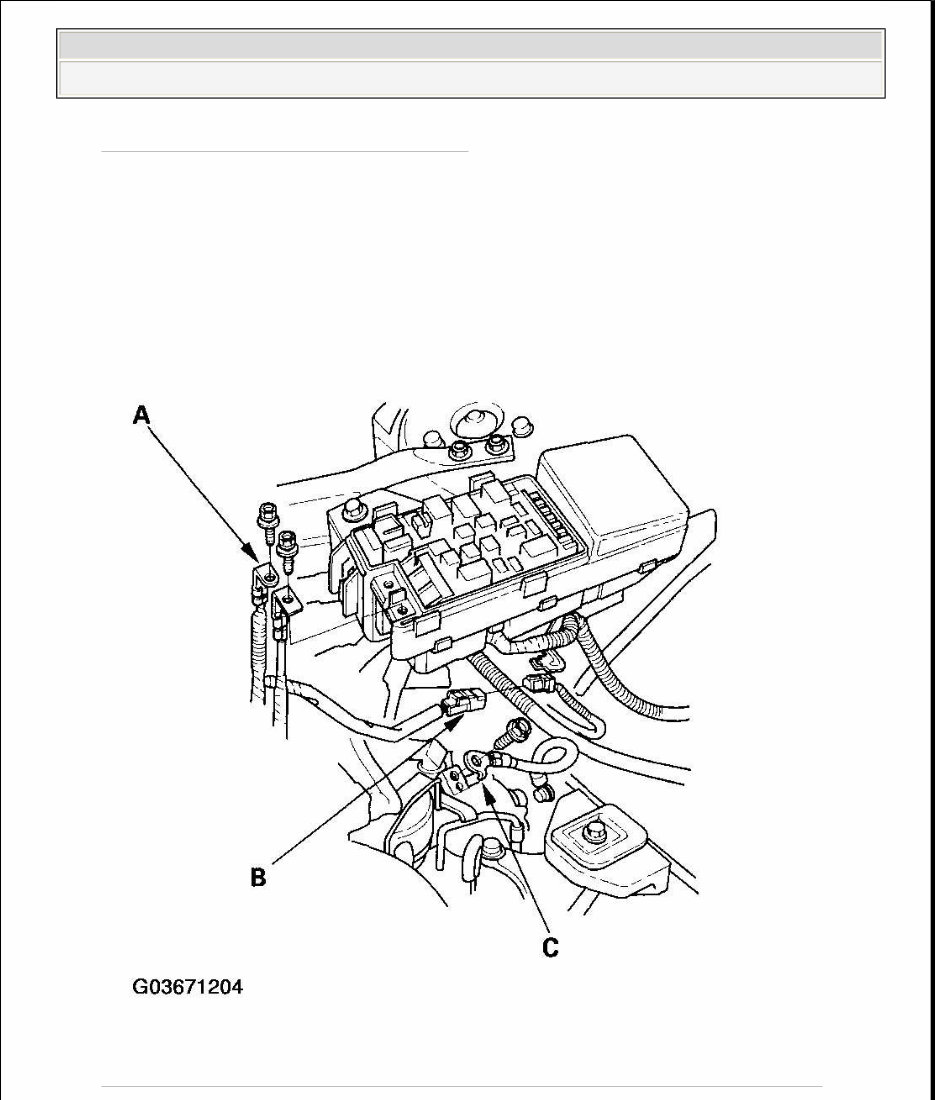
Fig. 2: Identifying Harness Clamps
Courtesy of AMERICAN HONDA MOTOR CO., INC.
11. Remove the two bolts (B), and loosen the two bolts (C) securing the battery
base, then remove the battery base (D).
12. Remove the battery cables (A) from the under-hood fuse/relay box, then
disconnect the harness connector (B).
Fig. 3: Identifying Battery Cables From Under - Hood Fuse/Relay Box
2006 Honda Accord
2003-07 ENGINE Engine Assembly - Accord (V6)
Courtesy of AMERICAN HONDA MOTOR CO., INC.
13. Remove the ground cable (C).
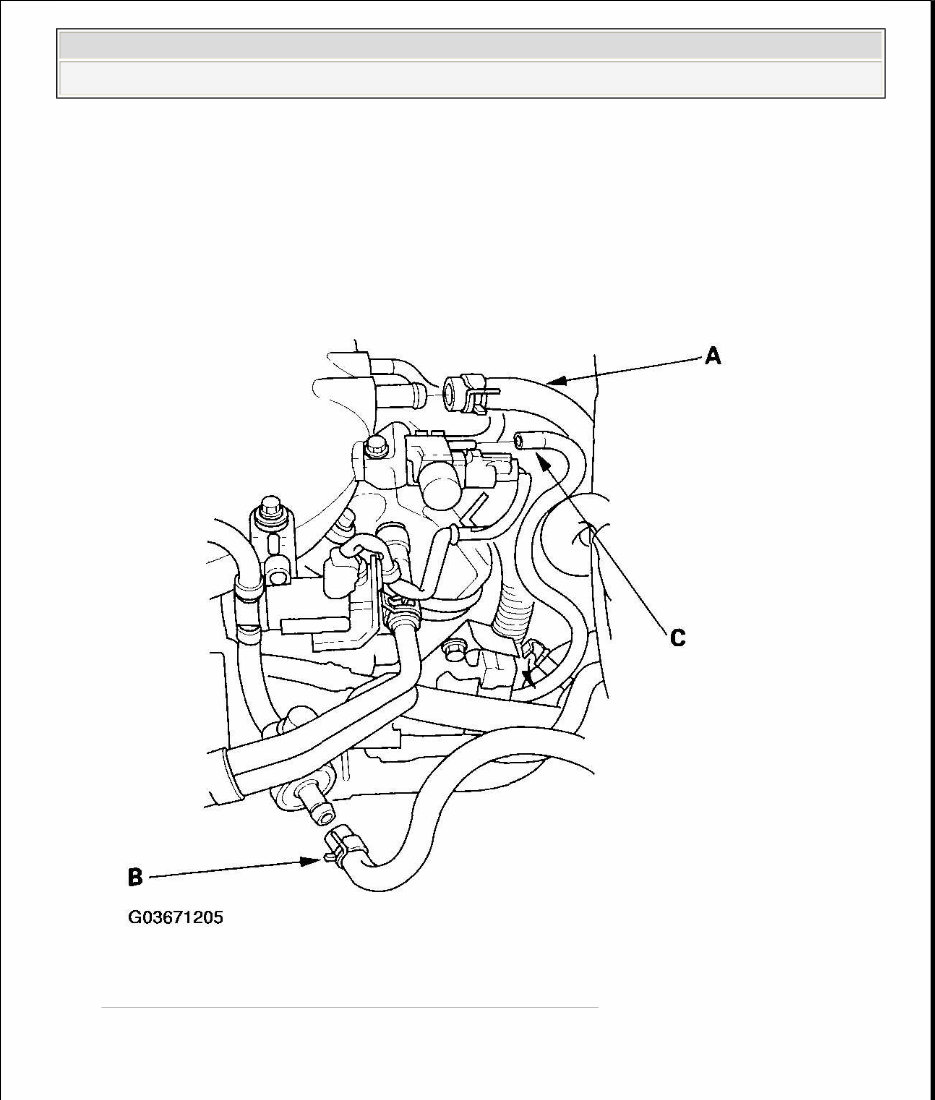
14. Remove the brake booster vacuum hose (A), evaporative emission (EVAP)
canister hose (B) and vacuum hose (C).
Fig. 4: Identifying Brake Booster Vacuum Hose
Courtesy of AMERICAN HONDA MOTOR CO., INC.
15. Remove the harness clamp (A), and disconnect the engine wire harness
2006 Honda Accord
2003-07 ENGINE Engine Assembly - Accord (V6)
You're Reading a Preview
What's Included?
Fast Download Speeds
Offline Viewing
Access Contents & Bookmarks
Full Search Facility
Print one or all pages of your manual
$24.99
$32.99
Viewed 67 Times Today


Secure transaction
What's Included?
Fast Download Speeds
Offline Viewing
Access Contents & Bookmarks
Full Search Facility
Print one or all pages of your manual
$24.99
$32.99
The 2005-2007 Honda Accord Service & Repair Manual is a comprehensive guide for maintaining and repairing your Honda Accord from 2005 to 2007. This manual is an essential tool for both professional mechanics and Honda Accord owners who prefer to do their own repairs.
Features of the 2005-2007 Honda Accord Service & Repair Manual include:
- Step-by-step instructions for performing various maintenance tasks on your Honda Accord
- Detailed diagrams and illustrations to help you understand the repair procedures
- Instructions for troubleshooting common issues and identifying the root causes
- Information on the proper tools and equipment needed for each repair
- Specifications and technical data for your Honda Accord
- Guidance on routine maintenance tasks such as oil changes, brake pad replacements, and tire rotations
- Instructions for more complex repairs such as engine overhauls and electrical system troubleshooting
With the 2005-2007 Honda Accord Service & Repair Manual, you can save time and money by performing your own repairs and maintenance. Whether you're a professional mechanic or a DIY enthusiast, this manual will be a valuable resource for keeping your Honda Accord in top shape.


