

2005 CHEVY / CHEVROLET Impala Owners Manual
What's Included?
Fast Download Speeds
Online & Offline Access
Access PDF Contents & Bookmarks
Full Search Facility
Print one or all pages of your manual

Seats and Restraint Systems ........................... 1-1
Front Seats ............................................... 1-2
Rear Seats ............................................... 1-6
Safety Belts .............................................. 1-8
Child Restraints ....................................... 1-29
Airbag System ......................................... 1-49
Restraint System Check ............................ 1-58
Features and Controls ..................................... 2-1
Keys ........................................................ 2-2
Doors and Locks ....................................... 2-8
Windows ................................................. 2-12
Theft-Deterrent Systems ............................ 2-14
Starting and Operating Your Vehicle ........... 2-16
Mirrors .................................................... 2-28
OnStar
®
System ...................................... 2-30
HomeLink
®
Transmitter ............................. 2-32
Storage Areas ......................................... 2-36
Sunroof .................................................. 2-37
Vehicle Personalization ............................. 2-38
Instrument Panel ............................................. 3-1
Instrument Panel Overview .......................... 3-4
Climate Controls ...................................... 3-21
Warning Lights, Gages, and Indicators ........ 3-26
Message Center ....................................... 3-40
Driver Information Center (DIC) .................. 3-49
Trip Computer ......................................... 3-51
Audio System(s) ....................................... 3-52
Driving Your Vehicle ....................................... 4-1
Your Driving, the Road, and Your Vehicle ..... 4-2
Towing ................................................... 4-34
Service and Appearance Care .......................... 5-1
Service ..................................................... 5-3
Fuel ......................................................... 5-5
Checking Things Under the Hood ............... 5-10
Headlamp Aiming ..................................... 5-53
Bulb Replacement .................................... 5-53
Windshield Wiper Blade Replacement ......... 5-57
Tires ...................................................... 5-58
Appearance Care ..................................... 5-86
Vehicle Identification ................................. 5-94
Electrical System ...................................... 5-95
Capacities and Specifications ................... 5-102
Maintenance Schedule ..................................... 6-1
Maintenance Schedule ................................ 6-2
Customer Assistance and Information .............. 7-1
Customer Assistance and Information ........... 7-2
Reporting Safety Defects ........................... 7-10
Index ................................................................ 1
2005 Chevrolet Impala Owner Manual M
GENERAL MOTORS, GM, the GM Emblem,
CHEVROLET, the CHEVROLET Emblem, the IMPALA
Emblem, and the name IMPALA are registered
trademarks of General Motors Corporation.
This manual includes the latest information at the time it
was printed. We reserve the right to make changes
after that time without further notice. For vehicles first
sold in Canada, substitute the name “General Motors of
Canada Limited” for Chevrolet Motor Division whenever
it appears in this manual.
Keep this manual in the vehicle, so it will be there if it is
needed while you are on the road. If the vehicle is
sold, leave this manual in the vehicle.
Canadian Owners
A French language copy of this manual can be obtained
from your dealer or from:
Helm, Incorporated
P.O. Box 07130
Detroit, MI 48207
How to Use This Manual
Many people read the owner manual from beginning to
end when they first receive their new vehicle. If this
is done, it can help you learn about the features
and controls for the vehicle. Pictures and words work
together in the owner manual to explain things.
Index
A good place to quickly locate information about the
vehicle is the Index in the back of the manual. It is an
alphabetical list of what is in the manual and the
page number where it can be found.
Litho in U.S.A.
Part No. 05IMPALA A First Edition
©
2004 General Motors Corporation. All Rights Reserved.
ii
Safety Warnings and Symbols
There are a number of safety cautions in this book. We
use a box and the word CAUTION to tell about things
that could hurt you if you were to ignore the warning.
{CAUTION:
These mean there is something that could hurt
you or other people.
In the caution area, we tell you what the hazard is.
Then we tell you what to do to help avoid or reduce the
hazard. Please read these cautions. If you do not,
you or others could be hurt.
You will also find a circle
with a slash through it in
this book. This safety
symbol means “Do Not,”
“Do Not do this” or “Do Not
let this happen.”
iii

Vehicle Damage Warnings
Also, in this manual you will find these notices:
Notice: These mean there is something that could
damage your vehicle.
A notice tells about something that can damage the
vehicle. Many times, this damage would not be covered
by your vehicle’s warranty, and it could be costly. But
the notice will tell what to do to help avoid the damage.
When you read other manuals, you might see
CAUTION and NOTICE warnings in different colors or in
different words.
There are also warning labels on the vehicle. They use
the same words, CAUTION or NOTICE.
Vehicle Symbols
The vehicle has components and labels that use
symbols instead of text. Symbols are shown along with
the text describing the operation or information
relating to a specific component, control, message,
gage, or indicator.
If you need help figuring out a specific name of a
component, gage, or indicator, reference the following
topics:
• Seats and Restraint Systems in Section 1
• Features and Controls in Section 2
• Instrument Panel Overview in Section 3
• Climate Controls in Section 3
• Warning Lights, Gages, and Indicators in Section 3
• Audio System(s) in Section 3
• Engine Compartment Overview in Section 5
iv
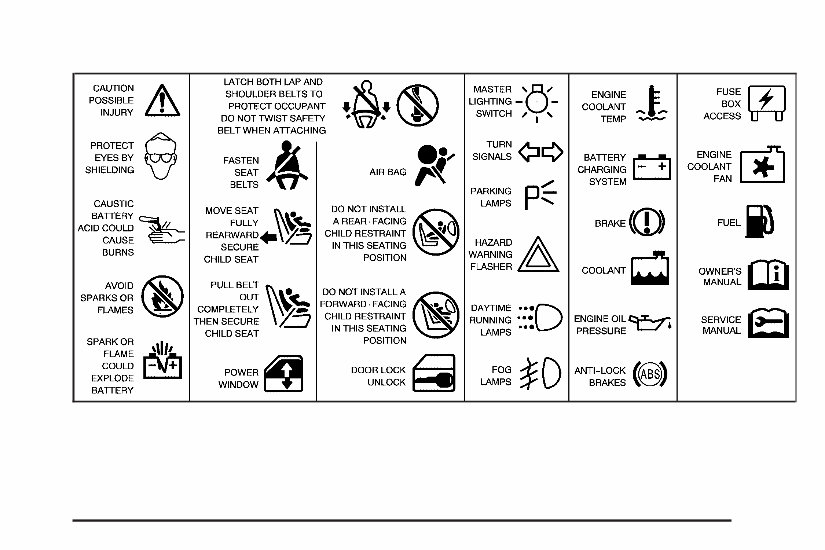
These are some examples of symbols that may be found on the vehicle:
v

✍ NOTES
vi

Front Seats ......................................................1-2
Manual Seats ................................................1-2
Six-Way Power Seats .....................................1-3
Manual Lumbar ..............................................1-3
Heated Seats .................................................1-4
Reclining Seatbacks ........................................1-4
Head Restraints .............................................1-6
Rear Seats .......................................................1-6
Split Folding Rear Seat ...................................1-6
Safety Belts .....................................................1-8
Safety Belts: They Are for Everyone .................1-8
Questions and Answers About Safety Belts ......1-12
How to Wear Safety Belts Properly .................1-13
Driver Position ..............................................1-13
Shoulder Belt Height Adjustment .....................1-20
Safety Belt Use During Pregnancy ..................1-21
Right Front Passenger Position .......................1-21
Center Front Passenger Position .....................1-22
Rear Seat Passengers ..................................1-23
Rear Safety Belt Comfort Guides for Children
and Small Adults .......................................1-26
Safety Belt Extender .....................................1-28
Child Restraints .............................................1-29
Older Children ..............................................1-29
Infants and Young Children ............................1-31
Child Restraint Systems .................................1-35
Where to Put the Restraint .............................1-38
Top Strap ....................................................1-40
Top Strap Anchor Location .............................1-41
Lower Anchorages and Top Tethers for
Children (LATCH System) ...........................1-42
Securing a Child Restraint Designed for the
LATCH System .........................................1-44
Securing a Child Restraint in a Rear
Seat Position ............................................1-44
Securing a Child Restraint in the Right Front
Seat Position ............................................1-46
Airbag System ...............................................1-49
Where Are the Airbags? ................................1-52
When Should an Airbag Inflate? .....................1-54
What Makes an Airbag Inflate? .......................1-55
How Does an Airbag Restrain? .......................1-56
What Will You See After an Airbag Inflates? .....1-56
Servicing Your Airbag-Equipped Vehicle ...........1-58
Restraint System Check ..................................1-58
Checking Your Restraint Systems ...................1-58
Replacing Restraint System Parts After
a Crash ...................................................1-59
Section 1 Seats and Restraint Systems
1-1
Front Seats
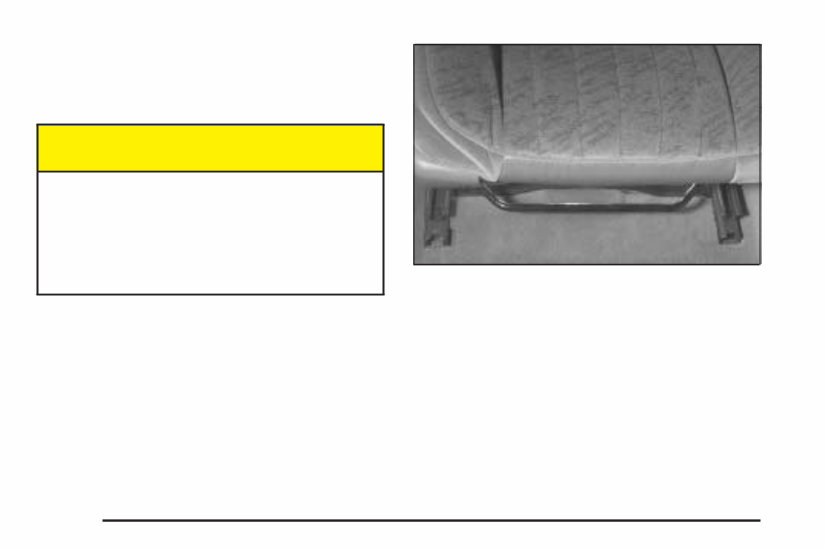
Manual Seats
{CAUTION:
You can lose control of the vehicle if you try to
adjust a manual driver’s seat while the vehicle
is moving. The sudden movement could startle
and confuse you, or make you push a pedal
when you do not want to. Adjust the driver’s
seat only when the vehicle is not moving.
If your vehicle has manual seats, lift the bar located under
the front of the seat to unlock it. Slide the seat to where
you want it and release the bar. Try to move the seat
back and forth to be sure the seat is locked in place.
1-2
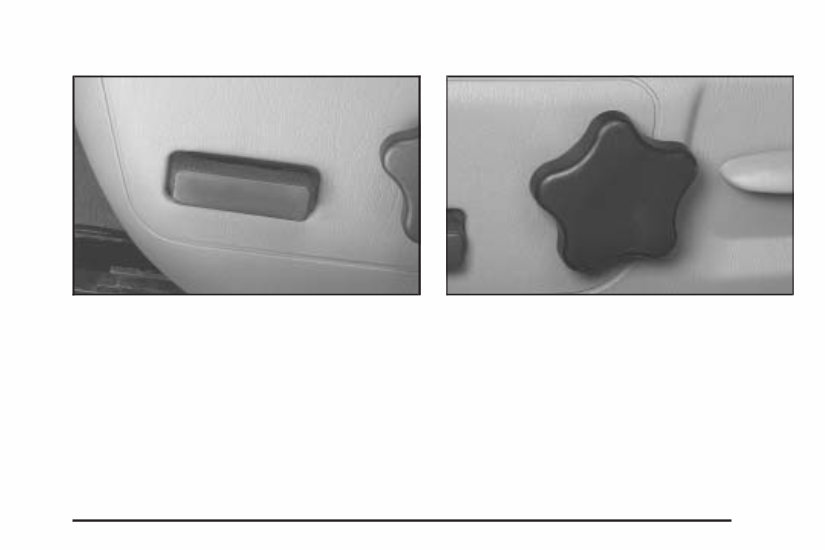
Six-Way Power Seats
If your vehicle has this feature, the control is located on
the outboard side of the front seats. To adjust the
seat do any of the following:
• Move the seat forward or rearward by sliding the
control to the front or the rear.
• Raise or lower the seat by sliding the control up
or down.
• Raise or lower the front portion of the seat cushion
by sliding the front of the control up or down.
• Raise or lower the rear portion of the seat cushion
by sliding the rear of the control up or down.
Manual Lumbar
If your vehicle has this feature, the knob is located on
the outboard side of the driver’s seat. Turn the knob
toward the front of the vehicle to increase lumbar
support. Turn the knob toward the rear of the vehicle to
decrease lumbar support.
1-3
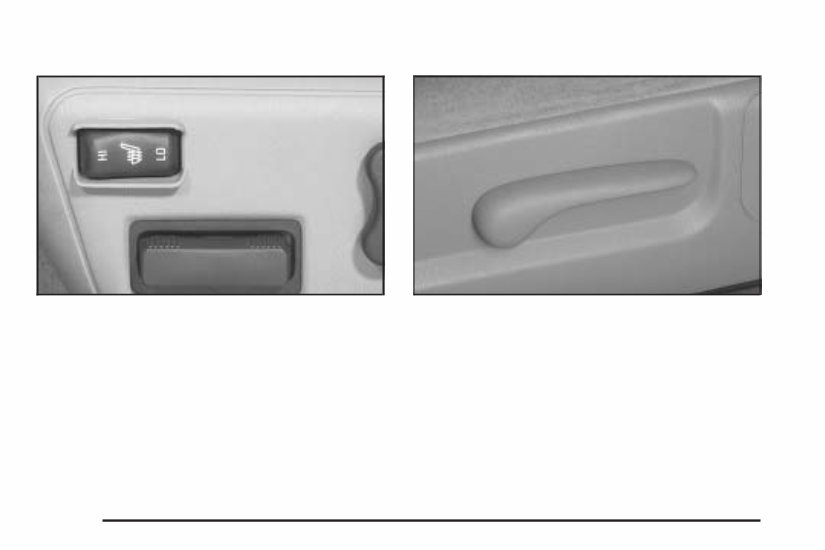
Heated Seats
If your vehicle has this option, the driver’s and
passenger’s heated seat switches are located on the
outboard side of the seat.
Press LO to warm the seat to a lower temperature. Press
HI to warm the seat to a higher temperature. To turn this
feature off, move the switch to the center position.
Reclining Seatbacks
Lift the lever to release the seatback, then move the
seatback to where you want it. Release the lever to lock
the seatback in place. Pull up on the lever without
pushing on the seatback and the seatback will move
forward.
1-4
You're Reading a Preview
What's Included?
Fast Download Speeds
Online & Offline Access
Access PDF Contents & Bookmarks
Full Search Facility
Print one or all pages of your manual
$24.99
Viewed 38 Times Today


Secure transaction
What's Included?
Fast Download Speeds
Online & Offline Access
Access PDF Contents & Bookmarks
Full Search Facility
Print one or all pages of your manual
$24.99
Introducing the 2005 CHEVY / CHEVROLET Impala Owners Manual, the ultimate guide to understanding and operating your Impala. This manual is specifically designed for owners of the 2005 model, providing detailed information to enhance your driving experience.
Key Features:
- Comprehensive instructions for vehicle operation
- Technical specifications and maintenance guidelines
- Insightful tips for maximizing performance and efficiency
- Detailed troubleshooting and diagnostic procedures
- Important safety information and precautions
Whether you are a new owner or have been driving your 2005 CHEVY / CHEVROLET Impala for years, this manual will assist you in getting the most out of your vehicle. Equipped with easy-to-follow instructions, you'll have a better understanding of the various features and systems of your Impala.
Upgrade your driving experience and take control of your Impala with the 2005 CHEVY / CHEVROLET Impala Owners Manual. Get your copy today and unlock the full potential of your vehicle.


