

BUSH HOG RDTH 60 72 Operation Maintenance Owners Manual
What's Included?
Fast Download Speeds
Online & Offline Access
Access PDF Contents & Bookmarks
Full Search Facility
Print one or all pages of your manual
ASSEMBLY l OPERATION l MAINTENANCE
04/09 Rev.1 $4.00 95986
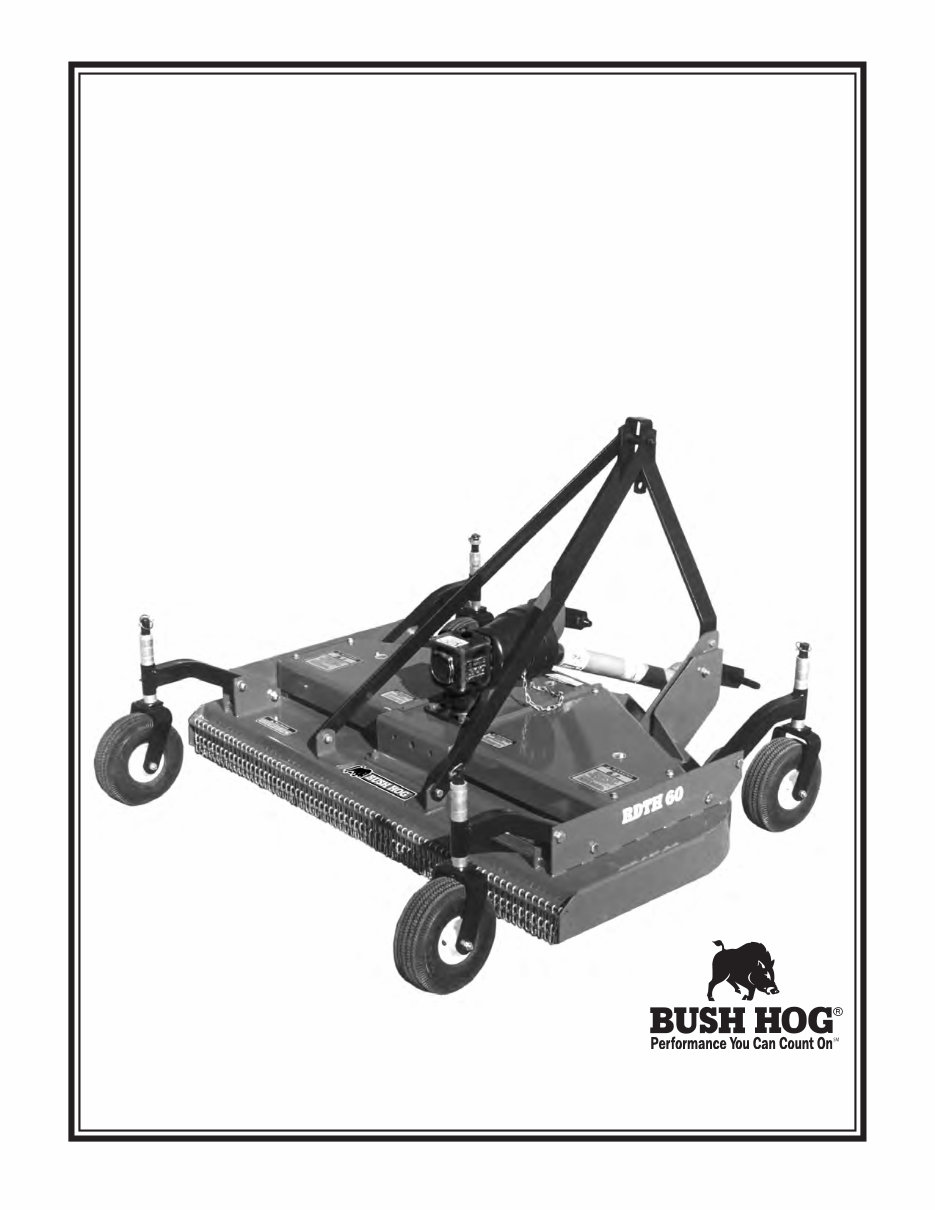
RDTH
Models RDTH 60 / RDTH 72
Rear Discharge Finishing Mower
Operator’s Manual
BUSH HOG
®

CONGRATULATIONS!
You have invested in the best implement of its type on the market today.
The care you give your Bush Hog implement will greatly determine your satisfaction with its
performance and its service life. We urge a careful study of this manual to provide you with a
thorough understanding of your new implement before operating, as well as suggestions for
operation and maintenance.
If your manual should become lost or destroyed, Bush Hog will be glad to provide you with a
new copy. Order from Bush Hog, 2501 Griffin Ave., Selma, Alabama 36703. Most of our man-
uals can also be downloaded from our website at www.bushhog.com.
As an authorized Bush Hog dealer, we stock genuine Bush Hog parts which are manufactured
with the same precision and skill as our original equipment. Our trained service personnel are
well informed on methods required to service Bush Hog equipment,
and are ready and able to help you.
Should you require additional information or assistance, please contact us.
YOUR AUTHORIZED
BUSH HOG DEALER
BECAUSE BUSH HOG MAINTAINS AN ONGOING
PROGRAM OF PRODUCT IMPROVEMENT, WE
RESERVE THE RIGHT TO MAKE IMPROVEMENTS
IN DESIGN OR CHANGES IN SPECIFICATIONS
WITHOUT INCURRING ANY OBLIGATION TO
INSTALL THEM ON UNITS PREVIOUSLY SOLD.
BECAUSE OF THE POSSIBILITY THAT SOME PHO-
TOGRAPHS IN THIS MANUAL WERE TAKEN OF
PROTOTYPE MODELS, PRODUCTION MODELS
MAY VARY IN SOME DETAIL. IN ADDITION, SOME
PHOTOGRAPHS MAY SHOW SHIELDS REMOVED
FOR PURPOSES OF CLARITY. NEVER OPERATE
THIS IMPLEMENT WITHOUT ALL SHIELDS IN
PLACE.

RDTH
Operator’s Manual
TABLE OF CONTENTS
SECTION/PARA PAGE
Warranty ....................................................2
Dealer Preparation Check List ..................3
Safety Precautions ....................................6
Federal Laws and Regulations ..................6
I INTRODUCTION AND DESCRIPTION......7
1-1 Introduction ..........................................7
1-2 Description ...........................................7
II PREPARATION FOR USE.........................8
2-1 Attaching to Tractor ..............................8
III OPERATING INSTRUCTIONS ................10
3-1 General Safety ...................................10
3-2 Cutting Height Adjustment .................10
3-3 Operation ...........................................10
3-4 Transporting .......................................10
SECTION/PARA PAGE
IV MAINTENANCE .......................................11
4-1 Maintenance Check List .....................11
4-2 Lubrication..........................................11
4-3 Belt Adjustment ..................................12
4-4 Belt Replacement ...............................12
4-5 Blade Replacement ............................12
4-6 Troubleshooting .................................13
V DEALER ASSEMBLY...............................14
5-1 Base Unit Assembly ...........................14
Safety Decals ...........................................16
Torque Specifications ...............................17
RETAIL CUSTOMER’S RESPONSIBILITY
UNDER THE BUSH HOG WARRANTY
It is the Retail Customer and/or Operator’s responsibility to read the Operator’s
Manual, to operate, lubricate, maintain and store the product in accordance with all
instructions and safety procedures. Failure of the operator to read the Operator’s
Manual is a misuse of this equipment.
It is the Retail Customer and/or Operator’s responsibility to inspect the product and to
have any part(s) repaired or replaced when continued operation would cause damage
or excessive wear to other parts or cause a safety hazard.
It is the Retail Customer’s responsibility to deliver the product to the authorized Bush
Hog Dealer, from whom he purchased it, for service or replacement of defective parts
which are covered by warranty. Repairs to be submitted for warranty consideration
must be made within forty-five (45) days of failure.
It is the Retail Customer’s responsibility for any cost incurred by the Dealer for travel-
ing to or hauling of the product for the purpose of performing a warranty obligation or
inspection.
1

LIMITED WARRANTY
OOOOOOOOOOOOOOOOOOOOOOOOOOOOOOO
Bush Hog warrants to the original purchaser of any new Bush Hog equipment, purchased from an
authorized Bush Hog dealer, that the equipment be free from defects in material and workmanship for a period
of one (1) year for non-commercial, state and municipalities’ use and ninety (90) days for commercial use from
date of retail sale. Models RDTH gearboxes are covered by a five (5) year limited warranty period. The obliga-
tion of Bush Hog to the purchaser under this warranty is limited to the repair or replacement of defective parts.
Replacement or repair parts installed in the equipment covered by this limited warranty are warranted
for ninety (90) days from the date of purchase of such part or to the expiration of the applicable new equip-
ment warranty period, whichever occurs later. Warranted parts shall be provided at no cost to the user at an
authorized Bush Hog dealer during regular working hours. Bush Hog reserves the right to inspect any equip-
ment or parts which are claimed to have been defective in material or workmanship.
DISCLAIMER OF IMPLIED WARRANTIES & CONSEQUENTIAL DAMAGES
Bush Hog’s obligation under this limited warranty, to the extent allowed by law, is in lieu of all war-
ranties, implied or expressed, INCLUDING IMPLIED WARRANTIES OF MERCHANTABILITY AND FITNESS
FOR A PARTICULAR PURPOSE and any liability for incidental and consequential damages with respect to
the sale or use of the items warranted. Such incidental and consequential damages shall include but not be
limited to: transportation charges other than normal freight charges; cost of installation other than cost
approved by Bush Hog; duty; taxes; charges for normal service or adjustment; loss of crops or any other loss
of income; rental of substitute equipment, expenses due to loss, damage, detention or delay in the delivery of
equipment or parts resulting from acts beyond the control of Bush Hog.
THIS LIMITED WARRANTY SHALL NOT APPLY:
1. To vendor items which carry their own warranties, such as engines, tires, and tubes.
2. If the unit has been subjected to misapplication, abuse, misuse, negligence, fire or other accident.
3. If parts not made or supplied by Bush Hog have been used in connection with the unit, if, in the sole judge-
ment of Bush Hog such use affects its performance, stability or reliability.
4. If the unit has been altered or repaired outside of an authorized Bush Hog dealership in a manner
which, in the sole judgement of Bush Hog, affects its performance, stability or reliability.
5. To normal maintenance service and normal replacement items such as gearbox lubricant, hydraulic fluid,
worn blades, or to normal deterioration of such things as belts and exterior finish due to use or
exposure.
6. To expendable or wear items such as teeth, chains, sprockets, belts, springs and any other items that in the
company’s sole judgement is a wear item.
NO EMPLOYEE OR REPRESENTATIVE OF BUSH HOG IS AUTHORIZED TO CHANGE THIS LIMITED
WARRANTY IN ANY WAY OR GRANT ANY OTHER WARRANTY UNLESS SUCH CHANGE IS MADE I N
WRITING AND SIGNED BY BUSH HOG’S SERVICE MANAGER, 2501 GRIFFIN AVE., SELMA, ALABAMA
36703.
OOOOOOOOOOOOOOOOOOOOOOOOOOOOOOO
Record the model number, serial number and date
purchased. This information will be helpful to your
dealer if parts or service are required.
MAKE CERTAIN THE WARRANTY INFORMATION
HAS BEEN FILED ONLINE WITH BUSH HOG
SELMA, ALABAMA
.
MODEL NUMBER
SERIAL NUMBER
DATE OF RETAIL SALE
2

DEALER PREPARATION CHECK LIST
RDTH FINISHING MOWER
BEFORE DELIVERING MACHINE — The following check list should be completed.
Use the Operator’s Manual as a guide.
r 1. Assembled completed.
r 2. Gearboxes filled with oil.
r 3. All fittings lubricated.
r 4. All shields in place and in good condition.
r 5. All fasteners torqued to specifications given in Torque Chart
r 6. All decals in place and readable. (See decal page.)
r 7. Overall condition good (i.e. paint, welds)
r 8. Operators manual has been delivered to owner and he has been instructed
on the safe and proper use of the cutter.
r 9. Waranty information has been registered online with Bush Hog.
Dealer’s
Signature
Purchaser’s
Signature
THIS CHECKLIST TO REMAIN IN OWNER’S MANUAL
It is the responsibility of the dealer to complete the procedures listed
above before delivery of this implement to the customer.
3
Safety Alert Symbol
This Safety Alert Symbol means: “ATTENTION! BECOME ALERT!
YOUR SAFETY IS INVOLVED!”
This symbol is used to call attention to safety
precautions that should be followed by the
operator to avoid accidents. When you see this
symbol, carefully read the message that follows
and heed its advice. Failure to comply with
safety precautions could result in death or seri-
ous bodily injury.
Safety Signs Signal Words
The signal words DANGER, WARNING, AND CAUTION are used on the equipment safety signs. These words
are intended to alert the viewer to the existence and the degree of hazard seriousness.
This signal word indicates a potentially hazardous situation
which, if not avoided, will result in death or serious injury.
White letters on RED
This signal word indicates a potentially hazardous situation
which, if not avoided, could result in death or serious injury
It may also be used to alert against unsafe practices.
Black letters on ORANGE
This signal word indicates a potentially hazardous situation exist
which, if not avoided, may result in minor or moderate injury.
It may also be used to alert against unsafe practices.
Black letters on YELLOW
4

IMPORTANT SAFETY PRECAUTIONS
This symbol is used to call attention to safety
precautions that should be followed by the
operator to avoid accidents. When you see this
symbol, carefully read the message that follows
and heed its advice. Failure to comply with safe-
ty precautions could result in serious bodily
injury.
In addition to the design and configuration of equipment, hazard control and accident prevention are dependent
upon the awareness, concern, prudence and proper training of personnel in the operation, transport, maintenance
and storage of equipment. Lack of attention to safety can result in accident, personal injury, reduction of efficiency
and worst of all—loss of life. Watch for safety hazards and correct deficiencies promptly. Use the following safety
precautions as a general guide to safe operations when using this machine. Additional safety precautions are
used throughout this manual for specific operating and maintenance proce-dures. Read this manual and review
the safety precautions often until you know the limitations.
1. Read the Operator’s Manual. Failure to read the Operator’s Manual is considered a misuse of this equipment.
2. Become familiar with all the machine’s controls and all the caution, warning and danger decals affixed to the
machine before attempting to start or operate.
3. Before starting or operating the machine, make a walk around inspection and check for obvious defects such
as loose mounting bolts and damaged components. Correct any deficiency before starting.
4. Do not allow children to operate the cutter. Do not allow adults to operate it without proper instruction.
5. Do not carry passengers.
6. Keep the area of operation clear of all persons, particularly small children and pets. The operator
should cease mowing whenever anyone comes within the operating area.
7. Clear the work area of objects which might be picked up and thrown.
8. Use a piece of cardboard or wood rather than hands to search for hydraulic leaks. Escaping hydraulic oil
under pressure can penetrate skin. If fluid is injected into the skin, it must be surgically removed within a few
hours by a doctor familiar with this form of injury or gangrene may result.
9. Do not operate without all guards and shields in place and in good condition.
10. Lower implement to ground, stop tractor engine, apply parking brake, and allow blades to completely stop
before leaving the tractor.
11. Keep hands and feet away from blades.
12. This cutter is not to be operated along highways or in any area where people may be present unless
all sides of the unit are enclosed by permanent bands, safety chains or other factory approved safety shields
that are in good repair.
13. Wear personal protective equipment such as, but not limited to, protection for eyes, ears, feet, hands and
head when operating or repairing the equipment. Do not wear loose clothing or jewelry that may catch on
equipment moving parts.
14. When performing adjustments or maintenance on the cutter, first lower it to the ground or block it securely at
a workable height.
15. Never stand between tractor and cutter while tractor is being backed to the cutter hitch.
16. Reduce speed when transporting cutter to avoid bouncing and momentary loss of steering.
17. Use tractor flashing warning lights, day or night, when transporting cutter on road or highways unless
prohibited by law.
18. In the event that someone other than yourself will operate this equipment we firmly suggest that all
SAFETY references be discussed prior to operation.
19. It is recommended that tractor be equipped with Rollover Protective System (ROPS) and seat belt
be used in all mowing operations.
5

IMPORTANT FEDERAL LAWS AND REGULATIONS* CONCERNING
EMPLOYERS, EMPLOYEES AND OPERATIONS.
*(This section is intended to explain in broad terms the concept and effect of the following federal laws and
regulations. It is not intended as a legal interpretation of the laws and should not be considered as such).
U.S. Public Law 91-596 (The Williams-Steiger Occupational and Health Act of 1970) OSHA
This Act Seeks:
“...to assure so far as possible every working man and woman in the nation safe and healthful working
conditions and to preserve our human resources...”
DUTIES
Sec. 5 (a) Each employer—
(1) shall furnish to each of his employees employment and a place of employment
which are free from recognized hazards that are causing or are likely to cause
death or serious physical harm to his employees;
(2) shall comply with occupational safety and health standards promulgated under
this Act.
(b) Each employee shall comply with occupational safety and health standards
and all rules, regulations and orders issued pursuant to this Act which are
applicable to his own actions and conduct.
OSHA Regulations
Current OSHA regulations state in part: “At the time of initial assignment and at least annually thereafter, the
employer shall instruct every employee in the safe operation and servicing of all equipment with which the
employee is, or will be involved.” These will include (but are not limited to) instructions to:
Keep all guards in place when the machine is in operation;
Permit no riders on equipment;
Stop engine, disconnect the power source, and wait for all machine movement to stop before
servicing, adjusting, cleaning or unclogging the equipment, except where the machine must be
running to be properly serviced or maintained, in which case the employer shall instruct employees
as to all steps and procedures which are necessary to safely service or maintain the equipment.
Make sure everyone is clear of machinery before starting the engine, engaging power, or operating
the machine.
Child Labor Under 16 Years Old
Some regulations specify that no one under the age of 16 may operate power machinery. It is your
responsibility to know what these regulations are in your own area or situation. (Refer to U.S. Dept. of
Labor, Employment Standard Administration, Wage & Home Division, Child Labor Bulletin #102.)
EMPLOYEE TRACTOR OPERATING INSTRUCTIONS:
1. Securely fasten your seat belt if the tractor has a
ROPS.
2. Where possible, avoid operating the tractor near
ditches, embankments, and holes.
3. Reduce speed when turning, crossing slopes, and
on rough, slick, or muddy surfaces.
4. Stay off slopes too steep for safe operation.
5. Watch where you are going, especially at row
ends, on roads, and around trees.
6. Do not permit others to ride.
7. Operate the tractor smoothly - no jerky turns,
starts, or stops.
8. Hitch only to the drawbar and hitch points recom-
mended by tractor manufacturers.
9. When tractor is stopped, set brakes securely and
use park lock if available.
6
1-1 INTRODUCTION
We are pleased to have you as a Bush Hog cus-
tomer. Your RDTH Series Rotary Cutter has been
carefully designed to give maximum service with
minimum down time.This manual is provided to give
you the necessary operating and maintenance
instructions for keeping your rotary cutter in top
operating condition. Please read this manual thor-
oughly. Understand what each control is for and how
to use it. Observe all safety precautions decaled on
the machine and noted throughout the manual for
safe operation of implement. If any assistance or
additional information is needed, contact your autho-
rized Bush Hog dealer.
1-2 DESCRIPTION
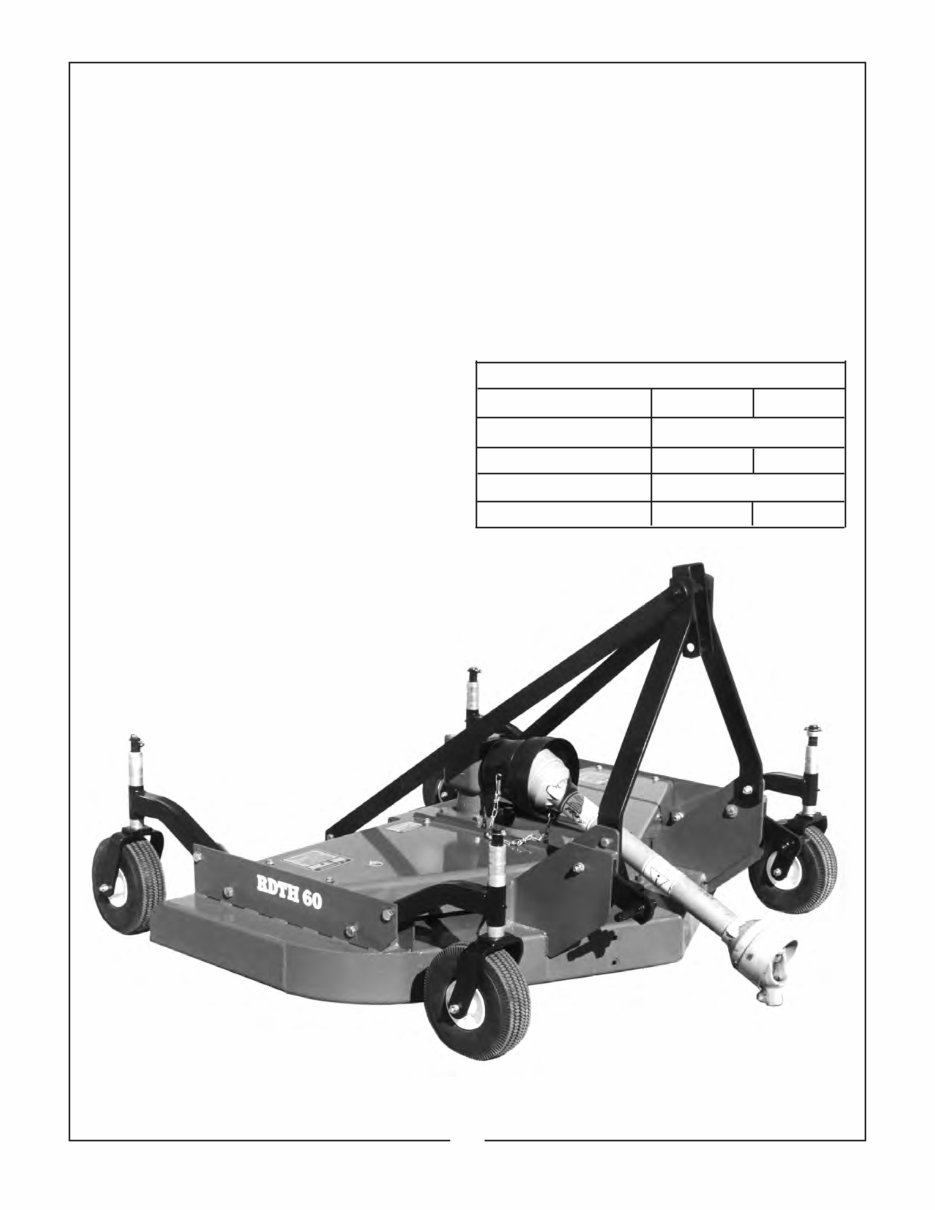
The RDTH cutters (Figure 1-1) are grooming mow-
ers intended for cutting lawns, golf courses, athletic
fields, or any maintained area where a clean, uni-
form finish is desired. Uplift blades form a suction
during operation to lift the grass before cutting it. The
caster wheel arrangement along with the floating lift
linkage and optional front roller, all work together to
give an even cut and minimize scalping.
Power from the tractor is transmitted through a trian-
gular, telescoping driveline to the 90 degree gear-
box. It is then passed to the spindle housings by a
single, B-section, Kevlar reinforced belt. Drivetrain
protection is provided by belt slippage.
Table 1-1 RDTH Specifications
RDTH-60 RDTH-72
Cutting Width (in.) 60 72
Cutting Height (in.) 1-1/2” - 6-1/2”
Horsepower Range 15-35 20-40
Blade Tip Speed (fpm) 15,613 fpm
Weight (lbs.) 536 588
SECTION I
INTRODUCTION AND DESCRIPTION
NOTE
All references made to right, left, top,
bottom, front or rear are as viewed
facing the direction of travel with
implement properly attached to trac-
tor.
7
Figure 1-1 RDTH 60

2-1 ATTACHING TO TRACTOR
A. Attach to tractor Cat. I three point hitch as
described in tractor operator’s manual.
B. Raise and lower cutter to determine position
with shortest distance between the tractor PTO
shaft and gearbox input shaft. Shut down tractor
leaving cutter in position of shortest distance.
SECURELY BLOCK CUTTER IN POSITION.
C. Pull driveline apart. Attach outer (female) sec-
tion to tractor PTO shaft. Pull on driveline section to
be sure yoke locks into place.
SECTION II
PREPARATION FOR USE
D. Hold driveline sections parallel to each other to
determine if too long. Each section should end
approximately 3 inches (76mm) short of reaching
universal joint shield on opposite section. If too
long, measure 3 inches (76mm) back from univer-
sal joint shield and mark opposite section. (Figure
2-1). Do this for both sections.
E. Raise and lower cutter to determine position
with greatest distance between PTO shaft and
gearbox input shaft. Shut down tractor leaving cut-
ter in position of greatest distance. SECURELY
BLOCK CUTTER IN POSITION.
F. Hold down driveline sections parallel to each
other and check for minimum 6 inches (152mm)
overlap. (Figure 2-2) If driveline has been marked for
cutting, overlap will be the distance between two
marks. If driveline has less than minimum overlap,
DO NOT USE. Contact authorized Bush Hog dealer.
WARNING
NEVER STAND BETWEEN TRACTOR
AND CUTTER WHILE TRACTOR IS
BEING BACKED TO HITCH.
WARNING
ADDITIONAL TRACTOR FRONT
BALLAST MAY BE NEEDED FOR
STABLE OPERATION AND TRANSPORT
OF CUTTER. SEE TRACTOR OPERA-
TOR’S MANUAL FOR RECOMMENDED
WEIGHTS. IT IS RECOMMENDED THAT
TRACTOR BE EQUIPPED WITH
ROLLOVER PROTECTIVE SYSTEM
(ROPS) AND SEAT BELTS.
NOTE
Due to the many variations in trac-
tor/implement hitch points and corre-
sponding differences in distances between
tractor PTO shafts and implement input
shafts, drivelines may need to be short-
ened as described in the following steps:
NOTE
If driveline is correct length, omit the fol-
lowing steps “G” through “J” and proceed
to step “K”.
Figure 2-1
Figure 2-2
Minimum
Overlap
8
You're Reading a Preview
What's Included?
Fast Download Speeds
Online & Offline Access
Access PDF Contents & Bookmarks
Full Search Facility
Print one or all pages of your manual
$27.99
Viewed 31 Times Today


Secure transaction
What's Included?
Fast Download Speeds
Online & Offline Access
Access PDF Contents & Bookmarks
Full Search Facility
Print one or all pages of your manual
$27.99
Get the owner manual for the RDTH Rear Discharge Finishing Mower models RDTH 60 / RDTH 72. This manual covers assembly, operation, and maintenance. It's a valuable resource for professional mechanics and DIY enthusiasts alike.


